Creating A New Database
You can create additional databases for your own particular
needs. For instance, you may have different types of accounts
that you work as separate business departments, you may
need to split a large database, or you may want a test
environment for import routines.
This option is only available with a CV11Corporate license.
In CV11, a database is a "registered device." This means that
the CV11 Server must know all the parts of the system before
it opens them for use. We will use this document to show you
how to create a new database device. This is a very simple
process.
There are three ways to create a new database:
Upgrade Database
 This procedure has creates a fully functional
database that may be used immediately. However, there
are few basic requirements for preparing any database for
upgrading into Version 11.
This procedure has creates a fully functional
database that may be used immediately. However, there
are few basic requirements for preparing any database for
upgrading into Version 11.
- Your database must be a version 8.2.16 or newer, or a 10.2.16
or newer.
- You must have a User with ID: 99, Password: 99 and User
Level 99 in the database you intend to upgrade.
- Make sure every Operator in your database has a Password.
Prepare for your upgrade by exporting your database as
outlined in the Exporting document for your version
of Collect!. There are instructions for
- Exporting Your CV11 Database
- Exporting Your CV10 Database
- Exporting Your CV8 Database
- Exporting Selected Clients and Records
This will generate an export folder containing all your data.
You must be able to access this folder freely.
Although this procedure does not alter the export folder,
it is advisable that you have backed it up and saved it to
a secure location, as a precaution.

Procedure
1. Sign into Collect! and stop at the Welcome To Collect!
screen.
2. Make sure that EXCLUSIVE is selected for the
Database Access option.
3. Select File from the top menu bar and then select
Upgrade Database from the drop-down choices.
4. When the Upgrade Database form is displayed, press the
SELECT button next to the Upgrade Database Into field. The
list of available database devices will be displayed. Select the
NEW button at the bottom of this list and enter a name for
your new database.
The NEW button is visible only with a CV11Corporate license.
5. Select the OK button and Collect! will create the new
database device. This may take a few moments and then the
name of your new database will be displayed in the
Upgrade Into Database field
6. When Collect! returns you to the Upgrade Database form,
select the BROWSE button to find the database that you
want to upgrade. If you prepared your database correctly,
you will see an export folder. Double-click
the export folder. You will see several
folders and a file named datcolle.imp
or collect.imp or collect.exp
or collect.dbt. Select the datcolle.imp
or collect.imp or collect.dbt
or collect.exp file.
7. Prepare the other upgrade settings on this form as needed.
Please press F1 for help if you are unsure of any of the settings.
If you are upgrading from an earlier CV11, do not
select "Auto- update client addresses." This is mainly for
upgrading from CV8/10 and may inadvertently double up
the client address fields in your reports. If you need to update
the client addresses, you can use the Update Client Addresses
utility after the upgrade.
8. When you are ready, select the START THE UPGRADE
button. Collect! will proceed to upgrade your database. The
time this takes depends on the size of the database and
the speed of your CPU.
9. When the upgrade is finished, you may sign into your new
database immediately.
Copy Database
This procedure creates a fully functional database
that may be used immediately. However, you should use only
the exact same version of CV11 to ensure proper results.
If the version or build is different, the upgrading method
is recommended.
1. Sign into Collect! and stop at the Welcome To Collect! screen.
2. Select the SELECT DATABASE button to display the list
of available registered databases that you can open.
3. Select the NEW button at the bottom of the device list to
create a new empty database. Collect! will create the new
device and display the name you chose in the
Database To Open field.
This is a completely empty database! There are
several ways that you may choose to populate it. We are
discussing copying a fully functional database into it.
4. Sign out of Collect! and shut down the CV11 Server.
5. Copy and paste the MASTERDB folder in your CV11 folder.
This will give you an exact copy of your Masterdb database.
6. Open this folder and select all the files and subfolders.
Then paste them into the newly created database folder.
7. You can now sign back into Collect! and open the newly
created database. At this point it is an exact copy of your
Masterdb database.
Create Empty Database
This procedure creates a fully functional EMPTY database.
A default set of user levels and operators is provided, as well
as a complete list of printable fields and import field definitions.
However, there are no clients, debtors, transaction types,
import maps, reports, contact plans or status codes.
1. Sign into Collect! in EXCLUSIVE mode as User ID 99 with
Password 99 and stop at the Welcome To Collect! screen.
2. Select the SELECT DATABASE button to display the list
of available registered databases that you can open.
3. Select the NEW button at the bottom of the device list to
create a new empty database. Collect! will create the new
device and display the name you chose in the
Database To Open field.
4. Select the START button and Collect! will rebuild your
access rights, printable field and import field definition
lists.
Troubleshooting Create New Database
When creating a new database, Collect! uses ODBC
functionality to clone the structure of an existing database.
If you receive an error when trying to create your new
database, install the ODBC drivers that ship with Collect!.
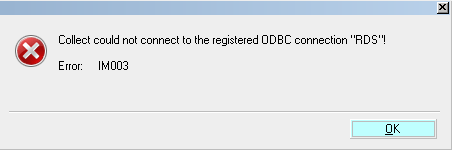
Collect! cannot find the ODBC drivers
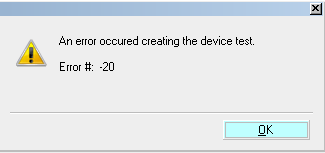
Collect! cannot create the database device
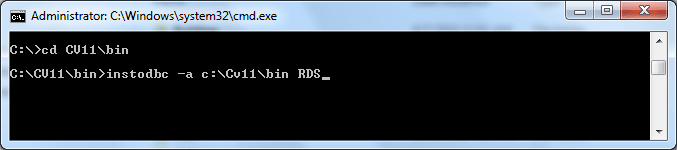
Installing ODBC Drivers
From the command line, navigate to your CV11\bin folder
and run instodbc with the following arguments,
instodbc -a {dll path} RDS
{dll path} refers to the \bin folder where
the driver *.dlls are located and RDS
is the name of the data source you are creating.
Example:
c:\CV11\bin>instodbc -a c:\CV11\bin RDS
Creating a new data source
This will create a data source called RDS and will write the
location c:\CV11\bin to the Windows Registry as the
location where the ODBC driver and set up *.dlls are
located, (codrv32.dll and cocfgf32.dll).
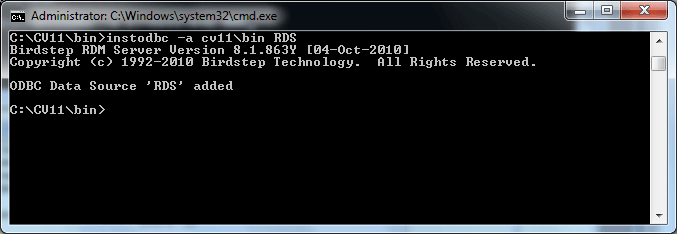
RDS data source created successfully
You should now be able to create a new database with
no problems.
Summary
This topic outlined three ways of creating a new database in
CV11, upgrading, copying and creating an empty database.
There are many uses for additional databases. Testing and
running multiple businesses are two examples.
See Also
- Additional Database Topics
|
Was this page helpful? Do you have any comments on this document? Can we make it better? If so how may we improve this page.
Please click this link to send us your comments: helpinfo@collect.org