Dynamic Attachments
Collect!'s Attachment form is used for storing additional data
related to an account. You can store any sort of information
that you need, including files. To demonstrate the impressive
flexibility of the Attachment form, a control file and several pick
lists ship with the Demodb database. A few simple setup steps
enable you to begin to use the Attachment form to its fullest
potential in your working database, as well.
 If you are already using a control file and pick lists
for your Attachments, please be aware that the new control
file and pick lists may change some of your choices. So
proceed with caution, or try this out in your Demodb database
first.
If you are already using a control file and pick lists
for your Attachments, please be aware that the new control
file and pick lists may change some of your choices. So
proceed with caution, or try this out in your Demodb database
first.
 The files for Dynamic Attachments are also available
for download at the Member Center.
The files for Dynamic Attachments are also available
for download at the Member Center.
Control File
The sample control file is assigned to the Class and Type
fields and the Attachment form through the Access Rights.
The control file assigns a pick list to the Type field depending
on the choice that is displayed in the Class field.

Pick Lists
The control file assigns a pick list to the Class field. Several
additional sample pick lists are chosen dynamically by the
control file based on the selection in the Class field. There is
a pick list for each one of the different Class choices. Many
different types of details are provided for insurance, assets,
credit bureau pulls, court cases, skip tracing and more.
Dynamic Changes
When you select a Class, the control file sets a Type pick
list. When you select a Type, the fields on the Attachment form
change to enable you to enter data relevant to the Class and
Type of data you are storing.
You must sign into Collect! as a user that is not
User Level 99 to see the effects of these dynamic changes.
User Level 99 displays only defaults as they ship in Collect!,
it does not display dynamic field labels.
Setting Up Dynamic Attachments
If you are already using control files and pick lists
with your Attachments, you may want to rename your existing
control and pick list folders before proceeding as some of the
files may be overwritten in Step 1.
1. Copy the sample control and picklist folders to your database
folder.
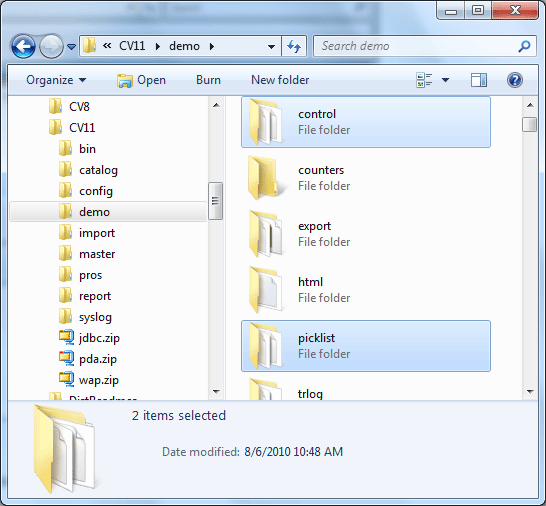
Control and Pick List Folders in Database Folder
2. Sign into your database as a user with level 99 to set the
control file and pick lists in the steps that follow.
If you are not familiar with using the Access Rights form
to assign control files, please refer to Help topic,
How to Attach A Control File.
3. Attach the attach.ctf to the Attachment
Class field.
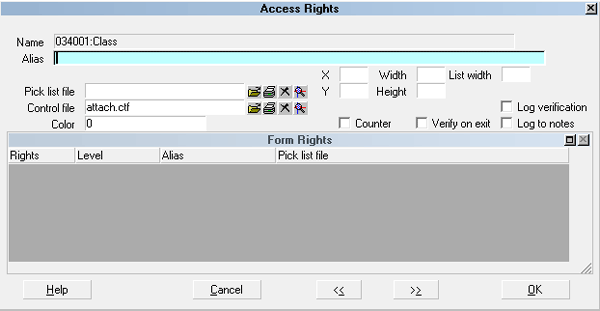
Access Rights for Attachment Class Field
4. Attach the attach.ctf to Type field.
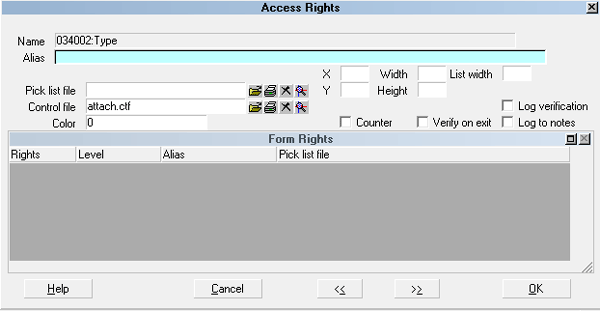
Access Rights for Attachment Type Field
5. Attach the attach.ctf to the Attachment form.
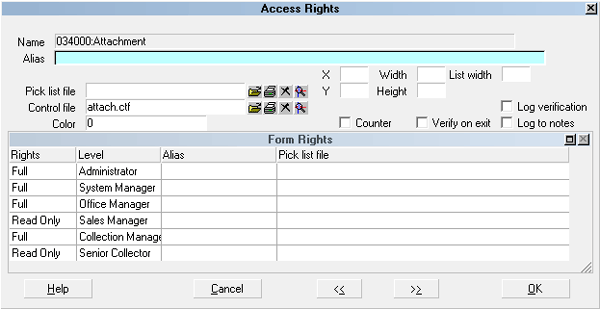
Access Rights for Attachment Form
To attach the control file to the Attachment form,
click anywhere in the grey area of the Attachment form to
display the Access Rights form for the Attachment form
itself, rather than any one of the fields on the form.
6. Sign out and back into your database with any other user level
that is not user level 99. When you view an Attachment or create
a new one, you can now select a Choice from the Class field, the
Type pick list will change dynamically to match your choice.
Selecting a choice from the Type pick list will change the field
names so that relevant labels are displayed, matching the Class
and Type of data you are entering.
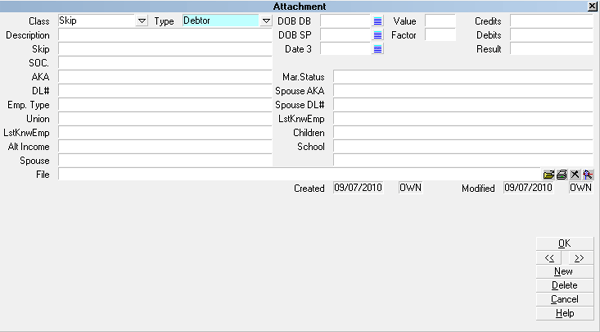
Fields Available for Skip Debtor Information
If you have existing Attachments in your database
you may need to reset your choices when you view the Attachments
for the first time.
Browse Attachments
When using Dynamic Attachments, the Type of Attachment
is dynamically set according to the Attachment Class. This
means that the list of Attachments, viewed from the Browse
menu, Attachments option, will not display the correct value
in the Type field until you actually open the Attachment. If
this is confusing, you can hide the Type field when viewing
the list of all Attachments. Please refer to Help topic,
Customizing List Views, for details.
In the Demodb database, the Attachment Subclass field is
visible in the Attachment list view. This is a hidden field
which stores the textual value of the Type field pick list
for each attachment. This makes it easier to find what
you are looking for when browsing the list of Attachments.
Class, Subclass and Description enable you to quickly
locate and examine the information you need.
If this field is not visible in your Attachment list
view, please refer to Help topic, Customizing List Views,
to insert the column into your list view.
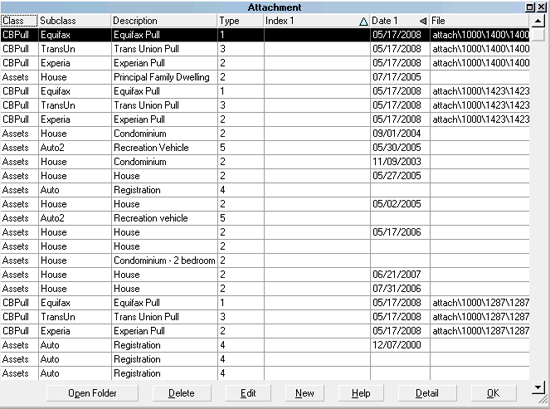
Attachment Subclass Column Displays Type
Edit Search Or F6 Attachments
If you want to do a search using Edit, Search or F6 on the
list of Attachments when using Dynamic Attachments,
you may notice that the Field choices are aliased
depending on the current Class and Type. This may not be
appropriate for your Search criteria.
There is an easy way to set the Class and Type for your
Search as outlined in the steps below.
1. Select Browse from the top menu bar and then select
Attachments from the drop-down choices.
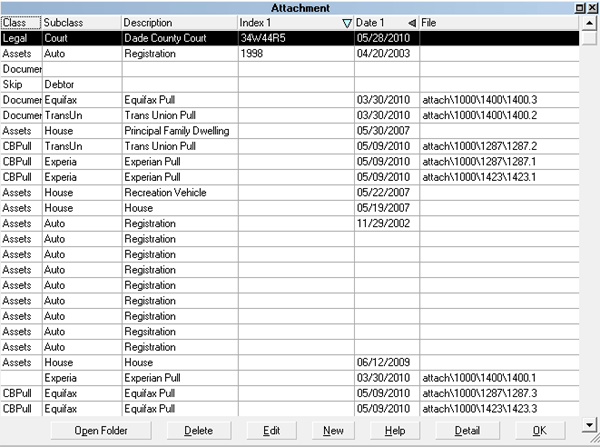
List of All Attachments
2. Press F3, or select the NEW button, to open a new
Attachment.
Default New Attachment
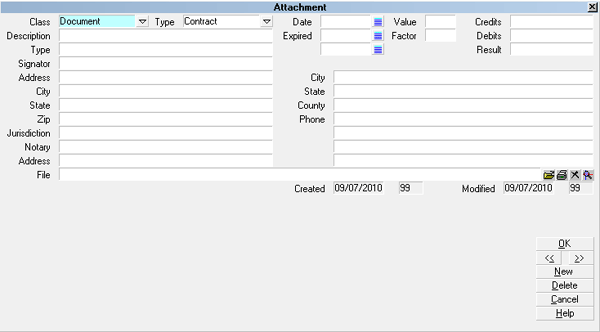
3. Select the Class of Attachment you wish to search.

Selecting Class of Attachments
4. Select the Type of Attachment you wish to search.
Notice that the aliases of the Attachment fields, match your
Class and Type.
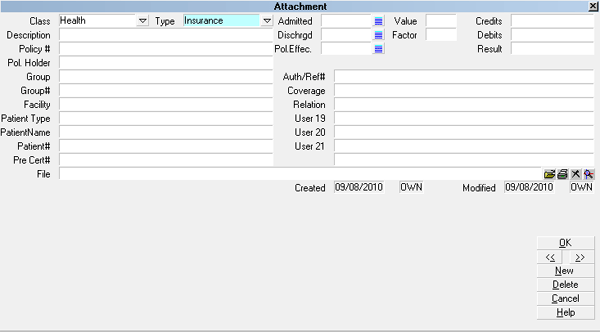
Class and Type of Attachment Selected
5. Select OK to close the Attachment and return to the
list. The Attachment you just created will be highlighted.
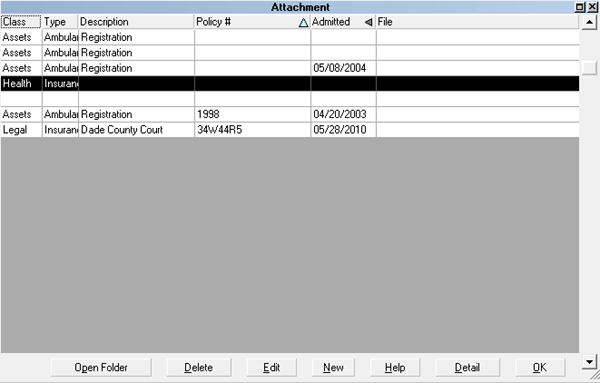
Health Class Attachment Highlighted
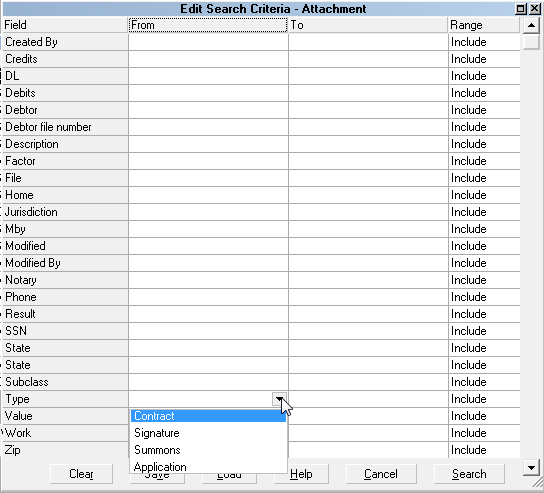
6. Press F6, or select Edit from the top menu bar and then
select Find from the drop-down choices. This will open the
Edit Search Criteria form with the proper aliases in the left
column for the type of search you wish to perform. Notice
as well, that you can also select any Type in that particular Class
to broaden your search.
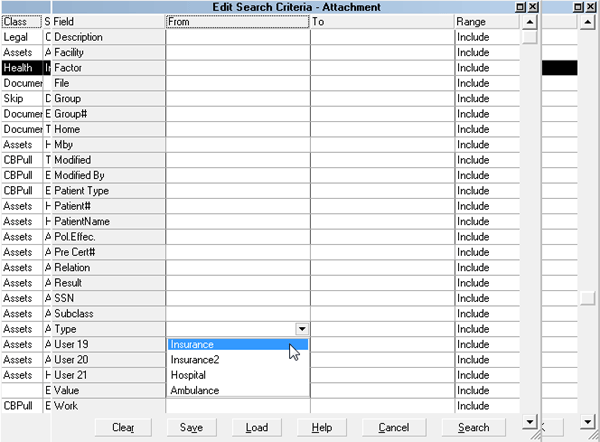
Edit Search Criteria Type Pick List
7. To search a different Class, you can open the Attachment
that you created and select a different Class and Type.
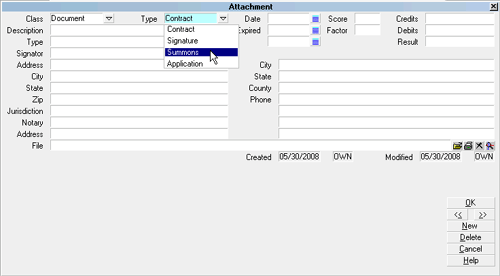
Setting Class and Type for Document Search
8. Now when you press F6 or Edit, Find, the Edit Search Criteria
field choices will reflect your latest choice of Class and Type.
Setting Class and Type for Document Search
Summary
Collect!'s Attachment form enables you to store many different
types of information. Using Dynamic Attachments enables you
to change the pick list choices and field labels to match
whatever Class of data you want to store. When you view each
attachment, you will see the information displayed according
to the Class and Type of attachment you are viewing. When
viewing the list of all Attachments, you can use the features
of Dynamic Attachments to set the Class and Type for your
search criteria.
See Also
- How to Use Pick Lists
- How to Attach A Control File
- Edit Search Criteria
- Customizing List Views
|
Was this page helpful? Do you have any comments on this document? Can we make it better? If so how may we improve this page.
Please click this link to send us your comments: helpinfo@collect.org