How To Maintain Your Database
In your computer system, both hardware and software are
tools. Like any tools, they require regular tune-ups to run
smoothly. Checkups prevent minor difficulties from
escalating and possibly causing system down time.
Run SCANDISK and DEFRAG often. These should be run
monthly, or anytime the machines act up.
We recommend you backup critical data files before running
maintenance since, if the machine is failing, the maintenance,
while manipulating data files, may cause undesirable
consequences and, potentially, loss of data.
 Please refer to Backup Database Topics for options
for backing up your files.
Please refer to Backup Database Topics for options
for backing up your files.
Run database maintenance daily until you are sure your
installation of Collect! is stable and error free. Once you
have operated for a week, or so, without any errors reported
during data maintenance, you can safely reduce the
frequency with which you do your maintenance.
These recommendations should be considered according
to the volume of data at stake. You want to be able to recover
very quickly should anything unforeseen happen. Keeping a
recent error-free backup of your Collect! database is your
safest bet.
You can also schedule maintenance routines to run
off hours using Collect!'s Scheduler. Please refer to Help
topic, Database Maintenance in Scheduler for details.
- CV11 maintenance should be done directly at the server, not
from a workstation.
- The CV11 server should be running, but no users should be
signed into Collect!, unless you are running only the DBCheck.
- Sign into the database you wish to maintain. Make sure you
are signed in using EXCLUSIVE mode, unless you are running only the DBCheck.
- Select File from the top menu bar and then select
Maintenance from the drop-down choices. This will display
a side menu.
- Select Maintenance from the choices presented. This
will display the Database Maintenance form.
- Select the START MAINTENANCE button on the
Database Maintenance form to begin maintenance.
- Let the routine run to completion without interference, noting
any error messages which come up. Common sources of difficulty
in running maintenance are dealt with below, in the
Troubleshooting section. If any others arise, contact Collect!
Technical Services for further assistance.
The rest of this document gives further details for the
steps outlined so far.
To Run Maintenance
Make sure no users are attached to the Collect! files over the
network. Make sure there are no db files open in WinNT Server
Manager. If you find open files, close them to prevent
corruption of the database. To be sure, reboot your server
machine.
 These instructions are for running a full
maintenance. If you only want to run DBCheck, please
refer to the section entitled, Check Database.
These instructions are for running a full
maintenance. If you only want to run DBCheck, please
refer to the section entitled, Check Database.
1. Start CV11.
2. Sign in as a user with User Level 99.
3. Select the SELECT DATABASE button and
choose the database you wish to maintain.
4. In the Database Access section, make sure
there is a dot in the radio button
labeled Exclusive.
5. Select the START button to sign into the
database and stop at the Main Menu.
6. Select File from the top menu bar and then
select Maintenance from the drop-down choices.
This will display a side menu.
7. Select Maintenance from the choices presented.
This will display the Database Maintenance form.
There are many settings available for fine
tuning your maintenance procedure. For details, please
press F1 when the Database Maintenance form is displayed.
8. Select the START MAINTENANCE button to begin
maintenance using the chosen settings.
By default, the maintenance procedure will rebuild database
keys, sort the delete chain, run a check and dbfix, and a
UID check on each of the databases that make up Collect!.
As each process runs, Collect! will update the message
window.
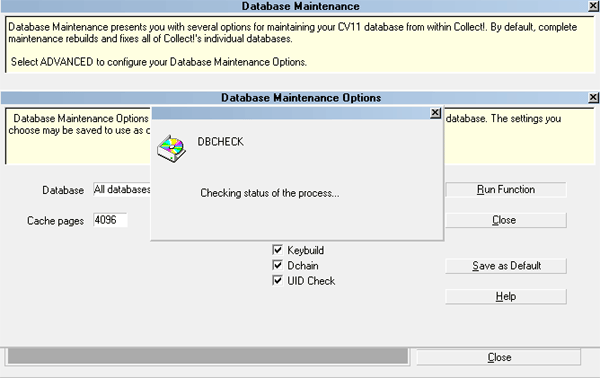
Maintenance Running
Some processes may take quite a while depending
on the size of your database. If the process does not seem
to be "moving" you can look at the CV11 Server (rds.exe)
window for details.
When the maintenance completes, you will see a status
report.
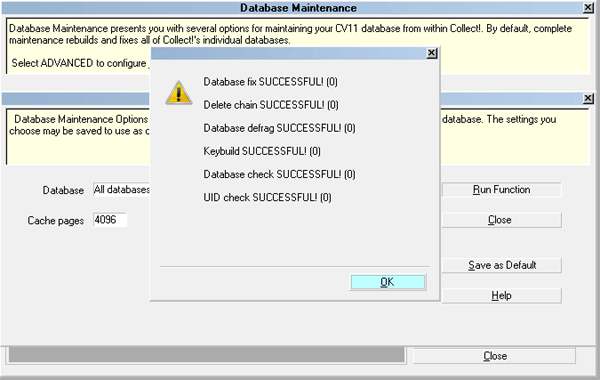
Maintenance Results
When maintenance is finished, you can select
Application Log from the System, Diagnostics menu to open
the Collect! Log Viewer which displays the results of the
maintenance process. Press F1 for details when the
Log Viewer is open.
Now that maintenance has completed
successfully, backup your error-free database and
store it in a safe location.

Troubleshooting CV11 Database Maintenance
RDM Server writes Server process information to
the RDS.log file in the CV11\catalog folder.
The RDS. log file is renamed to RDS#.bak
when the RDS restarts. If you sort these files by date modified,
you'll see the .bak files organized by the days in which they were
created, extending back to the first day the RDS was in use on
your system.
Whenever you experience errors, it is a good idea to check the
entries in these .bak files for the appropriate day. Whenever the
server reports an error, these logs show the particular error
number and names of any files affected. This helps greatly to
pinpoint the area you need to address and you can report this
information to Technical Services when requesting assistance.
Partial Maintenance
When your database is very large, you may find it more efficient
to maintain parts of the database at one time. Collect! ships with
several utilities to assist you in this.
- Three timed maintenance batch files are included. These
batch files are explained below.
- The Collect! database is structured with an individual file for
each index key. You can easily reindex a particular key or a
particular file. Please refer to How To Reindex Individual Fields
for more information.
Timed Maintenance Batch Files
Sometimes we need to know how long a maintenance takes
and what parts are taking the most time. Three timed batch
files are included to provide these timing functions. If you are
familiar with creating batch files, these files may be edited to
run selective maintenance procedures.
These files are:
TIMEDRECFIX.BAT - runs the dbfix with the -r argument to
check records only, and provide times for checking each
record type.
TIMEDSETFIX.BAT - runs dbfix with the -s argument to check
sets only and provides times for checking each set type.
TIMEDREINDEX.BAT - runs a keybuild and measures the
time to rebuild each index file.
The results of these maintenance routines can be used
to assess where time is taken during maintenance and to
then construct a schedule of maintenance routines that
run daily, maintaining parts of the database as time
permits on each day.
To use these batch files:
1. Make sure the batch files are in your bin folder
2. When you would normally run your maintenance, try the
TIMEDRECFIX batch file. With the RDM Server running,
from the command line, type 'timedrecfix d01_collect' to maintain
your demodb database or 'timedrecfix d00_collect' to maintain your
masterdb database.
3. Examine the two log files created in the bin folder (refixlog.txt
and refixlogdetail.txt). The first file shows elapsed times.
The batch files assume you have an administrator
account on the RDM Server userid=admin, pwd=secret. Please
edit the files if you have different ID and Password.
The other two batch files also create log files in
the bin folder. After the maintenance test runs, just look for
recently created text files in the bin folder and you will see
the logs.
If you have any questions about the use or construction
of these batch files please feel free to contact Collect!
Technical Services.
Email support@collectsoftware.cc
Check Database
If you only want to check the state of your database, you can
do this when users are logged into Collect!.
1. Start CV11.
2. Sign in as a user with User Level 99.
3. Select the SELECT DATABASE button and
choose the database you wish to maintain.
4. Select the START button to sign into the
database and stop at the Main Menu.
5. Select File from the top menu bar and then
select Maintenance from the drop-down choices.
This will display a side menu.
6. Select Maintenance from the choices presented.
This will display the Database Maintenance form.
7. Select the CONFIGURE button to display the
Database Maintenance Options form.
8. Ensure that only the "Check records, sets and blobs"
choice is selected.
9. Select the RUN FUNCTION button to begin the
database check.
When maintenance is finished, you can select
Application Log from the System, Diagnostics menu to open
the Collect! Log Viewer which displays the results of the
maintenance process.
If errors are found, you can run a targeted fix, rather than
your whole system.
Dbanalyze Utility
Collect! ships with a utility that may be used to check the
state of all the files in all your databases. This is very
handy because it can run when users are signed in.
If errors are found, you can run a targeted fix on a single
database, rather than your whole system.
The DBAnalyze utility checks the catalog as well as
devices. It can be run with arguments to target only your
working database.
Please refer to Help topic, Dbanalyze Utility for details and
examples of running a targeted fix.
See Also
- Database Maintenance Topics
- How to Reindex Individual Fields
|
Was this page helpful? Do you have any comments on this document? Can we make it better? If so how may we improve this page.
Please click this link to send us your comments: helpinfo@collect.org