How To Sign On
To sign on to Collect!, you need the ID and Password
assigned to you by your System Administrator. If you
receive a message from Collect! that the ID is invalid,
check your Caps Lock first. Your ID will display in
block capitals irrespective of whether you typed it in
with or without Caps Lock. The ID is not case sensitive.
Your Password IS case sensitive and must be keyed in
exactly as it was set up. If you have tried twice and
have not met with success getting in, ask your Systems
Administrator for assistance. If you attempt too
many times, you will disable your login and your
Systems Administrator will need to unlock your ID
in the Operator Setup screen.
When you click your desktop shortcut or icon to launch
Collect!, the first window you encounter is the Splash, or
Login, screen. It is necessary to enter your login
credentials, a valid ID and Password, to sign on.
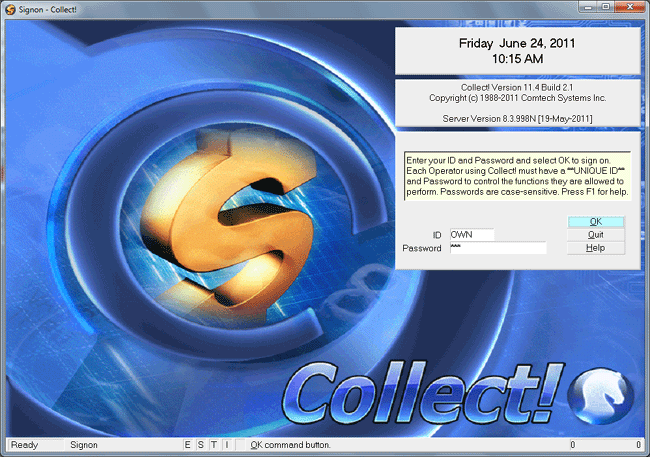
Collect!'s Splash Screen and Sign On
Sign On
Collect! ships with a representative sample of user IDs
and passwords already set up in the default Operator
Levels so that you can experiment with them to see which
levels suit your staff job functions. Each of the shipping
default sample IDs is set with the ID and password matching
for ease of use. Example, a recommended login permissions level
for System Administrators and Executives is contained in the
Operator ID "OWN", Password "own". All of the preset IDs
shipped with Collect! follow this ID/Password convention
of the password being the lowercase repeat of the ID. For more
details about Operator configurations, user Level permissions and
Access Rights, refer to Help topics How To Set Up Operators,
and Access Rights - Default Settings.
Steps:
1. Key in your ID where indicated, then press the Tab or
Enter key to move to the Password field.
2. Key in your Password where indicated, then press the
Tab or Enter key to move to the OK button.
3. Press the Enter key to move to the OK button and
to indicate that you are ready to advance to the next
screen in the sign on process.
If your login is successful, you will proceed to the
" Welcome to Collect!" window.
 If you are signing in with an operator ID that
has user level 99, you will see a cautionary
message.
If you are signing in with an operator ID that
has user level 99, you will see a cautionary
message.
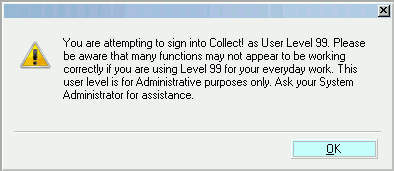
Signing on with User Level 99
 The user level 99 message will only trigger once
you log into a database. It will not prompt
when you are using the ID 99/level 99 login
that ships with Collect!.
The user level 99 message will only trigger once
you log into a database. It will not prompt
when you are using the ID 99/level 99 login
that ships with Collect!.
It is strongly advised that you do not create a day-to-day
login for yourself that has a Level 99. This is considered
a special function system administration level that is not
intended for day-to-day ordinary usage. This user level
does NOT receive standard WARNING messages that all other
user levels receive. Whatever you instruct the system to do,
it will do. Because your database may be radically and
irreplaceably be affected by such an occurrence, we STRONGLY
recommend that you do not routinely work with a level 99 ID.
Additionally, any fields which have had their field labels
alias to be other name are not visible: user level 99 sees only
original field labels.
As the system logs you in, it pauses briefly
to update certain files. Do not interrupt
this process. The screen will advance in
a moment.
It is during this reading of your login credentials that
Access Rights and field Aliases are being set for your
session.
The next window is the "Welcome to Collect!"
screen. This is where you need to check a few settings
to ensure you are entering the database you wish to
access and in the access mode practical for what you
plan to do during your login session.
In the lower left of the window, you see an indicator
called "Database to open" and the name of the
database being pointed to is beside it. If you are
experimenting with your new system, "demodb" is where
you want to be. This is your test environment. If
you want to access your main working database,
called "masterdb", you can change the selection of
which database you are signing into by clicking the
" Select Database" button to the right of the field
displaying the current database select name.
The system also ships with a third database, called
"prosdb". This is your prospecting database for
inside sales personnel. It is a Collect! database where
the debtor and client related fields have been largely
renamed/Aliased to be job function friendly for your
sales team to track their prospect call-backs that have
not turned to actual clients yet, as you have entered into
your masterdb.

Default Database
Once you've clicked into "Select Database", if your
selection is not the current default, you will get
a screen prompt asking if you want to make what you
just chose your new default database.
If you select Yes, the Database Preferences "Database"
field is updated and your choice will become what the
system sets automatically for you when you log into
Collect!.
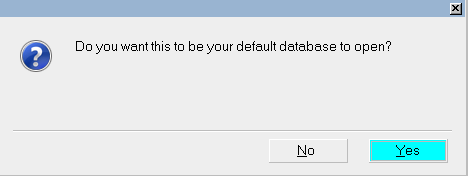
Default Database Prompt
This prompt displays only once per login session. If you
exit to the Welcome to Collect! screen and select a different
database to open, you will not see the prompt a second
time. If you exit out of Collect! to the login screen, the
prompt will be enabled again.
If you inadvertently set your demodb to be your
primary database and you do not wish this to be so,
you can either log out/log back in & Select Database
as masterdb, this time saying Yes with intent to the
preference question, OR, you can update the preference
directly by following the menu path to this screen
"System\ Preferences\Database Preferences" and entering
your database to open first by name into the top field
labeled "Database".
Shared Or Exclusive
You also need to check your session mode, or "Database access",
which is immediately beneath the "Database to open"
indicator.
1. If you are the only person who will be accessing the
system at the moment, and you are not about to perform any
Server level functions, it does not matter if you sign in
"Shared" or "Exclusive".
2. If anyone else is using the system with you, then you
must be sure that your login with "Shared" access.
3. If you are preparing to perform any Server level processes
(i.e. Maintenance, Upgrades to the software), then you MUST be
sure that no one else is in the system, then sign in Exclusive AND
at the main Server station to perform these specialized,
high level processes.
Once you have confirmed your database to open and access
mode are both set correctly for your session, click the
START button to enter the Collect! program.
See Also
- Introduction To Sign On
- Exclusive Mode
- Command Line Startup Options
|
Was this page helpful? Do you have any comments on this document? Can we make it better? If so how may we improve this page.
Please click this link to send us your comments: helpinfo@collect.org