Custom Upgrade For Technicians
This topic explains ways to optimize the upgrade process if
you are upgrading very large databases.
Collect! copies your entire Collect! contents to its upgrade folder
prior to upgrading, excluding help, snapshots, backup and other
irrelevant folders. This process ensures the integrity of your
original Collect! system and it is the preferred upgrade method.
However, the copy process may take quite a while if you have a
very large database.
Alternatively, you can prepare the upgrade folder yourself by
moving or extracting the complete contents of a Collect!
folder into the \bin\upgrade folder.
When Collect! attempts to autodetect an existing Collect!
installation, it will first look in the bin\upgrade folder. When
upgrading from there, the disk space check and initial copy
operation will not occur. This means that you are responsible
for ensuring that you have enough space on your computer
for the upgrade process and running the new Collect! after
the upgrade.
 Please refer to Help topic, Hardware Requirements for
system specifications.
 WARNING: When you upgrade Collect! Version 11.2 or
Version 11.3 databases, the structure of the
database becomes changed with the upgrade.
For this degree of upgrade, any previous methods
of cut/ paste of the original database folder are
no longer valid because the schema will be changed.
We cannot emphasize strongly enough that prior
to starting this level of upgrade, you MUST ensure
you have a full backup taken the night before to
ensure that you have rollback ability if needed.
Should the upgrade process fail to complete for any
reason, you will not be able restore function by
moving a cut/paste of the original files back into
the original folder.
CV8 and CV10 databases are not modified by the process
since they still rely on exporting the data and reimporting it. The
only thing that is removed is the version.dat file from the data
folder so that Collect! will not autodetect it again when it is
restarted.
Preparing The Upgrade Folder
To ensure that no files are being held by the operating system,
reboot your server.
Install Collect! Version 11.6 on your computer. Create a sub-folder
named upgrade in the "CV116\bin" directory.
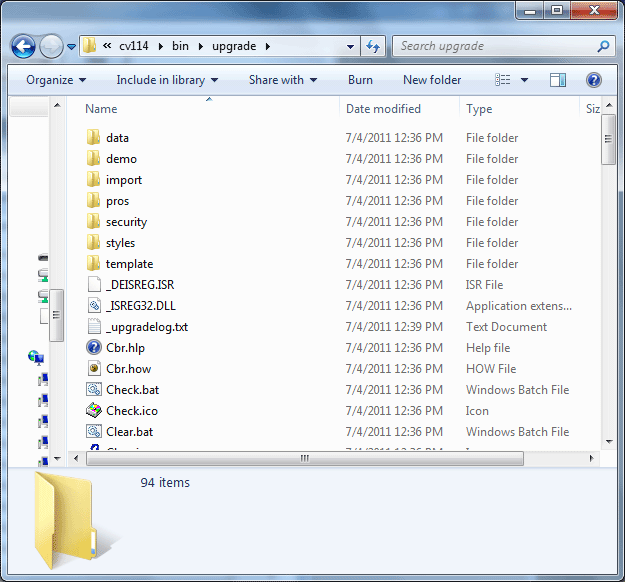
Copy the entire contents of your Collect! folder into the upgrade
folder.
 Collect! needs your total Collect! directory in the
upgrade folder - all its contents - NOT the
folder itself. For example, NOT
"upgrade\cv8" or "upgrade\cv11" but instead
"upgrade\data" or "upgrade\masterdb" and so on.

Upgrade Folder Contents for Upgrading

Performing The Upgrade
From here on, the upgrade procedure is exactly the same
as the steps in the upgrade topic for your Collect! version.
Collect! simply detects the database to upgrade in the
cv116\bin\upgrade folder, rather than by searching the drives
on your computer. Please refer to Help topic, Upgrading your Collect!
for the relevant topic for your Collect! version.

Troubleshooting
If the upgrade process does not complete successfully, Collect!
will display a message.

Upgrade Not Successful
Please review the _upgradelog.txt in the cv116\bin folder
for details.
The main reason for failure is due to copying an incomplete
Collect! folder into the upgrade folder. All the relevant files must
be present. Make sure that the upgrade folder has all the contents
of your Collect! folder, except for help, tutorials, backup folders,
snapshots and so forth.
If you are not sure, please request assistance from
Collect! Technical Services. Your data drives your business!

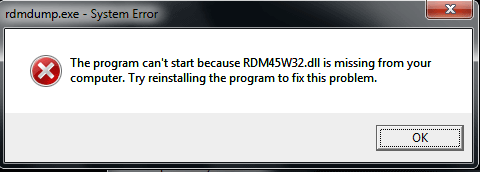
CV8 Upgrade Error
You may see a particular error message if you have failed to
copy the entire contents of the cv8 folder into the upgrade
folder.

CV8 Upgrade Error
However, failure can occur without an error message like this.
Instead, Collect! will display a generic message.

Upgrade Not Successful
Please review the _upgradelog.txt in the cv116\bin folder
for details.

Summary
Collect! is able to perform the entire upgrade procedure
with very little intervention on your part. However, if you have a
large database, and you find the copy procedure unacceptable,
Collect! gives you the option of preparing the upgrade folder
yourself instead of letting Collect! perform the copy procedure.
 This is only for large databases and should only be
done with expert technical assistance. You should
have a safe backup stored separately from the
database you have moved into the upgrade folder.
Create an upgrade folder if it does not exist. make sure it is
empty to start. To prepare the upgrade folder yourself, move all the
contents of your Collect! folder into the upgrade folder. Or extract
a complete backup into the upgrade folder. Remember, you must
include all the contents, not just the databases as the upgrade
procedure needs to utilize other utilities contained in the other
folders, like DLL files, for instance.
 WARNING: When you upgrade Collect! Version 11.2 or
Version 11.3 databases, the structure of
the database becomes changed with the upgrade.
For this degree of upgrade, any previous methods
of cut/paste of the original database folder are
no longer valid because the schema will be
changed. We cannot emphasize strongly enough
that prior to starting this level of upgrade,
you MUST ensure you have a full backup before
you proceed to ensure that you have rollback
ability if needed. This can be done the night
before or the morning of, if you are doing it over
a weekend or other business hour holiday. Should the
upgrade process fail to complete for any reason,
you will not be able restore function by moving a
cut/paste of the original files back into the original
folder.
CV8 and CV10 databases are not modified by the process
since they still rely on exporting the data and reimporting it. The
only thing that is removed is the version.dat file from the data
folder so that Collect! will not autodetect it again when it is
restarted.

See Also
- Upgrading Your Collect!

| 
Was this page helpful? Do you have any comments on this document? Can we make it better? If so how may we improve this page.
Please click this link to send us your comments: helpinfo@collect.org