How To Export A Contact Plan
This topic gives you steps to export a contact plan from
your database. This is especially useful when you want to
send a contact plan to Collect! Technical Services, or move it
to a different database. We will also cover exporting several
plans at once.
You may want to export a contact plan for several reasons:
* When you email Collect! Technical Services concerning an
issue with the way a contact plan works, we might ask
you to send us your contact plan as an email attachment.
* You may want to move a contact plan from one
database to another in Collect!
* We can customize an existing contact plan for you.
* You may want to share a contact plan with another
Collect! user.
To get the contact plan out of Collect!, we export it
and give the contact plan a name. (e.g. myplan)
A contact plan exported from Collect! has
a *.cpl extension. It is a special Collect!
file and is not meant to be opened except in Collect!.
Make sure you know exactly which contact plan you
want to export. Also, have a name ready to give to your
exported contact plan file and know where on your computer
you want to save it. Saving to your Desktop is convenient.
The exported contact plan can have the same name as it
has in Collect!
Let's proceed, now, with the steps below to export
your contact plan from Collect!
1. Sign into Collect! as you would normally
and select System from the top menu
bar. This displays a list of choices.
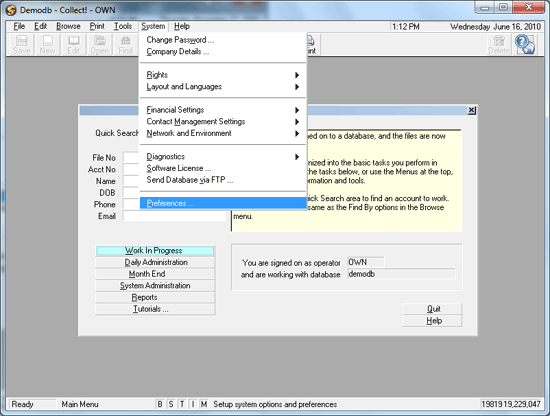
System Menu
2. Then select Contact Management Settings from the choices.
This will display a submenu. From the submenu, choose
Export Contact Plan.
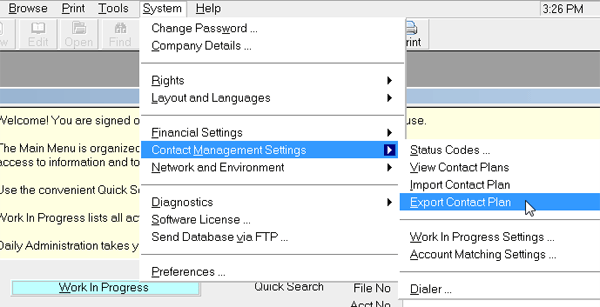
Contact Management Submenu
3. This displays the Contact Plan list where you see all
the contact plans in your working database.
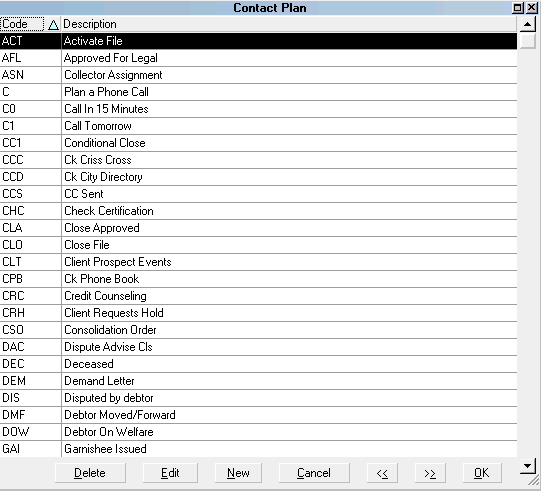
Contact Plan List
4. Use the up/down arrow keys on your keyboard to highlight
the contact plan you want to export. Press Enter
or select the OK button at the bottom of the list.
The Export Collect! Contact Plan dialog pops up.
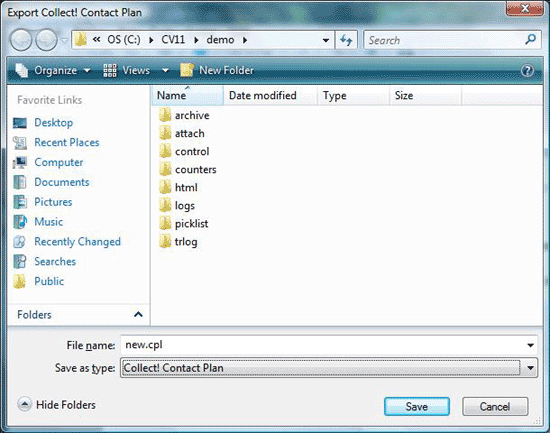
Export Collect! Contact Plan Dialog
5. Use this window to navigate to the folder where you want
to save the exported contact plan. If you know the location,
you can type this into the Filename
box. Or, you may use the down arrow next to
the Save In box to navigate to the
Desktop, or to the folder where you wish to save your *.cpl file.
When you are in the folder, type in a name for your exported
contact plan in the Filename box.
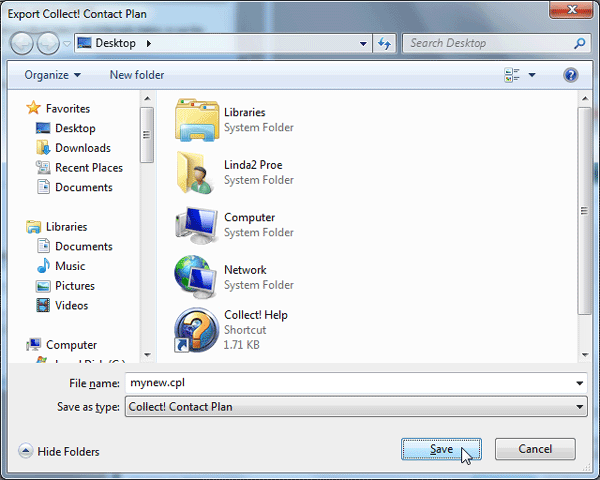
Contact Plan To Save
5. Select Save to export the contact
plan. Your contact plan will be exported immediately and a
message will show the name of the contact plan you
just exported and the location where you saved it.
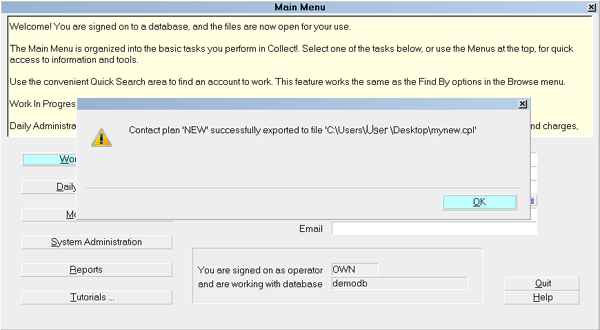
Contact Plan Export Success
Please make note of the location so that you can find the
exported contact plan.
6. Select OK to close the window.
 Please make sure you also export any other
contact plans that may be in this contact plan as events.
Export Multiple Contact Plans
If you wish to export several contact plans at once, in
Step 4 above, simply use your spacebar to select each
one of the plans that you want export. When all your
plans are highlighted, press F8 to close the list and
continue.
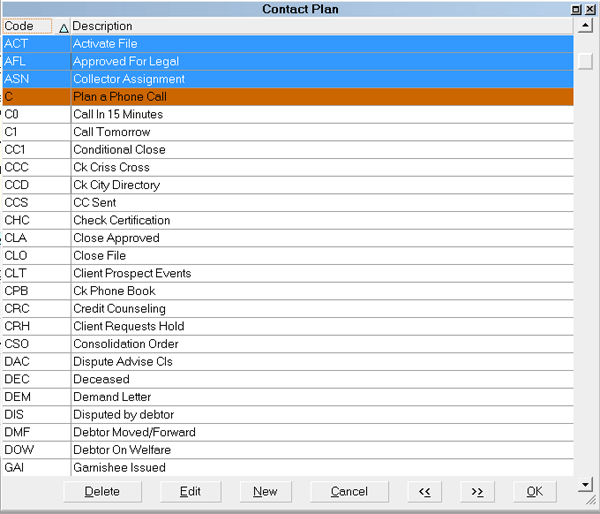
Select Multiple Plans to Export
Collect! let's you know that exporting was successful.
All the contact plans are saved in a single *.cpl file.

Success Exporting Multiple Plans

Send To Tech Support
If you are going to send this contact plan file to Collect! Tech
Support, you can attach it to an email. Sometimes system
security does not allow you to send files with a CPL extension.
You can rename the *.cpl extension to *.txt or zip it. It is a good
idea to send the file or files as a zipped file. Please refer to your
email program's help documentation on attaching a file to an email.
 Do not attempt to open the *.cpl contact plan file
outside of Collect! This may make it unusable if you
accidentally save it in a different format!
Locating the exported contact plan
If you do not know where on your computer the exported contact
plan was saved, you may do a search for files and folders using
the Windows Search feature to locate your contact plan file.
You have to know the exact name of the file or do a search for
all *.cpl files.
Please refer to your Windows Help for details. Type in "searching
for files and folders" as the keywords for your Help topic and you
should see results that help you use the Search feature.
When your contact plan shows up in the search results, select it
and Right click on it. This will display a submenu. Click COPY
from the submenu.
Now, move your mouse to a spot on your Desktop. Right click
again and select PASTE.
A copy of the contact plan file is now on your Desktop. This is a
convenient location to use to easily find the *.cpl file if you want
to attach it to an email.

See Also
- How To Import A Contact Plan
- How To Copy Contact Plans To Master Database
- Contact Plan Topics

| 
Was this page helpful? Do you have any comments on this document? Can we make it better? If so how may we improve this page.
Please click this link to send us your comments: helpinfo@collect.org