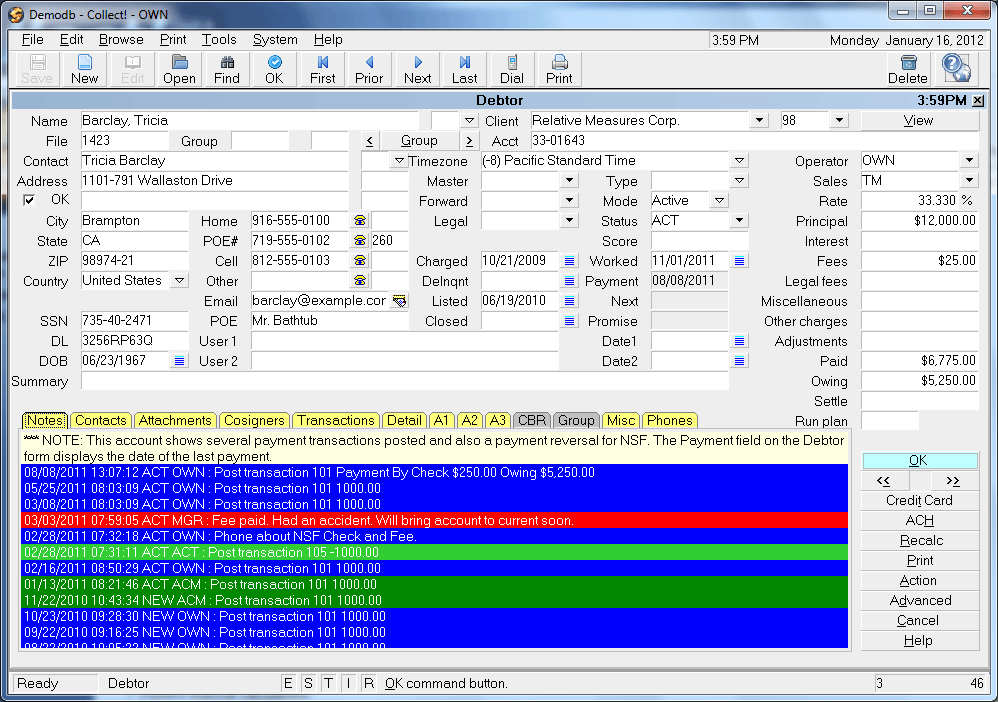
Debtor
The Debtor form stores all information that you need to work
and manage your accounts. Personal, financial and in-house
management information is displayed on the form. Tabs enable
you to open subforms to access various types of related
information, such as contacts scheduled for the debtor,
financial transactions posted, bank information and other
debtor details, cosigners and attachments. When you select
financial fields on the Debtor form, additional financial details
are displayed in summary screens.
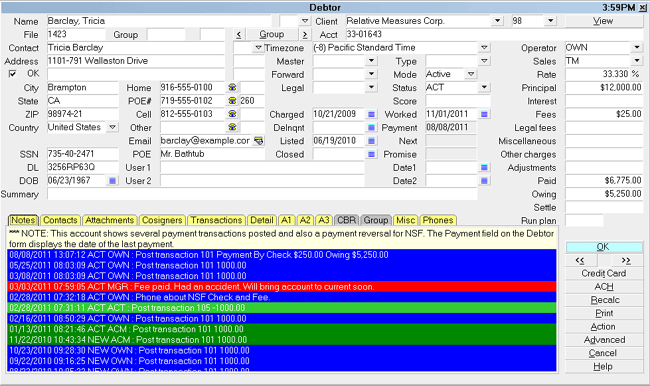
Debtor form
 Please refer to Debtor Basics for steps to access
this form.
Please refer to Debtor Basics for steps to access
this form.
Collect! uses the information entered in the Debtor form to:
- Help you manage your collectors' workloads
- Perform financial calculations
- Print a broad array of reports
- Keep track of all activity on each account
Information on the Debtor form can be loaded automatically
for each new Debtor that you create. This speeds up data entry
and minimizes errors. First, the settings and details are entered
into the other areas of Collect!. Then they are readily available
when each new Debtor is entered. For details, please see
- How To Enter A New Debtor
- How To Setup Debtors (Administrative concerns)
Name
The Name of the debtor entered as ' Last, First / Middle initial'.
Please ensure your spelling is correct. This field is INDEXED.
If you type a comma in the name, Collect! will split first and
last names automatically and put the result into the Contact
field below. For example, JONES, SAM = Sam Jones.
If you do not place a comma between the last and first name,
Collect! will assume the name is a business name.
FOR CBR: Hyphenate multiple last names,
e.g. 'Van-Deusen, Jack'.
FOR CBR: Please put ONE Debtor name ONLY
in this field. If you have a Cosigner,
use the Cosigner form.
FOR CBR: Don't include Generation titles in the
name here. Use the Generation field.
FOR CBR: When reporting Commercial accounts,
Collect! can detect a business name as long
as there is no comma in the Name. If there
are commas in the business name, please
ensure that you switch ON "Business/Commercial"
in the ECOA designation when setting up this
account for reporting.

Legal Entity
Press F2 or select the arrow to pick the Legal Entity
title of the Debtor. For example, Jr, Sr, II, III, Ltd. or Inc.
This field is optional.
FOR CBR: If there is a Legal Entity title for this
Debtor, it MUST go here, NOT in the
Name field.
File
The File Number of this account is automatically created
by Collect!. It looks at the highest numbered debtor and
adds 1 for numbering a new debtor. File Number is a
UNIQUE identifier for each account, up to 9 digits in
length. You must not have duplicate File Numbers in
your database.
Collect! uses this File Number for several functions, such
as storing Attachment and Data records attached to the
account. It is also sent as the UNIQUE identifier when
processing accounts for credit bureaus, letter service
and eBureau.
This field is INDEXED.
FOR CBR: the File Number must not change
while the account is being reported.
 Collect! does allow you to modify the File
Number, if needed. Remember that you can
use up to 9 digits here. Each account must
have a UNIQUE File Number.
Collect! does allow you to modify the File
Number, if needed. Remember that you can
use up to 9 digits here. Each account must
have a UNIQUE File Number.
Contact
This is the name of the Contact person at the address
or phone number. This field is INDEXED. Unless you enter
a different name manually, Collect! uses the information in
the Debtor Name field to construct the Contact name.
Generation
Press F2 or select the arrow to pick the Generation of the
contact person. (Jr, Sr, II, III etc.) This field is optional.
Address
This is the Address of the debtor, if it is known. Two lines are
available. If you enter text into the first line, the Print switch
(Address OK) will be set automatically. This will enable printing
notices to this debtor using contact plans and action codes.
When you change an existing debtor Address line, the old
address line will be written automatically to the debtor's Notes.
*** IMPORTANT *** If you ever intend to report to
Credit Bureaus, you must use one of the
following address formats or an error will result.
FOR CBR: There are two acceptable formats:
- Format 1:
- Address = street address
- Addr1 = blank
- City = city
- State = state
- Zip = zip
- Country = country code
- Format 2:
- Address = street address
- Addr1 = suite or apartment number
- City = city
- State = state
- Zip = zip
- Country = country code
Do not include the # symbol in the
apartment number. The Credit Bureau
rejects addresses with the # sign.
Street Number
Optionally, you can enter the Street Number here. This
provides a means of searching and/or filtering by street name.
This field is optional.
FOR CBR: Do not use this field if you intend to
report to the credit bureaus.
Addr 1
This is another Address line for the debtor. Use this line to enter
Suite or Apartment number if you intend to report to credit bureaus.
FOR CBR: Do not use the words "Suite", "Apt.",
etc. or the '#' symbol, just enter the
Number of the suite or apartment.
FOR IMPORTING: If you have a data file that combines city, state,
and zip into one field or string (Example: Los
Angeles CA 90210), you can import it into the
Addr 1 field and the import module will separate
the string into the applicable city, state, and
zip fields. In order for this to work, the city,
state, and zip fields can not have any existing
data in the fields.
Street Type
Optionally, you can enter the Street Type here. This field
is a numeric field.
You can add a pick list to this field for your own
needs.
FOR CBR: The information in this field is not sent to
credit bureaus.
Address OK
The Print Notice (Address OK) switch controls whether or not
letters are printed to this debtor. If the box contains a check mark,
letters will be printed. If it is blank, letters will NOT be printed for
the debtor. Only set this switch to print (by clicking into the box
to create a check mark), if you have a valid address to send notices
and letters to. Collect! checks the first line of the address. If it
finds an address, it will turn this switch ON automatically by
entering a check mark in it.
FOR CBR: Entering the correct address status
is important if you are reporting to CBR.
*** NOTE If this box is blank or you remove the check mark
from the box by clicking into it, the address fields
in the Debtor form change color. This is to alert the
operator that there is no valid address for this
debtor. This is the first step in skip tracing.
You can fine-tune Address OK functionality for
printing your daily letter batch. Please refer to
Help topic, Required Address Fields for
additional options for validation addresses.
City
Enter the City Name here.
This field is INDEXED.
FOR CBR: truncate the rightmost positions
in this field to 20 characters. Alternatively,
you can use the standard 13-character
U.S. Postal Service city abbreviations.
State
Enter the State Name or Code here.
This field is INDEXED.
FOR CBR: you must enter State Codes in this
field. Refer to your CBR manual for
correct State Codes.
ZIP
Enter the Zip or Postal Code here.
This field is INDEXED.
FOR CBR: the zip or postal code must be entered
and it must be correct. The zip code may
be either 5 or 9 digits for U.S. zip codes,
or 6 digits for Canadian postal codes.
For example: 12345-6789 or 123456789 for U.S.and
X2Y 3Z4 or X2Y3Z4 for Canada.
Country
Enter the Country where the Debtor lives.
This field is INDEXED.
FOR CBR: The Country Code is read from the
Country Code field in Credit Report Details
for the debtor. Collect! uses standard
two-character country abbreviations
specified in the Metro 2 manual.
If you are not doing Credit Bureau Reporting, this field is optional.
Timezone
This field holds a POSITIVE or NEGATIVE integer
indicating the Timezone of this Debtor. Timezones
are standard integer values calculated from GMT
(Greenwich Mean Time). You can use the value in
this field to load contacts in the operator's
work queue according to the account's local time.
Please refer to Reload Work In Progress List for
details.
The control file that manages Debtor timezones
is called setzone.ctf and is stored in your
"\CV11\masterdb\control" folder.
As of version CV11.6.2.1, control files to set
timezones for Cosigners/Other Parties and record
items stored in the Phone tab are available for
download from the Member Center. They are
DCsetzone.ctf and PHsetzone.ctf, respectively.
If you are not currently a Member, contact
Administration at 250-391-0466 option 3 for pricing.
When the timezone is not "Local Time," the
title bar displays the Debtor's current
time.
SSN
This is the Social Security Number of the Debtor.
If you are NOT reporting to credit bureaus, you
can use this field for other purposes.
This field is INDEXED.
FOR CBR: this field must be filled in.
If SSN is not known, Please check with
your Client/Account provider for the
required information.
DL
Debtor's Driver's License. You can use this
field for other purposes. This field is INDEXED.
DOB
This is the Debtor's Date of Birth.
This field is INDEXED.
Press F2 or select the small calendar icon. Select a
Date from the calendar that is displayed. Use the arrows
to scroll through years. Or type the date as MM DD YY.
If you are not reporting to credit bureaus, you can use
this field for other purposes. This field is INDEXED.
FOR CBR: Date of Birth must be entered. If DOB is not known,
Please check with your Client/Account provider
for the required information.
Group
The Group button allows you to group this debtor. When the
Debtor is in a group, the Group will display a Group ID
number and a Group Member number. All members in the
group share the same Group ID. The Group ID is INDEXED.
If the debtor is already grouped, the Group button will display
as yellow, instead of grey, and will display the debtor's
Group ID and Member number. To view other debtors in the
group, click the forward or backward arrow or press the Group
button to view Matching Accounts, or select the GROUP
tab.
If the debtor is not part of a group, you will be
prompted to choose debtors to form a group.
If the debtor is already part of a group, then
Matching Accounts information displays.
Pressing the "G" key on your keyboard
will prompt you to add this account to
a group.
Group Member
If this debtor is grouped, it will be assigned a
sequential number based on the order in which it
was added to the group.
If your Group Member IDs are no longer
sequential due to removing members from
the group, you can run the Tools, Utilities,
Group Member Renumbering utility to
restore sequential numbering to each group.
Home
This is the Home or Personal Telephone Number of the debtor.
This field is INDEXED. It holds up to 23 characters.
When you change an existing phone number, the
old number will automatically be written to the debtor's
notes. Select the telephone icon to initiate the
Phone Dialer to dial this number.
If your system is not setup for using
the Phone Dialer, you will not be able to
use this feature.
You can switch ON 'Only numerics in phone fields'
in Screens and Messages to remove any non-numeric
data from your phone fields.
Home Extension
This field is used to enter an Extension to the phone
number if needed. It might also be used to enter an
ID number.
POE#
This is the Work or Business Telephone Number of the debtor.
This field is INDEXED. It holds up to 23 characters.
When you change an existing phone number, the old
number will automatically be written to the debtor's notes.
Select the telephone icon to initiate the Phone Dialer
to dial this number.
If your system is not setup for using
the Phone Dialer, you will not be able
to use this feature.
You can switch ON 'Only numerics in phone fields'
in Screens and Messages to remove any non-numeric
data from your phone fields.
Work Extension
This field is used to enter an Extension to the phone
number if needed. It might also be used to enter an
ID number.
Cell
This is the Cellular or other number where you can reach the
debtor. This field is INDEXED. It holds up to 23 characters.
Select the telephone icon to initiate the Phone Dialer to
dial this number.
If your system is not setup for using the
Phone Dialer, you will not be able to use
this feature.
You can switch ON 'Only numerics in phone fields'
in Screens and Messages to remove any non-numeric
data from your phone fields.
Cell Extension
This field may be used to enter an Extension
to the phone number if needed. It might also
be used to enter a Cellular ID number.
Other
Use this field for an additional Phone Number. This field is
INDEXED. It holds up to 23 characters. Select the telephone
icon to initiate the Phone Dialer to dial this number.
If your system is not setup for using the
Phone Dialer, you will not be able to use
this feature.
You can switch ON 'Only numerics in phone fields'
in Screens and Messages to remove any non-numeric
data from your phone fields.
Other Extension
This field may be used to enter an Extension
to the phone number if needed. It might also
be used to enter an ID number.
Email
This field is used to enter the debtor's Email
Address. This field is INDEXED. Select
the field icon to open the Send Mail form
where you can compose an email and send it
to this debtor.
POE
Place of employment.
User 1
This field is for your own definition and use, but it may have
another function if you are reporting to credit bureaus.
If you are reporting to credit bureaus, this
field may contain Original Creditor information.
Please refer to Client Settings for details.
User 2
This field is for your own definition and use, but it may have
another function if you are reporting to credit bureaus.
If you are reporting to credit bureaus, this
field may contain Original Creditor information.
Please refer to Client Settings for details.
Client
Enter the Name of the Client in this field. You can
pick from your list of clients by pressing the F2 key
when the Client field is highlighted.
Your clients MUST be set up before
you begin to enter debtors.
Acct
This is the Reference Number assigned to this debtor by
the client. This is printed on statements to your clients.
This field is INDEXED.
Client Number
This is the Client Number assigned by Collect!.
When you select a Client for the Client field,
the Client Number displays in this field. Also,
you may select a Client by selecting the pick
list attached to this field.
This field will change automatically if you change
the client's Number in the Client form.
You must set up clients before you
begin to enter Debtor information.
View
Select this button to open the Client form for
this Debtor's client. This enables you to quickly
view the client's information with a single click.
Master
Click the arrow to view clients that you may select from for
this field.
This field is limited to 4 characters only.
If you are using longer Client Numbers
you may want to use the Client Owner
feature instead to create a Client with
a shorter client Number.
Client ownership is a hierarchical system that
allows you to use the "Owned by client"
in the Client form.
Forward
Click the arrow to view clients to whom you can
forward this account.
Legal
The Legal field gives you a place to put an attorney that
you may want to forward this account to. Click the arrow
to display a list of clients.
You will have to setup your attorney client
first so that it shows up in the list of all clients.
Please refer to How To Post Attorney Fees
for information about setting up an attorney
client.
Charged
This is the date the debt was originally incurred by the debtor.
This date is also used when applying an age-based
commission rate plan to the account. In that case, both Listed
and Charged dates are required to calculate the account age.
FOR CBR: If you do not enter a Delinquency Date, Collect!
automatically uses the Charged Date. For credit
grantors, a switch in the Credit Bureau Setup
form, 'Report charged date', allows the Charged
Date to be used instead of the Debtor's Listed
Date as the 'Date Opened' for CBR reporting
purposes.
Delnqnt
This is the date the account went Delinquent. This is usually
the date the account went 31 days past due.
Enter this date manually if you are a collection agency.
Or, the date can be filled in automatically by Collect!
as '31 days prior to the Listed Date' by turning on the
'Delinquent 31 days prior to listing' switch in the
Client Settings form.
FOR CBR: This is the 'Date of Occurrence'. If you do
not enter a Delinquency Date, Collect!
automatically uses the Charged Date.
FOR CBR: If you are a CREDIT GRANTOR and you
have switched ON ' Report as credit grantor'
in the Company Details form, an unmet
promise or a missed payment will show up
as delinquent in the debtor's Delnqnt field.
You must also switch ON 'Calculate
delinquency date' in the Financial Detail
form. The 'Calculate delinquency date'
check box is in effect only when you are
in Credit Grantor mode.
This date affects a person's credit
rating, so use it carefully.
Delinquency Date For Credit Reporting
If you do not fill in a Delinquency Date, the credit
reporting function will use the Charged date, also known
as the 'Date of Last Service' or 'Service Date' and will
issue warnings to you.
You MUST provide a Delinquency Date for all
accounts reported to credit bureaus. The
Delinquency Date is defined as the date of the first
delinquency that led to the derogatory status being reported.
The date of delinquency is necessary to purge accounts
from the bureau databases in accordance with the
Fair Credit Reporting Act (FCRA).
The date an account is charged off or placed for collection,
is NOT the Delinquency Date. The Delinquency Date
should be the date the account became 31 days past due.
Listed
This is the Date the debtor was Listed with your agency.
Listed Date is automatically filled in when you create a
new debtor. This field is used in numerous reports and
is important to accurately keep track of your accounts.
This field is INDEXED.
FOR CBR: When reporting to credit bureaus,
this date is used for 'Date Opened'.
For credit grantors, a switch in the
Credit Bureau Setup form, 'Report charged
date', allows the Charged Date to be used
instead of the Debtor's Listed Date as
the 'Date Opened' for CBR reporting purposes.
Closed
This field shows the Date When the Account was
Closed. It is visible only when an account is closed.
This field is INDEXED.
When you set the Mode to CLOSED, this
field auto-fills with the current date. This
may be modified as needed for your
purposes.
FOR CBR: This date is used for 'Closed Date'.
Type
This is a free form field. You can define your own types of
debts, or use this field as a sort criteria. This field is INDEXED.
You can attach a pick list to this field (as you can with
most fields in Collect!). Select System from the top menu
bar and then select Layout and Languages, Field Properties
to attach a pick list.
Mode
This is a very important field. The setting you
choose here affects contact management and
financial calculations. This field is INDEXED.
Select the field or select the arrow to choose
one of the following modes.
Active - activates the account.
Closed - closes the account and deletes all
pending Contacts, UNLESS a Contact has
the switch "Do not autodelete" set. However,
Promises and Transactions will be marked
completed when an account is closed,
regardless of the "Do not autodelete" setting.
Precollect - treats the debtor as 'Closed' but
does not delete Contacts.
Suspend - treats the debtor as 'Closed' but
does not delete Contacts.
Mode And WIP List
Only ACTIVE accounts appear in WIP Lists.
CLOSED or SUSPENDED accounts do not show even
if they have contacts scheduled for the day.
Closed Mode And Interest
When you close an account with interest, Collect!
posts a Total Accrued Interest transaction, Type 499,
for all interest that has accrued over the time that you
have been calculating interest on the account. If you
should re-open the account at a future date, this
record can be used to start up interest calculations
again.
Collect! needs Transaction Type 499, with
the correct settings, to perform the
calculations. If you do not have
Transaction Type 499, you can copy it
from your Demonstration database or
request it from Collect! Member Services.
Mode And CBR
Mode does not affect credit bureau reporting. As
long as "Report to credit bureau" is switched ON in
the Debtor's Credit Report Details, Collect! will continue
to report this Debtor, no matter what Mode is selected.
Status
This is the Status of the Account.
This field is INDEXED.
Press F2 or select the arrow to pick from a
list of Debtor Status codes. You can create
your own account status codes.
Score
Use this numeric field to store the
Debtor's credit score. This field holds up to
9 digits. Previous entries are logged
to notes whenever the Score is updated if
you have your 'Log to Notes' Access Right
switch checked. Right click in the Score
field to open the Access Rights window.
This field can be displayed in the Collector's
WIP List for targeted queueing of High to Low
Score accounts.
To insert the field into a WIP display, Right
Click on the column header beside where you
wish to insert the field. You will get a popup
which has options to Insert Fields. Select
this option and use your Up/Down arrow keys to
scroll down to Score until it is highlighted,
then click OK to insert the field.
Fields can be dragged and dropped if you wish
to rearrange the positioning.
The Score column can be sorted ascending or
descending by clicking on the black triangle
at the extreme right side of the field title.
Worked
This is the Date the debtor was Last Worked by an
operator.
The Worked Date is filled in, or updated,
automatically only when an operator is physically
working the account by doing one of the actions
listed below.
1. An operator creates or modifies the notes on
the account.
2. An operator runs a contact plan on the account.
The Worked Date is not updated by any other
method. You can not edit this field. It is used in
numerous reports and is important to accurately
keep track of your accounts.
When the Worked Date is the current date, this
field turns red to alert the operator that this
account has already been worked today.
Payment
This is the Date of the Last Payment made by the debtor.
Collect! automatically changes that date whenever a
transaction is posted for the debtor.
FOR CBR: When reporting to credit bureaus, this
date is used as the Date of the Last
Consumer Payment.
If the debtor has made a payment to the agency,
the Payment Date is used instead of the Charged
Date above.
You can inhibit Collect! from automatically altering the
date with a switch in the System menu,
Preferences, Plans and Reference Tables,
Payment Posting Options form.
If you turn off this switch and don't intend to do
Credit Bureau Reporting, you can use this field for
anything you want.
Next
This is the Next Payment Date field. The debtor's Next field
contains a date when you are applying Amortized interest
to the account. It is the date that the next payment is due.
This field is read only.
Next Payment Date is calculated as follows:
If the debtor is neither delinquent nor overpaid, according to
the amount in the Payment Amount field, then the Next Date
is the date the next scheduled payment is due, based on the
interest settings in the Interest Detail form. For example, if it
is early September, and the account is paid up, then the next
payment date could be September 31 or some such date in
the near future.
If the debtor is delinquent, then the Next Date shows
the last date when the debtor should have made a
payment. For example if it is September, and no payment
has been received for the July 31 payment, then the
next date would show July 31 in RED to indicate
delinquency.
If the debtor has overpaid, then the Next Date rolls forward
into the future to reflect the number of monthly payment
periods that have actually been covered in the overpayment
amount.
The ' Report as credit grantor' switch must be
turned ON in the Credit Bureau Setup form to
activate the Next payment date calculations
for Credit Bureau Reporting.
Promise
When a debtor has made a promise to pay, this field shows
the date that the promise is due. If the date is not displayed,
try pressing the Recalc button.
If there is more than one promise recorded for this debtor,
the date of the earliest unmet promise is displayed here.
Promises can be entered into Collect! by
creating a Promise Contact or by creating a
Transaction with no Posted Date. In either
case, Collect! will automatically display the
earliest due date of the debtor's promises in
this field IF "Automatically manage promises"
is switched ON in the Payment Posting Options
form.
When a promise becomes Past Due, this field is displayed
in red unless the " Report as credit grantor" switch is ON in
the Credit Bureau Setup form. In that case, only, past due
promises are considered delinquent and the date is displayed
in the Delnqnt field on the Debtor form.
You can open the Payment Posting Options
form through the System menu, Preferences,
Plans and Reference Tables.
Date1
This is a date field for your own definition and use.
Date2
This is a date field for your own definition and use.
Summary
This is a single Note Line to Summarize the account status
and add any pertinent vital information.
Last Action
This field is a shortcut to activating a Contact Plan. If you
know the code of the Contact Plan you wish to run on this
debtor, you can type it here or press F2 to pick from a list.
This field is located to the left of the OK button on the
Debtor form.
Typing the code here will not execute the plan
unless you press ENTER to leave the field.
Operator
This is the ID of the Operator assigned to this account.
It is important to fill in this field since many other account
related functions depend on this Operator ID. For instance,
if you are using Account Access Control, this ID may be
used for restricting access to the account. Also, contact
scheduling and timely working of the account often rely
on this ID.
This field is INDEXED.
Press F2 when this field has focus or click
the arrow to pick from a list of available Operators.
Sales
This is the ID Code of the Salesperson assigned
to this account. When payments are posted, this ID is
used to determine collector's commission.
This field may also be used to display a Team ID
for commissions or for account access control.
This field is INDEXED.
Press F2 when this field has focus or select the
arrow to pick from a list of available Operators.
Rate
This is the current Commission Rate for payments
made by the debtor. If a commission rate is entered
in your Client Settings, the Rate field will be filled
automatically when you choose a client or enter a
new debtor for a client. You can override the setting
by entering a rate that applies only to this debtor.
Information is not entered in this field directly. The
Rate field displays information taken from the
Commission section of the Financial Detail form. Click into
his field or start typing to pop up the form where you can
select the Commission section to enter a enter a new
commission rate, or rate plan, and other commission
details for this account.
Any transactions that you post for this debtor load
the settings from the Financial Detail form.
Principal
This is the amount of the Original Debt, or the sum of
all transactions posted to the Principal account. (This
means Principal is dotted in the transaction 'Account'
column.) Information is not entered in this field directly.
The Principal field displays information taken from
the Financial Detail form. Click into this field, or start
typing, to pop up the Financial Detail form where you
can enter a Principal Amount or view the Principal Paid
To Date and other details for this account. Please press
F1 when the Financial Detail form is displayed for help
about the fields and buttons on this form.
When the debtor has a judgement, the Principal field will
be "overlaid" by the Judgement field which will be shown
in color. In this case, the Owing field will be calculated
based on the Judgement Principal and Judgement Interest,
rather than the Original Principal and Interest.
You can also set the debtor's currency here, if you have
the ' Multi Currency' switched ON in the Company Details
form.
If you are a Credit Grantor, you can choose to
display 30/60/90 fields on the Debtor form by
switching ON 'Show 30/60/90' in the Financial
Detail form.
For revolving compound interest accounts or
Amortized loan accounts, please access
the help available for these topics.
If you start typing the Principal in this field,
Collect! will open the Financial Detail field
with the Original Principal highlighted to
speed up your data entry.
Judgement
When a judgement has been awarded, this field will
display the amount of the judgement. This field "overlays"
the Principal field. To view the amount of the Original
Principal, click in the field to bring up the Financial Detail
form.
All transactions posted prior to the
Judgement Date are ignored.
If a debtor has a Judgement, all principal type transactions
that are not 194s are ignored and ALL transactions prior to
the Judgement Date are ignored.
Judgement interest calculation, if enabled, will always be
based on the 194 transaction, if present.
Multiple 194 and 195 transactions are ignored. The active
one is the most recent of each. If a Judgement Date is set,
ALL other Principal type transactions are ignored.
Interest
This field displays the Total Interest for this account. This
is the sum of Original Interest and all Accrued Interest
on this account. Information is not entered in this field directly.
The Interest field displays information taken from the
Financial Detail form. Click into the Principal field to pop
up the Financial Detail form where you can set and view all
interest details for this account.
Click into the Interest field or start typing to display
the Debtor Transaction Summary to view the list of
Interest transactions posted to this account. Press F1
for help when the Debtor Transaction Summary
is displayed.
If you want interest to be calculated for a given debtor, you
must enter an interest rate for the account in the
Financial Detail form. For revolving compound interest
accounts or Amortized loan accounts, please access
help when on these topics.
When the debtor has a Judgement, the Principal field
label changes to " Judgement" and the field is displayed in
color. Also, the Interest field displays only Judgement
Interest. The amount displayed in the Owing field is
calculated based on the Judgement Principal and
Judgement Interest, rather than the Original Principal
and Interest.
Fees
This field is a summary of all Fee transactions belonging
to this debtor. Information is not entered in this field directly.
The Fees field displays information taken from the
Financial Detail form.
To view Total Fees and Fees Paid To Date, click into
the Principal field to display the Financial Detail form.
There you can also Add Commission to the debtor's
Owing, assign fixed fees to both the client and the debtor
and view the Total Commissions earned to date on this
account.
Click into this field or start typing to pop up the
Debtor Transaction Summary form where you can view
a list of all Fee transactions posted to this account.
Legal Fees
This field is a summary of all Legal Fee transactions belonging
to this debtor. Information is not entered in this field directly.
The Legal Fees field displays information taken from the
Financial Detail form.
To view Total Legal Fees and Legal Fees Paid To Date, click
into the Principal field to display the Financial Detail form.
Click into this field or start typing to pop up the
Debtor Transaction Summary form where you can view
a list of all Legal Fee transactions posted to this account.
Miscellaneous
This field is a summary of all Misc transactions belonging
to this debtor. Information is not entered in this field directly.
The Misc field displays information taken from the
Financial Detail form.
To view Misc and Misc Paid To Date, click into the Principal
field to display the Financial Detail form.
Click into this field or start typing to pop up the
Debtor Transaction Summary form where you can view
a list of all Misc transactions posted to this account.
Other Charges
This field is a summary of all Other transactions belonging
to this debtor. Information is not entered in this field directly.
The Other Charges field displays information taken from the
Financial Detail form.
To view Other and Other Paid To Date, click into the Principal
field to display the Financial Detail form.
Click into this field or start typing to pop up the
Debtor Transaction Summary form where you can view
a list of all Other transactions posted to this account.
Adjustments
This field is the sum of all Adjustment transactions
belonging to this debtor. Information is not entered in this
field directly. The Adj field displays information tallied
from Adjustment transactions posted for this account.
Click into this field or start typing to pop up the
Debtor Transaction Summary where you can view
Adjustment transactions already posted to the account.
Paid
This is the Amount Paid by the debtor. This can be a
negative number if there are charges incurred on
the account. Information is not entered in this field
directly. The Paid field displays information tallied
from Payment transactions posted for this account.
Click into this field or start typing to pop up the
Debtor Transaction Summary where you can view
Payment transactions already posted to the account.
30 Days
This is the amount outstanding since the last statement.
This field is visible only if the Show 30/60/90 switch is
ON (checked) in the Financial Detail form. Values only
show in this field if you are applying Amortized Interest
and there is a date in the "Next" field that Collect! can use
for evaluation.
This field is useful if you are a Credit Grantor.
The ' Report as credit grantor' switch must be
turned ON in the Credit Bureau Setup form to
activate the 30/60/90 calculations for
Credit Bureau Reporting.
60 Days
This is the amount outstanding from between 30 and 60 days.
This field is visible only if the Show 30/60/90 switch is
ON (checked) in the Financial Detail form. Values only
show in this field if you are applying Amortized Interest
and there is a date in the "Next" field that Collect! can use
for evaluation.
This field is useful if you are a Credit Grantor.
The ' Report as credit grantor' switch must be
turned ON in the Credit Bureau Setup form to
activate the 30/60/90 calculations for
Credit Bureau Reporting.
90 Days
This field displays amounts owing longer than 60 days.
This field is visible only if the Show 30/60/90 switch is
ON (checked) in the Financial Detail form. Values only
show in this field if you are applying Amortized Interest
and there is a date in the "Next" field that Collect! can use
for evaluation.
This field is useful if you are a Credit Grantor.
The ' Report as credit grantor' switch must be
turned ON in the Credit Bureau Setup form to
activate the 30/60/90 calculations for
Credit Bureau Reporting.
Over 90
This field displays amounts owing longer than 90 days.
This field is visible only if the Show 30/60/90 switch is
ON (checked) in the Financial Detail form. Values only
show in this field if you are applying Amortized Interest
and there is a date in the "Next" field that Collect! can use
for evaluation.
This field is useful if you are a Credit Grantor.
The ' Report as credit grantor' switch must be
turned ON in the Credit Bureau Setup form to
activate the 30/60/90 calculations for
Credit Bureau Reporting.
Owing
This is the total amount Owing, the remaining balance
outstanding on this account. Information is not entered in this
field directly. The Owing field displays an amount tallied
from Original Principal and Interest, plus charges and interest
accrued, minus debtor payments. This is dependent on whether
the debtor has a judgement. If a judgement is recorded, then
the Judgement Principal and Judgement Interest are used
instead of the original values.
Click into this field to open the Debtor Financial Summary
This form shows all the charges and payment details for the
debtor's account, including total charges, total payments
and total owing amounts for Principal, Interest and Fees.
Overpayments and adjustments are displayed. For interest
and loan accounts, any amounts needed to bring the account
to current are also shown.
Settle
This field indicates an optional settlement amount for this debtor.
The amount entered here may be used to calculate
the promised payment amount when scheduling
a Promise with a contact plan. Please see Help
topic, Event for more information.
Run Plan
Enter a Contact Plan to run on this account. You can press
F2 to view the list of available plans.
Account Details
This area of the Debtor form contains tabs to sublists of
related Debtor information. The areas that may be
accessed are as follows.
* Notes
* Contacts
* Attachments
* Cosigners
* Transactions
* Detail
* A1
* A2
* A3
* CBR
* Group
* Misc
* Phones
Each of these subforms allow you to view records
related to this account and add new ones. If the tab is
displayed as YELLOW that means there are records in
that area.
Notes
Select the NOTES tab to view Notes for this account
or add new ones. Notes allow you to type free form
text. Today's date, the current time and the operator ID
are inserted automatically on the first line of text that
you type.
Users with Read Only rights to the Notes Text Editor
will be able to enter new notes but may not delete
existing ones. Please refer to Help topic,
Change Debtor Notes to Read Only for details.
Group Members who have the "Cascade Notes" switch enabled
in the "Member Setup" section of the Group tab will also
have their notes copied to all other Members of the Group.
Contacts
Select the CONTACTS tab to view contacts scheduled
for this account. This links to all contacts made for this
debtor. You may select an existing contact or create
a new one.
Attachments
Select the ATTACHMENTS tab to view Attachments
stored for this account. You may view existing attachments
or create a new one. Check the A1, A2 and A3 tabs to
access attachments that you classified as Type 1, Type 2
and Type 3.
Cosigners
Select the COSIGNERS tab to view the list of all related
parties assigned to this account, such as Attorney, Employer,
Spouse, Bank and others. You may view an existing
Debtor Cosigner or enter a new one.
Transactions
Select the TRANSACTIONS tab to view transactions
posted to this account. You may select an existing
Transaction or create a new one. This links to any
payments, promises or other related transactions
regarding this debtor.
You must set up transaction types
before you can post transactions.
Detail
Select the DETAIL tab to view the Debtor Detail
subform where you can enter information about a bank
account, as well as other details.
A1
Select the A1 tab to access attachments that
you classified as Type 1 in the Type field of the
Attachment.
A2
Select the A2 tab to access attachments that
you classified as Type 2 in the Type field of the
Attachment.
A3
Select the A3 tab to access attachments that
you classified as Type 3 in the Type field of the
Attachment.
CBR
Select the CBR tab to view the Credit Report Details
subform where you adjust the Credit Reporting settings
for this debtor or switch ON Credit Bureau reporting.
Use this subform to specify reporting and cosigner
details and a reporting date.
Your data must be entered in the correct
format if you intend to report to credit
bureaus. Review popup help for each field
that has a FOR CBR: note or press F1
when you are on the Debtor form to display
help for examples of formats for name,
address and other fields used in reporting to
credit bureaus.
Group
Select the GROUP tab to view the list of Group Members
in this account's Group. This will only display if a Group ID
and Member number are displayed in the GROUP button.
Misc
Select the MISC tab to set additional switches for this
account. This is an area where you can set flags as
needed or store additional information on the account.
There are several user-defined Currency, Date, Number,
Time and Switch fields. Please refer to Help topic, Misc,
for more details.
Phones
The Phones tab displays phone numbers listed for this
account. Pertinent information is displayed in the listed
columns. Select an item to view further details, or select
one of the buttons to create a new record or modify an
existing one. Please refer to Help topic, Phone for
more information.
Group Notes
The Group Notes tab displays all notes from all Group Members
who have the "Share Notes" switch checked in the "Member Setup"
section on the group tab. Each note line contains the
respective file number of the account that the note line
belongs to.
OK
Select this button to save any changes you
have made and return you to the previous form.
Pressing the "O" key on your keyboard
will close the Debtor form.
<<
Select this button to take you
to the previous debtor in the database.
>>
Select this button to take you to the next debtor
in the database.
Credit Card
Select this button to open the Credit Card Payment Tasks
menu. You can post a single or recurring credit card
payment, or query Billing Tree to update the Debtor's
payment history.
This button is visible only if you have the
Billing Tree Module enabled in your
Collect! license.
Please refer to Help topic, Billing Tree Topics for details.
Pressing the "T" key on your keyboard brings
up the Credit Card Payment Tasks menu.
ACH
Select this button to open the ACH Payment Tasks
menu where you can post a single or recurring ACH
payment through Billing Tree.
This button is visible only if you have the
Billing Tree Module enabled in your
Collect! license.
Please refer to Help topic, Billing Tree Topics for details.
Pressing the "H" key on your keyboard brings
up the ACH Payment Tasks menu.
Recalc
Press this button to Recalculate and Update any fields
containing financial information relating to this debtor.
Pressing the "R" key on your keyboard
will Recalc this Debtor.
Mode And Recalc
RECALC is not done on CLOSED accounts, but accounts
with other modes are recalculated. The only exception is
when a payment is posted - if the account is closed then
the total is still recalculated.
Basically, if you close an account, its financial figures
are frozen where they are at the time you closed the
account, unless a payment is posted, at which time,
and only then, a Recalc actually alters the Owing.
Print
Select this button to view a list of reports available for
printing that relate to debtors.
You must setup your reports and
letters before you begin to enter
debtor information.
Pressing the "P" key on your keyboard
will display the list of reports that you
can print from the Debtor form.
Action
Select the ACTION button to pick a Contact Plan to run
on this account.
Pressing the "A" key on your keyboard
will display the list of contact plans that you
can run on this account.
Advanced
Clicking this button opens the Financial Detail form, where
you can enter information relating to debtor's Principal,
Commission Rate, Taxes and Fees, as well as Interest and
Payment Plans.
Pressing the "D" key on your keyboard
will display the Financial Detail form.
Cancel
Select the CANCEL button to discard any changes
made to the Debtor form. You will be prompted to
discard the changes. If you selected SAVE or F8,
those changes will not be discarded. Also, any
Contacts or other records created from the Debtor
form will not be canceled.
Pressing the "C" key on your keyboard
will cancel your changes and close
the Debtor. You will be prompted to save
or discard changes.
Help
Select the HELP button for information on the
Debtor form and links to related topics.
Pressing the "H" key on your keyboard
will display the Help topic, Debtor.
See Also
- Debtor Basics - Introduction/Accessing
| 
Was this page helpful? Do you have any comments on this document? Can we make it better? If so how may we improve this page.
Please click this link to send us your comments: helpinfo@collect.org