How To Ungroup Debtors In A Single Group
This document discusses ungrouping previously grouped debtors. It requires familiarity with the general use of Collect!.
Debtors that have been previously grouped may be ungrouped. You can remove single members from a group and leave the other
members in the group.
1. Select Browse from the top menu bar and then select Find By from the drop-down choices. This will display a sub-menu.
Select Name.
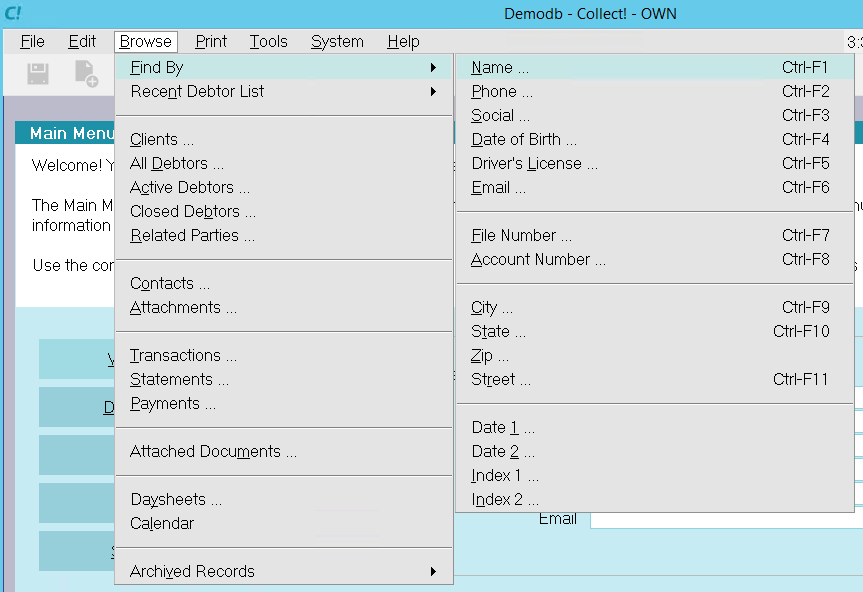
Browse - Find By - Name
2. A prompt will be displayed where you can enter the name that you want to find in the database. Type in name of one
debtor in the group you wish to ungroup.
 Type in a name just as it appears in the Debtor form, that is, Last Name, comma, space, First Name. It is
not necessary to capitalize the letters. Please read the instructions in the Find By box or look up Find By in the
Help index.
Type in a name just as it appears in the Debtor form, that is, Last Name, comma, space, First Name. It is
not necessary to capitalize the letters. Please read the instructions in the Find By box or look up Find By in the
Help index.
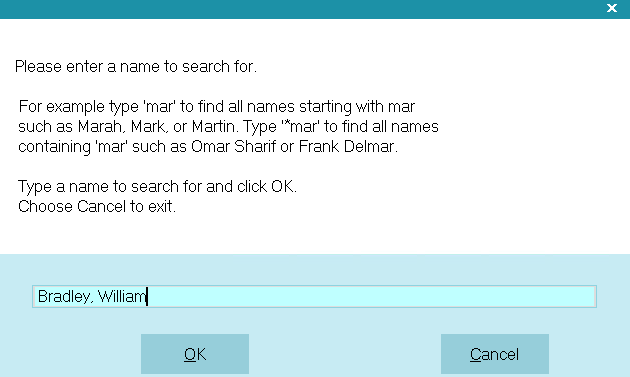
Find By Name Prompt
3. Select the OK button and the Debtor form will display for the Debtor you typed. Select the GROUP button, highlighted
in yellow. The Matching Accounts form will open showing a list of all the debtors in the group.
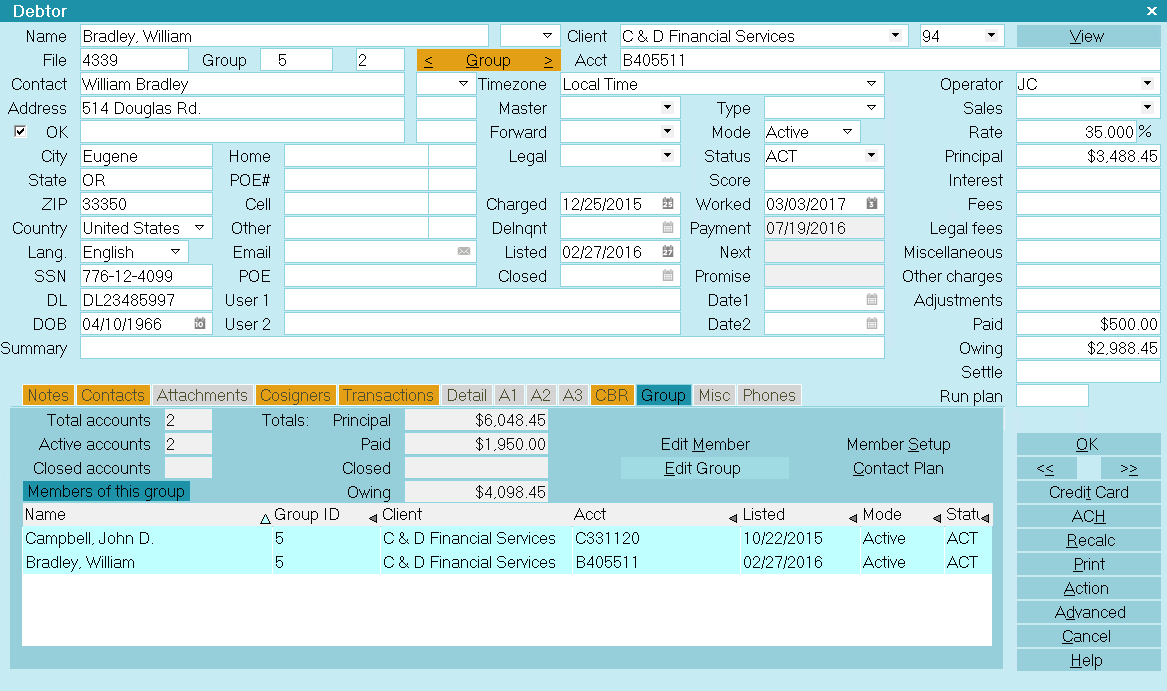
Matching Accounts Group Members
4. Select the EDIT GROUP button and the following message will appear.
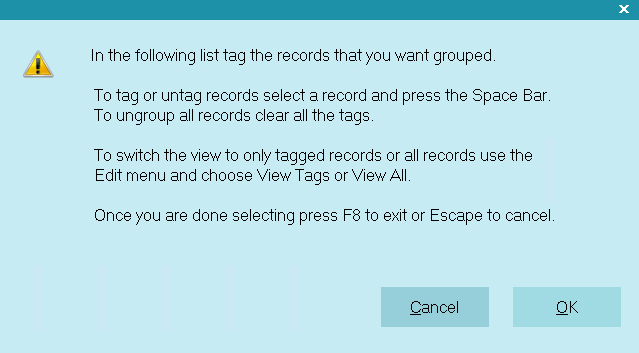
Prompt to Edit Group
5. Select the OK button. The list of debtors will be displayed. All members of the current group will be highlighted in blue
except the first record, which will be highlighted in yellow.

Group Members
6. Use the down arrows on your keyboard to move onto debtors that are highlighted in blue. When you are on the
debtor, the highlight color will change to yellow. Now, press your spacebar.
You will notice that the yellow now turns to black. This means that you have ungrouped this member.
This step is not finalized until you press F8 in Step 8.
7. Use the arrow keys to scroll down the list and find other highlighted debtors. Follow the information in Step 6 to
ungroup these debtors too, if you wish. You may ungroup all debtors or only the ones you wish to remove from the group.
 If you want to ungroup all members of the group at once, select Edit from the top menu bar and then select
Clear Tags from the drop-down choices.
If you want to ungroup all members of the group at once, select Edit from the top menu bar and then select
Clear Tags from the drop-down choices.
8. Once you have completed this task, press F8 and you will see a message telling you that you have just ungrouped
these debtors. The message that you see depends on whether you have removed some debtors from the group,
or you have ungrouped all the debtors.
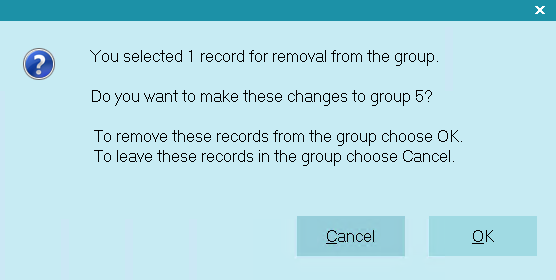
One Debtor Ungrouped
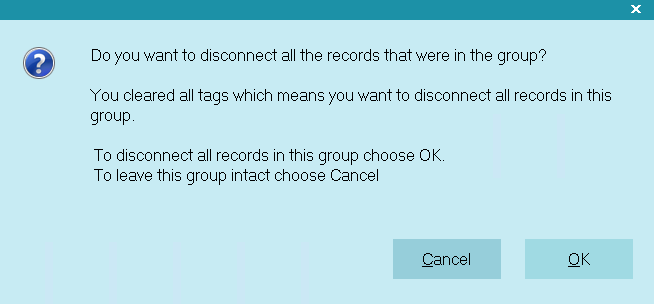
All Debtors In Group Ungrouped
Select the OK button to close the message and return to the Debtor screen.
Having followed the above steps, you will have successfully ungrouped your debtors. Please examine the accounts to
make sure the results are what you expect.
| 
Was this page helpful? Do you have any comments on this document? Can we make it better? If so how may we improve this page.
Please click this link to send us your comments: helpinfo@collect.org