Fax Setup
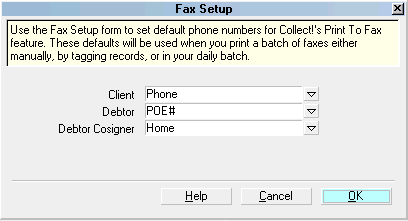
Use the Fax Setup form to set default phone numbers for Collect!'s
Print To Fax feature. These defaults will be used when you print
a batch of faxes either manually, by tagging records, or in your
daily batch.

Fax Setup Form
This form may be accessed two ways.
1. From the top menu bar, select System, then select Preferences,
Reports and Printing. Select the FAX SETUP button to open the
Fax Setup form.
2. From the top menu bar, select Print, then select Settings,
Report and Printer Setup. Select the FAX SETUP button to open
the Fax Setup form.
Client, Debtor and Cosigner records each have 4 possible phone
fields to choose from. Use the Fax Setup form to configure
the default number to use for each record type.
 The pick list choices for each record type are taken
from the phone field labels. If fields are aliased, then the pick
list will show the aliased labels.
Client
Select a phone field from the Client form to use as a default.
The default choices are Home, Fax, Cell and Other.

Debtor
Select a phone field from the Debtor form to use as a default.
The default choices are Home, POE#, Cell and Other.

Debtor Cosigner
Select a phone field from the Debtor Cosigner form to use as
a default. The default choices are Home, Work, Cell and Other.

Help
Select this button for help on the Fax Setup form
and related topics.

Cancel
Select Cancel to ignore your changes and return
to the previous form.

OK
Select OK to save your changes and return to
the previous form.

Summary
The settings you specify in the Fax Setup will be used when
you print to fax in your daily letter batch.
When you print from a single account manually, the Print Report
form will display the phone numbers according to your
default Fax Setup choices.

See Also
- Print To Fax

| 
Was this page helpful? Do you have any comments on this document? Can we make it better? If so how may we improve this page.
Please click this link to send us your comments: helpinfo@collect.org