Field And Column Icons
Several fields in Collect! forms have small icons in them.
Each icon activates a different feature when it is clicked.
Calendar

Select the Calendar icon to bring up the Calendar for
choosing a date or date range. You will notice this icon
anywhere that Collect! can display a date.

Phone
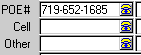
Select the Phone icon to initiate Phone Dialing. This
will only work if you are setup to Auto Dial. You will see
this icon anywhere that Collect! can store a phone number.
Pick List
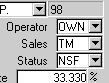
Select the down arrow to display a list of choices. Anywhere
you see this icon, you will know that there is a list attached to
the field. You can create your own lists and attach them to
almost any field in Collect!
 Sometimes selecting the arrow will display a
list in a separate window rather than attached to the field.
Sometimes selecting the arrow will display a
list in a separate window rather than attached to the field.
Email
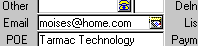
Select the Email icon to open the Send Mail form where
you can compose and send an email. You will see this icon
in the Email field on the Debtor and Client forms. Collect!
enters the Email address automatically in the Send Mail
form's 'To:' field.
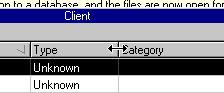
Sort Column
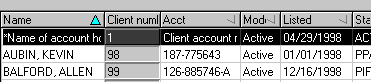
Select the sorting indicator and the column will be
sorted - either ascending if you select, or
descending if you click again. Notice that an arrow
indicates that the list is sorted by the particular
column and in the direction of the arrow. (up or down]
Only columns with the small "tic" in the right corner can
be sorted.
Size Column
When you hold your mouse over a column separator,
it will change to a double-headed arrow and you can
resize the width of the column. To do this, select
the column separation and drag it. When you release
your mouse button, the column will be re-sized.
File Attachment
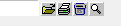
These four file attachment icons are found wherever
Collect! can store a filename or attachment.
These buttons let you:
- Open the file
- Print the file
- Delete the file
- Select a file from your system without opening it
Refer to the Help topic ATTACHMENT and scroll
down to FILE for more information.
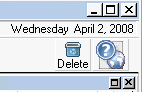
Popup Help

These two icons are seen in the lower right hand
corner of the popup help windows. Select the
book to bring up F1 help. Select the printer to
print the F1 Help topic for the form you are viewing.
Maximize Screens
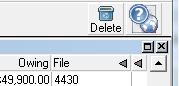
In the upper right hand corner of each Collect! screen, you
will see these small squares. Select the left hand icon, the
square, to maximize the dialog, list or form you are viewing.
First maximize the Collect! screen, as described above. Then
maximize the list or dialog.
Minimize Screens
When you want to bring a screen or dialog back to its original
size, select the icon with the two overlapping squares.
First minimize the dialog, as described above. Then minimize
the Collect! screen the same way.
Close Screens
To close a form or screen, select the icon that displays the
small ' x ' as shown in the images above. You will find this
icon in the upper right hand corner of almost all Collect!'s
dialogs and screens.
See Also
- How To Use Pick Lists
- Calendar
- Email
- Dial Phone
- Attachment
|
Was this page helpful? Do you have any comments on this document? Can we make it better? If so how may we improve this page.
Please click this link to send us your comments: helpinfo@collect.org