Process TCN Campaign In Scheduler
Schedule Calls (create and send your campaign list uploads to
TCN) and Download Report (retrieve your campaign call result
download file from TCN) at times that are convenient to you
using Collect!'s Scheduler Module. All the functionality available
through the Process TCN Call Campaign option in "Tools\Batch
Processing" is available in the Scheduler as well.
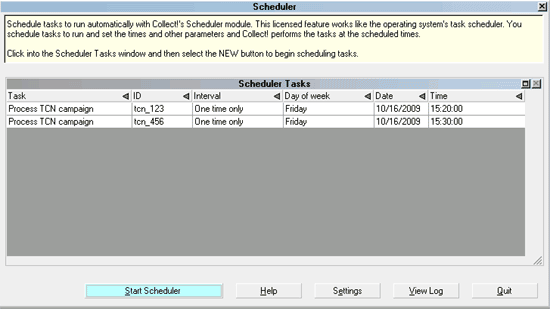
TCN Scheduler Tasks
 The Scheduler is a licensed add-on module. Contact
Administration at 250-391-0466 option 3 for
pricing details.
TCN Scheduler tasks are configured similarly to other tasks in
the Scheduler.
Schedule Call Campaign Task
1. If you already have a Scheduler up and running on your
Server, you must make your additions to the scheduled tasks
list from that station. It is best to be sure before you take
down the Scheduler Server window that there are not any tasks
ready to launch in the few moments it will take you to make the
addition to the list of scheduled items. To stop a running
Scheduler, click anywhere in the body of the Scheduler window.
You are now ready to add a New task.
We recommend that the Scheduler server session be set up and left to
run 24/7 on your actual network server PC because that session
has less likelihood of being accidentally closed down than if it was
up and running on a regular workstation PC.
Click "Tools\Scheduler" from the top menu drop down choices.
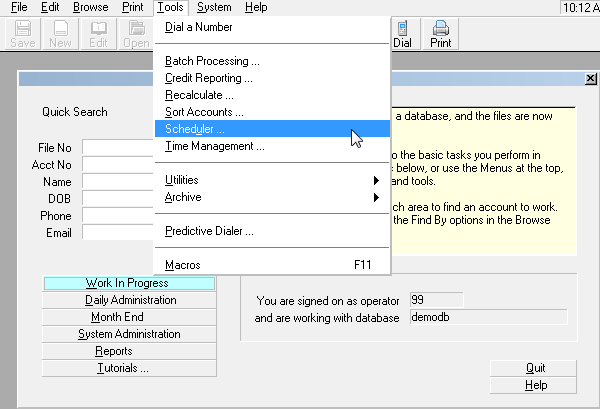
Tools Scheduler Option
2. Click into the Scheduler Tasks sub-window and then click
the New button to create a task.
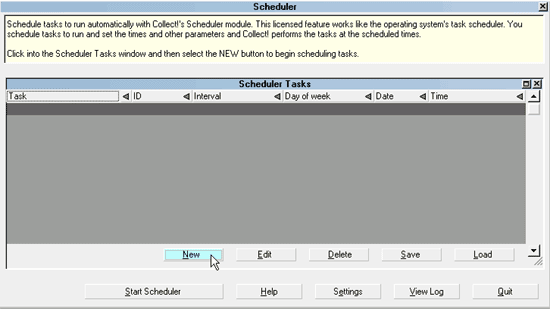
New Scheduler Task
A new Scheduler Task screen will open.
3. Select Process TCN Campaign from
the Task pick-list.
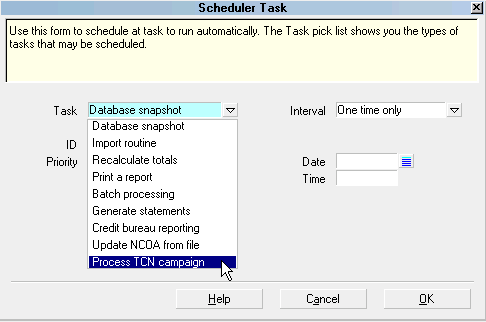
Process TCN Campaign Task
4. You will see that the Configuration is reading "Not
ready." This means that you have to put in additional
settings. Click the Configure button.
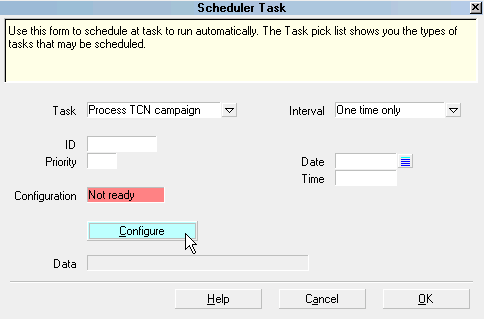
Select Configure to Set Up the TCN Task
5. You will see the same choices that the familiar batch
process gives when choosing the TCN function you wish to schedule.
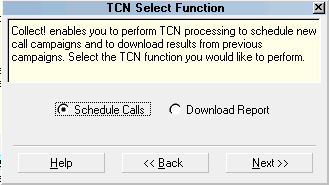
TCN Select Function
Click the radio button for the Schedule Calls
function and click Next.
6. You will see the setup and configuration popup for the
Schedule Calls function.
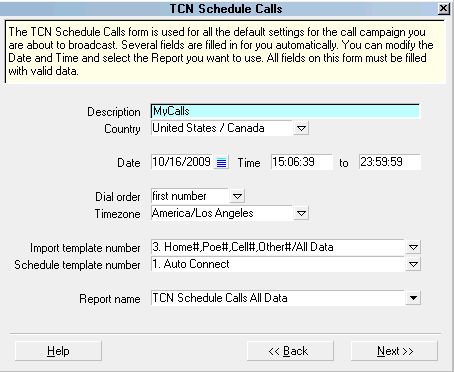
TCN Schedule Calls
7. When you have entered your settings, click the Next button.
You will see the usual Schedule TCN Calls popup. Enter the rest of
your selection details, clicking Next until you are back at the
Scheduler Tasks setup screen. Input a Date and Time for the task
to start running. You may also give your task an ID and Priority
if you have a great many tasks in your Scheduler in overlapping cycles
and due times. The Priority will subsort the tasks so that the higher
priority items are launched and completed first.
If the same selections are to run on a repeating schedule, enter your
Interval as well at this time. If you will be utilizing different
reports to create your call campaigns, you will want to set up a fresh
Scheduler Task each time. In this case, use select "One time only" from
the drop-down menu of Interval options.
When you click OK to indicate you have completed the entry, you will be
back at the Scheduler screen.
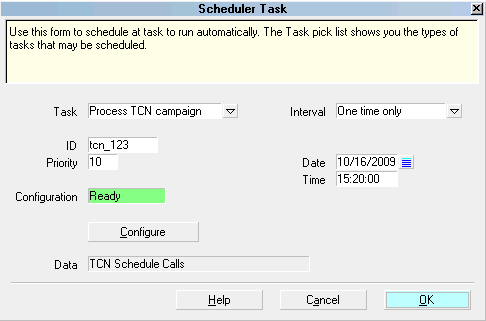
TCN Schedule Calls Task

Schedule Download Report Task
The process for scheduling the Download Report is a similar to
creating the call campaign list for upload. Begin the same way,
clicking New to enter a new Task into the Scheduler list.
1. Perform all steps as above until step 5. Select
the Download Report function.
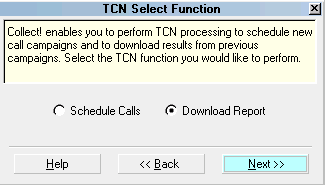
TCN Download Report
2. You will see the setup and configuration popup for the
Download Report function.
You have two choices:
i) If you select a Task ID, the Scheduler will process
only the Task you select.
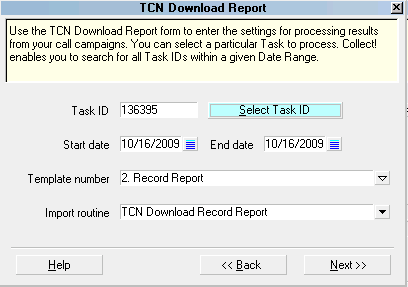
TCN Download Report with Task ID
ii). If you select a Date Range and leave the Task ID
blank, the Scheduler will process all tasks within
the date range.
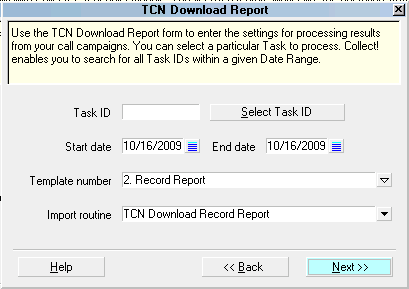
TCN Download Report with Date Range
In the example above, there were two call campaigns
on the selected Date, so both of them will be processed.
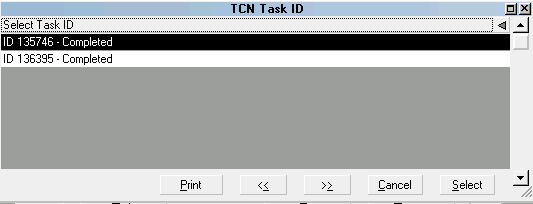
Task IDs Returned for Date Range
3. When you have entered your settings, click the
Next button. You will see your TCN task. Enter the rest of
the details, selecting a Date and Time for the task
to run. You can also give your task an ID and Priority.
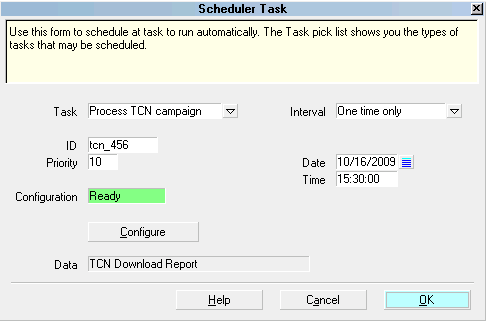
TCN Download Report Task

Start The Scheduler
Once you have completed your setup, you will see
your tasks in the Scheduler Task list.

TCN Scheduler Tasks
This step is critical. If you do not click the Start
Scheduler button to restart the Scheduler, none of
the tasks will process.
With a view to not having to reload all your tasks again if
there is a power outage or some other reason that the Scheduler
Server session was inadvertently shut down, Save your configuration
so that when you restart the Scheduler session the next time, you
can simply Load your last configuration file.
When you click Save, you will receive a Windows File Explorer
popup asking where to do want to save the file and for a filename.
The default will be to the "CV11\bin" folder. The file will be
saved with the file extension ".sch".
At the appointed times, your tasks will run. You can review the
results just as you would if you had run the tasks through the
batch processing function.

Troubleshooting
You must ensure that you have set up your TCN login
credentials in the TCN Setup screen before you attempt to
configure a Scheduler Task for TCN.
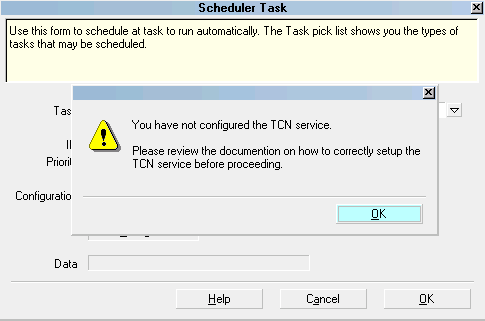
TCN Setup Needed
If you see this prompt, select "System\ Preferences\TCN Setup"
to enter the credentials provided to you by your
TCN representative.

See Also
- TCN Topics

| 
Was this page helpful? Do you have any comments on this document? Can we make it better? If so how may we improve this page.
Please click this link to send us your comments: helpinfo@collect.org