Taking A Promised Payment - Quick Tour
This is a quick tour of the steps involved when you
want to handle promised payment in Collect!.
We will cover:
- Single Promise
- Repeating Promises
- Promise Payment Received
Single Promise
Let's say a debtor makes a promise to pay you $150
in two weeks. How do you enter this information in
Collect! and keep track of whether or not the promise
is met?
You create a Promise Contact for the account:
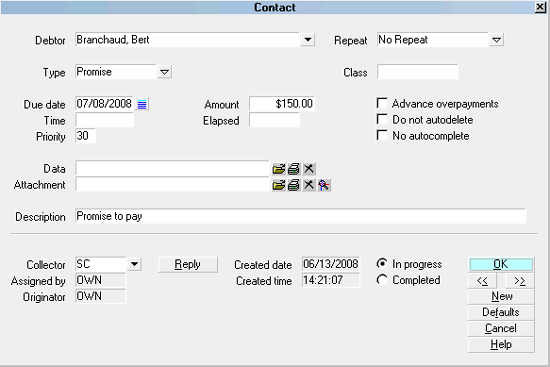
Contact for Promise To Pay
1. Select "Promise" from the pick list on the Type field.
2. Enter the promised dollar amount into the Amount field.
3. Enter the date that the payment is promised
in the Due Date field.
Now, the Debtor screen will show that there is a Promise
active on this account.
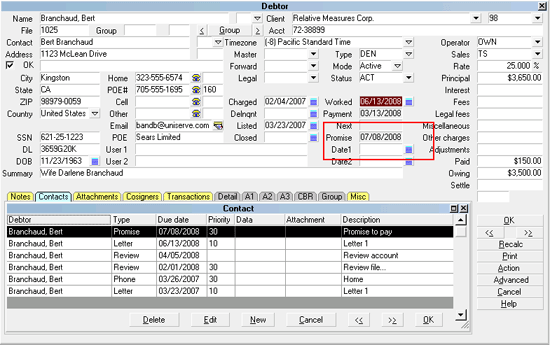
Debtor Screen with Promise Date
 Press the RECALC button on the Debtor to refresh
the screen.
The day the Promise is due, it will show up in the operator's
WIP List.
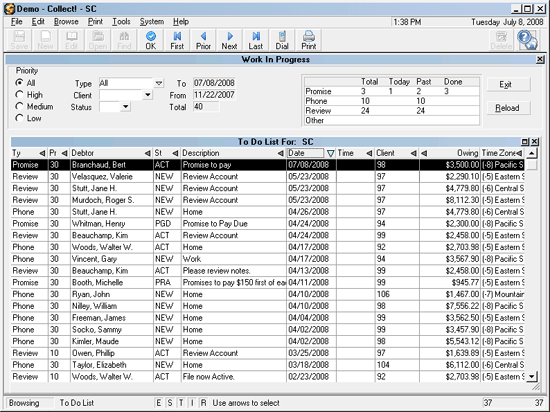
WIP List With Promise Contact Loaded
 Ensure that your WIP List is set up to load
Promises.
If the day passes without payment, the Debtor screen will
show the Promise field as Delinquent - red.
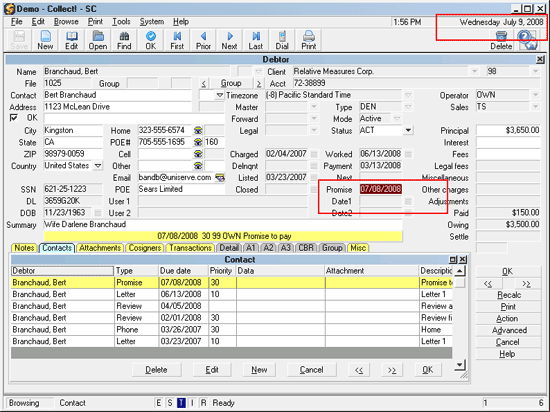
Debtor Screen with Promise Date Delinquent
 Ensure that Automatically Manage Promises is
switched ON in the Payment Posting Options form.

Repeating Promises
Let's say a debtor promises to pay you $150 a month
until their debt is settled. You know how to enter one
promise, but how do you enter repeating promises and
keep track month by month?
You create a Promise Contact for the account. This time,
select " Monthly" from the pick list on the Repeat field.
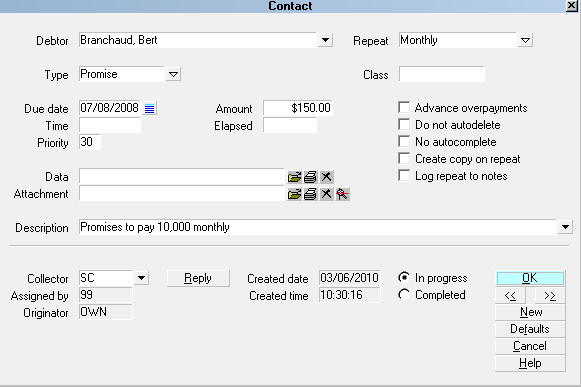
Contact for Monthly Promise To Pay
Enter the monthly promised dollar amount in the
Amount field. Collect! automatically stores this value
in the Interest Detail for the account.
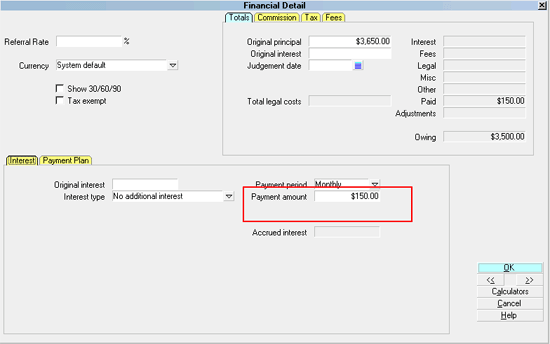
Promise Amount Stored in Interest Detail
Collect! uses this each month to see whether or not the
Promise is met. If the Promise is met, the Promise Contact
Due Date will roll forward to next month, same day. If the
Promise is not met, the Promise Contact Due Date does
not roll forward. When the debt is completely settled,
Collect! marks the Promise Contact as Done.
 Ensure that Automatically Manage Promises is
switched ON in the Payment Posting Options form.
There are other options available for handling repeating
promises. They depend on the way you do business.
Some of these options are:
1. Advance Due Date on Overpayment
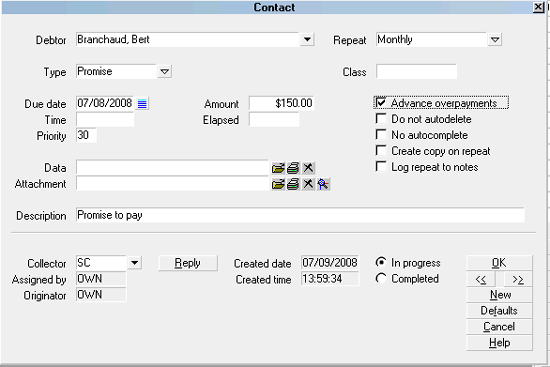
Advance Overpayments Enabled
Now Collect! will roll the Promise Due Date forward according to
how many periods are satisfied by the payment. For example,
if the debtor pays $300 at once, and that satisfies 2 monthly
payments of $150, the Date Due will roll forward 2 months
when this switch is enabled. If it is not enabled, the Date Due
will roll forward only one month, no matter how much is
overpaid.
2. Promise Contact Actions
Use Payment Posting Options to run contact plans for
Overpayment, Underpayment, Full Payment, NSF Payment
and Broken Promises.
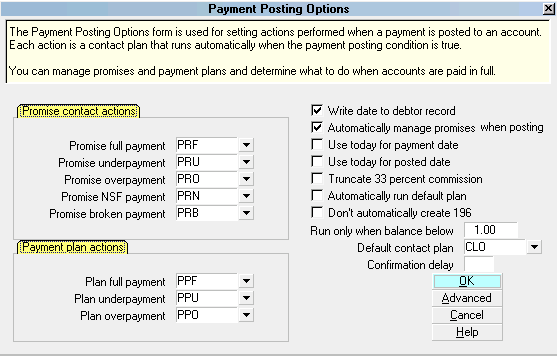
Payment Posting Options Promise Contact Actions
Each code in the Promise Contact Actions section is
a contact plan set up in the database to be evaluated
when Collect! handles a promise. These are demonstrated
in the Demodb database and may be copied to your Masterdb.
You may modify the events in the plans if you need to.
Please refer to the Help topic, Promise Contact Actions
for details and tips.
 If you do not want to run any contact plans, just
erase the codes from each one of the Promise Contact
Actions, but make sure you leave 'Automatically Manage
Promises' switched ON.

Promised Payment Received
What happens when a payment is made?
Collect! fills in the promised dollar amount for the
transaction. When the transaction is posted, the
promise is marked done. A repeating promise is not
marked done, rather its Due Date is rolled forward until
the debt is completely settled. The Advance Overpayments
is evaluated, if switched ON. Promise Contact Actions are
evaluated, if required.

Summary
How do you keep track of a promise to pay? By creating
a Promise Contact.
- Enter a Due Date and the promised Amount.
- If the promise is repeating, enter a repeat value in the
Contact's Repeat field.
- Use the Advance Overpayments switch if you want to
give credit for overpayments.
Then make sure that 'Automatically Manage
Promises' is switched ON in the Payment Posting Options
form.
Ensure that WIP Reload Filters are set to load Promises
for the Operator's WIP, if desired.
Make sure you understand what events the Promise Contact
Actions will trigger on your accounts. Delete the contact plan
codes from the Payment Posting Options form if you do not want
this automation.

See Also
- Promise Contact Topics

| 
Was this page helpful? Do you have any comments on this document? Can we make it better? If so how may we improve this page.
Please click this link to send us your comments: helpinfo@collect.org