How To Retrieve A Copy Of A Printed Letter
You can reproduce upon demand a copy of any correspondence sent to a Debtor or Client. Collect! enables you to save a copy of
all letters printed to the printer or to Email, either individually or in your daily batch. Retrieve any information that was
on any letter that you send. Collect! saves an exact copy of each letter. providing a complete correspondence history that you
can quickly view in Print Preview. Email contents are stored as text only.
Whenever you print a letter to the printer or to Email, either individually or in your daily batch, Collect! will save a
snapshot of the letter internally with the Letter contact.
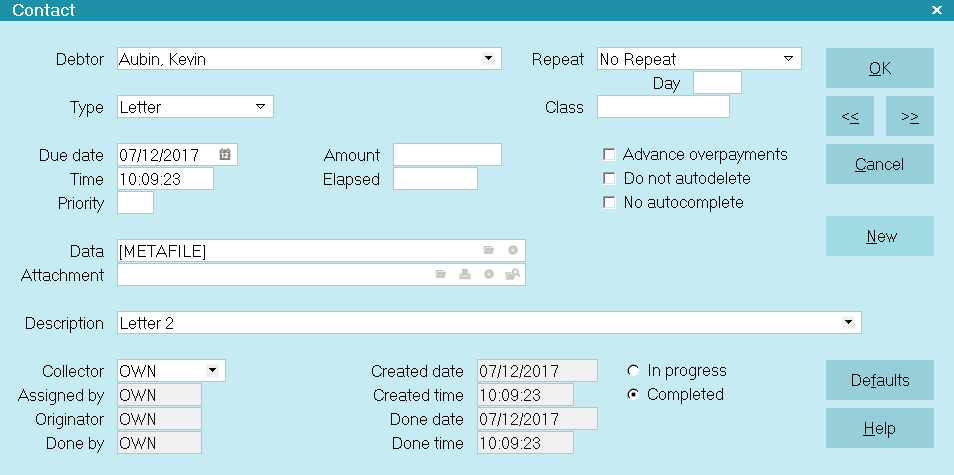
By clicking on the open file icon next to the 'Data' field in the Contact form, the saved letter will open in the
Print Preview window. This will display the letter as it was originally printed. If the letter consisted of multiple pages, all
pages are accessible.

Letter Metafile Stored in Letter Contact
You can print a copy of the letter by clicking the PRINT button in the Print Preview window.
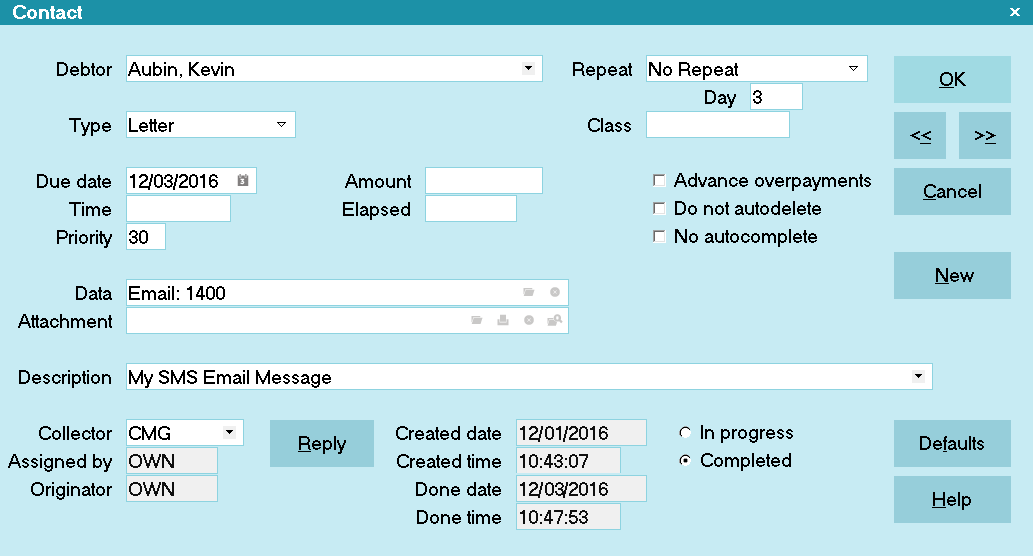
Email letter contents are not turned into a metafile, they are stored as text only. When opening the email blob, Collect!
uses its standard Text Editor.
The top few lines will contain the Email Header information, following by the Email Body.

Email Blob Stored in Letter Contact
 You can enable/disable creation of Metafiles in the Client settings and in the contact plan's Letter Event. This
gives you added flexibility for storing these metafiles, as needed.
 The letter copy saved during normal printing is saved within the database as a metafile in the contacts blob.
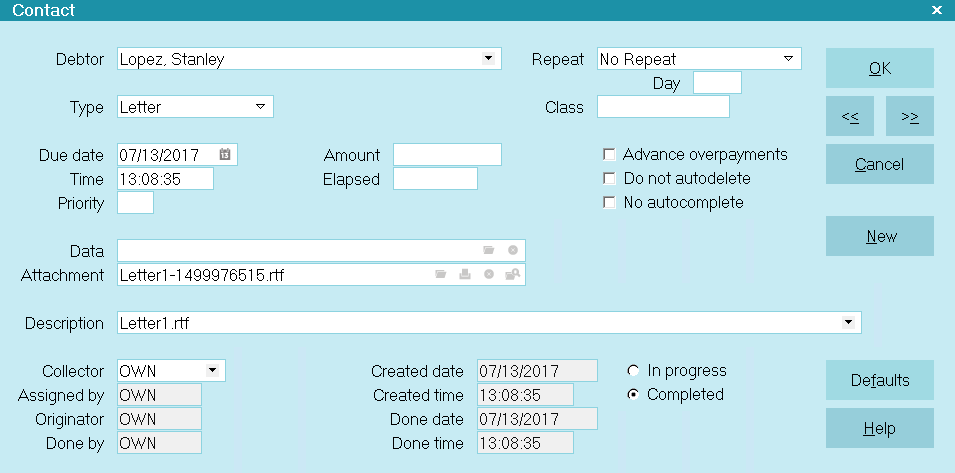
Collect! also saves a copy of a letter when you Print to Screen, edit and save the letter. When you print to RTF the
letters are actual files saved to your computer.

Letter RTF File Attached to Letter Contact
Metafile Image Storage
When Collect prints to a METAFILE, the BITMAP or PNG files within the METAFILE are removed and then stored in the
"styles\metaref" folder. The file names of the pngs/bitmaps are hash numbers derived from the pixels in the image and have an
.mrf extension. These files can only be opened by Collect!. If a file with the same hash number exists, it is
assumed to be the same image.
The associated BITMAP or PNG files in the original METAFILE are then replaced with a custom BITMAP REFERENCE record that
contains only the 32 bit hash value as well as the destination position and scaling data for the image.
When a METAFILE containing the new BITMAP REFERENCE records is printed, the hash number is used to locate the file in the
styles\metaref folder which contains the actual pixel data. If the file does not exist, no image will be
printed.
Reports that print images do not need to change and neither do the source bitmaps. The metaref folder will be updated
automatically as new images are detected. Identical images, regardless of the original filename, will always generate the same
hash number and therefore will only exist once in the metaref folder.
This will significantly slow down the expansion of the contact blob file as it will no longer contain image data. Additionally,
Collect! will no longer store multiple copies of the same image due to the hashing technique.
Hash collisions are possible but are rare. In the event that two different images generate the same hash value, the older image
will be displayed. Files in the metaref folder are never overwritten by Collect! once they are created. If a hash collision does
occur, the best solution is to modify the source image slightly. Just one pixel will be enough to result in a different hash
value.

Summary
Collect! enables you to save a copy of any correspondence sent to a Debtor or Client. You can instantly retrieve and reprint,
if necessary. any information on any letter that you send. Letters printed to printer are stored as metafiles, complete with
formatting and graphics. Letters printed to Email are stored as text only, just as they would be saved if you sent an Email
directly from an account. This feature may be switched ON or OFF at the Client level through Client Settings.

| 
Was this page helpful? Do you have any comments on this document? Can we make it better? If so how may we improve this page.
Please click this link to send us your comments: helpinfo@collect.org