How To Send Email In Collect!
The Email feature allows you to send emails directly from Collect!.
* Send emails when you are on the Client or Debtor or Operator screen.
* Send emails to additional recipients.
* Send attachments with your email.
* Print letters directly to email addresses.
* Send reports directly to email addresses.
* Save email drafts and complete them later.
* Send details or notes to an operator by email.
Requirements
You must be set up to send and receive email through an
Email program.

Sending Email From The Debtor Form
1. Sign into Collect! as you would normally.
2. Pull down the Browse menu and choose All Debtors.
3. When the list of debtors is displayed, choose one to open.
4. Locate the Email field and click the small icon located
to the right of the end of the field.

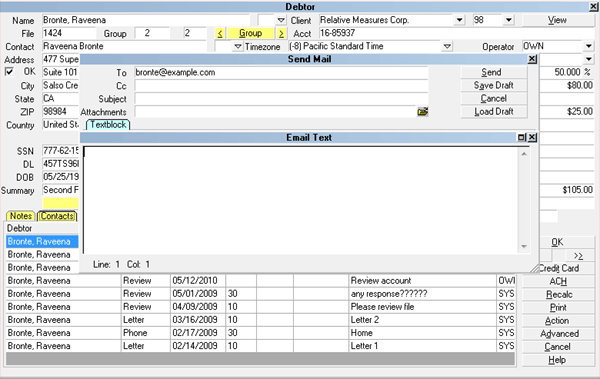
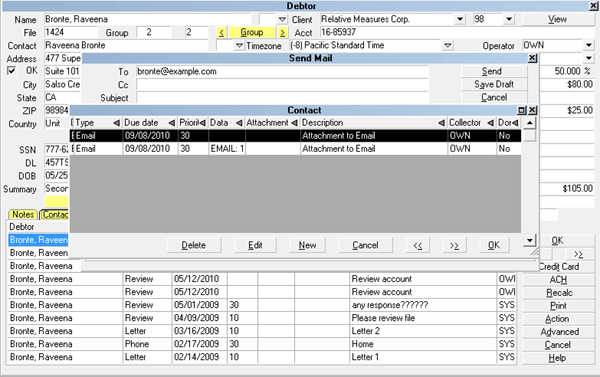
Email Icon
This will open the Send Mail window from where you can
compose and send your email directly to a Debtor.
 If you have entered an email address for this Debtor,
it will automatically display when the Send Mail
window opens.
If you have entered an email address for this Debtor,
it will automatically display when the Send Mail
window opens.
Email Window
Composing Your Email
When the Send Mail window is displayed, compose your email as you
would in your other regular email program, such as Thunderbird
or Outlook.
If you need more information about any of the fields on this
screen, place your mouse into the field of inquiry and press
F1 to be taken to online Help.
Sending To Multiple Recipients
To send to multiple recipients, simply use a space,
comma or semi-colon between each email address
you enter in the field labeled Cc
in the Send Mail screen.
 WARNING: If you are a current version user of
Outlook, changes to their protocols
interferes with multiple recipient
sending in Collect! Contact Technical
Services for information on workaround solutions if
you have volume emails with multiple email
recipients.
WARNING: If you are a current version user of
Outlook, changes to their protocols
interferes with multiple recipient
sending in Collect! Contact Technical
Services for information on workaround solutions if
you have volume emails with multiple email
recipients.
For an occasional email that must be sent to multiple recipients
and you are a current version Outlook user, we recommend using
Outlook directly for the intermittent, limited need.
Emailing Attachments
To email attachments, Collect! needs the complete path to the
file entered in the Attachments field. You can enter
multiple attachments, separated by semicolons.
If the attachment cannot be found by the name and/or
path you have indicated, the Collect! does
not send the email.
To easily attach files, select the file folder icon at the right
end of the Attachments field in the Email window and chose 1 or
more attachments to include. Collect! will automatically enter
the complete path to the files you have chosen and they will be
sent with your email.
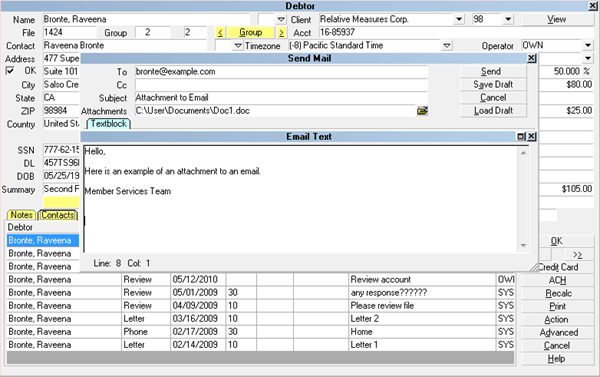
Attaching a File to an Email
Sending Your Email
Make sure your email has text entered in the Subject line as
well as the body of the email. However brief, something must
be in both areas or else the email will be filtered and not
sent, believed to be blank and not a real email.
Click the Send button to send your completed email. If you
open your email program, you should see that the email is now
displayed in the Sent Items list.
Printing Directly To Email
When you are on a Debtor file, click Print. Choose a letter or
report to send to this Debtor. When the Print Report window is
displayed, choose 'Email' as your choice for output. When you
click the Print button, the system will generate the letter or
report and send it to the Debtor's Email address that is present
on the debtor screen. The document is written into the body of
YOUR email to the debtor. If the document has specialized
columns to print in alignment to paper and the output looks
skewed or misaligned when sent by email, then this is a letter or
report that needs to be recoded in HTML format as your email
program is stripping out the text commands that are embedded in
the document stored in Collect!. Contact Technical Services to
obtain pricing for HTML versions of letters/reports.
If no email address is present on the debtor screen, the system
will prompt you with a popup asking you to enter the recipient
email address. Once you click Print to send it. You should see
the email in the Sent Items list of your email program.
By default, Collect! will use the name of the report or letter you
are printing as the email's Subject. You can modify this by
using the report writer @SUBJECT command in your report
or letter. Please refer to Help topic, How To Add a Subject
When Printing to Email for details.
If you can print to email successfully from a single debtor,
you can also print the letter or report in your letter batch.
You can print an entire batch of Letter contacts to email
by specifying 'Email' as your output choice in the Print
Report window.
Letters and Reports which can be successfully
emailed out of Collect! must "Start On" either
Debtor, Client or Operator because
these file types have email address fields associated
with the record. Reports or letters that "Start On"
"*" meaning "Anywhere" cannot be used for emails.
Collect! has no reference file from which to get
its email address information.
SMS To Email
SMS (Short Message Service) is available on most digital
mobile phones that permit the sending of short messages.
When sending emails in Collect!, you can set up your system
to transmit messages to a specific phone number for a Client,
Debtor or Cosigner using the SMS Email feature. You can send
meeting reminders, payment notifications, and status reports to
Clients, Debtors or Cosigners as text messages. See the Help
topic, SMS Email Setup for details.
Save Draft
Click the 'Save Draft' button to save your email. This will
save it so that you can finish it later. An email saved in this
way is posted to your WIP list. Choosing the item in the To Do
List, opens the Send Mail window so you can resume composing,
then send out your email.
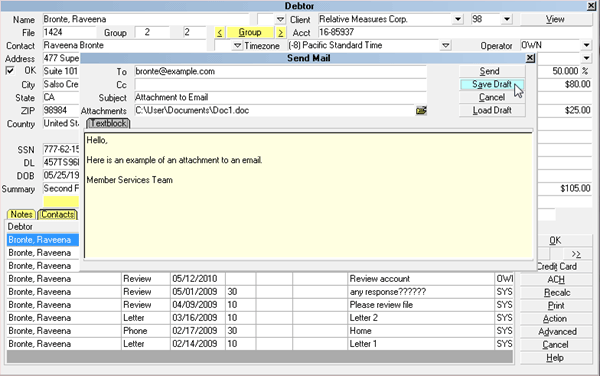
Save Email Draft
Additional recipients and Attachments are not
retained when you save a draft. These
would have to be re-entered when the draft
is revisited.
Emails Displayed In The WIP List
The Email switch in your Reload WIP Filters
setup screen must be checked ON if you
wish draft emails and interoffice emails
through Collect! to show up in a WIP list.
If you Reload your WIP and do not see Email Contact types
displayed, the steps to remedy are as follows:
1. From the Main Menu, click the Work In Progress button to
get to the WIP screen. Click the Reload button in the upper
right of the screen.
2. The Reload Work In Progress List will be displayed. If you
are making this change for an individual user, make sure their
ID is displayed in the "Load Contacts for Operators" field.
If you are making this change for all users, make sure the
Operator field is blank. Click the WIP Filters button on
the left of the screen, the topmost button in that bank of
buttons.
3. The WIP Reload Filters window will open. Check the box
beside "Email" to switch ON the ability to see Email contacts
in your WIP list.
4. Click OK on all screens until you are at the Work In Progress
window again. Either all WIPs or the user IDs you have enabled
it for, should reload with emails displayed. Save these settings
as default go forward by clicking the "Save as Default" button on
the "Reload Work In Progress List" screen.

WIP List with Email Contacts
When you choose an Email Contact from a WIP list, the
Send Mail window will be displayed for that email event.
Load Draft
Email drafts previously uncompleted can be reopened,
worked on and sent. Once you have accessed the account
with the draft email contact, you have 2 ways to to
reopen your saved draft.
1. From your WIP list, click Reload, then click the WIP
Filters button. Either include Email contacts by checking
the box beside the Email Type, or deselecting all other
types of Contact and checking only Email. Click OK to
close WIP Filters, then OK on the Reload Work In Progress
screen.
If you selected other contact types along with Email,
you can sort your WIP by "Ty" (for Type) by clicking
into the Type column in your WIP and sorting the
list in ascending or descending alphabetic order.
Find the debtor with the Email contact and click on it
to select it. Once the screen is open, your Email
contact will be in the yellow highlighted bar just
above the Tabs on the debtor screen. If you click
on that bar in the same manner as you would for any
other type of contact, the Draft Email will open
for you directly so that you can complete your
content and send.
2. After accessing the debtor account from your WIP
using the same method to load Email contacts as in
#1 above, you can click on the email icon on the
Debtor screen which will open a new, blank email
window. Click the "Load Draft" button.
If you have only 1 email contact for this debtor,
the draft will open directly.
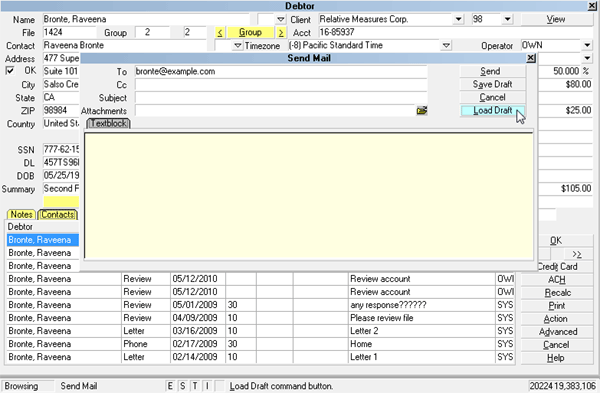
Load Email Draft
If you have multiple Email Contacts for the 1 debtor
account, you will get a list popup containing all
drafts that have a next work date which is due up
to and including the current date. You may select
from the list which of the drafts you want to complete
and send by clicking on it from the list popup.
Emails Saved as Drafts
Sending Email From The Client Screen
Email can be sent from the Client screen the same way as
from a debtor screen, by clicking on the icon beside the
email field, inputting your recipient (if not already present),
Subject line and the text body of your correspondence.
From a Client, an email must be composed and sent in one step.
The email window that will display from a client screen does
not contain a "Save Draft" or "Load Draft" button. If you
encounter an occasion where you cannot complete your email to
a client and don't want to have to start all over again later,
copy/ paste your draft text somewhere where you can retrieve the
content later. If you have sufficient access rights for Client
Notes, you can store partial text in the client Note tab to
copy/paste back into an email window when you are choose to
complete your email draft. If you have Read Only access rights
on the Client Note Tab, you can save your partial email body
to a text file in MS Notepad or in your preferred word processor
program, to be picked up later for copy-back into a Client
email from Collect!.
Sending Email From The Operator Screen
Email can be sent from the Operator screen the same way as from
a Client screen. The Operator email window does not have the
"Save Draft" or "Load Draft" buttons.
See Also
- How To Setup Sending Email In Collect!
- Print Batch Email in Scheduler
|
Was this page helpful? Do you have any comments on this document? Can we make it better? If so how may we improve this page.
Please click this link to send us your comments: helpinfo@collect.org