Assign Accounts To A Client By Import
This document explains a report and import procedure to reassign
accounts to a client after inadvertently deleting the client from
your database. This requires familiarity with Collect!'s
Import/Export module.
This is a two-step process. First a report is run to extract
the debtors providing a hard-coded client number. Then
using an import to import those accounts, the client link
will be restored. Finally, a contact plan is run to clean
up temporary markers.
Please make sure you have a recent back up
of your database before proceeding. Refer to
Database Snapshot for details.
It is recommended that you perform the import and
run the contact plan when there is no one else
using Collect!
Extracting Account Information
First we need to create a report.
1. Provide any name for it and
make it Start On Debtor.
2. Next put the following one line into your body, but
replace the 96 with the Client Number that you want
the accounts to have. This Client must exist in your
database before you proceed.
"@de.fi< ","96"
3. Once the report is created, you need to tag all the
accounts that you want to append to this client. You
should be on your debtor list after all the accounts
are tagged.
4. While on one of those tagged accounts, print the report
we just created. When prompted to print for All or One,
choose All.
5. When the Report Output Options form displays, select
print to file and specify a filename in the path. Make sure
you provide a *.csv extension on the end
of the filename.
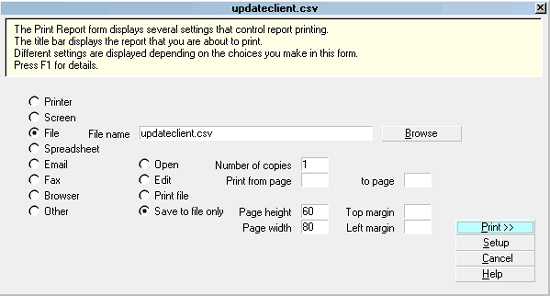
Report Output Options
If that path was specified as above, it gets saved in your
Collect! application folder, otherwise, it is saved to
whichever path you type in.
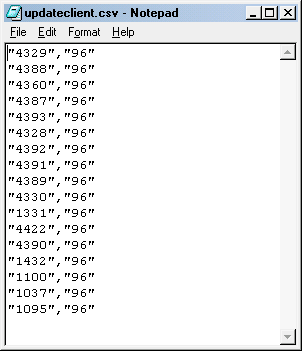
If you open the file in Notepad, it should be similar to this, a list
of file numbers and the client number.
Report Output Options

Preparing The Import Map
Once our file is ready, we need to create an import map to
update these accounts. The steps outlined below are detailed
in the Help topic How to Create A Single Record Import Map.
As you go through creating the import, you may refer to this
topic for more details.
1. Create a new import file with the settings shown
below.
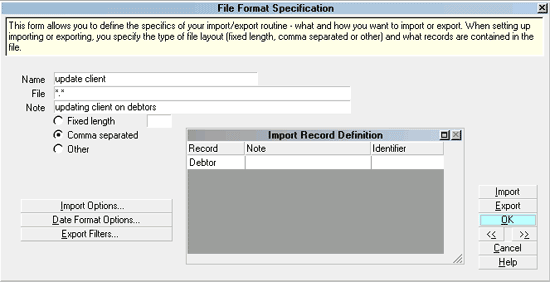
Update Client File Format Specification
2. The Debtor record will not be there yet, until you create it.
When choosing Debtor from the Records list, it will prompt you
if you want to add all fields. Choose No. Once the Debtor record
is added, we need to add the fields we are importing into.

Import Record Definition
3. The fields will not appear in the Import Field Specification until
they are created. Press F5 to access this subform, choose Yes
to creating a new field. We need to add three fields: File,
Client Number, and a field to update the debtor so that Client Number
gets updated. This is necessary because the Client Number is not
an actual data field on the Debtor.
The next few screen shots shows what should be done for each
field added.
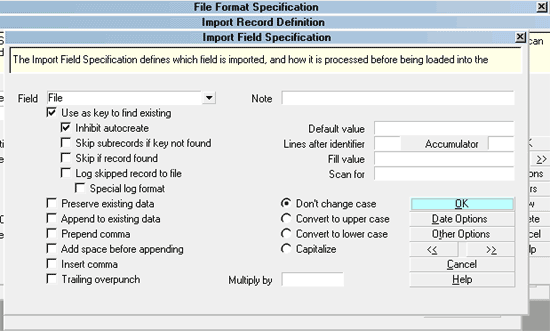
Import Field Specification - Debtor File Number
To create a new field, press F3.
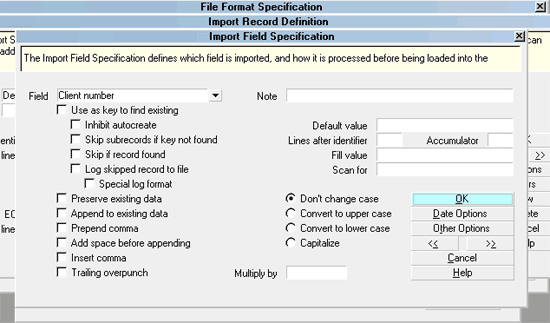
Import Field Specification - Client Number
4. The next field we write to is the Cell Extension field so the debtor
gets updated. Notice the default value. If your Cell Extension field is
being used, you will want to use a different field.
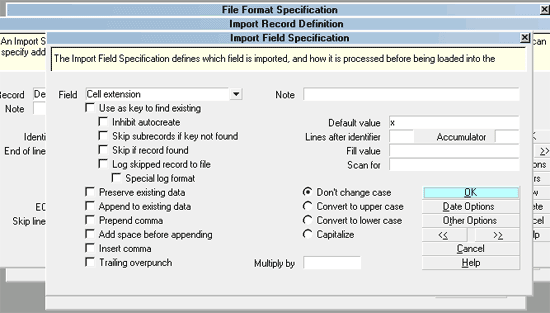
Import Field Specification - Cell Extension
5. After the fields are created, select OK to close each form.
Importing The Accounts
Please refer again to How To Create A Single Record Import Map
for details about the importing process, if needed.
Basically, you will select your new import for the File Format when
you run the import. Select the Browse button on the Import form
and navigate to the updateclient.csv we created
above. Then select Import. (There is no need to select a client,
as we provided it in our file.) Follow the remaining steps from the
above Help topic.
When accounts are imported, Collect! tags them automatically.
Examine some of these accounts and verify that the client has
been updated.
Removing Temporary Markers
Now to blank out the field that we updated (Cell Extension field).
Since the accounts are already tagged from the import, we can
run a contact plan on them to blank this out.
Please refer to How To Design New Contact Plans for details,
if needed.
1. Provide the plan with a Code and Description.
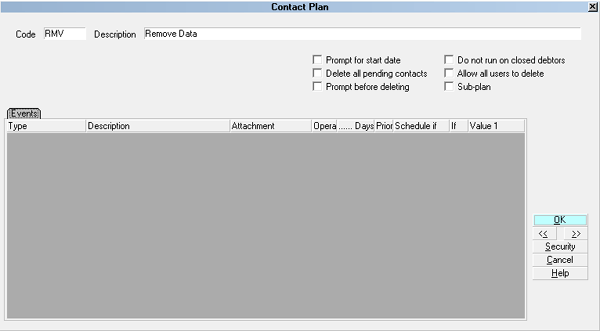
Contact Plan To Remove Temporary Data
2. Press F5 to access the Events form. Select Yes to create
a new event with the settings shown below.
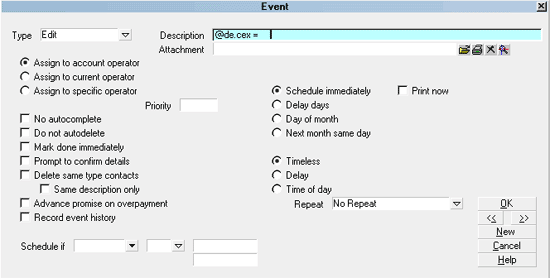
Contact Plan Edit Event
Make sure there are at least 5 empty spaces after the '=' sign.
3. Choose OK to close each form and return to the
Main Menu or WIP list.
4. Select Tools from the top menu bar and then select
Batch Process from the drop-down choices.
5. Run a batch process to Run a Contact Plan on the
list of tagged records.
6. After the batch has completed, it will provide you with
a summary of how many accounts were processed.
This should match the number of tagged accounts.
Go through some tagged accounts to verify that the
field has been emptied.
Your client and debtor records should now be in order.
You can clear all the tags through the Edit menu or
exit to your Desktop and re-enter Collect!.
See Also
- Import/Export Topics
- Assign Accounts To A Client
|
Was this page helpful? Do you have any comments on this document? Can we make it better? If so how may we improve this page.
Please click this link to send us your comments: helpinfo@collect.org