Scheduler
Schedule tasks to run offline and unattended with Collect!'s Scheduler
module. This optional module works like Windows Scheduler in that you can
set up specific tasks to launch on preset dates/times/repeat cycles and
have the Collect! system look after these processes itself thereafter.
In order to be able to use the Scheduler module, you will have to have
purchased a license for use from Comtech. Contact us at sales@collect.org
for pricing.
If you are a multi-user site, this is best set up on your Server. If you
are a 1 user site, then this process would require an extra license for the
Scheduler instance which would need to be left up and running in addition to
your working login of Collect!.
From the station where you will launch the Scheduler Task instance that will
remain up and running from this point forward. Signed on either as a minimum
level 10 user with the type "Scheduler" created in advance, open a session of
Collect!. From the Main Menu, click Tools, then Scheduler. This will will
open the Scheduler screen which contains the Tasks window. Click the NEW
button to begin scheduling tasks.

Collect! Task Scheduler
Tasks that may be scheduled include:
- Import routine
- Recalculate totals
- Print a report
- Print batch letters
- Letter service
- Batch processing
- Generate statements
- Credit bureau reporting
- Update NCOA from file
- Process TCN campaign
- Reconcile ACH transactions
- Reconcile credit card transactions
Accessing The Scheduler
To access the Scheduler, select Tools from the top menu bar
and then select Scheduler. You must be signed in as a
user with access level 10 or 99.
 To open the Scheduler automatically, you can sign into
Collect! as an Operator with Type "Scheduler." This must be
set up in the Operator form accessed through the System,
Rights, Operators menu option. Please refer to help on Operator
for more information.

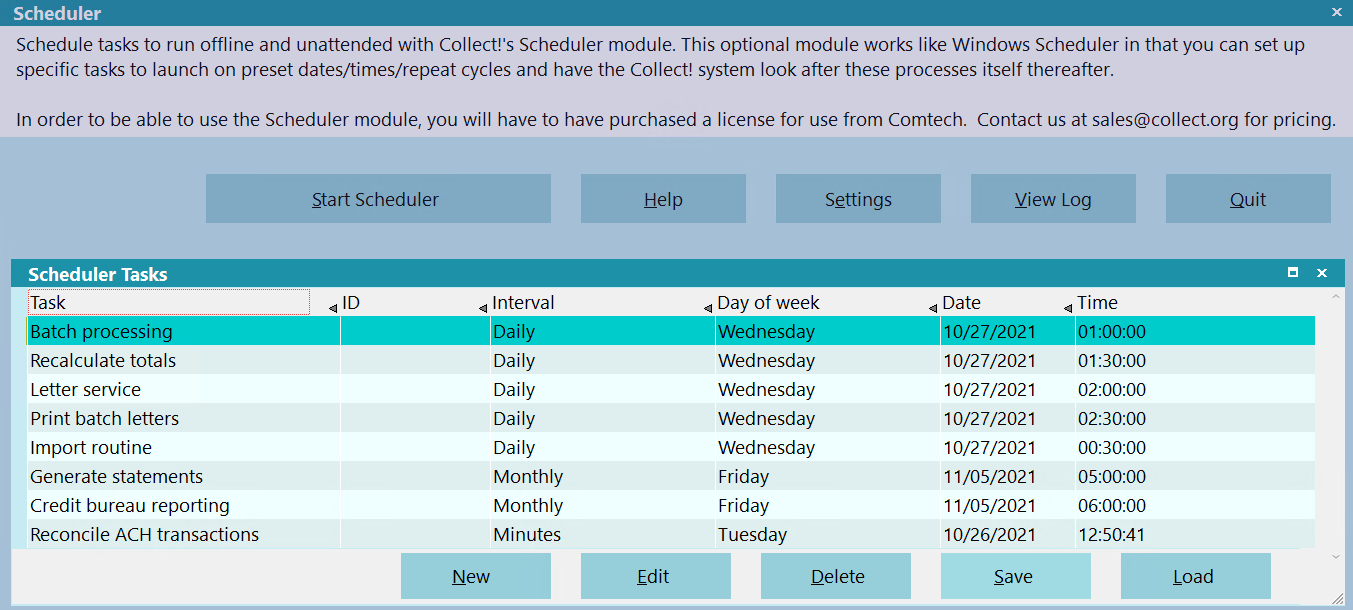
Scheduler Tasks
This window shows scheduled tasks and their settings. You
can edit or delete scheduled tasks or create a new task. Select
a column heading to sort the tasks.
Please refer to the Help topic How to Configure Scheduler Tasks
for more information.
 You can create a series of repeated tasks and
save this as a file. All settings and configurations
for saved tasks can be instantly retrieved and
loaded into the Scheduler as needed.

Start Scheduler
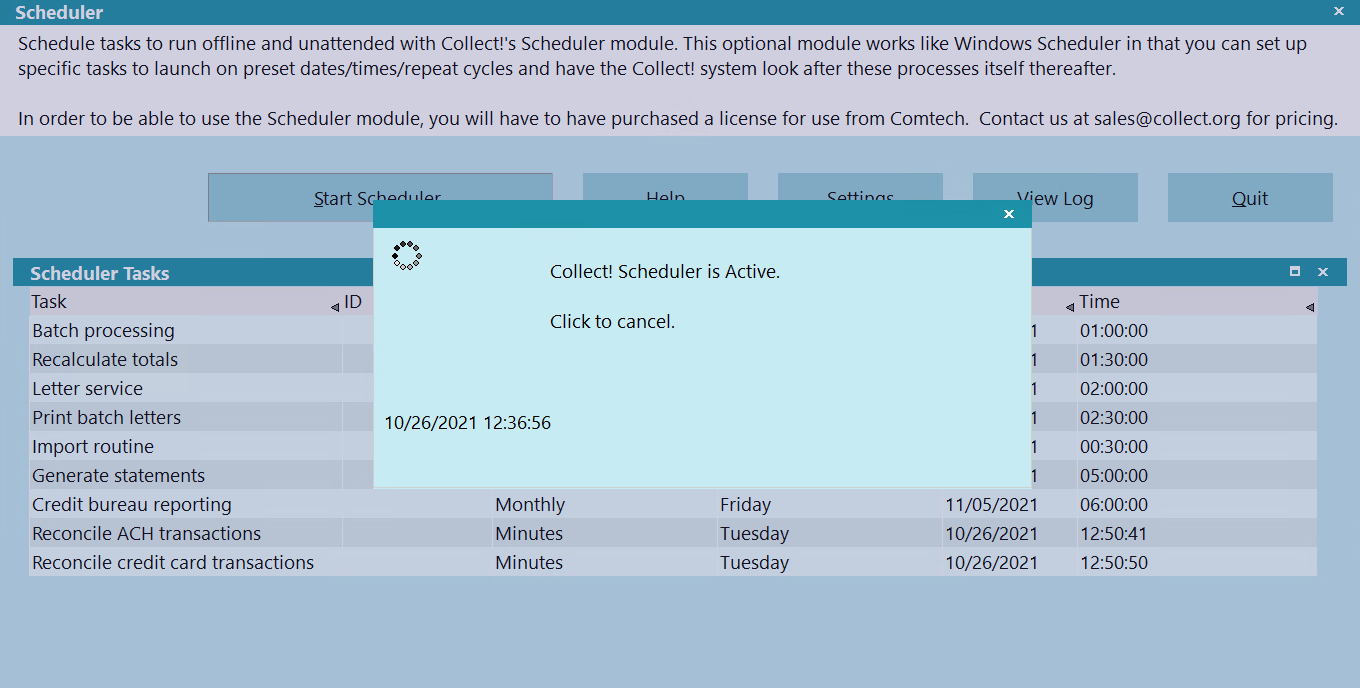
Select the START SCHEDULER button to start the Scheduler.
This activates the Scheduler and starts the timer so that Collect!
can perform the scheduled tasks in the list.
 Make sure you do not close the Collect! instance
running in Scheduler mode so that your tasks can
run on time.

Scheduler Active
 You can start the Scheduler automatically when
a Scheduler operator signs into Collect!. See
the Scheduler Settings for details.

Help
Select this button for Help on the Scheduler and
related help topics.

Settings
Select the SETTINGS button to view the Scheduler Settings
form where you can set a default task file to load when the
Scheduler is opened. You can also switch ON "Start
Scheduler Automatically" from this form to start up the
Scheduler as soon as the Scheduler operator signs on.
Press F1 for help when the Scheduler Settings form
is displayed.

View Log
When a task runs, Collect! writes a date/time stamped
entry to the Collect\bin\scheduler.log. Select the VIEW LOG
button to view the entries in the Scheduler log.

Scheduler Log Entries

Quit
Select the QUIT button to close the Scheduler. This will
close Collect! and return you to your Desktop.
 If you quit the Scheduler, tasks that you
have scheduled will not run! The Scheduler
must be running if you want to perform the
scheduled tasks.

Automatically Shutting Down
The Scheduler will not shut down automatically as long as
it is active. This means it must actually be running a task or
have its Scheduler Tasks window displayed waiting for the
next task to run.

Scheduler Active
If you wish to log out of the Scheduler automatically at a
given time, you can use the command line argument /T in
the Collect! shortcut you use to start the instance of the Scheduler.
Please refer to Help topic, Command Line Startup Options
for details.

| 
Was this page helpful? Do you have any comments on this document? Can we make it better? If so how may we improve this page.
Please click this link to send us your comments: helpinfo@collect.org