Scheduler Task
Use this form to schedule a task to run automatically. The
Task pick list shows you the types of tasks that may be
scheduled.

Scheduler Task
Task
Select a Task from the pick list.
If you select a task that requires further configuration,
the Configuration field will be displayed. Select the
CONFIGURE button to set the task.
CAREFUL: You cannot change the Task type after you have
attached a configuration to it. If an error is made,
delete the task entry and restart.

ID
Give your task a unique ID. This ID can be used to
help identify your tasks in the scheduler log as
well as in the scheduler task list.

Priority
Set a priority here. Collect! will sort the list of
tasks based on priority before processing the tasks.

Configuration
This field is visible for certain tasks that
require additional settings. It displays "Not Ready"
if you have not entered the settings appropriate for
this task.
If this field appears and shows "Not Ready," click the
CONFIGURE button to enter the necessary details for
scheduling the task that you selected.
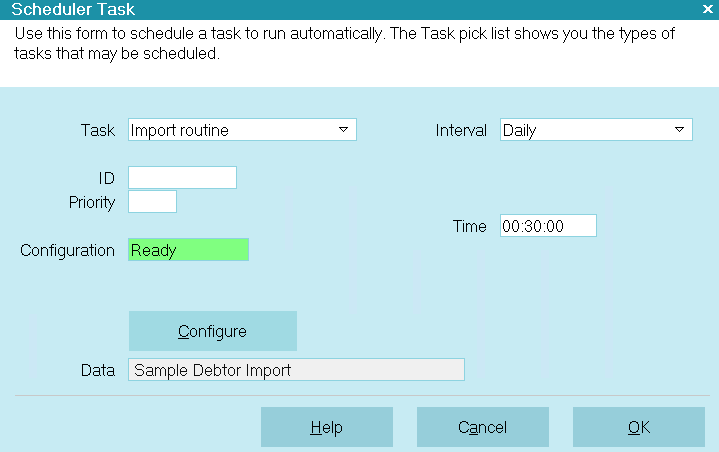
An additional field labeled DATA becomes visible when
you have set a configuration for your task.

Scheduler Task With Configuration

Data
This field is visible only when you have selected a
task that requires configuration. After you configure
the task, certain details are displayed in this field,
for instance, the name of a report that is scheduled
to print or the name of an import routine that you
have scheduled to run.

Interval
Choose an interval for running this task. Additional fields
become visible depending on the interval you select.
Intervals you may choose are:

Date
This field is visible only if you have chosen the
One Time Only interval. Select the Date icon to
bring a calendar or type in a Date as 07/21/2006.

Day Of Week
This field is visible only if you have chosen the
Weekly interval. Select the field's pick list to
choose a Day of Week to run this task.

Day Of Month
This field is visible only if you have chosen the
Monthly interval. Enter the number for the
Day of Month to run this task.

Time
Enter the Time that you want this task to start. This field
uses the 24 hour clock.
For example, 19:30:00 starts the task at 7:30 PM.
For repeating tasks, when you stop the Scheduler, this
Time value will update to display the next Start Time.

Minutes
Enter the number of minutes you want to use as the
repeating interval for this task.
If your task takes longer that the interval you set, Collect!
will use the original scheduled time to begin the next interval.
This means that if you have set a task to repeat every 20 minutes,
starting at 06:00, and it takes 25, Collect! will immediately
run the task again to process the missed interval for 06:20.
If the task normally takes 25 minutes to run, then this could
cause Collect! to cycle endlessly. You should ensure that the
interval for each task is set to an amount longer than the normal
time is takes to complete the task.
Collect! starts processing tasks as soon as the scheduler launches.
In other words, if the Collect! scheduler starts at 06:00 and has
Minute tasks for every 15 minutes, the first task will be processed
at 06:00, then the next one at 06:15, and so on.

Last Start Time
This is the date and time the task was last started.
This is useful to let you know how long the task
actually runs.
This field is visible only when a task has already run
at least once.

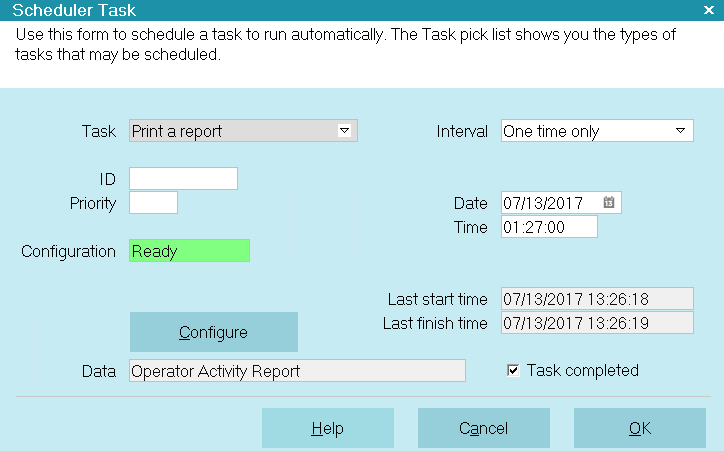
Scheduler Task Last Start Time

Last Finish Time
This is the date and time the task was last completed.
This is useful to let you know how long the task
actually runs.
This field is visible only when a task has already run
at least once.

Scheduler Task Last Finish Time

Task Completed
This field shows is visible only if Collect! was able to
complete the scheduled task. A check mark in the
box indicates that the task completed as scheduled.

Scheduler Task Completed
You can remove the check mark if you would
like to reschedule the task to run again.

Configure
Select the CONFIGURE button to enter the additional
settings required by your task. You will be presented
with the necessary lists and screens to properly
complete the configuration for your chosen type of task.
The screens that you see while configuring are the same
screens you would see if you were manually scheduling
the task, so you should proceed with setting up just as
if you were running the task manually.
You are sometimes prompted to enter a file name if the
Task needs to read a file. By default, Collect! looks in the
Collect\bin folder, or you can specify a complete path when
prompted.
You should never automatically schedule a task
that prompts for an ID, a Date or any other
user input.
Please be aware that you cannot change the Task type
after you have attached a configuration to it. If an
entry error occurs, delete the record and re-enter it.
If you are editing an existing task, selecting the
CONFIGURE button will show you the current
settings for the task. If the task is a Print Report
task, you will be asked if you want to select a new
report. Select 'No' to view the current settings. If
you select 'Yes', Collect! will clear the
configuration and display the Report Options for
the newly selected report.

Configuration Details For Various Tasks
Almost all Scheduler Tasks require configuration and
display the CONFIGURE button when selected. Tips and
details for configuring these tasks can be found in Help
topic, Scheduler Task Configuration.

You may have tasks scheduled for a certain time
that cannot run at that exact time because another
task is already running. This means that the time
the task actually runs may be different than the
scheduled time. The Task Scheduler is able to
evaluate date values dynamically to take this into
consideration. Collect! determines the date range
based on the configuration settings, not the
computer clock.

Help
Select the HELP button for Help on the Scheduler Task
form and links to related help topics.

Cancel
Select the CANCEL button to ignore any changes you
have made and return to the previous form.

OK
Select the OK button to save any changes you
have made and return to the previous form.

| 
Was this page helpful? Do you have any comments on this document? Can we make it better? If so how may we improve this page.
Please click this link to send us your comments: helpinfo@collect.org