User Level Basics
Collect! supplies a default set of User Levels that you
can use or modify. You can also create your own levels.
It is recommended that you try out the user levels that
are supplied before you create your own.
The predefined User Levels are:
1 Administrator
10 System Manager
20 Office Manager
30 Sales Manager
40 Collection Manager
50 Senior Collector
60 Junior Collector
61 Web Dialer Operator
70 Sales
80 Accounting Manager
85 Accounting
90 Data Entry
95 Legal
97 Client Group
98 Guest
99 Tech Access
Level 1 and Level 10 have the most access and 98
has the least. 99 bypasses the User Level settings
and grants full access to everything.
 Signing in as ID 99 with Password 99
bypasses security and allows you full access to
Collect!. This is a "special administrative level" and
should not be used as an ordinary user level.
Signing in as ID 99 with Password 99
bypasses security and allows you full access to
Collect!. This is a "special administrative level" and
should not be used as an ordinary user level.
If you want to make adjustments to a User
Level's settings, it is recommended that you make a
copy of the existing User Level and experiment on
that. Please see How To Copy User Levels for more
information.
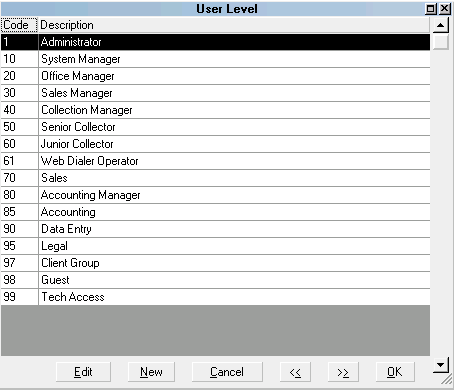
List of Predefined User Levels
 Level 1 has the same settings as Level 10 by
default. In your office, you may want your Administrator
and your System Manager to have different settings. So
we have provided two highest level User Levels for your
convenience.
Level 1 has the same settings as Level 10 by
default. In your office, you may want your Administrator
and your System Manager to have different settings. So
we have provided two highest level User Levels for your
convenience.
Accessing User Level List
The User Level List may be accessed in many ways.
Providing you have access to the various menus and
forms, you can use one of the following ways to get
to the list of User Levels.
1. Select System from the
top menu bar and then select User Levels
from the drop-down choices. This displays the User
Level list in Edit mode.
2. When the Operator form is displayed, select the
down arrow attached to the field labeled User level.
This displays the User Level list in Select Only mode.
3. When the Form Rights form is displayed, select the
down arrow attached to the field labeled Level.
This displays the User Level list in Select Only mode.
4. Or, from the Main Menu, select System Administration
to display the System Administration menu. Select
Setup And Configuration to display the System Setup
menu. Then select Security and Aliases to display
the Security and Aliases menu. Select User Levels to
display the list of User Levels. This displays the User Level list
in Edit mode.

Accessing User Level
The User Level form is used to make changes
to existing User Levels or to create a new
User Level.
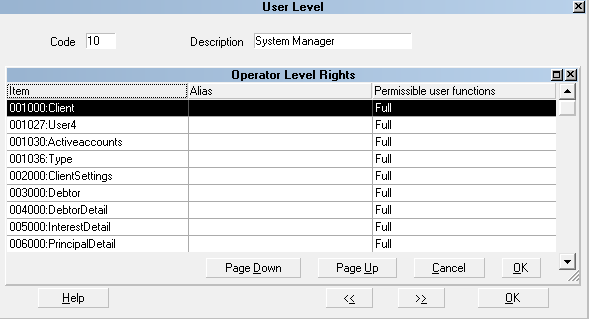
User Level form
The User Level form may be accessed in two ways.
Providing you have access to the various menus and
forms, you can use one of the following ways to get
to the User Level form.
1. Select System from the
top menu bar and then select User Levels
from the drop-down choices. To display the User Level
form for an item, select one of the levels in the list,
or select ENTER, or the EDIT button. To create a new
User Level, select the NEW button.
2. Or, from the Main Menu, select System Administration
to display the System Administration menu. Select
Setup And Configuration to display the System Setup
menu. Then select Security and Aliases to display
the Security and Aliases menu. Select User Levels to display
the list of User Levels. To display the User Level form for an
item, select one of the levels in the list, or select ENTER, or
the EDIT button. To create a new User Level, select the
NEW button.
See Also
- User Level
- How To Set Field Or Form Properties
- Security And Aliases Topics
|
Was this page helpful? Do you have any comments on this document? Can we make it better? If so how may we improve this page.
Please click this link to send us your comments: helpinfo@collect.org