How To Network Collect!
This document tells you what to do after you have installed Collect! to your Server and you want to enable your workstations to
access it. We will cover two areas of setup - what you need to do at your Server and what you need to do at each Workstation.
Before proceeding:
- You must have successfully installed Collect! on your Server. Please refer to How to Install Collect! for complete
installation instructions. Make sure you complete all the steps, including the section entitled "Server Startup." This will
automatically give the CV11 Server your Server's IP Address.
- You should not have any additional installations of Collect! on your workstations.
At The Server
The following steps need to be performed at your Server.
1. Double-click the Collect! icon to open the Collect! program.
2. Click Login to get to the Welcome To Collect! screen.
3. Select the SELECT DATABASE button and select Masterdb database, if it's not already selected. You may need
to use your UP arrow to see all the options. Select OK and ensure that the field labeled Database to Open
displays the word MASTERDB. This is your working database.
4. Select the button labeled Start to sign into Collect! This will ensure that you are able to access your
database.
5. Accept the default ID and Password, OWN and own to sign into Collect!
 If OWN doesn't work, use the administrator ID and password: 99 and 99
6. Quit Collect! all the way back to your Desktop.
7. On your server, create a share for the folder containing Collect!. This will permit workstations to find the shared Collect!
program. The share should have read/write access for all users of Collect!
8. In your firewall, make sure that the applicable ports are open. The default ports are 1433 for SQL Server and 2530 for
Collect!'s file server service.
By default, SQL server uses dynamic ports, which means each time the SQL Server Service is restarted, it may
start on a different port. This should work without issue if you are using NAMED PIPES to connect to the server.
If you are using TCP/IP to connect to the server, please refer to Microsoft's documentation on how to switch from
Dynamic Ports to a Static port.
9. Ensure that SQL Server is configured for what you network is setup for. You will need to enable Named Pipes and/or TCP/IP
in the SQL Configuration Manager, depending on your configuration. For further troubleshooting on this, you will need to
consult an SQL Server expert.
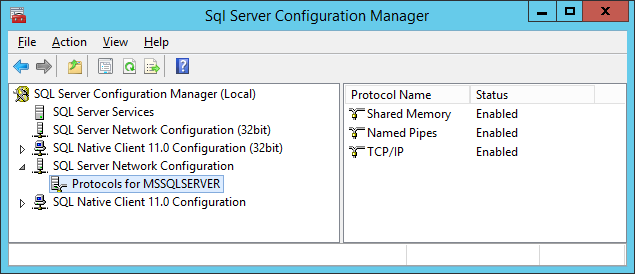
SQL Server Configuration
10. Proceed below and setup the Database Connection Method that you prefer.

Database Connection Method - Password Authentication
This method requires that you have a single admin user setup to access the database. This method does not require you
to be on a domain; therefore, it can be used in almost any Collect! installation. This method is requires a few extra steps,
but is more secure as you are not giving all your domain users administrative access to the database.
1. Sign in to Management Studio and navigate to the Server Security section.
2. Right-Click Logins and select New Login.
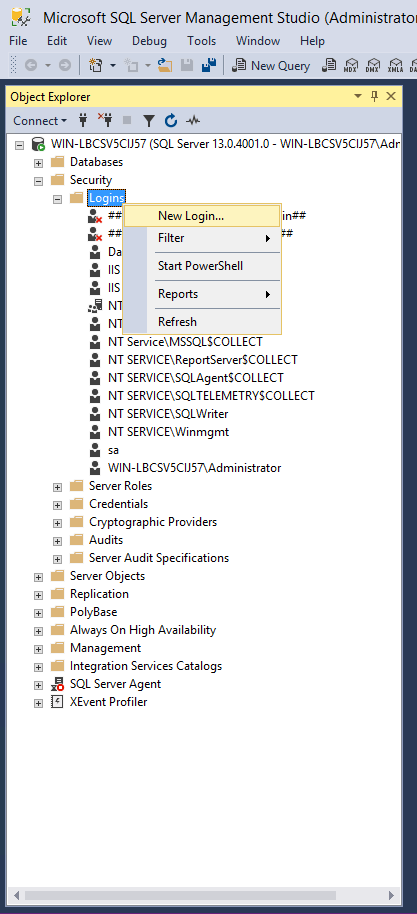
SQL Server Security
3. On the General page, type in any username into the Login Name field. For our example, we will use 'collect'
4. Select 'SQL Server Authentication' and fill in a password.
5. Unselect 'Enforce password expiration' and 'User must change password at next login'
6. On the Server Roles page, select sysadmin. Click OK.
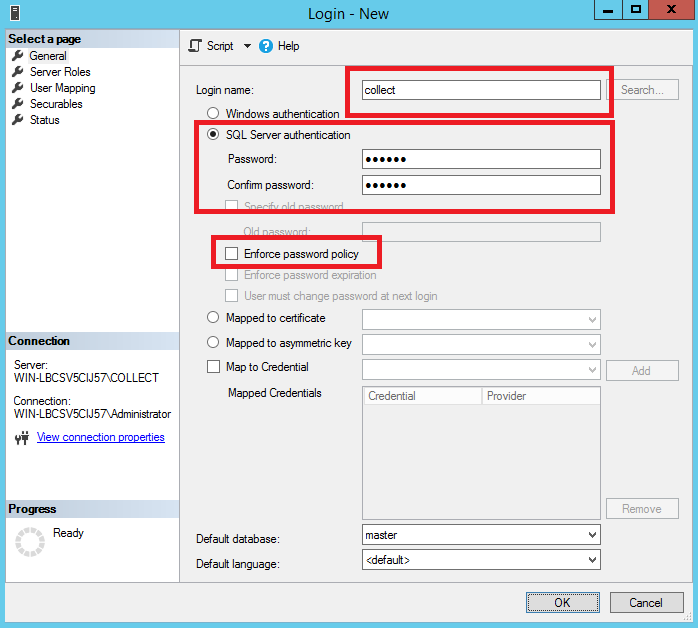
SQL Server User Account
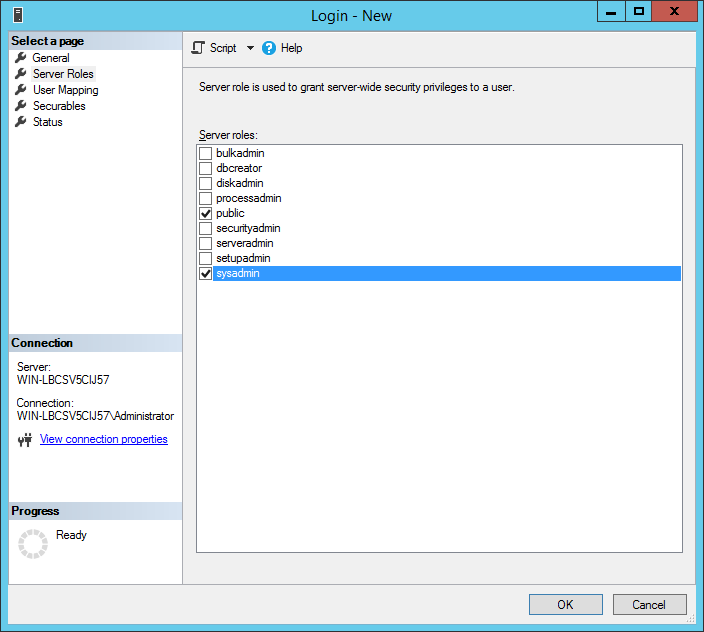
SQL Server Role
7. Sign into Collect! and navigate to System -> Preferences -> Database Preferences
8. Fill in the SQL Login and SQL Password fields.
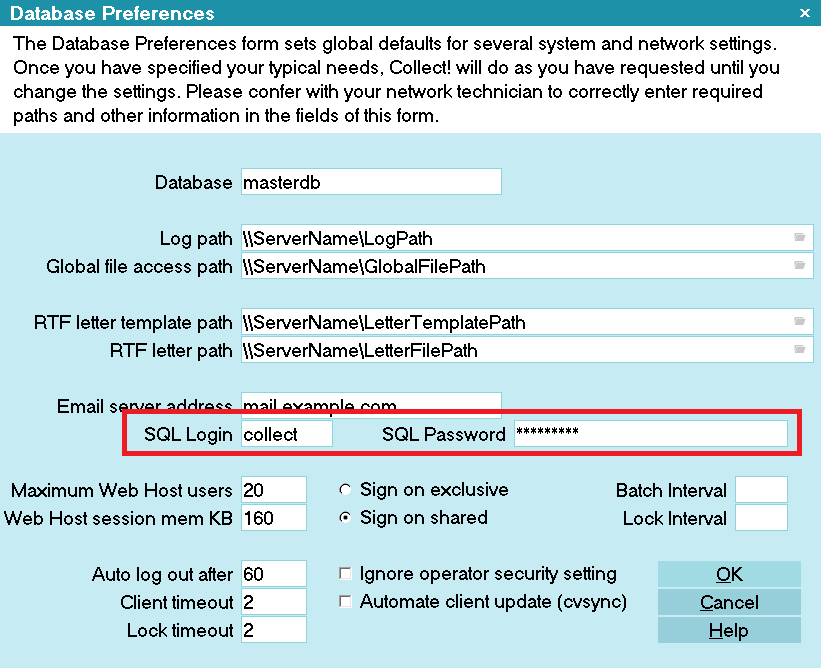
Database Preferences Configuration
9. Navigate to the Collect\bin folder and open the sqlconfig.ini file.
10. Add the following to the bottom of the file: auth=login
 If you want to switch back to Windows authentication, you can either remove the entry or
change it to: auth=windows
If you want to switch back to Windows authentication, you can either remove the entry or
change it to: auth=windows

SQL Configuration File
Database Connection Method - Domain Authentication
This method requires that you set all domain users to access the database. This method requires that you are setup on a domain.
This method can be simple or complex. The methodology outlined below is the simple method. For more complex methods, please
consult a Microsoft SQL database expert.
 WARNING: This method should only be used if you are small enough that database security is not an issue in your
organization, or if you have database expertise resources available to you.
WARNING: This method should only be used if you are small enough that database security is not an issue in your
organization, or if you have database expertise resources available to you.
1. Sign in to Management Studio and navigate to the Server Security section.
2. Right-Click Logins and select New Login.
SQL Server Security
3. On the General page, type 'BUILTIN\Users' into the Login Name field.
4. On the Server Roles page, select sysadmin. Click OK.
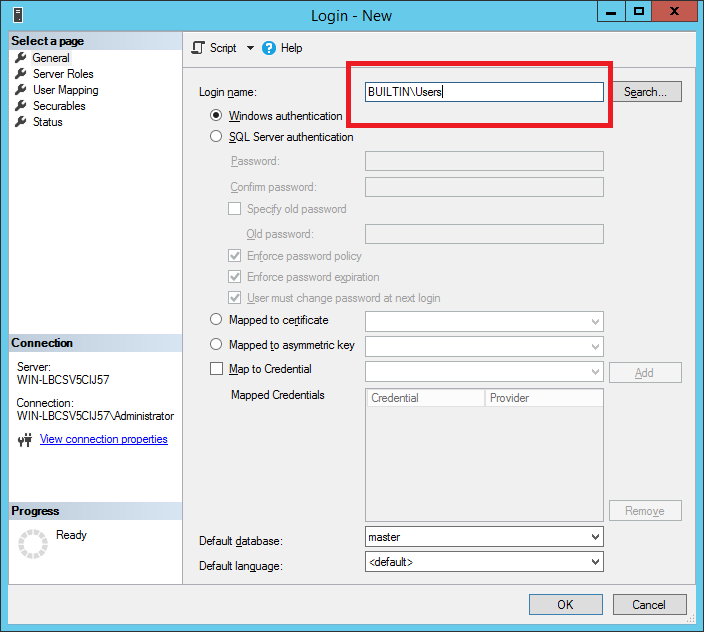
SQL Server User Account
SQL Server Role
At The Workstation
The following steps are performed at each workstation that needs to access Collect!.
Each workstation needs a shortcut pointing to the shared Collect! program on your server.
The shortcut typically contains a target like this:
\\server01\Collect\bin\CV12.exe
1. To create a shortcut use File Explorer to navigate your network to your server.
2. In the Collect\bin folder double-click the CV12.exe file to run Collect!
3. If Collect! runs successfully in the step above, highlight the CV12.exe entry you used and Right click it. A context menu
will appear.
4. From the context menu, choose Send To - Desktop (create shortcut) to send the shortcut to your
workstation's Desktop. This shortcut is all that Collect! needs to have installed on a workstation.
5. Repeat Steps 1 - 4 for each workstation.
Troubleshooting
Here are some know issues with connecting to Collect! over a network:
SQL Server Does not Exist or Invalid Login
1. First make sure that your CAPS LOCK is not on and that you are entering the correct password.
2. Have you opened the correct ports on your firewall? By default SQL server uses port 1433, but if you have dynamic ports
enabled you will have to refer to the Microsoft documentation on how to open SQL Server on your firewall.
3. Named Pipes versus TCP/IP - some networks will require that you connect to the ODBC data source via named pipes only. This
means that in the SQL Configuration manager, you will need to disable TCP/IP and on each work station you will need to set the
ODBC data source to use Named Pipes.
4. Is the SQL Browser Running? This service needs to be running on your server to connect with Named Pipes.
Unable to Connect to the Collect! Companion Server at IP x.x.x.x on port xxxx
1. Have you added port 2530 to your firewall?
If you prefer to use another port, you can edit the port that Collect! uses in the Collect\bin\fsrv.ini file.
2. Do you use a standard IP convention for your network (192.168.*.*, 10.0.*.*, 10.1.*.*, 10.90.*.*, or 200.200.*.*)? By default,
Collect! locks out access to the
Companion Server for security reasons. The standard networks are allowed by default.
WARNING: Using *.*.*.* will allow unrestricted access to the file server, so if your server is accessible outside your
network, you will want to restrict access to the Companion Server port to your network.
If you have multiple sub-nets, you can put each one on its own line.
| 
Was this page helpful? Do you have any comments on this document? Can we make it better? If so how may we improve this page.
Please click this link to send us your comments: helpinfo@collect.org