How To Process Results From TCN Call Campaigns
The following are the steps necessary to retrieve your completed call list results from the TCN
website.
TCN Download Report Form
Click Here to View this Form.
Click Here to Close this Form.
From the Process TCN Campaign screen accessed by the
menu path "Tools\Batch Processing\Process TCN Campaign",
select Download Report by clicking the radio button
next to this option. You will be able to search for all
the campaign Task IDs within the shown Date Range. You
can adjust the date range to include only those days
in which you have not retrieved results.
You can select the import routine that you wish to use
for processing the results.
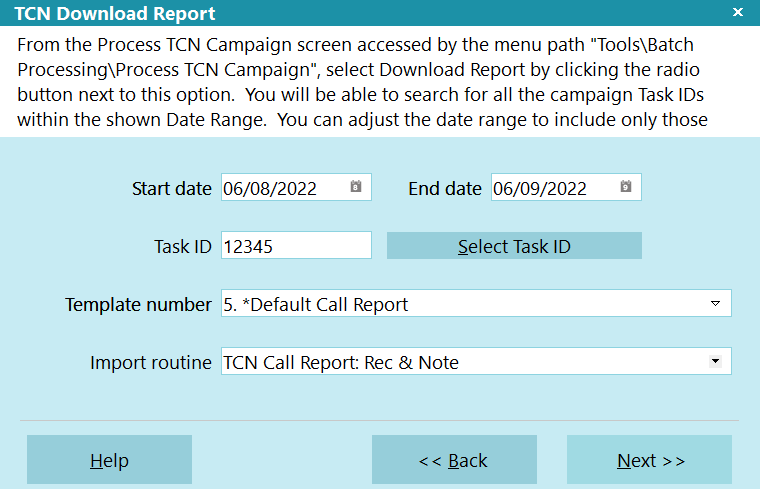
TCN Download Report
 If you enter invalid data in any of the fields,
you will be prompted to correct the information.
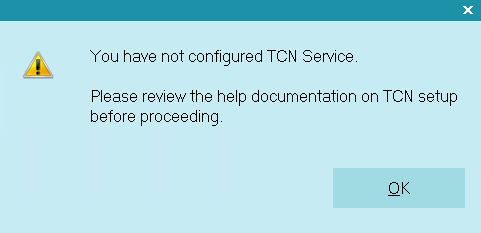
Invalid Information Entered
 Campaign processing requires that you have set up
an account with TCN Broadcasting and that you
have entered your login credentials in the
TCN Setup screen in Collect!.
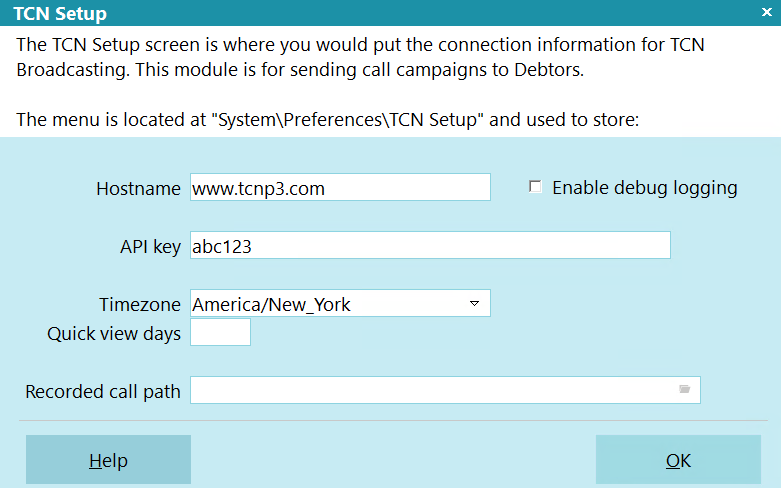
TCN Setup
See the Help topic, Processing Results from Call Campaigns,
for more details.
Start Date
Select the Start Date as your "From" date to be
used in defining the date range of campaign result
reports that you want to download.

End Date
Select the End Date as your "To" date to be used in
defining the date range of campaign result reports
that you want to download.

Task ID
This field displays the call campaign ID assigned
to your call list by TCN that you are about to
process. You can use the Select Task ID button
to generate a list of all call campaigns available
for download.

Select Task ID
When you click the Select Task ID button, the
system sends the Start and End Date parameters
to the TCN website to search for all call campaign
results available for download. The IDs in the
date range are displayed in a list for you to
choose which campaign results you want to download
and import into your system.
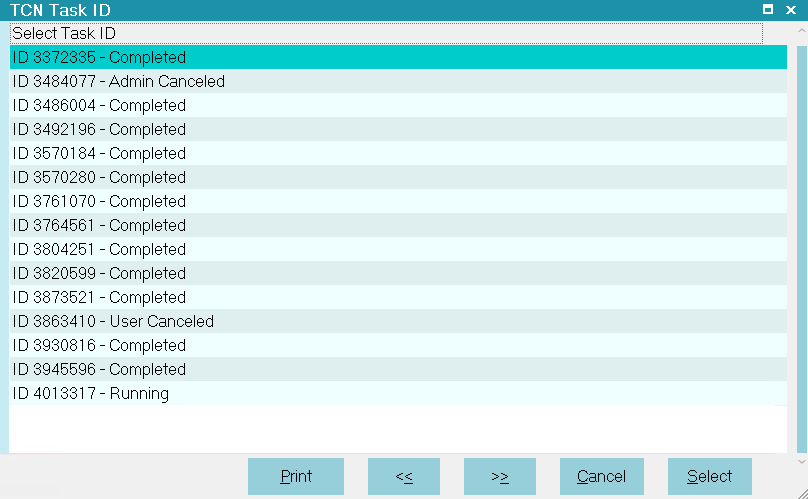
List of Campaign Tasks for Processing

Template Number
This pick list is generated from the choices available
for you from the TCN website. Collect! has several
default templates that match the TCN import routines.
 You can create your own templates at the TCN
website. If you do, you will need to also create
an import routine in Collect! that matches your
custom TCN template.

Import Routine
Select the import map name that you wish to use
for processing the campaign results.
Default import maps:
- TCN Call Report: Rec - with call recording and no note line
- TCN Call Report: Rec & Note - with call recording and note line
- TCN Call Report: No Rec - without call recording and no note line
- TCN Call Report: No Rec & Note - without call recording and with note line
For details about calls recorded during your
campaign, see the Help topic, TCN Recorded
Calls.

Help
Select this button for help on the Download Report
screen and links to related topics.

Back
Select this to return to the previous screen.

Next
Select this to proceed with the campaign results
download and import.


Downloading The TCN Report
- Confirm that you have the three Download Report import maps in your system. You can check by
navigating to File -> Import/Export -> Customize Import/Export -> Customize File Format. If
you do not have the import maps, you can obtain them in the Member Center.
 You will need an active Standard Membership and the Import Module.
- Navigate to Tools -> Batch Processing.
- Click the radio button beside "Process TCN Campaign", then click the Next button.
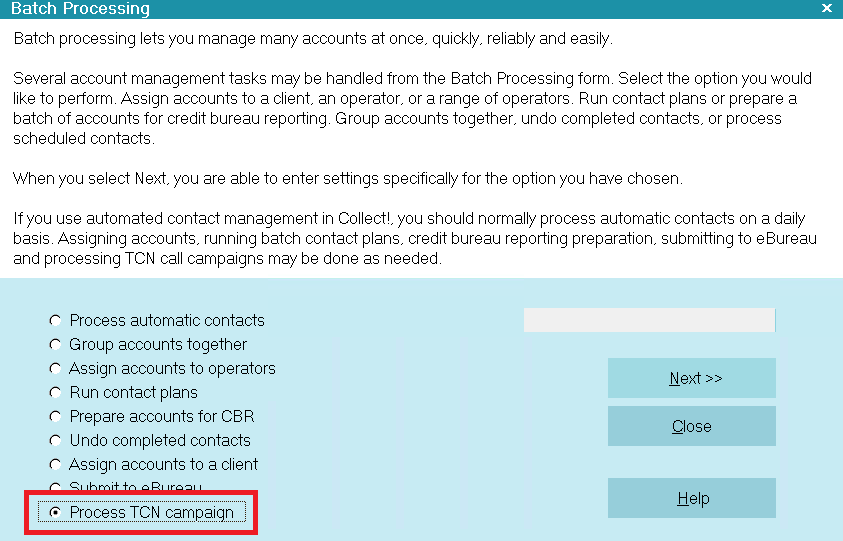
Process TCN Campaign
- Click the radio button beside "Download Report" on the TCN Select Function screen, then click
Next.
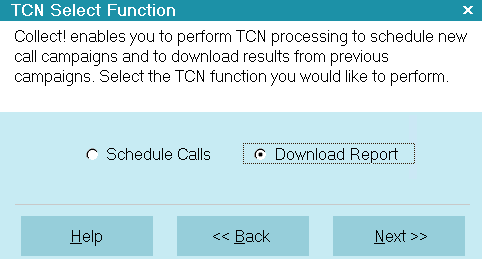
Select Download Report
 You must enter valid data for ALL fields when the TCN Download Report screen appears.

TCN Download Report
- Select the Start and End dates for the campaign you want to download. This will filter the list
for the Select Task ID button.
- Input a Task ID or click the Select Task ID button to choose which completed call list results
you wish to download. The Task ID is TCN's unique identifier for the campaign.

Completed and Running Call Campaigns
- Select the Template Number. You will notice when you have the Task ID and Date Range populated,
that a drop down arrow appears on the far right of the Template Number field. The pick list
will display the available templates at the TCN site. These match the TCN imports in Collect!
and are named to help you make the right choice.
 You can setup a variety of Reports with TCN as long as you have the import maps that match
up. The default import maps in Collect! are designed to work with the Default Call
Report.
- Select the Import Routine from your list of import maps. There are 4 default import maps with
Collect!:
- TCN Call Report: Rec - with call recording and no note line
- TCN Call Report: Rec & Note - with call recording and note line
- TCN Call Report: No Rec - without call recording and no note line
- TCN Call Report: No Rec & Note - without call recording and with note line
- Click Next to advance.
 If you have entered invalid data in any of the fields, or leave any of them blank, you
will be prompted to fill in correct information.

Invalid Information Entered
- Click the Start button when the TCN Start Process screen appears.
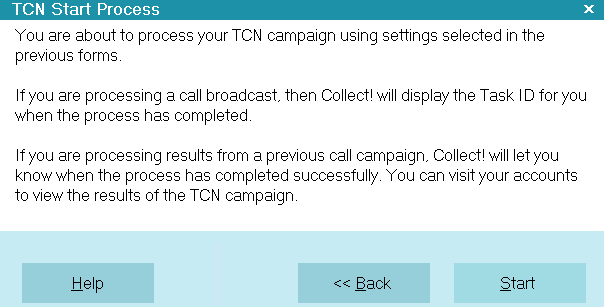
TCN Start Process
The interface will download the results and write them to the accounts that were in the campaign as
per the import type you selected.
- When the process has completed successfully, Collect! displays the Task ID and campaign Date/Time.
You can review your accounts to see the call results on a per file basis.
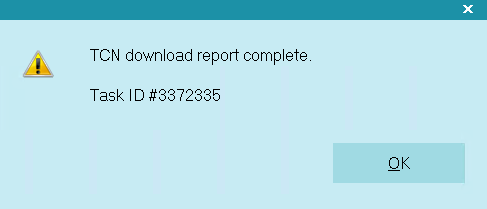
Download Report Complete Message

TCN Phone Contact
By default, the Imports create a "Completed" Phone contact for each account with details of the
results.

Phone Contact with TCN Results
The Last Number Attempted is written to the Description field and the Result is written to the Data
field. The Due Date is the Date of the campaign. The Time is the Time of the phone call.

TCN Recorded Calls
If you are receiving Recorded Call WAV files from TCN Broadcasting, you must use one of the import
maps that include the call recordings. The name of the WAV file will be stored in the Attachment
field on the Phone contact that Collect! creates when processing your call campaign returns.

Phone Contact with Call Recording
The TCN Module was designed to streamline your steps and processes to submit call campaigns to TCN
Broadcasting, and then import the results of those call campaigns into Collect!. If you establish
a call recording agreement with TCN, it is also possible to store the recorded calls from those
campaigns on each file with the date/time/phone number on which the call took place.
When you are using call recording with your campaigns, TCN will create a file for you to download
that contains WAV files and an HTML index page. You must download the file and unzip it into the
directory that you identified as the "Recorded call path" in your TCN Setup. This will enable the
files to be found by your system and available to be listened to, as needed.
The screen to configure your TCN connection is located on the menu path "Systems\Preferences\TCN Setup".
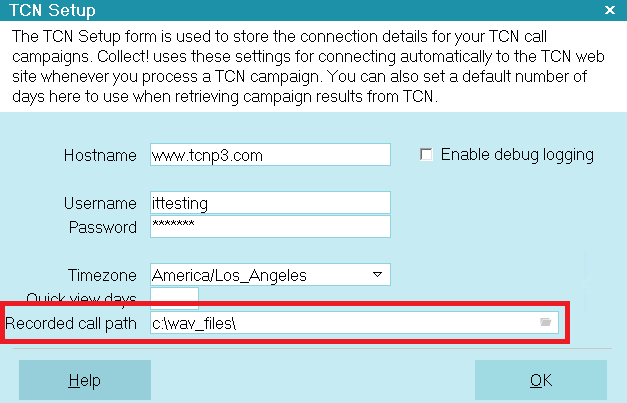
Recorded Call Path
 The folder you enter in the Recorded Call Path is where you should unzip the WAV file you
download from the TCN website.
The screen shot below depicts how the import builds the WAV file name from the data sent to you by TCN.
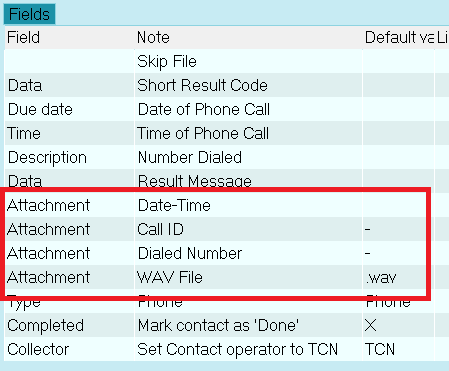
Contact Attachment Field Specifications
 The fields in the Call ID import map match the Report Template for "Call Report" stored for
your account at the TCN Broadcasting website.
The data sent by TCN also provides the Date, Time, Call ID and Dialed Number.
The "Call Report Template" shown below is a screen shot from the TCN website.
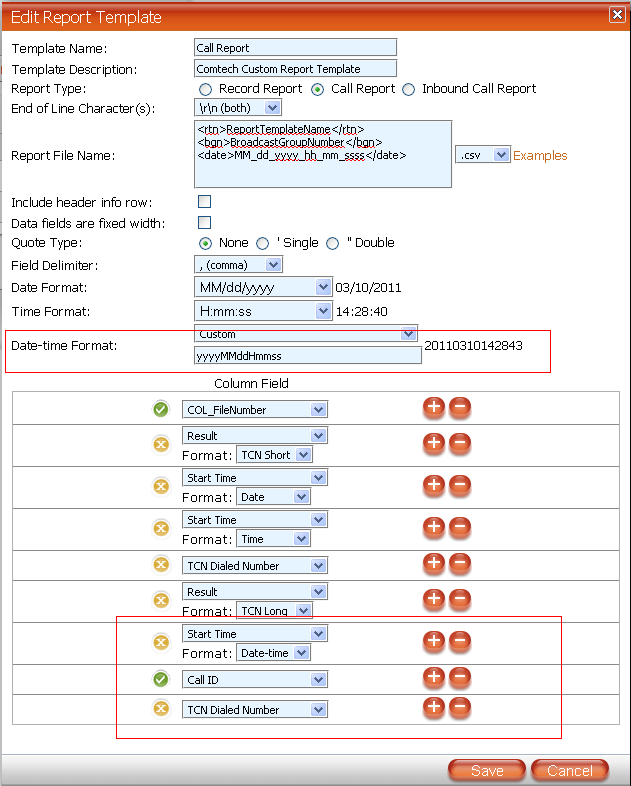
Report Template for Call ID Campaign Results
 Your "Call Report Template" that you set up on the TCN website MUST have the correct
data fields in it, in the correct order, as shown above.
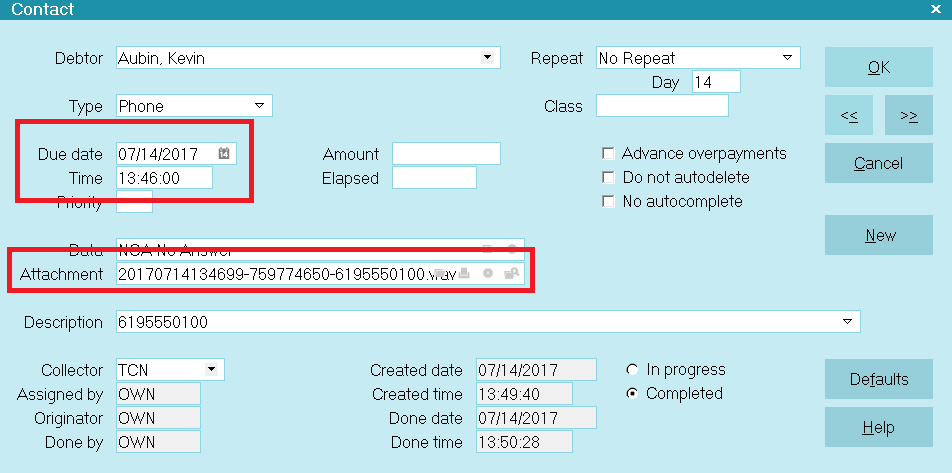
TCN Phone Contact with WAV File
Notice that the Date and Time of the Contact are the same as the first part of the WAV file name.
This is the naming convention used by TCN Broadcasting.
This is how the WAV file is named:
WAV File Name: 20110117110748-759774650-5045550100.wav
WAV File Name Sections: yyyyMMddHmmss-{Call ID}-{Dialed Number}.wav

Access To Listen To A Recorded Call Wav File
To listen to the recorded call, you must have an outside of Collect! application on your PC that
can open files with the *.wav extension.
To access, open a Phone Contact that has a WAV file name in the Attachment field.

TCN Phone Contact with WAV File
Click the Folder icon next to the Contact's Attachment field.

Selecting the Folder Icon
If Collect! cannot find a file with the name in the Attachment field, it will display a message.
The error message shows you the path to where the system is expecting to find the WAV file.
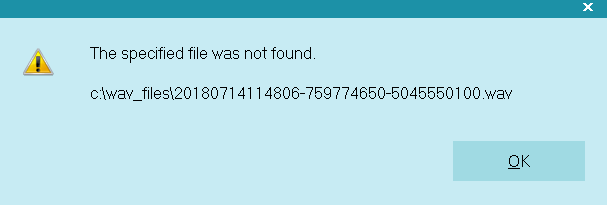
Collect! Cannot Open WAV File
This path is the one which was specified in your TCN Setup. Check to make sure that the WAV file
that you are trying to access hasn't been accidentally stored somewhere else.
 You will also receive a popup message if it is detected that it cannot find application
on your PC that will open the WAV file. Your inhouse System Administrator would your
go-to party in this case as these applications to listen to WAV files are outside of Collect!.

TCN Debtor Notes
By default, the import maps that include the Notes will write campaign results to the Debtor Notes
for every attempted call.
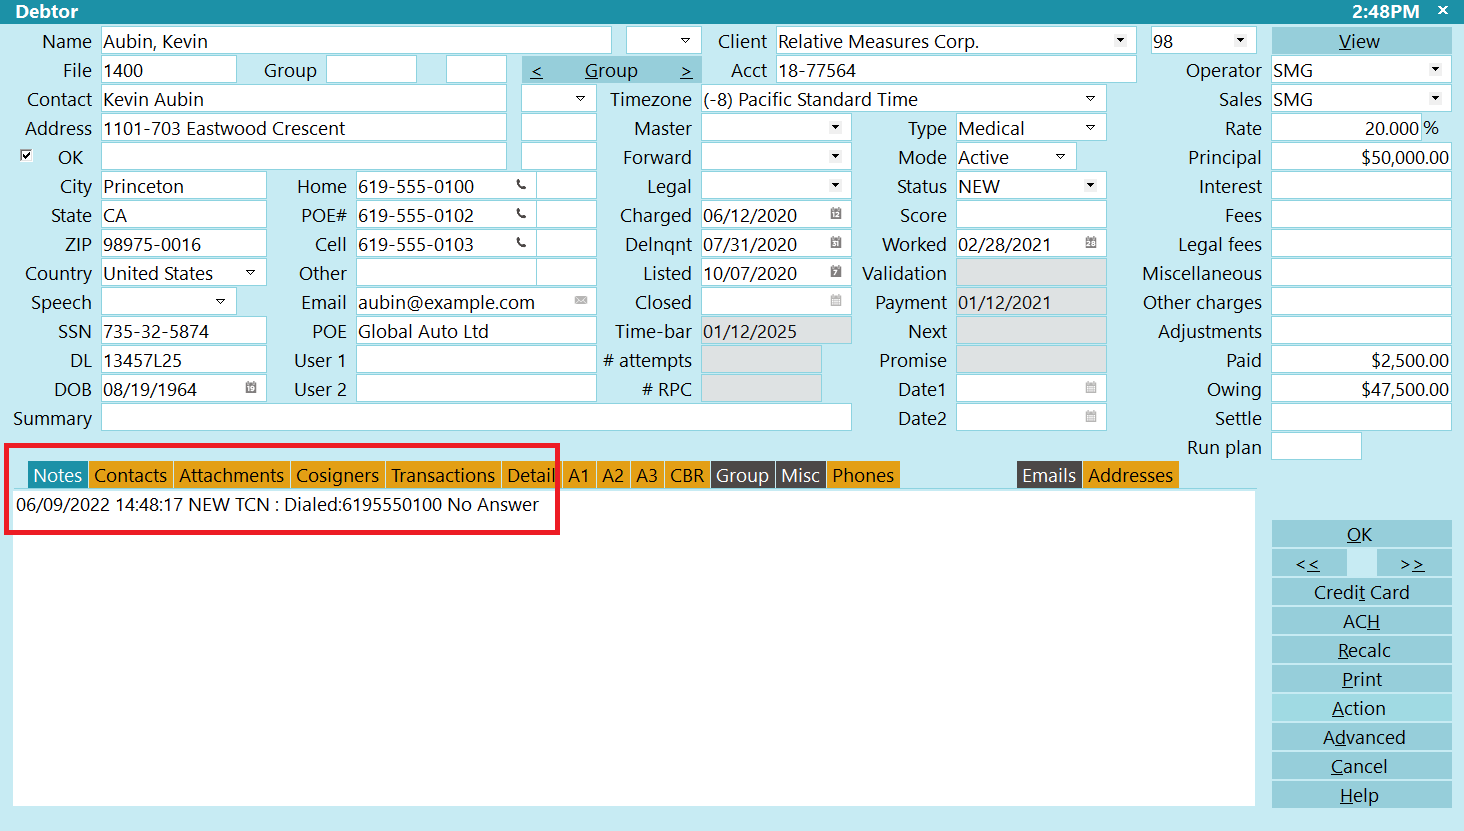
Debtor Notes with TCN Results
A line is written for each attempted call, including Date and Time of each call, number phoned, and
results.

Debtor Flagged By TCN
When you process returns from call campaigns, Collect! updates the Call Results field on the Contact
record with the TCN result code for that call. This may be used as a flag or hook to extract accounts
for further processing, such as sending them out for a skip tracing scrub.

Debtor Cell Extension with TCN Result Code

Call Campaign Result Codes
TCN returns a result code for each attempted call. The complete list of results may not be available
for every carrier.
View Result Codes
The TCN result codes are mapped into the Collect! Call Result codes that are on the Phone Contact.

Diagnostics
Please note that when you select "First Number" when you schedule calls, TCN will dial ONLY the
first number, even if you send all four phone fields.
TCN processes are logged in Collect!'s Application Log in the "Batch" section. The Log Viewer is
accessible through the menu path \System\ Diagnostics\Application Log. Switch ON "Batch" to view
TCN log entries, such as Task IDs, dates, and TCN events.
 Information which is logged via "Enable debug logging" will be logged in the "Debug" section
of the Application Log. Debug logging is enabled in the TCN Setup screen located by the menu
path \System\Preferences\TCN Setup.

| 
Was this page helpful? Do you have any comments on this document? Can we make it better? If so how may we improve this page.
Please click this link to send us your comments: helpinfo@collect.org