Ebureau Setup
The eBureau consumer eLink batch process is a skip trace and
data conditioning resource which may be utilized to automate
locate and inventory finalization trigger processes (such as
bankruptcy or deceased).
To use Collect!'s eBureau module, you must have the option licensed,
and you need to have an account established with eBureau. Once you
have your login credentials from eBureau that will allow the
system-to-system communication, you can configure your interface in
Collect! via \System\ Preferences\eBureau Setup.
 The eBureau Module is an extension module available to
sites who have a Collect! Professional level
license or higher AND who are operating on software
version CV11.3.1.1 and higher. If you have upgraded from
an older version, you will need to request a new license from
us to enable this module upon purchase. It is also
necessary that you have an account established with eBureau.
To access the module setup screen, click \System\Preferences.
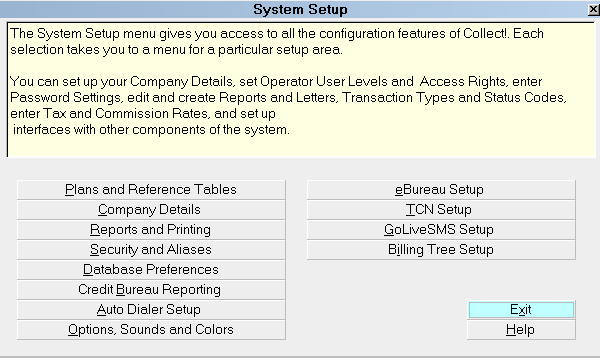
System Setup Menu
Click the eBureau Setup option to display the configuration window.
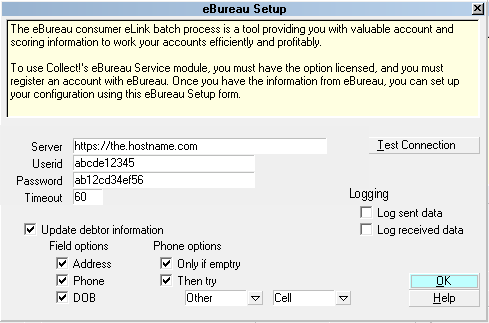
eBureau Setup
 Your eBureau representative will provide you with your
login credentials which will include a URL, userid,
password and the certificate file you need to connect.
Server
This is the URL of the server that you will be
connecting to. You will be provided with the URLs
for eBureau's test server and their production
server. URLs must be entered using the protocol
and host.
For example:
https://the.hostname.com
The terms of use for these servers will be decided
between yourself and eBureau. Expect to be
permitted a limited number of connections to their
test server, and to be charged per transaction with
their production server.

Userid
This is a unique login provided by eBureau. It will
be 10 alpha numeric characters long, and is case
sensitive. The first 5 alpha characters represent
your company and the last 5 numeric characters
represent a unique account serial number provided
for your company.
For example:
abcde12345
If less than 5 alpha characters are available, this
section may be padded with zeroes.
For example:
abc0012345

Password
This is the password used to authenticate with
eBureau's servers. The password is 12 characters
long, case sensitive, and is consistently formatted
as two alpha characters and two numeric characters.
For example:
ab12cd34ef56

Timeout
Timeout is the transaction processing timeout,
defined in seconds. The default is 60 seconds.
Timeout should be set to optimize processing. If
set too low, processing may not finish. The
transaction may be billable even though it
did not finish.
 Please make sure to set the eBureau
timeout mechanism lower than any other
timeout mechanism that is used in the your
system. This enables eBureau to fail
the transaction and log it before the
CV11client closes the connection.
 Contact an eBureau technical representative for
help in determining the best setting for your
specific circumstances.

Update Debtor Information
Switch this ON with a check mark if you want the
eBureau process to dynamically update Debtor
accounts with returned information blindly and
without human intervention.
When this switch is ON, you must select the
fields that you want Collect! to dynamically
update. Choices are Address, Phone and DOB.
Leave this switch OFF if you want to preserve your
account information as is and set your standard to be
that updates require manual review/verification before
the data may be swapped into place on the debtor screen.
The module does create a unique Attachment record for
each Address returned from eBureau irrespective of this
Update automatically or not preference setting.

Field Options
Select the fields you want to update automatically.
If you do not select any options, Collect! will
leave the current Debtor information alone,
creating an Attachment for each Alternate Address
returned from eBureau.

Address
Switch this On with a check mark if you want Collect!
to update Debtor accounts with Rank 1 Address
information returned from eBureau.
You must also switch On "Update Debtor Information."
Collect! also creates an Attachment for each Address
returned with the Class set to "eBureau" and the Type
set to "Alternate Address".
Old Address information is logged to Notes when the
eBureau process updates the Debtor account.

Phone
Switch this On with a check mark if you want to
dynamically update Debtor accounts with Phone
information returned from eBureau.
You must also switch On "Update Debtor Information".
Old Phone information is logged to Notes.
When you switch this On, additional Phone Options
will be displayed.

Phone Options
These choice relate to the Phone switch in the
Field Options section. You can define the order
you wish the module to use when automatically
updating the Debtor's Phone number information.
 These check boxes are greyed out unless
the Phone option is switched On
in the Field Options section.

Only If Empty
Switch this On with a check mark if you want
to leave the Home number intact if it is already
populated on the Debtor screen.
If the Home phone field is unavailable, the Rank 1
Phone number will be written to the Debtor Notes.
 This option is greyed out unless the
Phone option is switched On in the
Field Options section.
When you switch this On, you will be prompted to
designate which field it should "Then Try" if the
target field is unavailable due to being already
populated.
If this switch is unchecked in the Off position,
the Home phone number will always be updated
regardless of existing contents, and the "Then try"
options will be disabled. Any existing contents
in the Home field will be written to the Debtor Notes.

Then Try
If the Home field is already populated, you can select
Other and/or Cell as fields to be tried next when the
module is seeking an available phone field to write
return data. You may opt to select both, 1 or neither.
If no fields are available, Collect! will write the
return Phone number to the Debtor Notes.
 These options are greyed out unless the
Phone option is switched On in the
Field Options section.
When you switch this ON, you can select
up to two other phone numbers to try next.

Try Phone 1
Select the phone field from the pick-list that you
want to test next for empty when returning eBureau
phones.
If this field is not empty, the module will try
phone 2. If that is not empty, the phone number
will be written to the Debtor's Notes.

Try Phone 2
Select the phone field from the pick-list that you
want to test last for empty when returning eBureau
phones.
If this field is not empty, the module will write
the phone number to the Debtor's Notes.

DOB
Switch this On with a check mark if you want to
update Debtor accounts with Date of Birth.
You must also switch On "Update Debtor Information".
Old DOB information is logged to Notes when the
eBureau process updates the Debtor account.

Logging
Traffic between your system and eBureau's servers
can be logged by enabling either of the "Log sent
data" or "Log received data" check boxes. Each
connection will be logged and saved in your
CV11\bin\eBureau folder.

Log Sent Data
Switch this On with a check mark to write all
sent data to a log file in the CV11\bin\eBureau
folder. The filename will indicate the date and
time in 24 hour clock format.
For example:
EB_out_090102-105653.xml
This file would contain the information sent out
at 10:56:53 on January 2nd, 2009.

Log Received Data
Switch this On with a check mark to write all
received data to a log file in the CV11\bin\eBureau
folder. The filename will indicate the date and
time in 24 hour format.
For example:
EB_in_090102-105655.xml
This file would contain the information received
at 10:56:55 on January 2nd, 2009.

Test Connection
Selecting this button will attempt to connect
to the server URL entered in the Setup window,
using the Userid and Password you have entered
as supplied to your by your eBureau representative.

Troubleshooting Ebureau Connection
When testing your connection to eBureau, Collect! will
pop-up messages that the eBureau server returns.
Examples:
1. Collect! is attempting to establish a connection with the
eBureau Test Server.
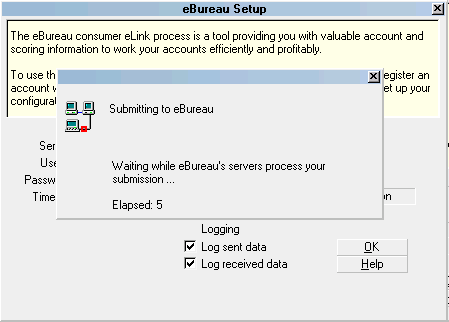
Attempting to Test Connection
2. Collect! connected successfully. All of your setup configuration
is correct.
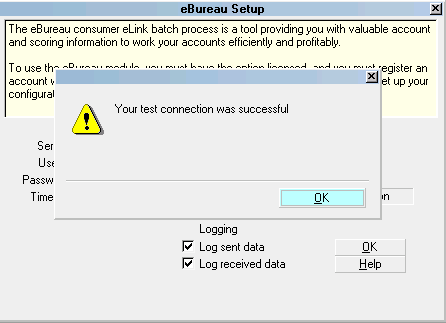
Successful Connection Test
3. You did not enter the correct address for eBureau's Server.
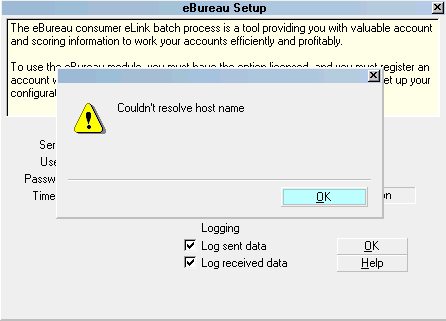
Incorrect URL Entry for eBureau Server
4. You did not enter the correct Userid and/or Password that
eBureau expects to identify you.
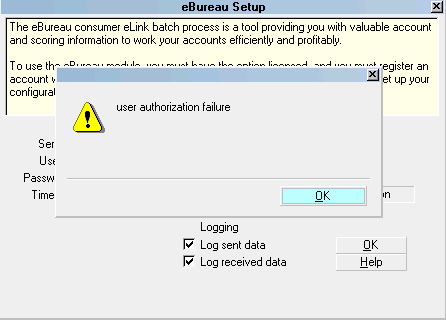
Incorrect Userid and/or Password
5. The eBureau connection reads a security certificate file
named ca-cert.pem found in your "CV11\bin"
folder. You should have received this file from eBureau
and it should be copied to your CV11\bin folder.
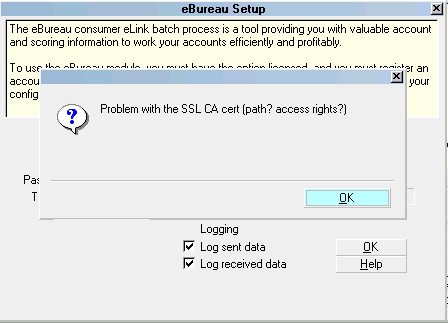
Certificate File Cannot be Found
6. Your IP Address must be registered with eBureau to send
and receive data from their server. eBureau should do this
for you when you set up your connection with them. Give
them your external IP address (if you are behind a firewall).
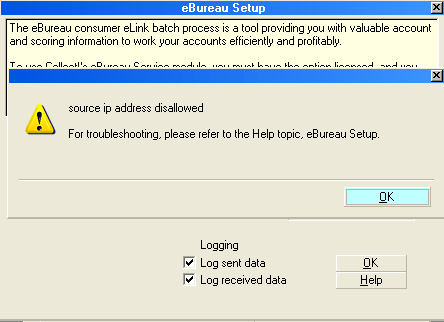
IP Address Disallowed

See Also
- How to Submit Accounts to eBureau
- Batch Processing Topics

| 
Was this page helpful? Do you have any comments on this document? Can we make it better? If so how may we improve this page.
Please click this link to send us your comments: helpinfo@collect.org