Getting The Most From Your Collect! Demonstration
If you haven't already installed Collect!, please see
Install Collect! For The First Time. You'll need
to install the program before you can proceed.
Help Components
Collect! comes with comprehensive tools to assist your evaluation
and to shorten your learning time. These include popup help,
hyper-linked online help, the Collect! Users' Community, and
Collect! Users' Guides. Any documents from these sources can
be printed for your convenience.
 If you leave your cursor sitting on a field for a short
time, a blue box will appear. This information describes the
field for you. The popup help appears throughout the system
and can greatly assist you. Popup help can be disabled
once you have a solid understanding of the program.
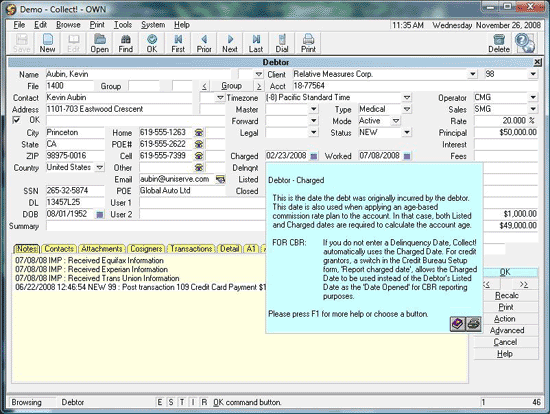
Debtor Information Screen With Popup Help
These is also an extensive "How To" section in the help
documentation that is designed especially for new users.
You may want to have a look at those topics first.
As mentioned above, Collect! Users' Guides are available
in the Help documentation. You may want to print only the
sections that you need. To access the guides, look at the top
of any help page and find the CONTENTS button. Click this
button to go to the Help Contents.
Descriptions of the available guides may be found on the
Help Contents page.
Anywhere in the system, you can hit the F1 function key on your
keyboard to get detailed information for the current form that is
displayed. You can also access this help by selecting
HELP from the top menu bar in Collect! this will give you a list
of choices.
- Select CONTENTS to view the Help Contents page.
- Select QUICK USER'S GUIDE to open the guide.
- Select HOW TO to display an alphabetical list of all
the "How To" topics.
- Select KEYBOARD TIPS to view a table of shortcut keys.
- Select INDEX to view a comprehensive alphabetical index
of all available topics.

Getting To Work
Collect! is activated by the START button. The information that
flashes on the screen sets up the available portion of the system,
according to the user access rights. For your demonstration,
we have given you access to all areas, so that you can have a
good look at Collect! For now, you don't need an ID code or
password. Later, when you are fully operational, you will set
up proper operator ID's with appropriate access to the system.
There is a section on operator setup in the system overviews.
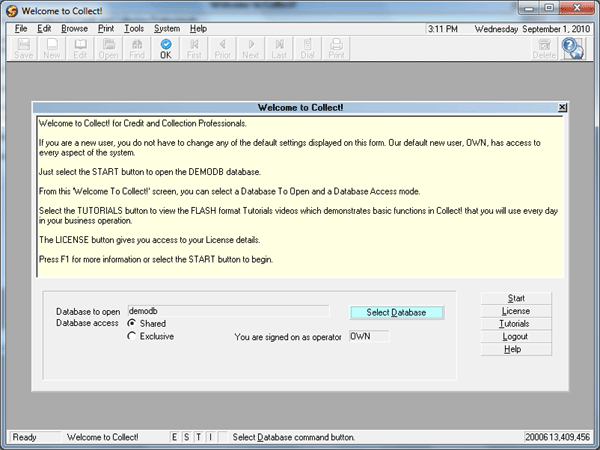
Welcome Screen
You are currently set to go into the Collect! Demonstration (DEMODB)
database. What you do there will have no impact on any other aspect
of Collect!, so don't be afraid to experiment. The other database
choices are Master (MASTERDB), where you will store your accounts,
and Client Prospecting (PROSDB), where you can handle prospective
client information. Click the START button now.
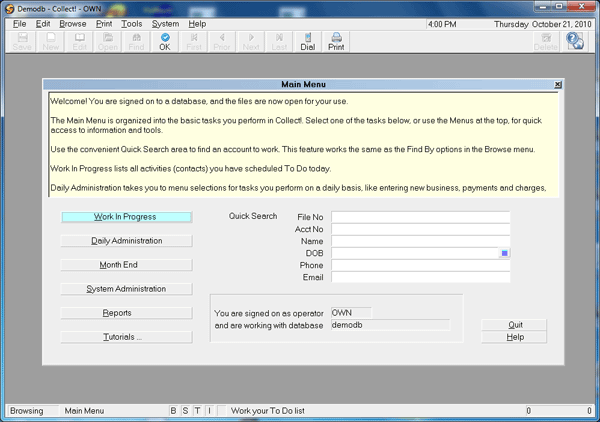
Main Menu
Here you will see the Main Menu. Notice the
labels, menus and icons at the top of the screen. Most of the
choices in these menus are also available in the six menu
boxes in the lower left hand of the screen. The labels on the
buttons are intuitive. When you select each, you will find the
steps to guide you. The MONTH END button takes you to all
the steps necessary to perform a typical collection agency
month end. DAILY ADMINISTRATION includes all the
day-to-day administrative functions. You will also find the
button for the TUTORIALS on this menu.
The QUICK SEARCH section will enable you to quickly search
for accounts in your database. The choices behave the same
as the Browse menu, Find By choices with fewer clicks!
Start by selecting the WORK IN PROGRESS button. This
is a typical daily work queue. The upper portion of the
screen depicts a variety of tallies for task types and
selections of the type of follow ups. Each line item is a
summary of a follow-up on a particular account.
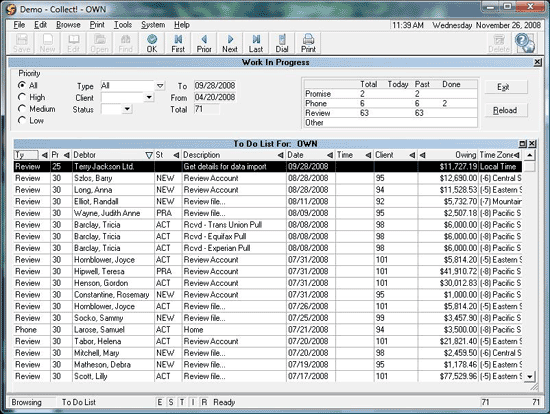
Work In Progress To Do List
Click your mouse on one of the lines. This action will take you
directly to the Debtor Information Screen.
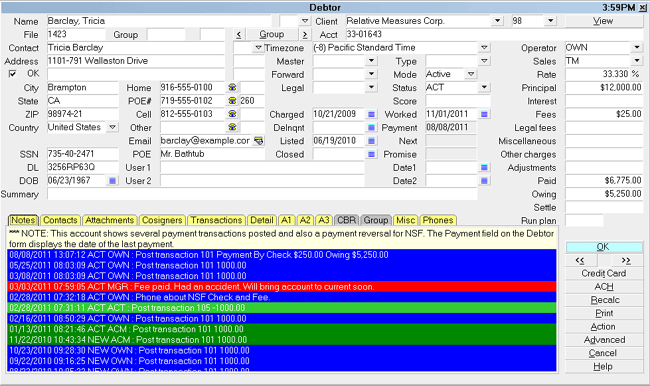
Debtor Information Screen
Once you feel ready, try setting up Collect! to meet your needs.
This is an extremely flexible system. You don't have to change
the way you conduct business, rather Collect! will change to
suit your needs. During your initial setup process, we
recommend that you keep things simple until you are
comfortable with the system. You'll find Collect! will meet the
challenges you set for it.
Please spend some time navigating through Collect! and reading
the popup boxes. Click buttons and pull-down menus. Pressing
F1 when a menu is displayed will give you details of the menu's
choices and links to additional information. Take a good look
around. Don't worry about making mistakes. This is your demo
and is easily re-installed.

Viewing The Tutorials
Now that you've had an opportunity to move around in Collect!,
we recommend that you review the FLASH format Tutorial
videos to begin using Collect! step by step. From the Main Menu,
select TUTORIALS. This button will open an HTML page with a
brief description of each available video. Select the PLAY TUTORIALS
link to view the videos. You will need the latest Adobe Flash Player
available for download from the Tutorials page. You will also need
a sound card in your computer to listen to the Tutorials.

Using Help Pages
Our online Help can be your best friend while learning and using
Collect!. The best way to get started is from the Help Contents
page. Please take advantage of this information in your evaluation
of the system.
Help Contents

You're Ready To Go
You have online HTML help, popup Help and user-friendly
documentation. System tutorials and many letter and
report samples are also available at our web
site, www.collect.org.
Collect! is fully functional and will run for 30 days with no further
licensing. If you need help, please call. We sincerely hope you
enjoy your demonstration and evaluation of Collect! We look
forward to working with you.
Comtech Systems Inc.

| 
Was this page helpful? Do you have any comments on this document? Can we make it better? If so how may we improve this page.
Please click this link to send us your comments: helpinfo@collect.org