Month End Process
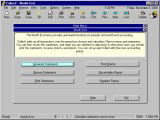
Month End is comprised of a few fast, easy steps. Once you have
posted all transactions; including client payments, debtor fees,
debtor payments and adjustments you are ready to begin. From
the Main Menu choose Month End.
The Month End menu is made up of six aspects.
Generate Statements
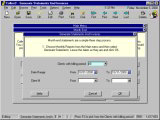
Select Generate Statements. You will see a default
date range, typically the first day of the month to the
last day of the month. If you need a different date span
you may select it at this time by picking dates from the
calendar. Note of caution: If you alter the default dates one
month you need to be very careful that you select the
correct dates in each successive month. See
Troubleshooting Month End for more information.
When generating statements, Collect! looks at last month's
statements and adds in any balances which were due from
your client, then calculates any debtor payments and fees
which you have posted. Collect! notes if the payments
were received by you or by your client. The commissions have
already been calculated when you posted the transaction and
at this stage, the generating process will separate accordingly
to benefit you or your client. Of the fees you have collected
the ones which have been marked for you will be added to
your benefit. Conversely the fees you have collected for your
client will be slated for your client's benefit. Lastly, the
payments you have received from your clients will be deducted
and Collect! will give you a current amount owing, indicating
whether you owe funds to your client or your client owes you.

Browse Statements
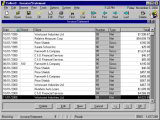
From the Month End menu, select Browse Statements.
This is an opportunity to have a look at the bottom line on
each statement you have just generated and look for any
glaring errors or omissions.
Open a statement and you can see the basic process of
calculations on the left. On the right is a box displaying
each transaction posted for the period for that client.
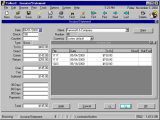
Each line item (transaction) can be viewed in detail by
clicking on the line and opening the transaction. These
details are a very useful way to confirm that you are
getting the results you expect when generating your
statements.
If you find a posting error, you must go to the actual
transaction listed in the Invoice Line, make your
correction and re-generate the statement. See
Troubleshooting Month End for more in-depth information.

Print Statements
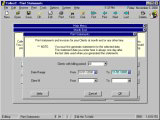
From the Month End menu, select Print Statements.
You have already indicated in the Client Settings if each
Client's Statement is net or gross remittance. When you
browsed the invoices, you saw the actual amounts calculated
in a generic format. When you print statements in a batch,
Collect! looks at the statement type you have chosen and prints
accordingly. Statements will always be stored dated one day
after your selected date of generation. (i.e. If you generate
statements for the period from the first to the last day of
June, the date on the actual statement will be the first of July.)
If you print one statement at a time from within the Statement
form, you have a choice of which template type to use.
Caution is advised. If your statements look very strange and you
have printed one at a time, it is likely that you have simply selected
the wrong template. See Troubleshooting Month End for
more information.

Print Checks
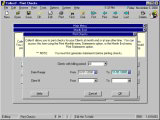
From the Month End menu, select Print Checks. Collect! will
print the checks for your clients automatically. The information to
be printed is taken directly from the Statement totals and applies
only to the clients which you owe, ignoring those that have a balance
owing to the agency. Collect! uses the Form #1000 form as a template
to produce very professional-looking checks. There is a bit of information
that needs to be setup before you begin to print checks. Please refer to
How To Setup Check and GCheck for details.
 The Form #1000 forms are available at any office supplier
or online.
Even if you write your checks manually, you do not need to post any
entries to tell Collect! that you have made the payment to your client.
Because of legislation and laws in all areas, we have designed Collect!
to assume that you have made payment to your client and no balances
in which you owe your client will be pulled forward into the next month's
statements.

Receivables Report
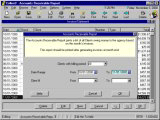
From the Month End menu, select Receivables Report. You have the
opportunity to select a Date Range, a Client Range and a Billing Period
type. The report is printed by gathering information from your statement
balances. Only the statements in which your client owes you are
reported at this time.

Payables Report
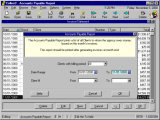
From the Month End menu, select Payables Report. You have the
opportunity to select a Date Range, a Client Range and a Billing Period
type. The report is printed by gathering information from your statement
balances. Only the statements in which you owe your client reported at
this time. Typically you will enter only the information which pertains to
the Date Range you are working on. Ideally, you would have generated
statements using the default dates and will not need to change the date
on this form at all.

Analysis Reports
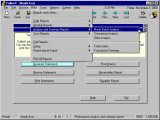
Typically, accounting departments want a variety of analysis reports to
make a comparative analysis. There are a variety of report templates
available in Collect! any of which may easily be modified.
If you are not happy with the results of your Month End please see
Troubleshooting Month End for information on common misconceptions
and errors.

See Also
- Accounting Topics
- Daily Administration
- Introduction To Printing Checks
- Financial Reports Basics - Introduction/Accessing

| 
Was this page helpful? Do you have any comments on this document? Can we make it better? If so how may we improve this page.
Please click this link to send us your comments: helpinfo@collect.org