Upgrading Your Collect! Version 8
This topic discusses upgrading Collect! Version 8 databases
to the latest Collect! release, using the automated upgrade
procedure.
 These instructions are for version CV8.0.22 and
newer. If you are running a build of Collect!
that is earlier than this, please get in touch
with Administration at 250-391-0466 option 3 for
upgrading options.
These instructions are for version CV8.0.22 and
newer. If you are running a build of Collect!
that is earlier than this, please get in touch
with Administration at 250-391-0466 option 3 for
upgrading options.
It is recommended that you have a recent, COMPLETE backup
of your Collect! system prior to any upgrade procedure.
 Please refer to Help topic, Preparing To Upgrade Your
Database before upgrading.
Please refer to Help topic, Preparing To Upgrade Your
Database before upgrading.
Preparing Your Databases
Perform these steps on your Server!
1. Run maintenance on your Collect! Version 8 database.
2. Make sure you have user 99/99 and Exclusive for all steps.
3. Examine and clean up all data, removing blank or
unnecessary records.
4. If you report accounts to credit bureaus, please switch
ON "Use METRO2 format" in your Credit Bureau Setup and
let Collect! convert your Metro Contacts to the new format
that Collect! Version 11 uses.
5. Make a copy of the database as a precaution.
6. Recalc all accounts.
7. Rebuild Lists.
8. Ensure that your working Collect! folder is named
simply "cv8" and that you do not have other folders named "cv8"
on your computer. The automated upgrade looks only for
a folder named simply "cv8."
This folder MUST be on the root of your drive. For
example: C:\cv8 or D:\cv8
and NOT like this: C:\my documents\cv8
The upgrade procedure looks on every drive, starting with your
C:\ drive. If it does not find a cv8 folder on the C:\drive, then
it will look on other drives on your computer.

Upgrading Large Databases
Collect! copies your entire cv8 contents to its upgrade folder prior
to upgrading, excluding help, tutorials and backup folders. This
process may take quite a while if you have a very large database.
Please refer to Help topic, Custom Upgrade for Technicians for details.
Performing The Upgrade
1. To ensure that the operating system is not holding on to files,
reboot your server.
2. Install the latest Collect! Version 11 Build 5 on your computer.
By default, Collect! will install to a cv116 directory. New shortcuts
on your desktop will be named "cv116," "cv116 Server" and so on.
3. Start Collect! Version 11 by selecting the icon
named cv116. After you enter your Company
Name, Collect! will prompt you when it sees that you have a cv8
folder on your computer.

Prompt to Begin Automated Upgrade
If you do not see this prompt, please look in the cv116\bin
folder and delete the "upgrade" folder.
Then start Collect! again.
4. Select the CV8 button and then select the database you
want to upgrade into Collect! Version 11. Select ALL if you want
Collect! to upgrade DATA, DEMO and PROS databases.

Prompt to Select Databases to Upgrade
If you have additional databases in your Collect!
Version 8 that you want to upgrade besides
these three, please get in touch with Technical
Services for assistance.
Collect! proceeds to copy your Collect! folder to the "CV11\bin\upgrade"
folder for processing.
5. Once the copying has completed, Collect! exports your databases
and performs the upgrade. If Collect! detects differences as it upgrades
your financials, you will see the Upgrade Financials Changes help page
displayed and discrepancy contacts will be created. Please refer to
the "Discrepancy Contacts" section below for details.
6. After the upgrade process has completed, sign into DATADB
to complete the upgrade. You MUST use a Level 99
operator!!! At this stage, Collect! will rebuild its internal
lists for report codes, access rights and import definitions.
If you upgraded DEMO and/or PROS too, then
sign into DEMODB and PROSDB as well to complete
the upgrade and examine results. You MUST
use a Level 99 operator!!!
Examining Results
1. Examine Addresses in Company Details and Clients. Make sure
all data in there. Please refer to the "Client Addresses" section
below for more information.
2. Examine your configurations and make sure everything is as
you expect. Areas to examine are noted below.
WIP Options
Account Matching Setup - this is important because there
are new options in versions CV11.6.2.7 and CV11.6.2.9 that enable
a Shared Notes Tab and Cascading Notes.
There are also writeback reports available on the Member Center to
assist with checking software switches in Debtor Group Tab, Member
Setup window to enable en masse the Cascade Notes and Share Notes
new features. These new features will not appear until the
check boxes on existing inventory are enabled.
Place the writebacks from the Member Center package located
in Utility Reports and Snippets, "Group Notes -
Cascading and Share Notes Tab" into your NEW
Contact Plan process to check these switches after
batch grouping for new accounts go forward.
Billing Tree / ACH Setup - this is important because there is
a new option in version CV11.6.2.6 that provides the choice between
allowing the Posted Date to remain blank with Recurring ACH
arrangements, instead of the legacy default that would prefill the
Posted Date with the date the arrangement was set up. This older
standard necessitating that a site to use the "Statement uses Payment
Date" switch in the Company Details to avoid future dated ACH payments
from being included in a current month statement. The new
functionality maintains an unrealized/blank for the Posted Date until
a Reconcile ACH History process finalizes the payment, thus allowing
a site to function for performance and remittances using their Posted
Dates.
 WARNING: If you were using the Company Detail switch for "Statement
uses Payment Date" and wish to change your processes
to rely on Posted Date instead, contact Technical
Services for an assessment: you may need writebacks to
blank out existing Posted Dates on not yet due ACH
payments and to have Accounting, Recovery and Performance
reports re-pointed to use the transaction Posted Date
field instead of the transaction Payment Date field, if
applicable.
WARNING: If you were using the Company Detail switch for "Statement
uses Payment Date" and wish to change your processes
to rely on Posted Date instead, contact Technical
Services for an assessment: you may need writebacks to
blank out existing Posted Dates on not yet due ACH
payments and to have Accounting, Recovery and Performance
reports re-pointed to use the transaction Posted Date
field instead of the transaction Payment Date field, if
applicable.
Options, Sounds and Colors
Reports and Printing - make sure your Letter Service settings are
accurate.
Credit Bureau Reporting - examine the Credit Bureau Setup form
for all the subscriber codes and settings.
Payment Posting Options - very important to check these settings
Payment Plan Setup - very important to check these settings
3. If you are using header include files in your reports, you will
want to copy the "cv8\styles" folder contents into "CV11\bin\styles"
so that the header include files will be correct.
4. Test print several reports.
5. Input your new license into Collect! Version 11.
Passwords
Passwords are case-sensitive in Collect! Version 11 so all
users must type in the correct case when entering their
passwords to sign into Collect!.
All Operators must have a valid Password. If the upgrade is not
able to decipher the Operator's Password for any reason, for
instance, if the Password is missing or is in asterisks, then the
upgrade resets the password to lower case User ID and
switches ON "Must change password next login."
Any passwords that were changed by the upgrade
will be noted in the "_upgradelog.txt" file
located in the "CV11\bin\upgrade" folder.
If an Operator cannot sign in with their old password, please
check the upgrade log. The Operator should sign in with
their User ID in lower case as the Password and they will
be prompted to enter a new Password.
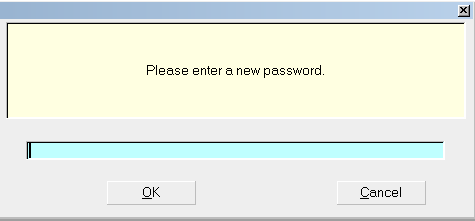
Prompt to Enter a new Password
Selecting the CANCEL button will return you to
the Welcome to Collect! screen.
All Operators with valid Passwords will have the same Password
in the new upgraded Collect!. However, the password system is
now case-sensitive.
Notes
Notes must be "Saved in files" before upgrading to Collect!
Version 11. If they are saved in the notes.rec in the old
version they will not come across in the upgrade.
Client Addresses
Collect! Version 11 does not have a Client Address 3 line. If
you had data in this third address line in your original database
you will have to take care of this after the upgrade. Select
Tools from the top menu bar and then select Utilities from the
drop-down choices. Select Update Client Addresses from
menu that displays. Please refer to this Help topic for details
about the options you have for updating your client addresses
and reports that use them.
Web Host
Many changes have been made to the Web Host. You may want
to take advantage of the new Web Host. However, if you have your
own customized pages, do not copy over them! Otherwise, you
can copy the Demodb Web Host into your Masterdb if desired.
Update Printer Control Codes
If you are coming from an early Collect! Version 8, you will
want to update your printer control codes and set your operators
to print "Via Device Context."
Discrepancy Contacts
If you are coming from an early Collect! Version 8, you may
notice differences in your financials due to code enhancements
made in Collect! Version 8.2.2. You have several options for
managing these contacts created during the upgrade.
Metro 2 Format
Collect! Version 11 reports credit only in Metro 2 Format so
you have to make sure Metro contacts are converted to this
format prior to going up to Collect! Version 11.
Technical Notes
During the automated upgrade procedure, Collect! copies your
entire cv8 folder and performs the database exports and upgrades
from there. Your original cv8 folder is left intact. A copy of all
your original Version 8 files may be found in the cv116\bin\upgrade
folder. Alternatively, you can place a copy of your Collect! into
the upgrade folder as described in Help topic, Custom Upgrade for
Technicians.
You may empty the cv116\bin\upgrade folder if desired, but please
do not remove the upgrade folder or Collect! will prompt to upgrade
again the next time you sign into Collect! at the Server. In other
words, Collect! looks for an "upgrade" folder in the cv116\bin folder.
If it finds one, it hides the upgrade prompts.
During the upgrade, Collect! backs up the existing MASTERDB
folder (and DEMODB, PROSDB folders, if you upgrade all your
databases.) You can remove the masterdb_bak, demodb_bak
and prosdb_bak folders. These are the databases shipped by
default with Collect!, not your data.
Summary
The automated upgrade procedure exports all the Version 8
databases that you choose to upgrade and upgrades them
into Version 11.6. This is the same process that would occur
if you did this upgrade manually. However, the automated
upgrade is quicker, less prone to user error, and involves
very few steps.
See Also
- Upgrading Your Collect!
|
Was this page helpful? Do you have any comments on this document? Can we make it better? If so how may we improve this page.
Please click this link to send us your comments: helpinfo@collect.org