How To Setup Collect!
Setting up your Collect! software is the most important aspect of preparing to use Collect!. It is
very important that you understand the basics so that the transition from using your existing system
to using Collect! is easy and efficient.
These setup tips are guaranteed to save you from needless frustration. Please take the time to print
this page. You will want to review the sections you need in your day to day operations.
Introduction
By default, Collect! is set to run an average Collection Agency. Your way of conducting business may
be different. Perhaps you plan to use Collect! to track your delinquent Accounts Receivable, in a
Credit Union, for Contact Management, or a variety of other businesses. Collect! is readily modified
to suit your needs. The average Collect! user utilizes only a portion of Collect!'s power.
Most system users have collection strategies which work for them. Collect! is extremely flexible and
can be modified to use your strategies. You don't have to change the way you do business; instead
Collect! will change to suit your needs.
This checklist shows how you can control Collect! for your own use. It is divided into sections
representing the main operations you perform.

Contact Management
Contact Management tasks include all the day to day operations you perform to work your accounts.
Work queues, letter printing, entering new accounts, and batch processing are examples. To use these
functions efficiently in Collect!, set up the following areas right from the start.

Company Details
Enter information about your company in the Company Details form. When you enter your company information,
please be aware that, by default, this information is printed on a variety of reports and letters.
You may change the information as needed. Access your Company Information by selecting System from
the top menu bar. Then select Company Details from the list of choices that is displayed. Alternatively,
through the Main Menu, select System Administration, Setup and Configuration.
Click Here to View this Form.
Click Here to Close this Form.
The Company Details form stores name and address information
about your company. This can be printed on reports and letters
and is used in credit bureau reporting. Some Client Settings
values are set up automatically for you based on information you
enter in the additional fields on this form.
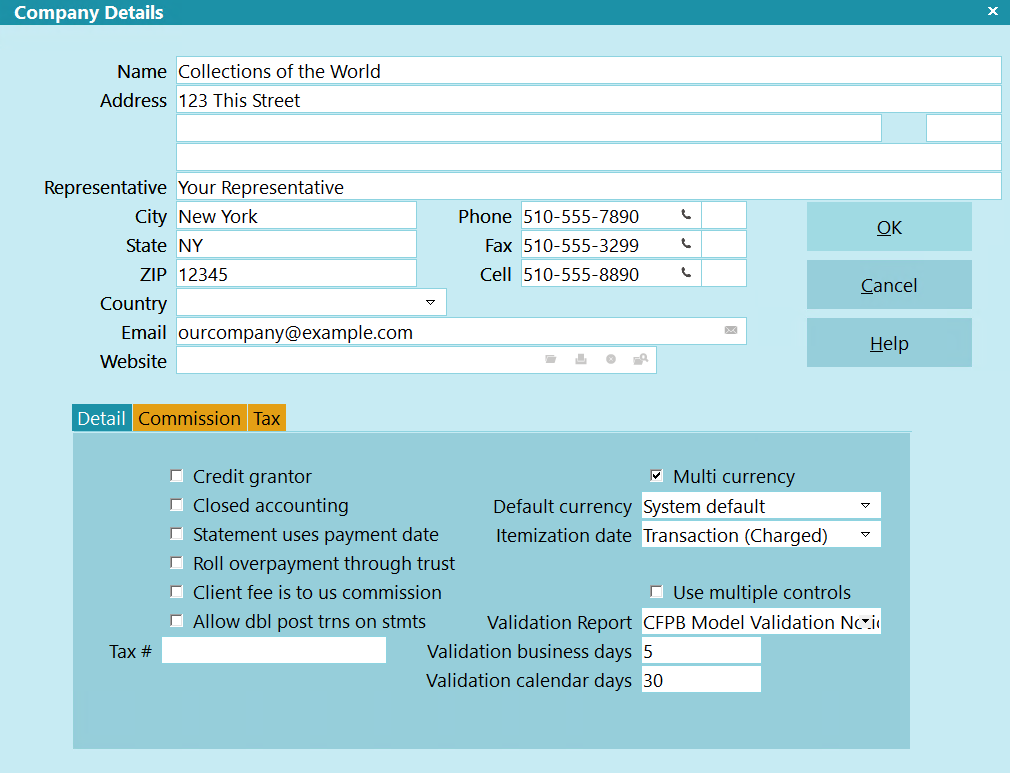
Company Details
The Company Details form is a very convenient way to store and
access your company information. Any field of the Company Details
form can be pulled into a report or letter from anywhere in the
system because all the Company Detail information is loaded into
memory when you sign into Collect! Name, Address and Phone
lines are used for credit bureau reporting. You can run multiple
companies by logging into different databases. Each database
stores its own company details.
Name
Enter the name of your company as you would
like it to appear on reports and letters. If you
are using the credit reporting module,
please enter your company's name as you would
like it to appear in credit bureau Metro2
output file header records.

Address
Enter your Street Address. There are three
address lines on this screen. The
information you enter in these lines
can be pulled into reports and letters.
The information in these three lines is
also included in header record of your credit
bureau Metro2 output files.
The format with which you enter your
information is up to each agency. However,
we recommend using Postal Addressing
Standards that are applicable to your
country. These are generally available
by looking up the website of the postal
service for your region.
Example:
Name - Your Company Name Goes Here
Address - Your Company Address
Address 2 - Company Addr2
Address 3 - Company Addr3, or Website Address
Representative - Default Report Name or Leave Blank
City - Your Company City
State - Your 2 Position State/Province Code
Zip - Your Zip/Postal Code
Country - Choose From Pick List or Leave Blank
Email - Any Company Email Address or Leave Blank

Address 2
This address field can hold your second
address line or other information you may
wish to store for later use/output to
reports or letters.

Address 3
This address field can hold your third
address line or other information you may
wish to store for later use/output to
reports letters.

Representative
Optional. Enter the name of your company
representative. This may be the Owner
or President's name. Some of the sample
letters and reports have this field built in
as a placeholder, but these can also be
removed or commented out of the report by
placing two slashes in front of the printable
field code: i.e //@cd.re<

State
Enter your agency's State Code.

ZIP
Enter your agency's ZIP/Postal Code.

Country
Optional. Use the drop-down arrow pick
list to select your Country OR leave blank
if you do not wish to see this field
expressed in reports/letters.

Email
Optional. This field is used to enter your
agency's central email address or the email
address of your main representative.

Website
Optional. This field is used to enter your
agency's website address.

Phone
Enter your main office Phone number.
This Phone number field is pulled into
many of the sample reports and letters.
Decide on a phone format for your company.
Such as, with hyphens or with parenthesis
around area codes or all numerics/no spaces.
You will find establishing a phone format
convention will ease all lookups by phone
in your system. Lookups read the field
exactly as entered.
Some format examples:
123-456-7890
123.456.7890
(123)456-7890
18004567890
1234567890
You can switch ON 'Only numerics in phone
fields' "System\Preferences\Options, Sounds
and Colors\Screen and Messages" so that the
system will disallow non-numeric data in
your phone fields.
If you use the Credit Bureau module, the
Phone number is required and is output
to the header record of the Metro2 formatted
text file when created. The Credit Bureau
module will strip out any non-numeric data
automatically and will use a maximum of 10
digits in compliance with the Metro2 File
Format specifications.

Phone Ext
Optional. This field can be used to enter
an extension for the Phone field, left blank
or re-purposed for user-defined storage of
other data.

Fax
This Fax number field is pulled into
many of the sample reports and letters.
Decide on a phone format for your company.
Such as, with hyphens or with parenthesis
around area codes or all numerics/no spaces.
You will find establishing a phone format
convention will ease all look ups by phone
in your system. Look ups read the field
exactly as entered.
Some format examples:
123-456-7890
123.456.7890
(123)456-7890
18004567890
1234567890
You can switch ON 'Only numerics in phone
fields' "System\Preferences\Options, Sounds
and Colors\Screen and Messages" so that the
system will disallow non-numeric data in
your phone fields.

Fax Ext
Optional. This field can be used to enter
an extension for the Fax field, left blank
or re-purposed for user-defined storage of
other data.

Cell
Optional. The Cell number is another phone
number for your company. It is not included
in default shipping sample reports/letters.
Decide on a phone format for your company.
Such as, with hyphens or with parenthesis
around area codes or all numerics/no spaces.
You will find establishing a phone format
convention will ease all look ups by phone
in your system. Look ups read the field
exactly as entered.
Some format examples:
123-456-7890
123.456.7890
(123)456-7890
18004567890
1234567890
You can switch ON 'Only numerics in phone
fields' "System\Preferences\Options, Sounds
and Colors\Screen and Messages" so that the
system will disallow non-numeric data in
your phone fields.

Cell Ext
Optional. This field can be used to enter
an extension for the Fax field, left blank
or re-purposed for user-defined storage of
other data.

Detail
Press F1 for help with Detail Tab system switch
settings and fields which will define key
software behaviors by setting your cursor into
any of the displayed items for selection.

Commission
If all your clients use the same Commission
Rates, you may set a global system default that
will be applied to all clients in the Commission
Tab. Press F1 for detailed help from any field
in this tab.

Tax
If all your clients are subject to the same
rate of Tax on your collection services, you
may set a global system default that will
be applied to all clients in the Tax Tab.
Press F1 for detailed help from any field
in this tab.

Tax Rate
Enter the tax rate, if applicable. This
rate will be entered automatically in the
client settings for every new client that
you enter in your system.
If your agency services multiple regions with
different taxation percentages, do NOT enter
data in this tab on the Company Details.
Instead, fill out the Tax tab on a per client
basis to ensure the correct rate is passed from
the Advanced Client Settings to the debtor
accounts as you enter them.
Tax Rate is a percentage field: i.e. if the
rate is 7%, you would enter 7.0. Tax is
calculated on the commissions that you earn,
not on the total amount you recover.
If you are in a region that has two types of
tax, such as Canada, enter the sum total
percentage tax which you are required to
charge into the Rate 1 field.
The Tax Rate field holds up to 6 digits
(or 5 digits and a period, e.g. 7.4563)
and is referenced in reports by using
the Printable Field Code @cd.tr
The system provides a field to enter a
Taxation # that is alpha numeric, allowing
you input a brief descriptor as well:
(EX:GST# 1050505050505).
Leave the Tax tab blank if you do not
charge tax OR if you have specific rates
that are input into Client Tax Tabs on a
per client basis.

Don't Calculate Tax
Switch this ON if you do not calculate tax.

OK
Click this button to save your changes
and return you to the previous screen.

Cancel
Click this button to ignore any changes
made and return to the previous screen.

Help
Click this button for help on the Company
Details window and links to related topics.


Client Setup
Clients are entered into Collect! before debtors. Once the client information and the appropriate
settings are in place, it is easy to enter the new debtors through the Client dialog. Entering
information in this order minimizes data entry, because each time you create a new debtor through
the Client dialog, basic information is automatically placed in the appropriate fields.
It is very important that you understand the client setup to facilitate any special requirements
each client may have for debtor records and reports.
Click Here to View this Form.
Click Here to Close this Form.
If you are new to the system, we recommend keeping your "Enable pop up help" function ON while you
are acclimating to the system. It will help you become familiar with key Fields of special
importance so that you can make operational decisions as to how your company wishes to use particular
settings or user-defined Fields with special properties.
On any screen, there are two types of online Help:
- Dynamic link to online Help Docs on our website. By pressing F1 while clicked
into a target field of interest on your screen, you will see your web browser open and take
you directly to the spot in our online Help Docs which describes that field in detail. You
will find yourself on a page that relates entirely to the screen you are working in. Links for
additional pages of possible interest appear at the bottom of the page you are taken to, if
applicable.
- Pop up Help screens. This requires that you have your online Help function
enabled via the menu path \Help\Enable Pop up Help. To use Pop up help, allow
your mouse to hover a few seconds over any field, and a help box will appear on the screen with
information about that field or screen you are on. To disable pop up help, click the menu path
"Help\Disable pop up help".
Before you are ready to enter the Client into your system, there are preliminary key details about
your Client's operational preferences that must be determined and decisioned within the software
prior to data entry of the Client information.
For example:
- What are the contingency terms?
- Commission rate plan structure
- Legal/collection cost handling
- Remittance type Net/Gross/Combined
- Remittance Schedule Monthly/Weekly/Biweekly/Daily
- New or different regional taxes to be applied
- Are there specific Securities or Portfolio staffing mandates?
- Portfolio isolation
- Multiple accounts group within Client only OR across full database
- Collectors for the project are general or project-specific with security settings
- Are there custom letter or report requirements?
- Do they intend to assign accounts on manual listing sheets OR will they be giving you a text
or spreadsheet file for electronic data import?
- Do they require electronic reporting, such as payment or account activity data files in a
specific layout from you on a fixed or ad hoc basis?
- Do they require a real-time login to your system to review/audit their own Debtor accounts?
- Will their accounts be reported to the Credit Bureau(s)?
- If your Agency uses an Electronic Payment Processing company for Credit Cards or ACH
checks/debits, does the Client permit or prohibit convenience fee charges?
- Are there contractual work flow requirements or guarantees for frequency of:
- Account activity
- Manager review
- Compliance audits
- Do any of these requirements necessitate the creation of Client-specific Contact (Action)
Plans to ensure that workstandards with Milestone Triggers reach the key personnel responsible
for those functions?
The answers to these questions determine how the Client is set up in the system and what areas of
the software will require specific configuration to meet the Client's needs as well as Project
Requirements.
 Many default Operator IDs, Letters and Contact Plans ship with Collect!. Upon review, you
may find that these provide the building blocks you need to get started, OR, that you have
a need to modify these stock shipping items to suit your specific operational needs. New
items can be created and changes can be made as needed.
 It is your responsibility to ensure that any letters you send to Debtors or contact plan
automations you enact with the system are compliant to legislation and regulations in your
region with respect to format, content and actions launched. SAMPLE letters shipped with
Collect! or available on the Member Center are SAMPLE only and intended to be rudimentary
templates for your own modification(s).
Client Form

Entering The Client
Having gathered all the information that you will need to completely configure your new Client, you
can proceed with their entry into the system.
- If you have not yet created your own login, sign into the system with the login ID "OWN" and
the Password "own". The password is case sensitive. This login ships with the system and is
available when you receive the product. It is configured with Level 10 set
of access rights/permissions.
- Click the menu path \Browse\Clients from the menu bar at the top of the screen.
This will display the list of all Clients in your database. Press F3 or the NEW button
at the bottom of this list to open an empty Client setup screen.
The Client Number field fills itself as the system keeps track of what your
next available number is. It is important to make sure you don't allow duplicate Client
Numbers. This will cause data integrity corruption because the database will have no way
to distinguish between the two unrelated Clients and the data for both of them will be
intertwined.
- Fill in the business information that you have for this Client along the left side of the
screen. Navigate through the basic intake Fields using your TAB or ENTER keys.
When you are done entering in your basic intake information, your screen should look like this:

Client Basic Intake Information
The following are descriptions of Fields with special characteristics or usages in Collect!:
D.B.A.
This acronym stands for "Doing Business As". Some Clients have a corporate name to whom you are
contracted but operate under a trade or business name that is different. Use this field to store
that information.
If your Client uses this field and it is to be displayed in Client reports and remittances, you
must make sure that the field @cl.dba is expressed in the requisite documents. Similarly, if your
Client requires that their name be fully expressed with the corporate name and the D.B.A. trade name,
then you must make sure that any letters you send to their Debtors contain the Printable field Code
@cl.dba beside the field Code which outputs the Client name (@cl.na) for every instance in letters
you generate to their Debtors.
Contact
Use this field to input the name of the individual who is the primary contact inside the Client
company to communicate with your Agency or receive statements/reports issued to the Client.
 Remember to edit your reports to include an "Attention: @cl.co<" line if you wish your
reports to show an individual's name with the company name/address that mailings are to be
directed to upon delivery.
User 2 to User 4
These are free-form Fields which you may use for any purpose you require. You can relabel these
fields by mousing into the field of interest and right-clicking. The pop up offers you the
highlighted choice "Properties". Enter or click on selection to enter the Access
Rights window for this field. Relabel the field by entering what you want to display in
the "Alias" field.
In the following example, the User 2 field was renamed "SIF Auth" to indicate
that a separate individual for this Client is to be contacted for settlement authorizations.
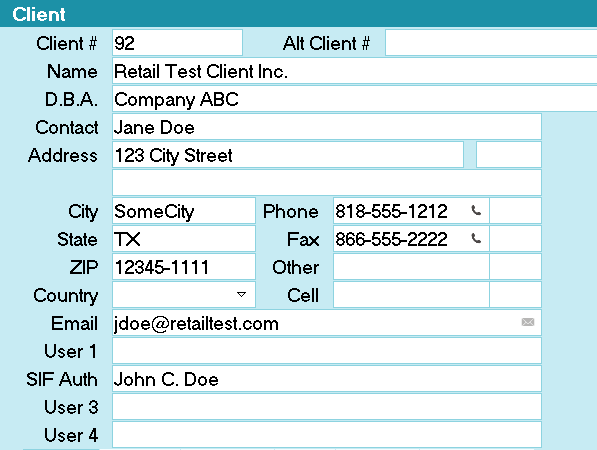
User 2 Field Aliased as SIF Auth
The User 2 to 4 fields on the Client screen are not tied or committed to any other system
functionality and are open for site specific user defined entry, unless you are reporting to the
Credit Bureau. Please refer to How to Setup Credit Bureau Reporting for details.
Owned By Client
Use this field when you have a Client which has multiple Client Numbers in your office and they
require any of:
- A single Invoice/Statement and Check for all their Client Numbers.
- A single report to reflect inventory reporting, performance metrics or other data that is
compiled from information being derived from multiple client account numbers sources.
- Access for "master" clients via the Web Host to view sub-clients.
Timezone
Collect! ships with embedded control files (scripts) that read the area code of phone numbers on
file for Clients and Debtors. This logic will constantly make the comparison between what is the
timezone known constant for your location and the Client (or Debtor) now on the screen. Your
calculated local time for the Client (or Debtor) currently on your screen is displayed in title
bar of the active window, on the extreme right side. The title bar is the color tinted stripe
which says "Client" (or "Debtor").
Type
If you will be sending this Client's Debtors to any of the Credit Bureaus, (Equifax, Trans Union
or Experian), it is required that you set the "Type" field in the upper right corner of the screen
by selecting one of the choices in the pick list.
These choices should NOT be modified as they represent all the VALID Creditor Classification
types that are defined by, and recognized by the Credit Bureaus for reporting in a standard Metro2
file format.
General Figure and Financial Fields Visible
As you complete the basic intake information on the left hand side of the main Client screen, you
will note that the Financial Fields on the right hand side of the screen appear grayed out/Read
Only. They are blank this way when you do not have any Debtors entered.
 It is recommended to run the batch process Recalculate Client Totals daily to keep your
figures up-to-date on-screen. It is also possible to recalculate an individual Client
ad hoc by clicking the Recalc button in the lower right corner.

Additional Setup Screens And Button Functions
In the lower right corner of the main Client Screen, you will see a bank of buttons. Their purpose
and general operation is described as follows:

OK
Click here when you have completed entering all your Client information to save any new or updated
information you have entered.
<< AND >>
The double arrow buttons will quick key you to the next Client forwards and backwards in your
Client list.

Recalc
Click this button to initiate an individual Client figure recalculation of all financial Fields
on the Client screen.
 It is recommended that you update your Client figures regularly but in particular, before
running reports or letters which will draw upon the data in the Client stored figure buckets.
This may be done as a batch process through the menu path \Daily Administration\
Daily Batch Processing\Calculate All Totals\Recalculate Client Totals. Examples of
processes that affect financials that require process Recalc are new business entry, mass
closeouts, write back reports used to adjust commissions.
 If you prefer keyboard navigation to mouse point/click, then observe which letter is underlined
when entering menus or needing to make a button choice. The letter in the item title that is
underlined is a quick key to enter the menu or screen. Quick key options are not case sensitive.
Example - to fast path into the Daily Administration menu from the Main Menu, keyboard "D" or "d".

Advanced Client Settings
The Client Settings screen contains the many software switches and preference settings that will
determine how Collect! manages this Client's data. Having these preferences auto-managed streamlines
your operations, optimizing both time efficiency and quality control.
 The Advanced screen must be completed before you begin entering new Debtors.
Setting entries or updates made to Clients do not retroactively update the Debtors already in the
system. Instead of trying to find a mass process or create a custom write back report after-the-fact,
better to make sure you have thoroughly entered all the requisite information for this Client from
the outset.

Client Settings Form
The Advanced Settings Screen looks as follows:

Advanced Client Settings
Before proceeding, it is necessary to have the following areas preset as pertains to the Client you
are about to enter so that the information is readily available to the system and usable in this setup
where applicable. All of these should be accomplished prior to entry of any Debtors for this Client.
- Company details
- Dunning letters
- Operators
- Transaction types
- Contact plans
 Many default Operator IDs, Letters and Contact Plans ship with Collect!. These are SAMPLE
only. Some may be usable for your purposes as is OR you can use the samples to assist in
creating your own customized items.
 It is your responsibility to ensure that any letters you send to Debtors or contact plan
automations you enact with the system are compliant to legislation and regulations in your
region with respect to format, content and actions launched. SAMPLE letters shipped with
Collect! or available on the Member Center are SAMPLE only and intended to be rudimentary
templates for your own modification(s).

Getting Started
If you are not already situated on a Client Advanced Settings screen, click the menu path of
\Browse\Clients, select an existing demo Client or create a New Client. Click the Advanced
button in the lower right corner of the main Client screen.
Be sure to have all your Client requirements available as covered in the Overview section of this topic.
Specifically,
- Details of your contingency terms for commission
- Requirements for charges, fees, and taxes
- Remittance Type and Frequency
- Credit bureau reporting requirements
The Client-specific defaults you select in the Client Settings screen are automatically applied as
applicable for every Debtor entered under that Client and all processes which access this Client's
data for output of key information.

Billing, Reporting And Fees
You will notice that the left-most and middle columns of the Client Settings window pertain to
details of your contractual agreement with your Client.

Remittance Options
Billing Period
This identifies which Remittance frequency on which your Client wishes to receive their Invoice/Statement
and Checks.It is NOT recommended to leave this field blank. Even if your current Client base is the
same cycle, there may be a future point in time where you have Clients with different remittance
cycles and have need for reporting purposes to have this field populated in all your Clients.
The default Remit Type in the system is Net. There is no tangible switch to
set this preference. It is presumed in the absence of either Combined or Gross being selected.
 Choose to remit Net if your Client has not stipulated otherwise. This means you deduct your
commission right away on the current Invoice/Statement instead of billing your client for
your fees and having to wait to be paid by them.
The calculation of the Net Remit is:
Check Sent to Client = Total Paid Agency - (Commissions + Fees due Agency + Taxes + Balances Past Due)
Net remittances use documents called "Statement" and "Check" in your Print menu to create their
output when invoked.
 There are times when you will have a Client who is going to want to change their billing
type. There are differences between the types in terms of how accounting calculations are
computed. Please see below on changing billing types.
Remit as Gross Funds
All funds paid to the Agency are returned to the Client at the end of the billing period and they
are billed for any commission/fees/charges/taxes due to the Agency as calculated on collections
both 'To Agency' and 'To Client' direct. The system will create a check for the gross collections
recovered to be remitted to the Client.
If you use this setting, you must have a GStatement and a GCheck
report in your Print Menu.
This switch becomes nullified if you have checked Remit as Combined Funds.
 There are times when you will have a Client who is going to want to change their billing
type. There are differences between the types in terms of how accounting calculations are
computed. Please see below on changing billing types.
Bill Client for Negative To Us
By default with a Gross Client, when reversals (negative payments) are posted, the system will not
recover the funds from the Client. When you receive the re-payment from the Debtor, it is expected
that you would check the Omit from Client Statement box on the Transaction to prevent double paying
your Client.
To get around that you can switch this ON for a Gross Client when you need your statements to reflect
amounts owed to you for transactions posted with a NEGATIVE To Us amount.
 WARNING: We recommend that this box is always on and should only be unchecked if you do not want
your clients to see reversals.
Remit as Combined Funds
Check this box if your Client requires the type of remittance which treats Paid Agency
funds as "Net" while treating the Paid Client directs as "Gross". This
means all Paid Agency transactions are handled first with the Total Paid Agency amount calculated.
From that amount, any commissions/fees/charges/taxes due the Agency will be subtracted and a check
will be written for the Net difference. The Client will be invoiced for any commissions/fees/
charges/taxes due to the Agency as a result of any Paid Client directs reported in the same billing
period.
If you use this setting, you must have a CStatement and a CCheck
report in your Print menu to use when generating statements for this Client.
 There are times when you will have a Client who is going to want to change their billing
type. There are differences between the types in terms of how accounting calculations are
computed. Please see below on changing billing types.
Bill Commission to Debtor
This switch is used if you add your commission to all Debtors' balances as a Collection Charge for
this Client.
 You are responsible for using this switch ONLY if it is permissible by law to apply
Collection Charges in your region.
Client is Tax Exempt
With this switch enabled, Collect! will not calculate tax on any commission amounts from monies
collected for this Client. This can be overridden at the Debtor or Transaction level.

Switching A Client To A Different Remittance Type
Switching from one billing type to another is as simple as checking or unchecking the applicable
boxes described above.
Gross and Combined invoice records stored receivables as a positive value and payables as a negative
values. Net stores receivables as a negative value and payables as a positive
value. For this reason, when you switch to or from Net, the system will invert the value TOTAL
field on the last invoice so the Receivables and Payables calculations for the next period will be
correct.

Report To Credit Bureaus
Report Accounts to Bureaus
This switch functions as an indicator that for this Client ONLY, you are permitted to report Debtors
to Credit Bureaus as having an open Collection Item with your office.
 It does NOT function as the trigger to activate accounts for credit reporting when new
accounts are entered for this Client, UNLESS you have the Auto-Activate CBR setting enabled
on the Credit Bureau Setup form.
These are the ways to activate an account for credit reporting:
- Manually enter the CBR tab on a Debtor screen and check the "Report to Credit Bureau" box.
- Via the batch process, "Prepare accounts for reporting to credit bureaus"
- Enabling the Auto-Activate CBR setting on the Credit Bureau Setup form, which will enable
credit reporting after accounts are entered manually, via import, or via the web portal.
 At all times, Cosigners that you wish to report MUST be manually activated in both the CBR
tab AND in the Cosigner window. The automated processes activates ONLY the primary Debtor
on the account.
For more information on setting up credit reporting, refer to Credit Bureau topics.
Send Client Detail to Bureaus
You must switch ON "Send Client detail to bureaus" if you are reporting as a Collection Agency.
This is for legislative compliance to include the identity of the original creditor with each Debtor
that your Agency reports to the Credit Bureau. In the Metro2 credit reporting
record layout, this is known as the F1 segment.
If you are the original Creditor and are reporting as first party, you would leave this switch
unchecked in the OFF position. You would additionally need to ensure you have checked the "Report
as credit grantor" in the menu path "Tools\Credit Reporting\Credit Bureau Setup".
Original Creditor is in User 1 or User 2
If your company is a Debt Purchaser AND you do not have the original Creditor name entered in the
Client Name field in Collect!, check this switch ON to meet your F1
segment compliance requirement. When you manually data enter OR electronically import new
Debtors, this switch relies on the original creditor name being stored in the User 1 or
User 2 fields respectively on the main Debtor screen.
Delay From and Delay Days
These fields are intertwined. If you have "Delay Report" enabled on the Credit Bureau Setup form,
then the system will use these settings.
The Delay From should always be entered first as the next field is dependent on this value. Select
the date to use as the starting point for calculating the delay.
The Delay Days is an override to the same field on the Credit Bureau Setup form. If blank, the global
value is used. If populated, this value is used.
 WARNING: When you enter or change the value, you will receive a prompt asking if you want to update
your existing accounts. If this is a new client, then you can select either option as
there are no accounts to update. If there are accounts that are setup to report, then
select the option that applies to you.
Min Value Of and Min Balance
These fields are intertwined. If you have "New Bus - Ignore Reporting Owing Less Than" enabled on
the Credit Bureau Setup form, then the system will use these settings.
The Min Value Of should always be entered first as the next field is dependent on this value. Select
the balance field to use for calculating the owing threshold. Balance and Total Principal are the
values at the time the account is activated for reporting, whether it be day 0 or day 100. Original
Principal is the value in the field of the same name on the Debtor's Assignment tab.
The Min Balance is an override to the "Less Than" field on the Credit Bureau Setup form. If blank,
the global value is used. If populated, this value is used.
 WARNING: When you enter or change the value, you will receive a prompt asking if you want to update
your existing accounts. If this is a new client, then you can select either option as
there are no accounts to update. If there are accounts that are setup to report, then
select the option that applies to you.

Success Rate
On the main Client setup screen, you will notice that there is a grayed out/read-only field labeled
"Success Rate" that contains a percentage figure. This is a system-generated liquidation rate and
you have control of the equation that calculates this figure. There are software switches in the
Advanced screen which offer you three ways to calculate this field. The chosen calculation and
results displayed do not impact liquidation percentages calculated elsewhere in reports. It is an
internal measure for your company to gauge performance that is meaningful to your Profitability
Analysis on a per Client basis.
The three options from which you can select your calculation preferences are:
Calculate Using All Accounts
This calculation uses data from all files assigned.
Equation: Gross Paid X 100 / ((All Listed + All Fees) - Adjustments)
- "All Listed" includes figures from closed accounts
- "All fees" includes Debtor and Client fees
- "Adjustments" includes all transaction series types 300's, 400's and 500's, if you are using the stock
Transaction Types that ship with Collect!
Use Closed Accounts Only
This calculation uses data from MODE CLOSED accounts ONLY. An example of where this calculation
might be meaningful is if this Client is a Pre-collect/Cure type portfolio where it isn't until an
account is closed that it is considered liquidated, this would be the internal metric to use.
Equation: (All Paid (closed accounts) / All Listed (closed accounts)) X 100
Custom Success Rate
If you need your own custom calculation for liquidation rate, click the radio button beside "Custom"
and create a Control File on the Client Form that performs the calculation / write back to the
Success Rate field for this Client. When the custom option is set, Collect! will not update the
Success Rate field at all.
 You may also use a Report that starts on Client to update the Success Rate to Clients in batch.

Fixed Fees
These switches govern whether there are any special fee handling requirements for this Client.
Use this switch if you have contractual agreement with your Client to impose a charge on them for
each account assigned OR if you are charging the Debtors for a specific fee.
 You are responsible for ensuring that any fees you charge a Debtor are permitted by law
in your region.
No Fixed Fees
This is the default setting that should be selected if there are no special fee handling
requirements for this Client.
Charge Fee to Client
When you enter a new Debtor, the system will automatically post a Transaction Type 397
for the amount determined here that will appear on statements as a 'due Agency' charge
billed to your Client.
You will not see this fee in the Debtor balance breakdown.
You can see this charge if you click the Principal field on the main Debtor screen and enter the
"Financial Details\Fee" Tab.
Charge Fee to Debtor
When you enter a new Debtor, the system will automatically post a Transaction Type 398 for the amount
determined here that will appear in the Debtor balance breakdown. You will see it in the "Fee" field
on the main Debtor screen. This amount does become included in the Debtor's balance owing.

Commission And Tax
Commission and tax tabs in the lower portion of the Client Settings screen are used in calculating
the contingency amounts due you when your run statements for this Client.

Commission
If your contingency agreement with your Client has hierarchical conditions for what rates are to be
applied on what segment of a balance is being paid (i.e. Principal versus Interest verses Fees etc.),
you may enter custom Client rate plans with up to four levels of rates on a per Client basis in
this tab.
These settings are embedded into each new Debtor you enter into the system for the Client. If there
are reasons to do so, the default settings you affix to this Client can be overridden at the Debtor
or Transaction level on a per posting basis.
Rate
Decision which of the three possible methods for attaching your contingency terms with your Client
is the most applicable:
Individual, custom rate structure
To assign a flat commission rate for all accounts, enter the commission percentage amount into the
field under the label Rate. You do not have to enter anything below this amount
if you have only one rate that will be charged.
To differentiate between where the money is being applied with respect to the Debtors owing breakdown
(i.e. principal, interest, fees etc.), enter the applicable rate and check the box for the financial
type that rate is to apply against. For example:
- Rate: 25% on Rate 1: Principal
- Rate: 100% on Rate 2: Interest
- Rate: 0% on Rate 3: Fees
Company-wide flat commission rate
If your company charges all Clients the same flat rate, you can fast path your Client and new Debtor
entry by including this flat contingency rate in your Company Details. If entered there, you will
see the Rate field populate automatically for every Client and Debtor entered into the system,
reducing the number of keystrokes required to set them up.
Rate Plan
If you wish to define your commission structures in rate plans that allow considerable fine tuning
for contingencies on the basis of assigned balance, remaining balance, age of account, paid to date
etc., you can set up such terms in the menu path "System\Financial Settings\Commission Rate Plan"
then select the code for that plan using the pick list on this field.
 It is recommended to use a Rate Plan as defined by setup outside of the Client screen when
there are more than two rates to be applied.
 If you are using method #1 or #3 above, it is important to NOT input both a rate plan and
a manual commission structure in the Fee tab on the same Client. Leave the Rate plan field
blank if you are not using a plan.

Tax
The rules for setting up tax percentages follow the same logic as discussed above for Commission.
You have three methods for how you want to affix a tax schedule:
- company-wide in Company Details
- on each Client separately
- at the Debtor payment level on a per transaction basis
In some regions, taxes may not be applicable and should be left blank. In other regions, you may
have different tax percentage rates based on where the Debtor lives.
 It is each Agency's responsibility to ensure that they are compliantly charging and
remitting taxes to governing bodies in their region as per the laws of their areas in which
they do business.

Currency And Statement Currency
These Fields are only visible if you selected to turn ON the "Multi-Currency" switch in the "System\
Preferences\Company Details"screen. If that switch is turned OFF, neither of these two fields are
visible in the Advanced Client setup screen.
At present, both serve informational display purposes only. The default is "System Default" for both.
What the Multi-Currency switch in Company Details does presently do if you have it turned ON, is it
will auto-print North American "$" signs before monetary Fields printed in reports and letters. The
dollar sign must be manually embedded if the "Multi-Currency" switch in Company Details is turned OFF.
 For any Client, Debtor, or Transaction that is set to system default, Collect! will use the
regional settings of the server to display the currency symbols.

Sales ID
If your Company tracks revenue by Inside Sales Rep, this field is where you will enter the
salesperson's Operator ID for tracking purposes. House Clients can be identified by using the
owner's ID or HSE as the salesperson.
This field may remain blank (or be used for alternate tracking meaningful to your company) if you
do not utilize in-house sales staff.

Operator ID
If all new accounts are initially assigned to any of the following you may wish to enter that ID
here to save steps when new accounts are entered:
- one Collector
- one Collection Team defined by a Team Operator ID
- one New Business Feeder/Pool desk
If there is an Operator ID on the Client, all new listings will be assigned to that Operator when
you enter them manually or via import.
 Operator ID settings embedded by the Client when new accounts are listed may be overridden
by BOTH selection of a different ID at time of manual or import entry.
It is not mandatory to input anything into this field if you utilize Account Toss batch processing
to distribute your new accounts to multiple collectors.

Contact Plan For New Accounts
It is not mandatory that a Contact Plan be run on new assignments. However, if you wish to batch
process a series of perfunctory initialization steps, it is helpful to create a NEW Contact Plan
that does the minimum number of housekeeping steps. Example:
- Set Mode to Active
- Set Status to NEW
- Queues up your first dunning letter
- Inserts a Review or Phone contact so that the account will appear in a collector's WIP list.
 If you enter accounts either manually or by electronic import and do not insert a Review or
Phone contact on the account, then you are creating Orphaned Accounts which
are on desks but NEVER appear in any body's WIP list. ALL accounts expected to appear in a
WIP list MUST have an In Progress contact event in one of the default types being Review,
Phone, Promise or Other.
 It is your responsibility to ensure that any letters you send to Debtors or Contact Plans
you enact with the system are compliant to legislation and regulations in your region with
respect to format, content and actions launched. SAMPLE letters shipped with Collect! or
available on the Member Center are SAMPLE only and intended to be modified by each site
before usage.

Debtor Sort Order
This switch determines how accounts with payments will be presented on Client Statements. Some
Creditors have a preference which they require their agencies adhere to. If your Client wants
alphabetic sorting on their statements, click the radio button beside "Debtor Name". If your
Client wants their statements to be numerically sorted by their own account number, click the radio
button beside "Debtor Account".

Client Tabs - Description, Purpose And Use
All multi-part screens in Collect! with a Tab section will evidence a visual signal indicating
whether there is, or is not, any data contained inside that tab. A Grey tab contains no data. A
Yellow tab means there is data inside. A convenient way to train staff to watch for this is to
suggest if the Tab 'light' is ON, then something is in there that can be viewed.
Debtors Tab
The left-most tab is labeled 'Debtors'. This is where you can most directly access all Debtors
for the Client that are not Archived. There are four key ways that this tab is time-saving for
staff in areas of Clerical/Accounting, Administration, Client Services, Sales and
Operational/Project Management:
- It is possible to manually data enter new business for the Client from the Debtor Tab. The
Fields pertaining to Client Name and Client Number in your system will be auto-filled, saving
your entry operator the redundant time of repeatedly entering the Client detail with each piece
of new business.
- It is the fastest way to create ad hoc batch letters for Debtors belonging ONLY to a certain
Client or run reports that will query the Debtor File to gather data for a specific Client.
- It is the fastest way to run Contact Plans and Batch Processes (such as Collector desk reshuffles,
etc.) that pertain only to Debtors under a specific Client number.
- It is also the most convenient way for your Sales/Client Services team to access Debtor accounts
when Clients call in to request or provide info about one of their accounts.
Invoices Tab
This tab contains the invoice/statement history of the Client. The invoice/statement screens display
all the line items from each remittance as well as the 30/60/90 Accounts Receivable balance forward(s)
which the Client may have with your office. From this tab, you are able to reprint a specific statement
for a Client, if needed.
You can adjust your List View options to add the 30/60/90 Fields so that from a Browse List of
Invoice/Statements, you are able to see at a glance if your Client owes you any money and the age
of that Receivable. To do this, click into the tab so that you have a scrollable list showing you
have entered the sub-menu Invoices tab. Then Right click in the list column header line to obtain
the pop up that prompts you to do any of Edit/Move/Insert/Remove/Restore Default.
The option to enable invoice #s to appear on your remittances on a per Client basis is controlled
from the invoice screens contained in this tab. This latter is a 3-step process discussed in detail
under How To Setup Custom Invoice Numbering.
Payments Tab
This is your historical listing of all Client payments, Client reversals/charges and where you can
post new Client transactions. Please refer to the Help topic How To Enter A Client Payment to
learn how to post payments.
Notes Tab
This tab is a free-form note area where you can copy/paste email correspondence to/from the Client
as well as keep a comprehensive log of any information pertaining to individual Clients. Your Sales
Personnel and Client Services Reps can store their contact notes from Client conversations in this
tab.
Contacts Tab
This functions like the Contact tab on the Debtor screen, and pertains to Client issues. In this
tab you can schedule Client mailings/emailings, reviews to CSRs who have follow-up calls they want
to make etc. Review and Phone events would create a working WIP list and appear for the Operator
for whom the the contact event was assigned to. In this way, your staff in any of
Admin/Accounting/Client Services/Sales can use Collect! to schedule Client specific tasks within
the software without having to rely on external calendars to prompt them.
This tab functions for Clients like the Contact tab does on Debtor accounts. If your sales or CSR
staff want to create a WIP list for themselves regarding Clients, they can enter Review or Phone
Contacts on the Clients for whom they have reason to follow up.
This type of queuing can also be used for Client balance due follow-up calls.
Letter/Report contacts can also be scheduled in this tab. Example, if a Client requires a
Client Status Report every month, you can set up a repeating contact to automatically queue
up this report every month and have it created through Batch Processing, Schedule Batch Letters
for Clients whenever you are ready to print them after each month end.
Attachments Tab
This tab functions the same as it does on Debtor accounts. You may use the free-form entry Fields
in whatever manner you choose and the tab provides a place to affix Client correspondence or
documents received that need to be accessible on the Client's file history with your company.
You can customize the contents of this tab to suit your needs. Unlimited Attachment entries
categorized by user defined Class, with or without the sub-category Type can be created.
If you wish to make a global change to an Attachment field label, meaning a
designated field will be renamed for all Attachment entries, then mouse into the field of interest
and Right click. You will get a pop up asking you to select what you want to do. Click on
"Properties" to gain entry.
A more advanced utilization of this feature is for the field name labels to be contingent on a
specific Class, meaning the same field can be used for different purposes depending on a logic
condition such as Class is "Contract" or Class is "Correspondence". This is accomplished by
creating a script/control file which defines what field Alias names are displayed as a function
of what Class of Attachment is selected.
Depending on what you need, you may find a script/control file that is very close to your need on
the Member Center which you can download and install. Alternatively, if you would like Tech Support
to create a custom script/control file for you, contact us for pricing.
 Keep your Alias label names short enough to fit in the physical screen space allotted for
that field to avoid cut off portions of word(s) and congested visuals presented to your
staff. Cluttered screens are hard on the eyes and make it difficult to locate the information
at-a-glance.
To make additions and customizations to the Class and/or Type pick-lists, refer to "How To Use Pick
Lists" for more detailed instructions.
 If you put a url in the File field, the system will call your web browser and take you
directly to the website when you click on the 'File Folder' icon (that you'd normally use
to Open an attached file) at the end of the File Name line.
Associates Tab
This section has the same layout as the Debtor's Cosigners tab. This tab is intended to store addition
contact people for a Client. You can also setup Associates to be included in Batch Letters or Emails.
Phones, Emails, Addresses Tabs
These sections behave the same as the Debtor. When you enter Phone numbers, Addresses, or Emails on
the Client form, applicable records are also created or updated here.
You can also manually create records here for situations where users have multiple contact information
such as Billing Address versus Shipping Address.


Debtor Setup
The Debtor form is used to store all account information. All account related information is stored
in areas accessible from the Debtor screen.
Entering new debtors and setting them up requires a good understanding of each information field in
the Debtor form. This is particularly important when planning your letters and reports because the
bulk of reported information is pulled directly from this form.
Click Here to View this Form.
Click Here to Close this Form.
This document discusses entering a new Debtor in your Collect! database. It is assumed that you have
signed into Collect! as a user with access rights to enter information into the fields on the Debtor
form.
Opening The Debtor Form
There are 2 ways to access the Debtor form to create a new account:
- Browse Debtors
- From the Client Screen
We are going to use the Client's Debtor list in this walk through.
 Debtors must be attached to a Client so that all the month end financials will calculate
correctly when you are figuring your commission and what you owe your clients.
- Select Browse from the top menu bar and then select Clients from the drop-down choices. The
list of all clients will be displayed.
- Choose the Client whose new Debtor you are about to enter.
- When the correct Client form is displayed, you can select the ADVANCED button on the Client
form, if necessary, to enter, modify or simply verify the settings, such as Commission Rate,
Tax Rate, Operator assigned to new accounts, and other settings you may need. When you are
finished with the Client Settings form, select the OK button to close it and return to the
Client form.
- Click into the Debtor List, then click the NEW button. A new Debtor form will be displayed.
 An important question will help you to enter your debtor information correctly right from the
start. Will you ever need to report the information to a credit bureau? If so, you will need
to pay special attention to the fields on the Debtor form. Many are related to information
that will be sent to the credit bureaus when you produce a CBR file. You will notice that
some fields have a FOR CBR note attached to them when you view the pop up help for the field.
These are fields where information must be entered in a particular way if you ever intend to
report this debtor to credit bureaus. These fields have additional information in the field
help that outlines the proper formats required.

Debtor Form
Print, PDF, or keep this section handy as you will need to populate the Debtor fields correctly.

Default Fields Populated
Some fields on the Debtor form are filled in automatically by Collect! when you create a new account
for an existing Client.
- Locate the File field and notice the number that Collect! has assigned to this account.
 WARNING: The File Number is an auto-generated unique identifier for this account and should not
be confused with the Client's Account number in the Acct field.
- The Client field and next to it, the Client's number, will have the client that you created
the account from.
 WARNING: The Client Name or Number will need to be populated manually if you added the account
from the Browse Debtor list.
- The Mode field is filled with 'Active'. This is the correct Mode for all accounts that you are
actively working. It ensures correct calculations of financials an enables your operators to
work the accounts from their WIP Lists.
- The Listed field will have today's date.
- The Rate field will show the Commission Rate based on the Client's settings.
- The Operator and Sales fields will show the account assignment.
- The Run Plan field will have the Contact Plan scheduled to run, if one is set on the
Client Settings. Do NOT empty this field, or the Plan will not run.
- If you have set any fields to populate with a Control File, they will be set now.

Popup Help
In addition to the Debtor form information above, you can also enable the Popup while you are learning
how to enter a new Debtor. Many fields require special formatting if you intend to report to credit
bureaus and popup help alerts you to them.
Select Help from the top menu bar and then select 'Enable popup help' from the drop-down choices.
If it is already enabled, you do not have to do anything to begin to use it. Simply hold your mouse
over the field of your choice and help will display.

Entering Debtor Identity And Demographic Information
Use the information from the Debtor Form section above as you fill the fields on the Debtor form,
or hold your mouse over each field to read the details for that particular field, if you enabled
the popup Help.
When looking at the Debtor form, there is a pseudo division line between the identity and demographic
information on the left and the account information on the right, starting with the Dates.
- Enter the Debtor's name. It must be in "Last Name, First Middle" format.
- Select a Legal Entity if you want to track commercial accounts or report commercial accounts
to the credit bureaus.
- Pay special attention to all references to credit bureau (FOR CBR) in the Debtor help for
addresses. If you ever intend to report this Debtor to credit bureaus, enter the address
information in the correct format.
- After filling in the Zip, the system will automatically check the Address OK box. This needs
to be checked for letters to go out in Batch Printing.
- Fill in all other identity and demographic fields as you require.
 If you have account matching enabled, you may receive a prompt on the applicable fields
like name or SSN asking if you want to add this account to the Group. If you select YES,
Collect! can copy the identity and demographic information from the group to the newly
entered account.
 The Timezone field should populate automatically, if you are using a Control File that sets
it when the Phone or Zip fields are updated.

Entering Account Financials And Assignment Information
- Enter the Client's Account Number/Identifier into the Acct field.
 Depending on how you organize your accounts, if you receive the same account number multiple
times, but for different invoices, you can store the account number here and the invoice
number in another field, or vice versa.
- Forward and Legal are used for tracking, if you are outsourcing collections or legal activity.
- Type is optional and used for your own tracking purposes.
- Status is usually set in the initial Contact Plan; otherwise, enter one.
- If not already set, select an Operator.
- Click either the PRINCIPAL field or ADVANCED button.
- On the Assignment tab, enter the applicable dates from your client.
 WARNING: For USA: Your Client must supply you with all applicable dates that match their selected
Itemization Date.
 For Credit Bureau Reporting, you must enter a Delinquency Date.
- Enter the Original Principal.
- If supplied, entered any other Original financials.
- If this account is contracted for Interest, go to the Interest tab.
- Set the Interest Type
- Set the Annual Interst Rate
- Set the Calculate Interest From Date
 For more information, please refer to the How To section of the Help for setting up Simple,
Compound, or Variable Interest.
- Click on the Commission Tab at the top to validate the information.
- Click on the Tax Tab at the top to validate the information.
- Click on the Fees Tab at the top to validate the information.
- Click OK to return to the main Debtor screen.

Navigate The Tabs
- Enter any Notes for the account, including any Client Notes.
- Contacts, like Phone call follow ups, are usually set by the initial Contact Plan; otherwise,
create a Phone contact.
 If you are not using a New Business workflow (Contact or Action Plan), then you should also
print or schedule the initial Letter. You should also consider creating a New Business
Contact Plan to automate several of the steps of creating a new account.
- If applicable attach any documents supplied by the Client. Attachments can also be used to
track other information like Assets or Health Insurance.
- Add any Related Parties, like Cosigner (Co-Debtors), Employers, or general contact people.
- The applicable transactions will have already been created. If there are more, like fees,
add them now.
- If you take Checks by Phone, and the Client supplied banking information, enter it on the Detail
tab until you get permission from the Debtor to use it.
- If you report this client's accounts to the Credit Bureau, and you have not enabled the
Automatic Activation feature, go to the CBR tab and check the Report to Credit Bureau box.
- If this account was added to a group, go to the Group tab, click the Member Setup button and
review the settings.

Finalizing The Account
When you are satisfied that you have entered all the information that you want to enter, press OK
or F8 to save the record. At this time, any previously scheduled contact plan (the code showing up
in the Action field) will automatically run on the account. You will be returned to the Client form.
 If this is a new Client or Contact Plan, go back in to the account to ensure that the
Contact Plan ran as expected.
If needed, add more accounts, repeating the steps above.


Debtor Status Codes
What are Status Codes? Is the debtor bankrupt (BNK), have they skipped (SKP), or are they active (ACT)?
Use a basic three character code to tell you the current state of each account. It is important to
put some thought into this aspect so that you can define status codes which have meaning for you.
With status codes, you can select clearly defined groups of debtors and perform specific actions on
their accounts. This information may be accessed to produce debtor information reports based on
assigned status.
Click Here to View this Form.
Click Here to Close this Form.
Debtor Status codes are standard status values
that describe the state of the account, such as Active,
Paid in Full, Bankrupt, Skip Trace and others.
These codes can be used in reports and batch processing
to separate accounts into categories. Set an account's
Debtor Status either manually, or automatically using
contact plans.
To add, edit, or remove Status Codes, navigate to the
Top Menu -> System -> Contact Management Settings -> Status Codes

Debtor Status Codes
Code
This is a short code for the status. Limit to 3 or 4 characters.
 Be aware that using the Status CLO (Closed) does
not remove the account from the Client record. It
only tags the account as Closed in your system.

Description
This is a brief description of the status condition.

WIP Priority
When sorting the Work in Progress list by Status via the
WIP Sort field on the WIP Options form, Collect!
will look at this field first and sort it descending, then
Ascending by Status Code.

Run Plan
Fill this field in with a Contact Plan code to run the
Contact Plan on the Debtor or Client when this Status is
selected.

Listing Reversal
Switch this ON to exclude any debtors with this status from
financial calculations on the client form. This would also
require the 'Exclude reversals from Recalc' option to be
enabled in the Client Settings of each client.
Switching this option on will also display reversals separately,
on the Day Sheet record. Listing reversals are meant to be
accounts that were placed in error.

OK
Select this button to save any
changes you have made and return you to
the previous form.
<<
Selecting this button will take you to the
previous record in the database.
>>
Selecting this button will take you to the
next record in the database.

Cancel
Selecting this button will ignore any changes
you have made and return you to the previous
form.

Help
Press this button for help on the Debtor Status
form and links to related topics.

Delete
This button is visible only on the list of all
Debtor Status Codes. Select this to delete
the highlighted item in the list.

Edit
This button is visible only on the list of all
Debtor Status Codes. Select this to open
and modify the highlighted item in the list.

New
This button is visible only on the list of all
Debtor Status Codes. Select this to open
a new blank Debtor Status form.


Reports And Letters
You may build your own reports and letters or modify the existing reports in the system. This
template driven system can print virtually any information you see in the program.
Create reports and letters to suit your business needs. Edit the existing Reports and Letters by
selecting Print from the top menu bar. Then select Customize Printing, Edit Report Templates and
select the report you wish to modify.
Particular emphasis on your initial collection letters that need to be ready to be inserted on new
accounts. The SAMPLE letters which ship with Collect! are NOT intended to be used as is; they are
exemplars of how to set letters up.
Click Here to View this Form.
Click Here to Close this Form.
This topic covers the basic steps necessary to begin to create your own reports or letters in
Collect!.
Requirements
- Setup Company Details
- Review help on Report Definition and Report Body
- Examine sample reports and letters for guidelines
- Have a definite plan for your report layout and the data you want to pull from database
fields
- Study help topics related to your specific needs
- Know what form your report or letter will "start on"

Creating Reports And Letters In Collect!
To get the most out of Collect!'s report writer, it is necessary to be aware of the kinds of
information you can include in your design. You will use several of these elements to create
effective, useful reports or letters. Basic elements are easy to use to create standard reports or
letters. Review the samples included in the pre-defined reports.
 You may find that one of Collect!'s pre-designed reports or letters provides the information
that you need. If so, you can use this report or change it slightly to suit your requirements.
Creating reports and letters begins with an understanding of the basic codes used in the report
writer and knowledge of the steps taken to pull information from your database records.
Once you are familiar with the basics, you can extend your use of the report writer to build
sophisticated reports, designed in your own manner and capable of displaying your data as you need
it, including calculations, totals, and information from various records and forms. The possibilities
are quite limitless! For this reason, it is necessary to learn the basics and proceed from there.

Start With Pre-Defined Reports Or Letters
Return to the pre-defined reports and samples provided with Collect! whenever you start to design
a new report or letter.
Pull down the Print menu and choose Customize Printing, Edit Report Templates. This will display
the Report Definition list with all the reports and letters that are within Collect.
 Take time to examine several of these reports and letters to get an idea of the way reports
are designed.
Use the up and down arrows on your keyboard to navigate through this list.

Copying A Report Or Letter
When you find a pre-defined report or letter that you would like to use, make a copy of this report.
To do this, make sure the correct report is highlighted.
- Pull down the Edit menu and choose Copy, or use the Ctrl-C key combination.
- Next, Pull down the Edit menu and choose Paste, or use Ctrl-V, to paste an identical copy of
the report into the Report Definition list.
- Click on one of these copies to open the Report Definition form for this report.
- Click in the Name field and rename your copy of this report.
Now you can experiment freely with changes. If you are not satisfied with the results, the original report can be used to
restore the design.

Report Definition Form

Report Options Form

Creating A New Report Or Letter
- Pull down the Print menu and choose Customize Printing, Edit Report Templates. This will
display the Report Definition list with all the reports and letters that are within
Collect.
- Press F3 or click the NEW button at the bottom of the Report Definition list screen to create
a new report.
- The Report Definition form will now display a form for you to use to create your report or
letter. Enter a name that you would like to call the report or letter in the Name field.
- Click in the "Start On" field or hit your F2 key and you will be able to select the form that
the report or letter will start on. Press F1 for more information. Especially, note the help
about Start On as this is most important.
- Click into the Report Body and the Report Body editor will open with a blank form for you to
start entering text and codes for your report or letter. Press F1 for assistance on using the
Report Body editor.
- Press F2 to display the Choose Report Item form. You can use this to find the codes you need
for database fields and printer commands. When the Choose Report Item form is displayed, press
F1 for more information.
- Refer to help and How To topics for guidance and code snippets. Also, find sample reports and
letters in the Report Definition list. You can copy code from these samples into your report.
As well, there is an extensive list of Report Samples that you can view and choose from.
 Please refer to the Help topic How To Use The Report Writer Commands for an extensive list of
Report Writer commands.

Collect! Report Samples
For many years, Comtech Systems has designed reports in answer to the needs of its clients. This has
resulted in a large library of reports that are made available to you with your system as shipped
and available on the Member Center for FREE download if you have a Support Membership.
If you do not have a current Support Membership, contact Comtech at 250-391-0466 and press 3 for
Administration.

Custom Reports From Collect!
Collect! creates custom reports on request. You can send us your requirements and we will quote and
contract to design a special report for you.

Summary
Creating reports and letters in Collect! can be challenging when the results you desire are complex.
The results are very powerful, flexible and almost limitless. Start with the basics and build on what
you are sure of.
The support team at Comtech Systems is always willing to email you "a snippet" to paste into your
reports!


Contact Plans
The Contact Plan is Collect!'s expression for "collection strategy." A contact plan is a series of
events which may take place immediately or at predetermined times in the future, and are to be
processed by designated operators. Contact plans eliminate a great deal of manual work and optimize
your time.You can set up automatic and semi-automatic sequences for processing debtors, printing
letters, posting transactions, closing accounts and more. Edit the contact plans already in Collect!
or create new plans.
Before you use complex scenarios, you need a good understanding of what a Contact Event is. So we
recommend that you work the debtors in a fairly manual way until you can define the actual flow for
your contact plan to take upon activation. If you seem to be repeating steps to an account, automate
the sequence by creating a contact plan.
Click Here to View this Form.
Click Here to Close this Form.
This document will help you begin to use Contact Plans to control and manage your Contacts.
What Is A Contact Plan?
Manually scheduling contacts is great, but there are many times when you would have to enter the
same contact over and over again because it is a repeating schedule. Other times you may need to
enter several contacts to work the account properly. For instance, perhaps a letter, a phone call
and a review are necessary. When you find that you are repeatedly entering the same contact, or
scheduling multiple contacts to perform the work you need done, let Collect! do your work for you
with a Contact Plan.
A Contact Plan is made up of single contacts or events. When many contacts are used together as a
single entity, it is called a Contact Plan. Each component in a Contact Plan is called an Event.
- An Event can be a letter, a review, a change in status, posting a transaction and many other
types of events.
- An Event may be scheduled to run immediately or at a predetermined date and time in the
future.
- An Event:
- may be assigned to an operator you specify
- may have a specific priority
- may be scheduled to run only if a certain condition is met
The Demonstration database in Collect! contains many samples of contact plans. We will use some of
these in the exercises in this document.
 It is assumed that you meet the following requirements. They are necessary in order to benefit
fully from the information in this topic.

Requirements
- Review help on Contacts, Events, and Schedule Next Contact
- Review help on Reports and Letters
- Plan a Collection Strategy
- Setup Clients. Debtors and Operators

Viewing Contact Plans
Contact plans are found by pulling down the System menu and choosing Contact Management Settings. A
sub-menu offers you the selections -- View Contact Plans, Import Contact Plan and Export Contact
Plan.
When you choose View Contact Plans, a list of all Contact Plans in Collect! will be displayed.
Buttons on the Contact Plan list allow you to create a New plan, Edit an existing one from the list,
or Delete a plan from the list.
Examine several of the existing plans to get a feel for how they work.

Import/Export Contact Plan
You can also import Contact Plans from other databases or from technical support documentation that
Comtech Systems sends you.
You can export Contact Plans in a similar fashion. This is often the best way to send Comtech Systems
details of a problem you are having with the functioning of your Contact Plan.
Please refer to the Help topics: How To Import Contact Plans & How To Export Contact Plans.

Contact Plan Events
Contact Plans are composed of events, as described above. Select an existing plan and click on one
of the events listed. The Event form will open and you can examine the settings that are possible
for each Event in a Contact Plan. Press F1 from the Event form for an explanation of the settings
on the Event form. You can also access information on Contact Plans by pressing F1 from the Contact
Plan form.
 When you are viewing a Contact Plan form, you can press the record navigation buttons:
[ << ] BACK , [ >> ] FORWARD to view other plans in Collect!'s list of Contact Plans. Also,
when you are viewing the Events form for a particular plan, you can use the record navigation
buttons to scroll through all the Events in the Contact Plan you are viewing.

Design Or Modify A Contact Plan
You can print all the details of a particular Contact Plan and all of its Events by pulling down the
Print menu. Choose Reports and Letters, then choose Quick Print. Choose the destination for your
output, for instance, screen or printer. Choose Print. When prompted to include details, choose "Yes".
This will print a Contact Plan report for the plan you are viewing, including all of the settings
for each of its Events. This can be used to examine a plan in detail and figure out the settings you
would like for your own plan. If you print this to the printer, you can compare the settings for a
few plans and jot down changes. All of the settings are labeled in the report so you will know exactly
what you are setting as you draft your own strategy into a Contact Plan.
You can create a new Contact Plan and apply your settings to it, adding events as needed to complete
the plan.

Contact Plan Form

Event Form

Select A Contact Plan For A Debtor
 For these exercises, please sign into Collect! as operator OWN. When you choose a Debtor
for one of the instructions, check the upper right hand corner of the Debtor form. The Operator
field should read OWN. This way, your results should match the results that are described
in the examples.
Pull down the Browse menu and choose Active Debtors. Then, open a Debtor form by pressing F5. Click
the Action button or press F2 when you are in the Run Plan field. The list of Contact plans pops up.
Choose one that sends a letter or schedules a phone call and press the Enter key. Collect! runs the
Contact Plan behind the scenes, scheduling Contacts and performing other tasks set in the Contact
Plan and its Events.
Select the Contacts tab. The list of this Debtor's contacts is displayed. Notice that the new
contacts have been added to this list.

Work In Progress
Go to the Main Menu and choose Work In Progress. The Contacts scheduled in the Contact Plan to occur
immediately will now appear in your To Do list or in the list of the appropriate operator. Events
scheduled in the future, such as reviews, will appear in Work In Progress on future dates as setup
in the Contact Plan and displayed in the Debtor's contacts after the Contact Plan is run.

Batch Processing
You can also run Contact plans on batches of accounts. You can batch accounts by any criteria you
choose. Use the Tools Menu Batch Processing command for more information.

Contact Plan Caching
Collect! has the ability to store Contact Plans in RAM for faster processing. If this feature is
enabled, then the first time a Contact Plan is run, all the Plans will be cached in RAM.
 Cached Contact Plans are not updated if they are modified. When Plans are modified, users
will have to sign out and back in.
To enable Contact Plan caching:
- Navigate to the System menu, select Contact Management Settings, then click Work In Progress
Settings.
- Check mark Cache contact plans to switch it ON.
- Click Save Operator or Save System, depending on who this should apply to.

How Collect! Executes Contact Plans Internally
When you choose an action for a Client or Debtor, Collect! goes through the following process.
Read the Contact Plan
Collect! reads the Contact plan from the local Contact plan cache or from disk.
If the Prompt Before Deleting Switch is Set
- Make a list of pending Contacts.
- Display the list.
- Ask the User if they should be deleted.
- If the User cancels, then cancel the whole plan.
Otherwise, continue.
 Don't turn the "Prompt Before Deleting" switch on if you plan to run a Contact plan in a
batch.
If the Delete All Pending Contacts Switch is Set on the Plan OR If the Delete Same Type Contact
Switch is Set on the Event
Collect! scans through all pending Contacts for the Debtor.
Delete All Pending Contacts will process all Contacts.
If Delete All is not checked, but one of the events has the "Delete Same Type Contact" switch set,
then only Contacts of that type are deleted. If "Same Description Only" is checked, then only Contacts
of that type and description will be deleted.
 Metro Credit Report Contacts are not deleted.
 Some contacts, like repeating Promises or active contacts from the WIP, are simply marked
as completed.
If the Prompt For Start Date Switch is Set
If the "Prompt For Start Date" switch is set in the Contact plan, then Collect! prompts for the
reference date for the Contact plan; otherwise, today's date it used.
 If you run a batch process with this switch ON, Collect! will prompt you only once at the
start of the batch. The Start Date you select will be applied to the whole batch.
Scanning Through Each Event
Collect! scans though each event in the Contact plan and prepares the Contact details.
Determing the Contact Date
Now Collect! performs the following tasks:
- If the "Delay Days" switch in the Event form is set, take the reference date and add the
number of delay days.
- If the "Day of Month" switch is set in the Event form, then check today's date.
If today's Day of Month is less than the specified Day, then schedule the Contact for this month
on that day. If we are already past that day of the month, schedule it for next month on that day.
If you did not enter a value for Day, Collect! will default to the 1st of the month.
- If the "Next Month Same Day" is set in the Event form, then schedule the Contact for next
month, the current day of month. For example, if today is the 20th of October, the Contact
will be scheduled for the 20th of November.
- After the date has been set, check the WIP Options to determine whether the "Schedule Contacts
On Weekends" switch is turned on. If Contacts are not to be scheduled for weekends, increment
the date if it falls on a holiday.
Determine the Contact Time
- If no time is specified in the Contact form, make the scheduled Contact time 0.
- If the "Delay Minutes" switch is set in the Event form, add the delay time to the current time
of day. This is useful for setting a phone call for a few minutes from now.
- If the "Timeless" switch is set in the Event form, then set the scheduled time to that time of
day. For example, if the Time entered is 18:00, the Contact will be scheduled for 6 PM.
Fill in the Other Contact Details
Collect! fills in other Contact details, such as the priority, Operator, description and so on.
If the Prompt To Confirm Details is Set
If "Prompt To Confirm Details" is set in the Event form, then display the Contact as scheduled, and
allow the User to change the details.
Processing the Contacts:
Collect! will group the contacts into the follow groups and run them in the order that they appear
in the Contact Plan Event list.
1. Plans, Letters, and Certain Transactions
Any Contact plan events scheduled in the plan for zero delay are run immediately, in the order listed
in the first Contact plan. Events within the called plan are also processed in the same order, as
outlined here. Notice that any changes made in the sub-plan will take effect before other events are
processed in the main plan.
Letters that are marked as "Print Now" will print.
Transactions that have "Prompt To Confirm Details" will prompt the user to confirm the transactions
details, then it will post to the database immediately.
2. Activate
Collect! executes Activate events to update the Debtor's mode. This is done near the beginning to
make sure that the account is active for recalc purposes.
3. Notes
Notes scheduled for today are written to the Debtor notes. They will contain the previous account
status before the plan was run (unless it was changed in called plan), but the new Operator if one
was assigned, and any changes made by the Contact plan.
4. Status, Sales, Edits, Commission, and Rate Plans
Status changes, sales assignments, edits, commissions, and rate plans that are scheduled for today
will execute next.
5. Promises
Promises are created next.
6. Operator Assignments
Operator assignments that are scheduled for today are made.
7. Transactions
Transactions that don't have "Prompt To Confirm Details" checked and are scheduled for today are
posted.
8. Metro
This is an honorable mention as Metro contacts should never be created in a contact plan. Please
refer to the Help topic How To Read The Metro Contact Description for more information.
9. Other, Phone, Review, Email, Client, ODBC, and Delayed Contacts
All remaining Contacts are scheduled, except Close. Those include the above Contact types if they
are scheduled for a future date.
 The Contact events that are scheduled for a future date can be run using the Tools menu
Batch Processing command.
10. Close
Collect! executes Close events to update the Debtor's mode. This is done last to ensure that
any financial recalculations are done first.

Contact Plan Samples
Quite a number of sample contact plans can be found in the Demodb database that ships with Collect!.
As described above, it's easy to change existing plans and add new ones to suit your requirements.
The list below introduces some basic predefined Contact Plans.
 The pre-designed Contact Plans are only found in the Demodb database.
Copying Contact Plans
If you would like to copy some of these Contact Plans into your Masterdb database:
- At the Main Menu, pull down the System menu and choose Contact Management Settings.
- Then select View Contact Plans.
- From the list that is displayed, use the arrow keys to locate and highlight the Contact Plan
you would like to copy.
- Select Edit from the top menu bar and then select Copy from the drop-down choices. You will
be notified that your Contact Plan has been copied to the Clipboard.
 To copy additional Contact Plans, use the arrow keys to highlight them. Repeat step 4. You
will be notified that other items are on the Clipboard. Choose "No" to add this item to the
Clipboard contents.
- Click OK to close the Contact Plans list. Choose Quit at the Main Menu to exit from your
Demodb database.
- At the Welcome to Collect! screen, switch to your Masterdb database. The Database to Open
field will now display "MASTERDB."
- Repeat steps 1 and 2.
- With the list of Contact Plans displayed, pull down the Edit menu and choose Paste.
- Check the Contact Plan(s) you copied to make sure it has all the information of the original
and all the Events listed.
Contact Plan and Event Settings
 Only settings that are switched ON are listed below. You can view these Contact Plans as
described above under the heading "View Contact Plans.".
 You will find it most helpful if you open each Contact Plan as it is being discussed and
examine the settings that are mentioned. Pull down the System Menu, choose Contact Management
Settings, Contact Plans and then choose View. Look for each plan by its Code.
Press F1 on the Contact Plan form and the Event form for field level help and details.
*** PLANS IN THE DEMONSTRATION DATABASE MAY NOT HAVE EXACTLY THE SAME SETTINGS AS THESE
PLANS ***
New Business
This Contact Plan manages new accounts. It is made up of a Contact Plan with five events. After an
initial letter, a phone call is made. This is followed by two more letters at intervals set in
"Delay Days" in the Event form. The events are scheduled and will appear in the Work In Progress
list of the account operator on the days predetermined by the Contact Plan.
On the days that letters are to be sent, they will be included automatically in batch process
letters for that day.
On the Contact Plan form, the following information is setup:
Code: NEW
Description: New Business
Delete all pending contacts
The five Events for NEW are as follows:
- This Event sets the Debtor status to NEW.
Type: Status
Description: NEW
Assign to account operator
Schedule immediately
Timeless
- This Event sends the first Letter.
Type: Letter
Description: Letter 1
Assign to account operator
Schedule immediately
Priority: 10
Timeless
- This Event schedules a phone call after 10 days.
Type: Phone
Description: Home
Assign to account operator
Delay days: Yes ......... Days: 10
Priority: 30
Timeless
- This Event sends a second letter when 30 days have lapsed.
Type: Letter
Description: Letter 2
Assign to account operator
Delay days: Yes ........ Days: 30
Priority: 20
Timeless
- This Event sends a third letter when 60 days have lapsed.
Type: Letter
Description: Letter 3
Assign to account operator
Delay days: Yes ........ Days: 60
Priority: 30
Timeless
 The Days in "Delay days" are counted from the day the Contact Plan is run. So this Contact
Plan has two events that happen immediately, a status change and a letter. Counting from
this date, another Event is 3 days later, one 30 days later and one 60 days later - all
counted from the same beginning date - the first day the Contact Plan is run.
Close File
This Contact Plan will close an account and note that it has been closed. It can be used with
another plan that sets the conditions for closing files. For instance, if an account is paid in full,
the account could be closed automatically.
 See the topic How To Design New Contact Plans where a Paid In Full Contact Plan is designed
using this idea.
On the Contact Plan form, the following information is setup:
Code: CLO
Description: Close File
Delete all pending contacts
The two Events for CLO are as follows:
- This Event closes the file.
Type: Close
Assign to account operator
Schedule immediately
Timeless
- This Event writes a note the Debtor's record.
Type: Note
Description: File closed
Assign to account operator
Schedule immediately
Timeless
Call in Fifteen Minutes
This Contact Plan schedules two events - one, a phone call in fifteen minutes and the other, a note,
in case of a busy signal.
On the Contact Plan form, the following information is setup:
Code: C0
Description: Call In 15 Minutes
The two Events in C0 are as follows:
- This Event schedules a phone call in 15 minutes.
Type: Phone
Description: Home
Assign to account operator
Schedule immediately
Priority: 90
Delay: Yes ...... Minutes: 15
Timeless
- This Event writes a Note to the Debtor record.
Type: Note
Description: Busy, call again in 15 minutes
Assign to account operator
Schedule immediately
Timeless
Send a Letter
This Contact Plan schedules a letter to be sent. Then it schedules a review to check whether a
response was received.
On the Contact Plan form, the following information is setup:
Code: L1
Description: Letter 1 - Today
The two Events in L1 are as follows:
- This Events queues a letter in the print batch.
Type: Letter
Description: Series 3 - Letter 1
Assign to account operator
Schedule immediately
Prompt to confirm details
Delete same type contacts
Timeless
- This Event schedules a review in 14 days.
Type: Review
Description: Letter sent recently. Any response?
Assign to account operator
Delay Days: Yes ...... Days: 14
Priority: 25
Prompt to confirm details
Delete same type contacts
Same description only
Timeless
Review a File
This Contact Plan schedules a file review.
On the Contact Plan form, the following information is setup:
Code: REV
Description: Review
The single Event in REV is as follows:
- This Event schedules a review.
Type: Review
Description: Review file...
Assign to account operator
Schedule immediately
Priority: 30
Prompt to confirm details
Delete same type contacts
Timeless

Examples Using Contact Plans
Now, let's try a few if these sample Contact plans.
 WARNING: For these exercises, please sign into Collect! as operator OWN. When you choose a Debtor
for one of the instructions, check the upper right hand corner of the Debtor form. The
Operator field should read OWN. This way, your results should match the results that are
described in the examples.
 The following examples assume you are on a Debtor record. If you are not on a Debtor record,
pull down the Browse menu, choose Active Debtors and press F5, or click on the line item,
to open a Debtor.
 Please press F1 for help regarding the Schedule Next Contact form which is mentioned in a few
of these examples. It is advised that you do not type details into this form or press the
buttons on it until you know what they are for.
Scheduling Letters to New Business
- Either press F2 on the Action field, click your mouse, or press the Action button.
- Type NEW in the Action field. Collect! quickly performs some actions "behind the scenes."
- Select the Contacts tab on the Debtor form. Notice that several new letters and a phone call
are entered in this Debtor's Contact list. Notice the dates. You will see that they correspond
to the Delay Days that were set in the NEW BUSINESS Contact Plan described above. These contacts
will appear in the account operator's To Do list on the days that they are scheduled.
Collect! has automatically scheduled all the appropriate contacts for this Contact Plan. You can see
how this speeds up data entry and minimizes errors. Contact Plans provide a consistent, timely contact
strategy.
Scheduling a Call
- Either press F2 on the Action field, click your mouse, or press Enter on the Action button.
- Type the letter C and press Enter. The Schedule Next Contact form opens. This is because the
"Prompt to confirm details" switch is ON in the Event form for the Contact Plan whose Code is
C.
 You can easily verify this by opening the Contact Plan list. (Pull down System menu, choose
Contact Management Settings, Contact Plans, View.) Look for Code 'C' - Prompt to plan call.
Open this Contact Plan and click on the Event. You will now see that "Prompt to confirm details"
is checked. Whenever this is checked in an Event for a particular Contact Plan, the Schedule
Next Contact form will open when you type that Contact Plan's code into the Action field on
the Debtor form.
 Find help on the Schedule Next Contact form by pressing F1. There you will find details about
the options and choices you have when this form is displayed.
- Fill in the details of the call you want to schedule. Select the Contacts tab and you will see
that the call has been added to the contacts list.
Scheduling a Letter
- Either press F2 on the Action field, click your mouse, or press Enter on the Action button.
- Type L1 and press Enter.
 If you refer back to the details of the SEND A LETTER Contact Plan described above, you will
notice that this Contact Plan also has an Event with "Prompt to confirm details" switched ON.
Therefore, the Schedule Next Contact form will open.
- The letter will be printed in the daily letter batch.
 Find help on the Schedule Next Contact form by pressing F1. There you will find details about
the options and choices you have when this form is displayed.
Scheduling a Review
- Either press F2 on the Action field, click your mouse, or press Enter on the Action button.
- Type REV and press Enter.
- When the Schedule Next Contact form displays, fill in the description of the review you want
to schedule and it will be added to the Debtor's contacts list.
 You will find more help by pressing F1 in the Contact Plan form and also in the Event form.
Changing Debtor Commission Rate
When you enter new accounts from within the Debtors Tab in the Client Screen, the Rate field on each
Debtor entered here will be auto-populated from the rate which currently exists on the Client. If
there is no default rate entered into the Client Advanced Settings screen, this blank rate field will
be passed along to Debtors as they are entered.
It is possible to override and overwrite a blank or default rate field on the Debtor screen as a new
account is being entered if there is an exception reason why it would be necessary to be faced with
this chore. For the majority of the business you will enter for any one Client, it shouldn't be
necessary to be doing extra entry when the system is designed to save you steps.
There are a few commonplace Industry scenarios where you may find that you need to update significant
portions of your inventory with a new commission rate or rate plan.
- A Client who normally assigns Retail only at a rate of 35% will now be sending you listings for
Commercial as well and you are to charge 45% on this stream of business. This creates a
condition where the Type of assignment is becoming the determining factor in what will decision
the correct rate to charge on each account.
- Your Agency has made a business decision to change its contingency rate for all Clients who
assign business of a specific Type, effective as of a designated date.
- You have an individual Client with one or more Client numbers that has changed their rate as
of a specified date and wants this change to be applied to shelf inventory retroactively in
addition to what is being reflected as the current rate for new listings.
 WARNING: We recommend taking a Snapshot of your database before embarking on any large-scale
invasive auto-process.
The scenarios above which want a different rate entirely from the Client default for different reasons
and based on Debtor account Type can be best handled by adding an Event to the NEW Contact (Action)
Plan which tests for account Type and changes the commission rate on that basis from the default
Client value for to the new prescribed rate for the account Type.
Here are examples of the settings you would use on the inside of a Contact (Action) Plan to make the
change on the basis of the account Type code.

Plan Event to set Commission Rate to 45%
This event runs if the Pick List 'Type' is 2. In this logic, the numeric representation of the
expressed "Commercial" type is being tested for and if found to be true, ONLY then does the system
update the commission rate on an account to 45%. Note as well that the fill value 45 is entered in
the Description field with no percent sign or decimal points.
The following is another example of the same decisioning using a different 'Type' Pick List numeric
to make the conditional logic test with.

Plan Event to set Commission Rate to 50%
This event runs if the 'Type' is 4.
To determine what your numeric value is for your 'Type' pick list selection, Right click on the Type
field and open the pick list by clicking into the field, then right-clicking. This will pop up an
Access Rights window. Next to the "Pick list file" field is a gray folder. Click the folder to open
the pick list and determine what numeric value in your site's pick list match the criteria you will
be isolating by.
Adding an Event to your NEW account automation addresses part of the issue on a go forward basis.
To run against the whole database to identify and isolate accounts for this treatment, you need to
gather up the shelf inventory and if applicable, update all of their Commission Rates. If you are
able to segregate on the basis of Client, like in #1 above, then this Tag List creation can be done
from within a Client's Debtors tab. If you need to sweep all Clients for a specific 'Type', the best
shelf inventory prospective will come from a Browse Active Debtors list.
The methodology is the same coming from a Client screen Debtors Tab or Browse Active Debtors list:
- From the list, click Find. When the Search Criteria window pops up, select
'Type' and pick from the drop-down menu to populate your From / To columns with the target
criterion.
- Click Search in the lower right corner to Tag a list of qualifying accounts.
- To properly gather your Tagged List, click Edit at the top of the screen, then
View Tags (or View All) - whichever message your running version shows you
for this purpose.
- Create a new Contact Plan from the menu path "System\Contact\Management Settings\View Contact
Plans" and input your Rate Change Event. This standalone Contact Plan will be run as a batch
process against your shelf inventory meeting the target criteria for update.
- To run the created Contact Plan against all the accounts in the tagged list, click "Tools\Batch
Processing\Run Contact Plans". Follow the prompts and select the Contact Plan designed for
this purpose and run it.
- When asked to Untag your list after the process completes, initially say NO
so that you can spot-check a few to make sure the desired result was obtained.
- After confirming that your rates on the target subset of accounts have updated correctly and
successfully, click Edit to Untag your list and Clear your search
criteria.
Reassigning an Account to a New Operator
This section steps you through creating a contact plan to reassign accounts to a different operator
based on debtor criteria. It requires familiarity with creating contact plans.
This example will assign accounts to JC based on the criterion
New York.
 Make sure that you have already set up an Operator form for the new operator you want to
assign to your accounts.
Please be aware that changing the Operator ID on an account also assigns any In Progress contacts to
the new Operator ID if they were assigned to the account's previous Operator. Contacts that are
Completed or assigned to a different Operator ID will not be affected.
The simplest way to reassign accounts is to simply open each account that you want to reassign and
select the new Operator ID from the pick list for the Operator field on the Debtor form. Another
method is using a contact plan. Please refer to How To Use Contact Plans if you are not familiar
with creating contact plans.
- From the top menu bar, select Options and then select Contact Plans from the drop-down choices.
This will display a sub-menu.
- Select View to display the list of contact plans. Select the New button at the bottom of the
list or press F3 to create a new contact plan. This will open a blank Contact Plan form.
- Type a unique 3 character name or number into the field labeled Code. Enter a
brief explanation in the field labeled Description.
- Press F5 to activate the Events sub-form and select YES to create a new Event.
- Select Operator from the pick list on the field labeled Type.
- Select the radio button labeled Assign to specific operator so that a dot
appears in it. This makes the Operator field visible. Select the new Operator ID from the pick
list attached to the Operator field.
For this example, select JC from the list.
- In the first field next to the label Schedule if, select the down arrow to
view the list of fields. Select the criterion you are going to use, or begin typing in the
field code, if you already know what it is.
- In the second field enter the "If" condition that must be satisfied to use this criterion.
- In the third field(s) enter the Value, or range of Values, to use when comparing fields to
see if they satisfy the condition.
For this example, type in de.st in the first field, = in the second
field, and then NY or New York in third field (depending how your
states are entered.)

Operator Assignment Event based on State
- Select OK or press F8 to close the Operator Event and return to the Contact Plan form. It
should resemble the following screen shot.

Operator Assignment Contact Plan
- Select OK or press F8 to close the Contact Plan form and again to close the list of contact
plans.
There are several ways to run this contact plan.
- This plan can be run on an account directly when you are viewing the account. Select the button
labeled Action and select the contact plan to run it.
- Or, type the contact plan's Code into the small Action box to the right of the field labeled
Summary.
- This plan can also be run through a batch process on specific accounts. Collect! will provide
a summary of how many accounts the plan ran on. Please see
How to Batch Process Using Contact Plans for details.
Any In Progress contacts on these accounts for the previous operator will now show in the new
operator's WIP list.

Summary
This article barely skims the surface of the possibilities available to you when you use Contact
Plans. To use them effectively requires a well thought-out collection strategy. As you know, there
are many possible outcomes of interactions with your Debtors and Clients. Many of them can be
anticipated and handled automatically with Contact Plans.


Contact Controls
Contact Controls allow you to implement rules to prevent over-contacting an account. You can create
controls for Calling, Texting, Emailing, and Lettering. You can set generic controls for all regions,
and then you can, optionally, set controls based on the State or Country fields.
Click Here to View this Form.
Click Here to Close this Form.
Contact Controls allow you to implement rules to prevent over-contacting an account. You can create
controls for Calling, Texting, Emailing, and Lettering. You can set generic controls for all regions,
and then you can, optionally, set controls based on the State or Country fields.
Contact Controls apply to Debtors and Debtor Cosigners.
Contact Control Form

Create A Contact Control
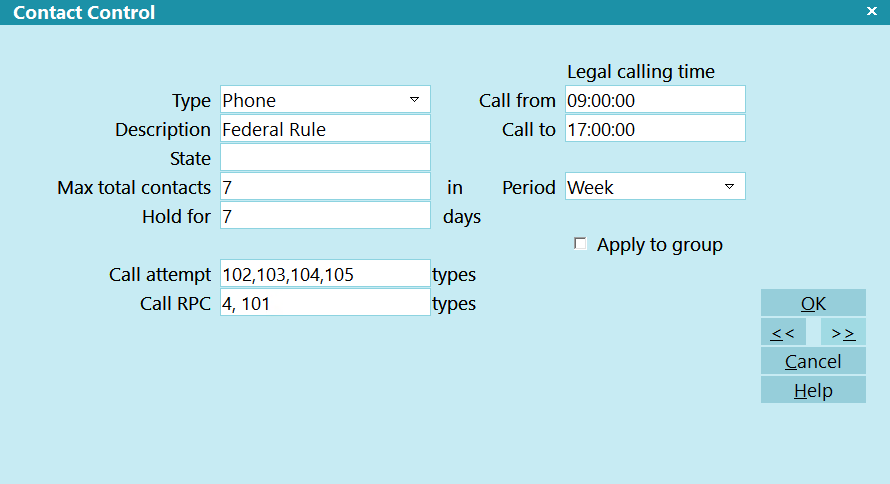
Contact Control - Phone
- Navigate to System -> Contact Management Settings -> Contact Controls.
- Click NEW.
- Select the Contact Type that the control will apply to.
- Optional: fill in a Description. This is useful if you have multiple rules for the same
type.
- Optional: fill in the State. A Blank state will assume the rule applies to all states.
- Optional: fill in the Country. A Blank country will assume the rule applies to all
countries.
- Fill in the Maximum Number of Times an account can be contacted by this type.
- Select the Period that the maximum applies to.
- Check the Apply to Group box, if this control should factor in all group members.
 For Cosigners, Collect! will check for Cosigners within the Debtor Group that either match on
SSN or match on Phone or Email.
Phone Type
- Fill in the Legal Calling Times, if applicable.
- Fill in the Hold for, if applicable.
 For calling, this refers to Right Party Contact. If you make contact with the Debtor or
Cosigner, and this field is populated, then the control will warn you if you try to make
another call with the number of days specified. For example, if you enter 7, then when you
make an RPC, then you will warnings until after 7 days have passed to prevent calling too
early.
- Fill in the Call Attempt Types and the Call RPC Types.
 These are a comma-separated list of the numeric pick list values on the Call Result field.

Default Call Results On Contact Form
0  : None specified
1  : Left Message on Machine
2  : Left message with person
3  : Debtor not in - call back. No message.
4  : Spoke to debtor. Verified right party.
5  : Wrong number / debtor unknown.
6  : NIS
101: Manual dial: right party contact
102: Manual dial: pick up, hung up
103: Manual dial: debtor in, unavailable
104: Manual dial: debtor not in, call back
105: Manual dial: machine answer, left msg
106: Manual dial: machine answer, no message
107: Manual dial: left message with person
108: Manual dial: no answer
109: Manual dial: busy
110: Manual dial: call did not go through
111: Manual dial: wrong number/debtor unknown
112: Manual dial: not in service
113: Dialer: transfer to operator
114: Dialer: unknown call result
115: Dialer: transfer-operator, wrong number
116: Dialer: answered, hung up
117: Dialer: answered, system terminated
118: Dialer: answered, voice mail
119: Dialer: no answer
120: Dialer: busy, no machine
121: Dialer: machine, delivered
122: Dialer: machine, not delivered
123: Dialer: fax machine detected
124: Dialer: cancelled, incomplete number
125: Dialer: cancelled, compliance reasons
126: Dialer: cancelled, do not call
127: Dialer: call failed, technical reasons
128: Dialer: cancelled broadcast or blank num
All Other Contact Types Types
If applicable, fill in the Model Validation fields.
 WARNING: These are an override of the Company Detail form. You would only fill in here if you have
different requirements on a state by-state-basis.
For texting, if applicable, fill in the SMS Reauth field. This links to a report writer command that
you can put in a report to tell you when Texting numbers are coming due for renewal. This is useful
if your region requires you to check that SMS numbers are still valid and not reassigned.

Using Contact Controls
After controls are created, Collect! will have some functionality based on the control's contact type.
Calling
When you open a Debtor or Cosigner:
- If the account is not in violation of a control, then the number of attempts and number of RPCs
will populate with the applicable counts, based on the Call Result types specified above.
- If the account is about to be in violation, the number of attempts and number of RPC fields
will change to the warning color.
- If the account is in violation of a control, then the operator will receive a popup warning to
let them know that the account is out of compliance. A note line is also written to the account
stating that the operator was notified. This is for auditing purposes.
 If you have Operators who should not receive the compliance warnings, then you can go to
their operator profile and on the Operator Detail tab, select the applicable Exclude
Contact Control boxes.
- If the account is in violation of a control, and you try to use the Autodialer module to do a
Click to Dial, then you will receive a Yes/No prompt asking if you want to proceed with the
call.
- If the account has explicitly requested a call back, then you can open the applicable phone
record and Click the RPC Override button. This will prompt you for the call back date. Once
done, Collect! will create a Phone contact on the account with a flag that will disable the
contact controls until the call is made.
Lettering And Emailing
When batch letters are being printed or emailed, any accounts that are out of compliance will
automatically be skipped.
Manually printed/emailed letters will give the user a popup message indicating that the letter
is being skipped due to compliance.
Texting
At present, all texting from Collect! is done via 3rd Party tools and Collect! reports. To enable
contact control checking for SMS, we recommend adding @CCTEXTOK to your reports. See below for more
information.

Contact Controls In The Report Writer
Several Report Writer commands exist for compliance checking that needs to be done in processes that
are outside the Collect! programming. For example: texting, dialer lists to external dialers, custom
letter service exports.
Below is a list of the commands and a description for each of them. For syntax and implementation,
please refer to the Help topic How To Use The Report Writer Commands for more Information.
@CCCALLOK enables you to populate a variable with either a 0 (FALSE) or 1 (TRUE) on whether or not
the record passed in can be called.
@CCTEXTOK enables you to populate a variable with either a 0 (FALSE) or 1 (TRUE) on whether or not
the record passed in can be texted.
@CCLETTEROK enables you to populate a variable with either a 0 (FALSE) or 1 (TRUE) on whether or not
the record passed in can be lettered.
@CCEMAILOK enables you to populate a variable with either a 0 (FALSE) or 1 (TRUE) on whether or not
the record passed in can be emailed.
@CCSMS enables you to populate a variable with either a 0 (FALSE) or 1 (TRUE) on whether or not
the record passed in is compliant with the SMS Reauth value on the Contact Control record as of the
Date that was passed in. This function is not to determine if an account can be Texted, rather it is
to determine if the phone number was Authorized for texting at that point.
@CCTZCALL enables you to populate a variable with either a 0 (FALSE) or 1 (TRUE) on whether or not
the record that is active is within the Legal Calling Times.
 This command is requires the Debtor or Cosigner to be Active, so it cannot be used with SQL
unless the result loop as a @de or @dc loop embedded in it. This command is useful for
Control Files where you want to add extra proceses than the prompt and note line that is
built-in to Collect!.
@CCVALDATE enables you to populate a variable with the date of the end of the Validation Period.
This command is used in the stock Model Validation notice.
@CCATTEMPTS enables you to populate a variable with the number of attempts if the as of the date
that is passed in.
@CCRPCS enables you to populate a variable with the number of RPCs if the as of the date
that is passed in.


Holidays
The Holiday window allows you to specify non-business days that are not the weekend days of Saturday
or Sunday. This is required if you are using Contact Controls and have Business Days specified for
the Validation Period.
Holidays are also factored into the Work in Progress functionality to not schedule events on weekends.
Click Here to View this Form.
Click Here to Close this Form.
The Holiday window allows you to specify
non-business days that are not the weekend days of Saturday
or Sunday.
When populated, Collect! will skip over these dates for
the following:
- Schedule Next Contact when working the WIP list and
"Schedule Contacts on Weekends" is not checked
- Business Day calculations for the Validation End date
on the Debtor record after the Model Validation notice
has been sent
- EFT notices when calculating the Notification Letters
and "Use Calendar Days" is not selected

Holiday Form
Date
The date of the holiday.

Description
This is a user-defined field for giving the control a
description.


Statute Of Limitations
The Statute of Limitation window is used to define the period when a debt will become time-barred.
The date used to calculate the start date is the one defined as the Itemization date.
Click Here to View this Form.
Click Here to Close this Form.
The Statute of Limitation window is used to define
the period when a debt will become time-barred. The date used to
calculate the start date is the one defined as the Itemization date.
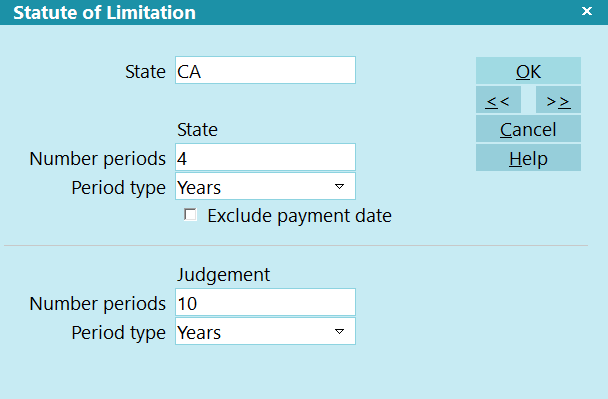
Statute of Limitation
State
The State that the rule applies to. You must use the same
values that you put into the Debtor state.
Leave this field blank if you want this rule to apply
to all States.
 If you use a picklist, you can put the same picklist
on this field.

Number Periods
This is the quantity of periods (days, years, etc.) that this
rule applies to for Debtors without Judgements.

Period
The period that this rule applies to for Debtors without
Judgements. The options are Days, Weeks, Months, or Years.

Exclude Payment Date
Check this box to indicate that the Time-Barred date on the debtor
is static and not to be updated when payments are posted.

Judgement

Number Periods
This is the quantity of periods (days, years, etc.) that this
rule applies to for Debtors with Judgements.

Period
The period that this control applies to for Debtors with Judgements.
The options are Days, Weeks, Months, or Years.


Financial Management
Financial Management includes all tasks pertaining to accounting. Taking payments, posting fees,
printing statements, writing checks and printing financial reports are examples. There are many
features in Collect! that make handling finances efficient and professional.
Set up the basic areas right from the start so that all the necessary information is at your
fingertips. Many financial settings will be in place after you set up your Company Details, Clients,
and Debtors, and your Reports and Letters.

Transaction Types
Transaction Types are used to organize account reporting information. They control what displays on
your client statements and are the very heart of the financial aspect of Collect!. Preparing your
transaction types is one of the most important aspects of setting up Collect!. Spend some time
thinking about the actual transaction types you need and how each one must perform. You may add,
change, and delete transaction types to suit your own business needs.
There are many flags associated with the Transaction Type form. They control who sees the
transactions, that is any fees, principal, interest or other types of transactions which must be
recorded, reported and fully accounted for.
 Transaction types can control processing of revenue from commissions and fees. They determine
how information appears on your client statements.
Click Here to View this Form.
Click Here to Close this Form.
This document explains the concept of Transaction Type in Collect!. It will help you use existing
transaction types in the right way and create your own.
Transaction types are an integral part of Collect!, and are used for recording and organizing
financial information. The Financial Type field in the Transaction form determines how Collect! will
process a transaction. Payments, Fees, Interest, Adjustments, Legal are examples of these Financial
Types.
For convenience and reporting, Collect! organizes Transaction Types into groups of 100, with the
100, 200, 300, 400, 500 and 600 codes actually reserved as titles for the group they represent. Each
series roughly represents one of the Financial Types. For instance, the 100 series is reserved for
Payment types. However, it is the Financial Type setting that actually determines how a transaction
is processed.

Financial Type Setting Determines Transaction Type
Transaction types are used when printing client and debtor trust account reports. The reports provide
a dated summary of financial transactions, and then show a breakdown of the financial activities,
usually organized by Transaction series, such as 100's, 200's and so forth. Using these groups will
help you with the organization of your own reports.
For example, Group 100 defines all basic transactions such as payment from a Debtor to the agency by
check or cash, payments from the Client to the agency and other details.
Several groups are predefined, including Original Principal and Interest, Legal Expenses, Interest,
and Other Expenses.
 The Demonstration database in Collect! ships with many predefined transaction types. You can
copy any of these to the Masterdb database.
 Even though we have supplied a standard list of transaction types, the code is capable of
storing 4 characters, which means you can put in your own. Some are system reserves as per
"System Reserved Types" below.
Viewing The List Of Transaction Types
The following list contains all the transaction types provided for you by Collect! You can modify
these if you need to or add your own, depending on your business needs.
100 PAYMENTS AND SYSTEM
101 Check Payment
102 Cash Payment
103 Payment Out of Court
104 Money Order Payment
105 Returned NSF Check
106 Payment of Agency NSF Fee
107 Check Payment Taken By Phone
108 Debtor Over Payment
109 Credit Card Payment
110 ACH Payment
111 Direct Payment to Client
120 Attorney Fee Payment
122 Court Cost Payment
150 Down Payment
151 Payment Plan Payment
160 Monthly Billing Amount
193 Payment Plan Initial Discount
194 Judgment Principal
195 Judgment Interest
196 Original Principal
197 Original Interest
200 LEGAL FEES
201 Court Cost Charge
202 Attorney Fees Charge
294 Judgement Legal Costs
300 FEES
301 NSF Charge Due Agency
302 Closing Fee
303 Locate Fee
305 ACH Convenience Fee Reversal
307 ACH Convenience Fee
309 Credit Card Convenience Fee
310 Service Charge
320 Payment Plan Late Fee
340 Daily Storage Fee
350 Payment Plan Service Charge
351 Late Fee
394 Judgement Court Costs
397 Client Fee
398 Debtor Fee
399 Collection Fee
400 INTEREST
401 Interest Adjustment
402 Accrued Compound Interest
495 Additional Judgement Interest
499 Total Accrued Interest
500 ADJUSTMENTS
501 Adjustment by Client
502 Adjustment by Court Order
503 Adjust Judgement Principal
599 Adjustment through Upgrade
600 INTERNAL EXPENSES
601 Agency Internal Expenditure
Each one of these transaction types has its own settings, set in the Transaction Type form for that
type.
 To view the settings for these transaction types, pull down the System menu and choose
Financial Settings, Transaction Types. The complete list of transaction types available to
you will be displayed. Click on your choice to open the Transaction Type form and view the
settings.
 You should leave code 100, 200, 300 and 400 etc. as titles for the group they represent.
Then use codes 101, 201, 301, 401, 501, 601 as the starting points for the transaction types
you want to list in the group. You can also create your own groups and codes with up to 4
characters and then build reports that reference transactions with these codes.

System Reserved Types
System Reserved Types are used by internal processes in Collect!. They should be left alone. If you
plan to customize Collect! in an extreme manner, please consult with Technical Support.
194 Judgment Principal
195 Judgment Interest
196 Original Principal
197 Original Interest
294 Judgement Legal Costs
394 Judgement Court Costs
397 Client Fee
398 Debtor Fee
399 Collection Fee
499 Total Accrued Interest
599 Adjustment through Upgrade
1081 Original Fees, Prior to Assignment
1082 Original Legal, Prior to Assignment
1083 Original Misc, Prior to Assignment
1084 Original Other, Prior to Assignment
1085 Original Paid to Client, Prior to Assignment
If these codes do not appear in your Transaction Type list, then they will appear as numbers in your
trust reports, rather than with text titles. You should create these codes in your Transaction Type
list if they are not there. These Transaction Type codes are required, and should not be changed.
Most of the others can safely be modified.

Print A List Of All Settings
To view all of the transaction types available in Collect!, pull down the System menu and choose
Financial Settings, Transaction Types. A list will display. You could pull down the Print menu and
choose Quick Print from the list of choices. When prompted, say "Yes" to details. This will give you
a complete list of the transaction types and their settings.

Using The Predefined Transaction Types
Press F1 from the Transaction form and the Transaction Types form to get Help on the fields in these
form. Using this information and the list above, pick the transaction types that you need.
Examine the settings of these transaction types to be sure they will act as you expect them to. Most
of the types can be modified. However, you should be sure of what you are doing when you make changes
to existing Transaction Type settings. These settings have been chosen to perform in a certain way.

Creating Your Own Transaction Types
The easiest way to create a new transaction type is to copy an existing type, or heading, give it
a new Code number, in the same general group, and a new Description. Then modify the settings to
suit your needs.
 Each group heading has default settings that generally apply to the whole group. You can copy
the heading as a template for your new type and the basic settings will be set already.

Copy A Transaction Type
- Choose System, Financial Settings, Transaction Types to display the list of types in your
system.
- Use the up and down arrows to locate and highlight the type or heading that you wish to
copy.
- Make sure it is highlighted and press CTRL+C. You will be informed that you have copied
data.
- Press OK and then press CTRL+V. The list will now contain a duplicate copy of the transaction
type or heading that you copied.
- Click on one of the copies to open the Transaction Type form for you to modify.
- Give your copy a new Code number and a new Description to begin to create your own transaction
type.

Create A Transaction Type Group
To add group 700, for example, to the Transaction Type list:
- Open the Transaction Type List.
- Press F3 to create a new Transaction Type.
- Enter 700 as the Code to identify the group.
- Type in a general Description that applies to each transaction type in this new group.
 The Description you use to label the group is used in trust account reports as the title of
the Transaction group.
- Choose the default settings that will generally apply to transaction types in this group.
These settings can be modified for each individual transaction type that you create in the
group.
- Press F8 to save your work.
Now, when you view the list of transaction types, this new group will display.

Transaction Type Form

Create A Transaction Type
As described above, you can copy an existing type or heading and modify it.
Or, you can press F3 when you are viewing the transaction type list or an individual transaction type.
This will display a new blank transaction type form for you to fill out. (Or press the NEW button on
the toolbar or the NEW button at the bottom of the transaction type list.)

Transaction Type Settings
Each Transaction Type has its own unique settings. These control report printing options, calculations,
commission rate, perhaps running a Contact Plan, assigning operators and sales persons to transactions.
There are over twenty settings on the Transaction Type form that you can choose from to setup a
particular Transaction Type. The ability to select a Contact Plan to run offers many more choices as
well. (This means that once you know what your business needs are, you can create uniquely customized
transaction types to automate your transaction posting operations.)
 Each section heading in the Transaction Type list has default settings that generally apply
to any new transaction type that you create in that category. You can use these settings as
a starting point when you create your transaction types.
- From the Transaction and the Transaction Types forms, press F1 for Help about the fields on
both of these forms. You should be aware of how closely they are connected with each
other.
- Use the information available from Help to fill in Code, Description and Copy description to
transaction. You can also use the default settings in the header sections to get you
started.
 Remember that this Transaction Type should be meaningful to you and fit the way you do
business. It enables you to categorize your transactions but you must decide what categories
mean something to you.
- Make choices in the Financial Type section as needed, using the F1 Help results to guide you.
The Financial Type determines how the transaction is processed and totaled.
- The second column of the Financial Type section pertains to the Transaction and Debtor forms.
The choices set the way information is displayed and calculated. A payment can be categorized
and broken down into Interest, Fees, Adjustment and Principal in any order you need.
 If you want to see the payment breakdown for this Transaction, switch ON "Payment breakdown"
in the Transaction Type form. Several fields on the Transaction form are only visible when
this switch is turned on. These fields relate to Principal, Fees, and Interest. Review help
on those topics.
 The Help available when you press F1 from the Transaction form will give you a good explanation
of these payment breakdown aspects. Categorizing your transactions using payment breakdown
gives you very detailed information for reporting and tracking purposes.
- The Processing section allows you to change the defaults for adding transaction information to
statements and reports.
- The Commission and Tax tabs give you choices for Commission and Tax calculation.
- The Display section can hide To Us or Direct fields on the Transaction form. This makes it
easier for the user to know where to enter the dollar amount when a transaction is posted.
Also, Collect! can create an Invoice or Receipt number automatically if you switch on these
settings for a particular Transaction Type. Please refer to the Help available on Transaction
for more information about numbering receipts and invoices.
- Choose an Operator and transactions of this type will be posted to this Operator. This may be
used for calculating Operator commissions. Press the arrow in this field to display a list of
operators in the system.
- Choose a Sales ID and transactions of this type will be posted to this Sales person. This may
be used for calculating Sales commissions. Press the arrow in this field to display a list of
Sales IDs in the system.
- Choose a Contact Plan to run when transactions of this type are saved. Press the arrow in this
field to display a list of available contact plans.
- You can set a Commission Rate to use with this Transaction Type. This rate will be used instead
of the normal Commission Rate in the Debtor form.
 WARNING: Commissions and Taxes are generally left blank as they will override the client settings.
They may be set in scenarios that involve non-payment type transactions.

Transaction Posting Event Sequence
The sequence of events when you post a transaction is:
- A transaction record is created and calculated.
- Debtor totals are recalculated.
- The Transaction Type specific Contact Plan is run.
- The Default Payment Posting Contact Plan is run.

Summary
Several basic transaction types are needed to handle the transactions that you post every day. You
may find that Collect! has already provided the types and settings you need to begin using
transaction types.
If your needs are not met by the predefined transaction types, you can modify existing types or
create your own. Please have an idea of the transaction types that you need and the particular
settings you would like to apply before you begin to construct your own system for organizing your
accounts.

Transaction Type Samples
Principal Transaction Types - This transaction type is needed if you are going to
apply interest, apply a judgment, or add more principal at a later date. If you are not using any
of the above items then you can skip this transaction type.
Interest Transaction Types - This transaction type is needed if you are applying
interest or applying a judgment with interest amounts. If you are not using any interest amounts,
then you can skip this transaction type.
Payment Transaction Types - This transaction type is needed for posting all payments.
Payment transactions control all aspects of payment posting, keeping track of who is posting credits
or debits to your accounts.
Legal Transaction Types - This transaction type is needed if you are applying any
legal fees to the account. These are transactions are kept together and calculated as total legal
fees on an account.
Other Expenses Transaction Types - This Fees transaction type is needed if you are
applying additional charges, such as a closing fee, late fee, or a service charge, to the account.
Any fee that is not a legal fee uses this transaction type.
Adjustment Transaction Types - This transaction type is needed if you are applying
adjustments to Principal, Interest, or Fees, or to adjust the Owing of any account.
Internal Transaction Types - This transaction type may be used for tracking internal
expenses on a particular account. This transaction does not affect either the Debtor's or the Client's
financials in any way. It is just for keeping track of internal expenses borne entirely by the agency.

Original Principal Sample
The Original Principal transaction type is needed if you are going to apply interest, apply a
judgment, or add more principal at a later date. If you are not using any of the above items,
then you can skip this transaction type.
By default, Collect! ships and uses the 196 Original Principal transaction type shown below when it
is required to perform interest or judgment calculations.
You may adjust or add to the Principal amount using Principal transaction types. Multiple principal
transaction types are added together and the total is set in the Original Principal field on the
Financial Details form.
 You may enter an Original Principal amount using the Financial Detail form accessed from the
Debtor form's Principal field. If you have no need of anything more complicated, this is all
you have to do to record the Original Principal for the account.
The sample shown below sets the Original Principal amount when entering a new debtor. There are several
instances when you will need this.
- If you ever intend to apply interest of any type,
- need to add more principal later,
- use Collect!'s judgment functions,
- use payment plans as a credit grantor,
then you will want to apply this transaction type to the account.
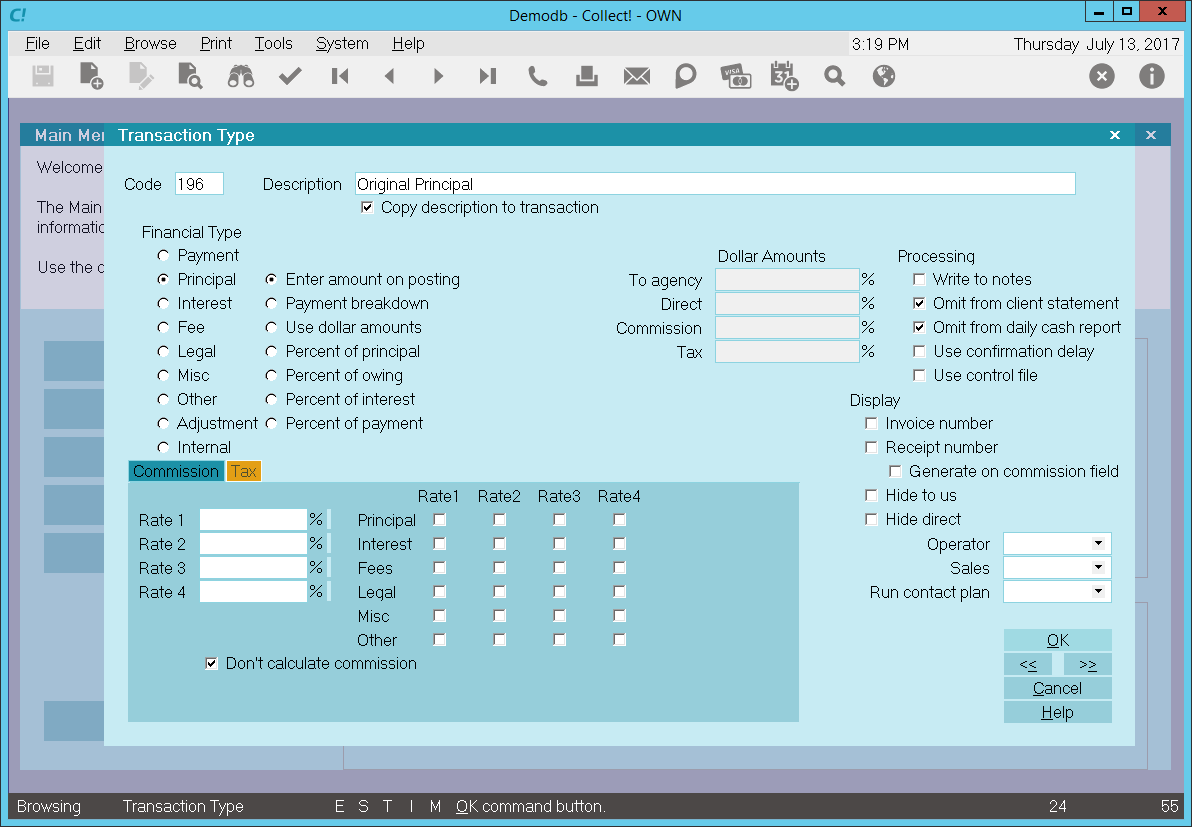
Original Principal Transaction Type 196
When you create a 196 Original Principal transaction on a debtor account, the description from the
transaction type form will be copied to the transaction being posted.
The 'Enter amount on posting' radio button is switched ON to allow you to enter the amount at the
time of posting the transaction.
Entering a negative amount in either the To Us or Direct field will add to the debtor's Principal
amount. If more than one of these transaction types is posted to an account, the total will be
calculated automatically and displayed in the Principal field on the Debtor form.
Entering a positive amount will reduce the amount of Principal. Interest will be recalculated
accordingly.
Interest, if used, is calculated from the Payment Date entered when the transaction is posted and
the amount entered in the To Us or Direct field. If you are using multiple principal transactions,
interest is calculated on the resulting principal total after each transaction's payment date. For
more details please see Interest Detail and documentation for specific types of interest.
In this sample, the reporting check boxes tell Collect! to omit this transaction when creating a
statement for your client and also to omit the transaction when generating the daily cash report.
Calculations are checked not to calculate commission and not to calculate tax on any commission
amount present.
Display is set to leave both the To Us and the Direct fields visible at all times when viewing the
transaction or Transactions List.
No operator or sales operator ID's have been set to be used as default values when posting this
transaction type. You may want to set the Operator or Sales values to HSE or OWN, if you wish to
always have operator and sales operator ID's on every transaction.
No contact plans have been set to be run when posting this transaction type.
No commission rate has been set to override the commission rate that may be set on the Debtor form.
All the above settings will be automatically filled in for you when you post a 196 Original Principal
transaction to an account. You may override any setting when posting the transaction.

Judgment Principal Sample
The Judgment Principal transaction type is needed if you are going to apply interest or add more
principal at a later date. If you are not using any of the above items, then you can skip this
transaction type.
By default, Collect! ships and uses the 194 Judgment Principal transaction type shown below when it
is required to perform interest or judgment calculations.
You may adjust or add to the Principal amount using Principal transaction types. Multiple principal
transaction types are added together and the total is set in the Judgment Principal field on the
Financial Details form.
 You may enter an Judgment Principal amount using the Financial Detail form accessed from the
Debtor form's Principal field. If you have no need of anything more complicated, this is all
you have to do to record the Judgment Principal for the account.
 Any transactions with a Payment Date that is before the Judgment Date will be excluded from
the Debtor's financial calculations. Collect! assumes that the Judgment awarded will factor
in all previous transactions.
The sample shown below sets the Judgment Principal amount. There are several instances when you will
need this.
- If you ever intend to apply interest of any type,
- need to add more principal later,
- use Collect!'s judgment functions,
- use payment plans as a credit grantor,
then you will want to apply this transaction type to the account.
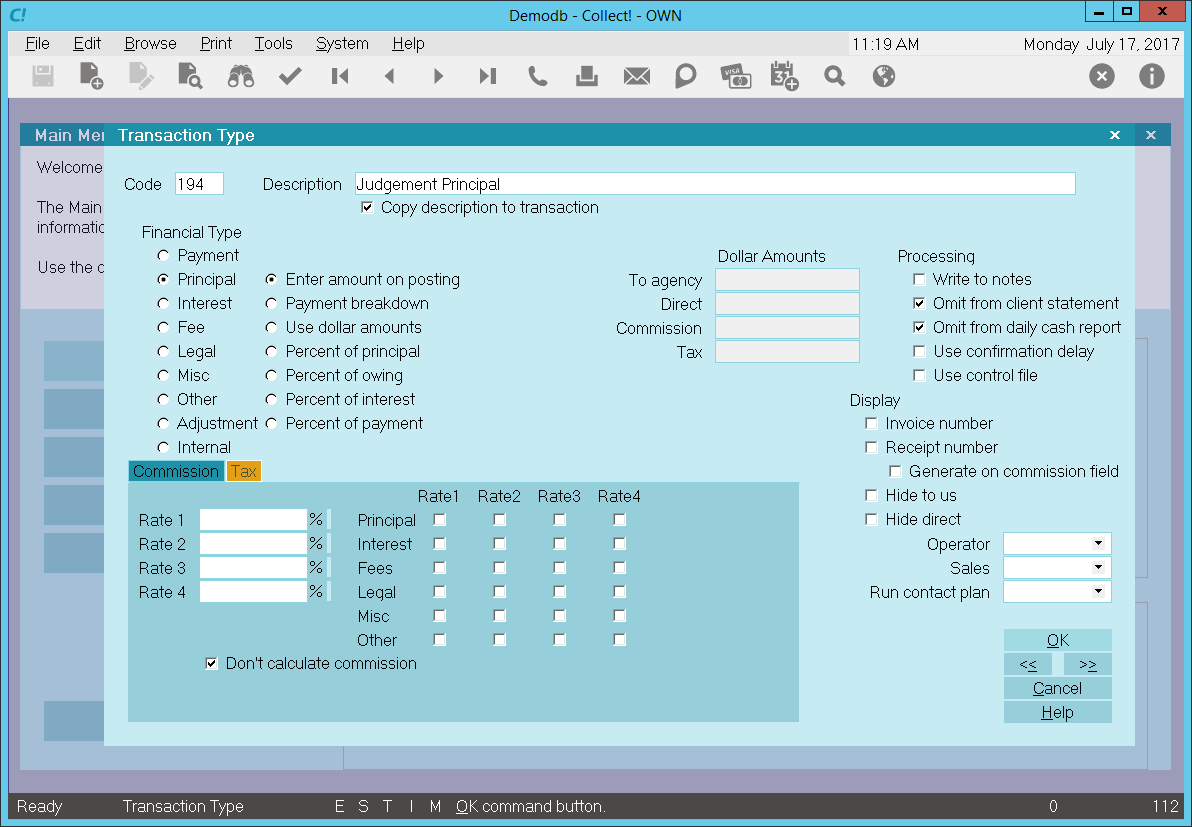
Judgment Principal Transaction Type 194
When you create a 194 Judgment Principal transaction on a debtor account, the description from the
transaction type form will be copied to the transaction being posted.
The 'Enter amount on posting' radio button is switched ON to allow you to enter the amount at the
time of posting the transaction.
Entering a negative amount in either the To Us or Direct field will add to the debtor's Principal
amount. If more than one of these transaction types is posted to an account, the total will be
calculated automatically and displayed in the Principal field on the Debtor form.
Entering a positive amount will reduce the amount of Principal. Interest will be recalculated
accordingly.
Interest, if used, is calculated from the Payment Date entered when the transaction is posted and
the amount entered in the To Us or Direct field. If you are using multiple principal transactions,
interest is calculated on the resulting principal total after each transaction's payment date. For
more details please see Interest Detail and documentation for specific types of interest.
In this sample, the reporting check boxes tell Collect! to omit this transaction when creating a
statement for your client and also to omit the transaction when generating the daily cash report.
Calculations are checked not to calculate commission and not to calculate tax on any commission
amount present.
Display is set to leave both the To Us and the Direct fields visible at all times when viewing the
transaction or Transactions List.
No operator or sales operator ID's have been set to be used as default values when posting this
transaction type. You may want to set the Operator or Sales values to HSE or OWN, if you wish to
always have operator and sales operator ID's on every transaction.
No contact plans have been set to be run when posting this transaction type.
No commission rate has been set to override the commission rate that may be set on the Debtor form.
All the above settings will be automatically filled in for you when you post a 194 Judgment Principal
transaction to an account. You may override any setting when posting the transaction.

Add Percent Of Principal To Principal Sample
You may adjust or add to the Principal amount using Principal transaction types. Multiple principal
transaction types are added together and the total is set in the Original Principal field on the
Financial Detail form.
The sample shown below will add 35% of the current principal to any previous principal amount. Use
this transaction type to add a percentage of the principal to the principal at the time of posting.
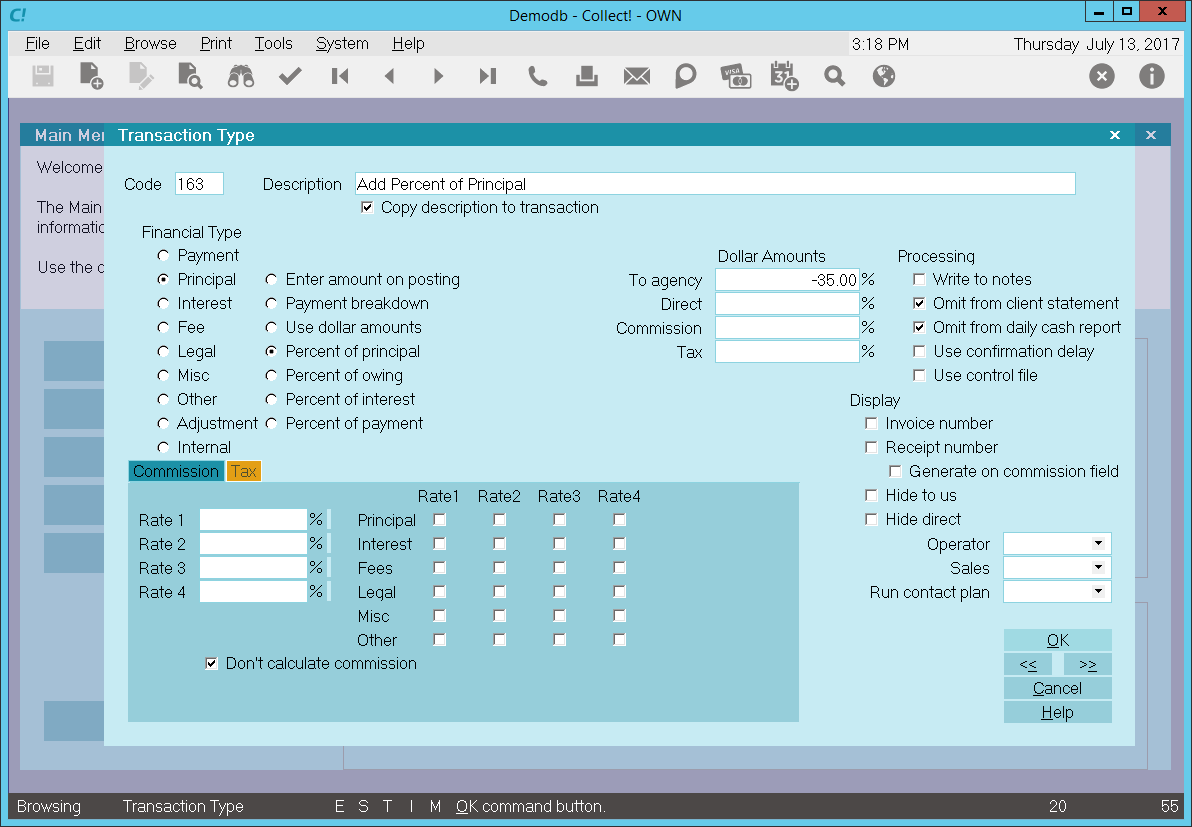
Percent Of Principal - Principal Transaction Type
When you post a 163, Add Percentage of Principal principal transaction to a debtor account, the
description from the transaction type form will be copied to the transaction being posted.
The 'Percent of principal' radio button is switched ON to allow you to set the percentage you wish
to be used at the time of posting the transaction. In this sample, -35% of the current principal will
be automatically filled into the To Us field when posting. Collect! will use the current Principal
amount and add 35% of this value to the previous principal posted to the account.
Entering a negative percentage in either the To Us or Direct field will add to the debtor's Principal
amount. If more than one of these transaction types is posted to an account, the total will be
calculated automatically and displayed in the Principal field on the Debtor form.
Entering a positive percentage will reduce the amount of Principal. Interest will be recalculated
accordingly.
Interest, if used, is calculated from the Payment Date entered when the transaction is posted and
the amount entered in the To Us or Direct field. If you are using multiple principal transactions,
interest is calculated on the resulting principal total after each transaction's payment date. For
more details please see Interest Detail and documentation for specific types of interest.
In this sample, the reporting check boxes tell Collect! to omit this transaction when creating a
statement for your client and also to omit the transaction when generating the daily cash report.
Calculations are checked not to calculate commission and not to calculate tax on any commission
amount present.
Display is set to leave both the To Us and the Direct fields visible at all times when viewing the
transaction or Transactions List.
No operator or sales operator ID's have been set to be used as default values when posting this
transaction type. You may want to set the Operator or Sales values to HSE or OWN, if you wish to
always have operator and sales operator ID's on every transaction.
No contact plans have been set to be run when posting this transaction type.
No commission rate has been set to override the commission rate that may be set on the Debtor form.
All the above settings will be automatically filled in for you when you post a 163 + Percent of
Principal principal transaction to an account. You may override any setting when posting the
transaction.

Add Percent Of Owing To Principal Sample
You may adjust or add to the Principal amount using Principal transaction types. Multiple principal
transaction types are added together and the total is set in the Original Principal field on the
Financial Detail form.
The sample shown below will add 5% of the current Owing to any previous Principal amount. Use this
transaction type for adding to the principal a percentage of the owing at the time of posting.
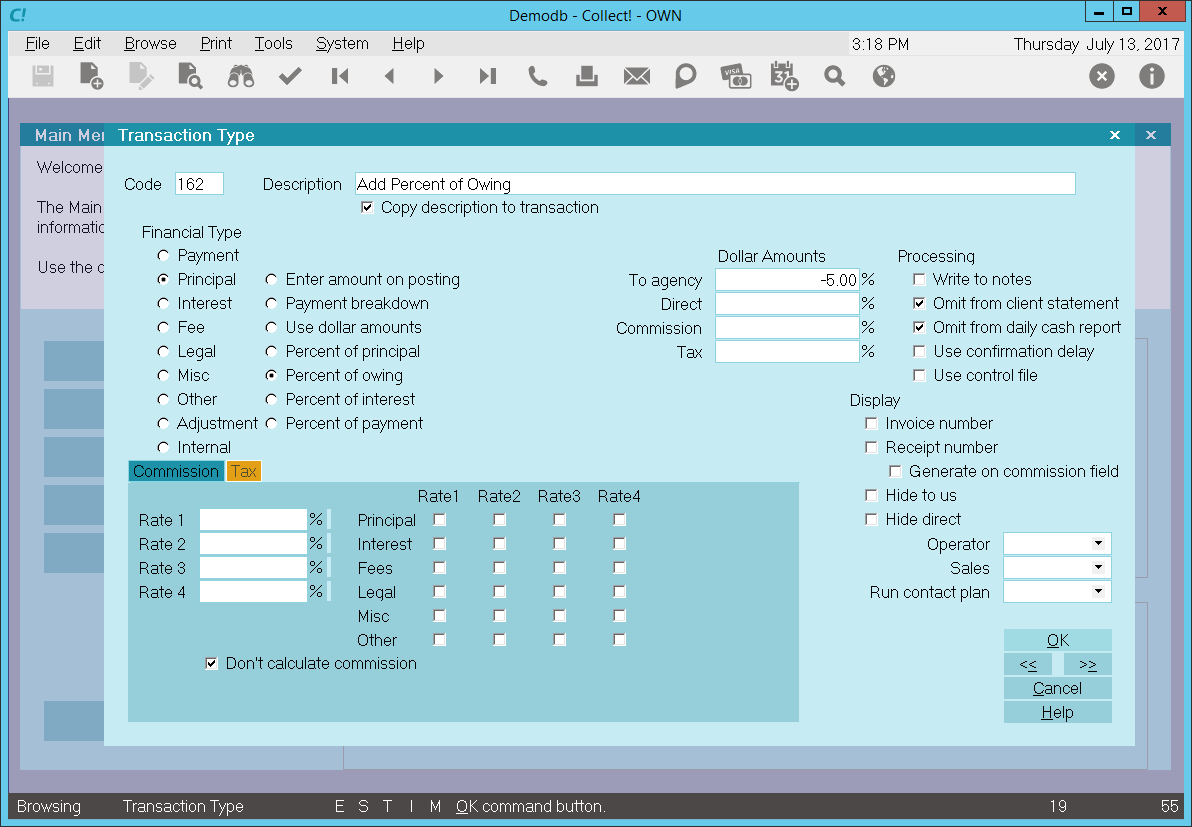
Percent Of Owing - Principal Transaction Type
When you post a 162, Add Percent of Owing principal transaction to a debtor account, the description
from the transaction type form will be copied to the transaction being posted.
The 'Percent of owing' radio button is switched ON to allow you set the percentage you wish to be
used at the time of posting the transaction. In this sample, -5% of the current Owing will be
automatically filled into the To Us field when posting. Collect! will use the current Principal
amount and add 5% of this value to the previous principal posted to the account.
Entering a negative percentage in either the To Us or Direct field will add to the debtor's Principal
amount. If more than one of these transaction types is posted to an account, the total will be
calculated automatically and displayed in the Principal field on the Debtor form.
Entering a positive percentage will reduce the amount of Principal. Interest will be recalculated
accordingly.
Interest, if used, is calculated from the Payment Date entered when the transaction is posted and
the amount entered in the To Us or Direct field. If you are using multiple principal transactions,
interest is calculated on the resulting principal total after each transaction's payment date. For
more details please see Interest Detail and documentation for specific types of interest.
In this sample, the reporting check boxes tell Collect! to omit this transaction when creating a
statement for your client and also to omit the transaction when generating the daily cash report.
In this sample, the reporting check boxes tell Collect! to omit this transaction when creating a
statement for your client and also to omit the transaction when generating the daily cash report.
Calculations are checked not to calculate commission and not to calculate tax on any commission
amount present.
Display is set to leave both the To Us and the Direct fields visible at all times when viewing the
transaction or Transactions List.
No operator or sales operator ID's have been set to be used as default values when posting this
transaction type. You may want to set the Operator or Sales values to HSE or OWN, if you wish to
always have operator and sales operator ID's on every transaction.
No contact plans have been set to be run when posting this transaction type.
No commission rate has been set to override the commission rate that may be set on the Debtor form.
All the above settings will be automatically filled in for you when you post a 162 + Percent of Owing
principal transaction to an account. You may override any setting when posting the transaction.

Additional Principal Sample
You may adjust or add to the Principal amount using Principal transaction types. Multiple principal
transaction types are added together and the total is set in the Original Principal field on the
Financial Detail form.
The sample shown below will add to any previous Principal amount. Use this transaction type for
adding to the principal, for example, monthly for services or equipment. Other examples might be
monthly charges for a membership, or charging for additional services or features your company
may offer.
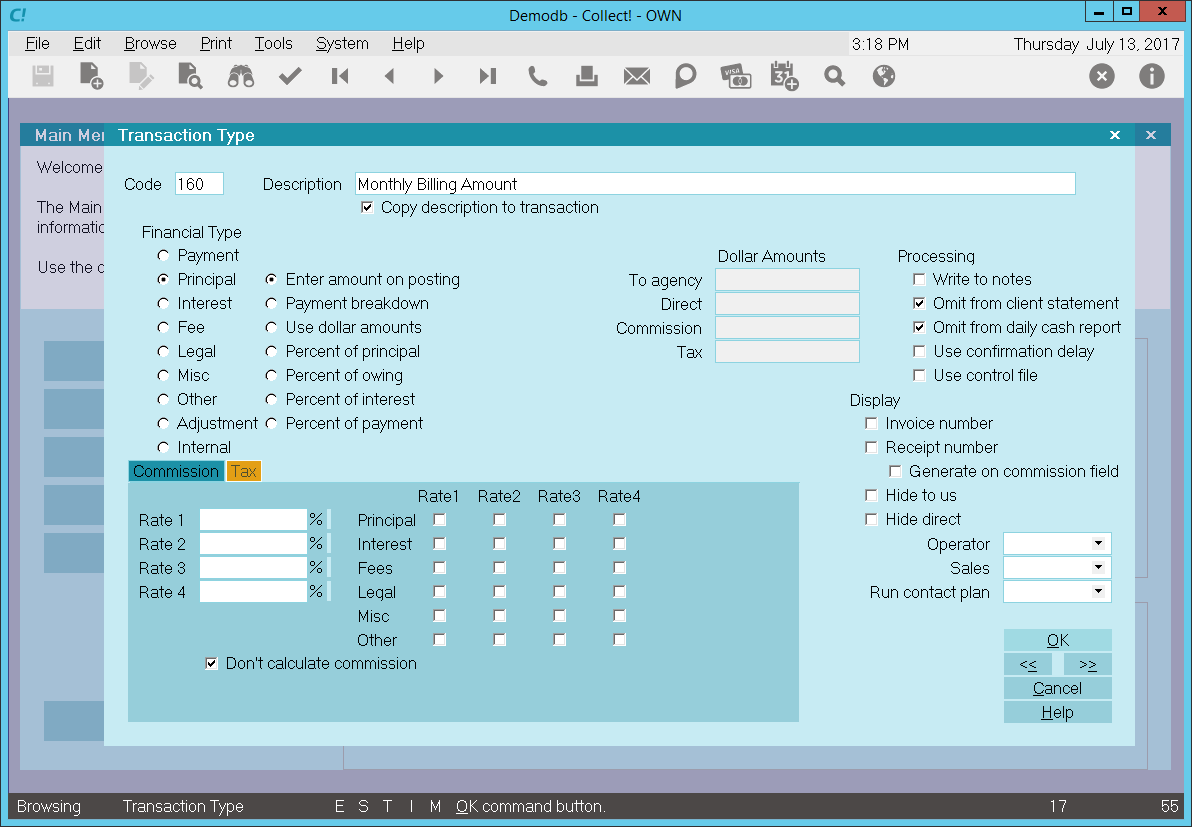
Monthly Billing Amount - Principal Transaction Type
When posting a 160, Monthly Billing Amount principal transaction to a debtor account, the description
from the transaction type form will be copied to the transaction being posted.
The 'Use dollar amounts' radio button is switched ON to allow you set the amount you wish to be used
at the time of posting the transaction. In this sample, -$53.20 will be automatically filled into
the To Us field when posting.
Entering a negative amount in either the To Us or Direct field will add to the debtor's Principal
amount. If more than one of these transaction types is posted to an account, the total will be
calculated automatically and displayed in the Principal field on the Debtor form.
Entering a positive amount will reduce the amount of Principal. Interest will be recalculated
accordingly.
Interest, if used, is calculated from the Payment Date entered when the transaction is posted and
the amount entered in the To Us or Direct field. If you are using multiple principal transactions,
interest is calculated on the resulting principal total after each transaction's payment date. For
more details please see Interest Detail and documentation for specific types of interest.
In this sample, the reporting check boxes tell Collect! to omit this transaction when creating a
statement for your client and also to omit the transaction when generating the daily cash report.
In this sample, the reporting check boxes tell Collect! to omit this transaction when creating a
statement for your client and also to omit the transaction when generating the daily cash report.
Calculations are checked not to calculate commission and not to calculate tax on any commission
amount present.
Display is set to leave both the To Us and the Direct fields visible at all times when viewing the
transaction or Transactions List.
No operator or sales operator ID's have been set to be used as default values when posting this
transaction type. You may want to set the Operator or Sales values to HSE or OWN, if you wish to
always have operator and sales operator ID's on every transaction.
No contact plans have been set to be run when posting this transaction type.
No commission rate has been set to override the commission rate that may be set on the Debtor form.
All the above settings will be automatically filled in for you when you post a 160 Monthly Billing
Amount principal transaction to an account. You may override any setting when posting the transaction.

Add Accrued Interest To Principal Sample
You may adjust or add to the Principal amount using Principal transaction types. Multiple principal
transaction types are added together and the total is set in the Original Principal field on the
Financial Detail form.
The sample shown below will add the total outstanding Accrued Interest to any previous Principal
amount. Use this transaction type to add to the Principal the monthly outstanding accrued interest.
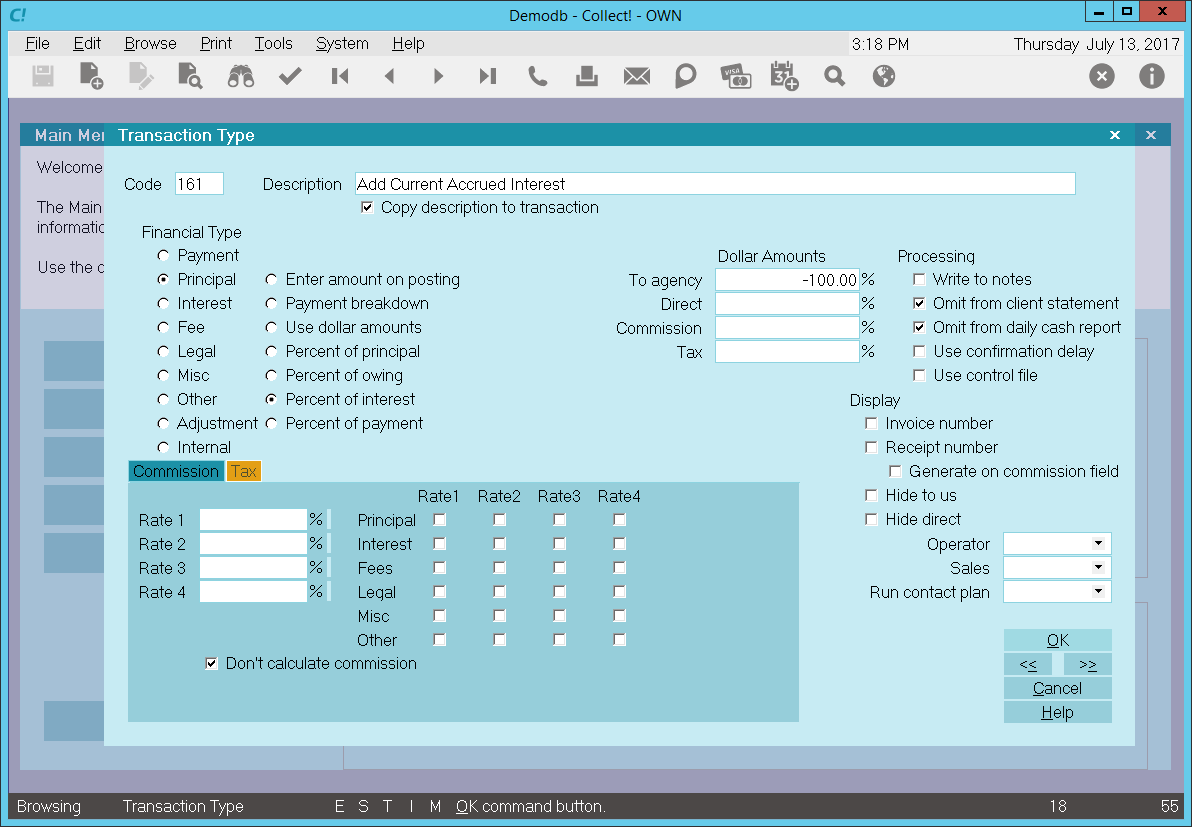
Accrued Interest - Principal Transaction Type
When posting a 161, Add Current Accrued Interest principal transaction to a debtor account, the
description from the transaction type form will be copied to the transaction being posted.
The 'Percent of Interest' radio button is switched ON to allow you set the amount you wish to be used
at the time of posting the transaction. In this sample, -100% will be automatically filled into the
To Us field when posting. Collect! will use the current Accrued Interest amount and add 100% of this
value to the previous Principal posted to the account.
Entering a negative percentage in either the To Us or Direct field will add to the debtor's Principal
amount. If more than one of these transaction types is posted to an account, the total will be calculated
automatically and displayed in the Principal field on the Debtor form.
Entering a positive percentage will reduce the amount of Principal. Interest will be recalculated
accordingly.
Interest, if used, is calculated from the Payment Date entered when the transaction is posted and
the amount entered in the To Us or Direct field. If you are using multiple principal transactions,
interest is calculated on the resulting principal total after each transaction's payment date. For
more details please see Interest Detail and documentation for specific types of interest.
In this sample, the reporting check boxes tell Collect! to omit this transaction when creating a
statement for your client and also to omit the transaction when generating the daily cash report.
In this sample, the reporting check boxes tell Collect! to omit this transaction when creating a
statement for your client and also to omit the transaction when generating the daily cash report.
Calculations are checked not to calculate commission and not to calculate tax on any commission
amount present.
Display is set to leave both the To Us and the Direct fields visible at all times when viewing the
transaction or Transactions List.
No operator or sales operator ID's have been set to be used as default values when posting this
transaction type. You may want to set the Operator or Sales values to HSE or OWN, if you wish to
always have operator and sales operator ID's on every transaction.
No contact plans have been set to be run when posting this transaction type.
No commission rate has been set to override the commission rate that may be set on the Debtor form.
All the above settings will be automatically filled in for you when you post a 161 + Current Accrued
Interest principal transaction to an account. You may override any setting when posting the transaction.

Original Interest Sample
The Original Interest Transaction Type is needed to keep track of any original interest charged
to the account prior to receiving the account. If you do not need to keep this information separate,
then you can skip this transaction type.
By default, Collect! ships and uses the 197 Original Interest transaction type shown below when it is
required to post an original interest amount.
You may adjust or add to the Interest amount using Interest transaction types other than the 197
Original Interest transaction type. Unlike Principal transactions, only the first original interest
transaction type will populate the Original Interest field on the Interest Details form. Any other
197 original transaction types will be ignored.
If you need to apply only original interest and no further interest, you may enter an Original
Interest amount using the Interest Details form accessed from the Debtor form's Interest field. If
you have no need of anything more complicated, this is all you have to do to record Original Interest
for the account.
For those users who use a more detailed or complex reporting method, posting an Original interest
transaction provides more information about the interest amount. With a transaction you can set
Payment and Posted Dates, choose to show or not show the transaction on statements, and assign
operator ID's for tracking and commission purposes.
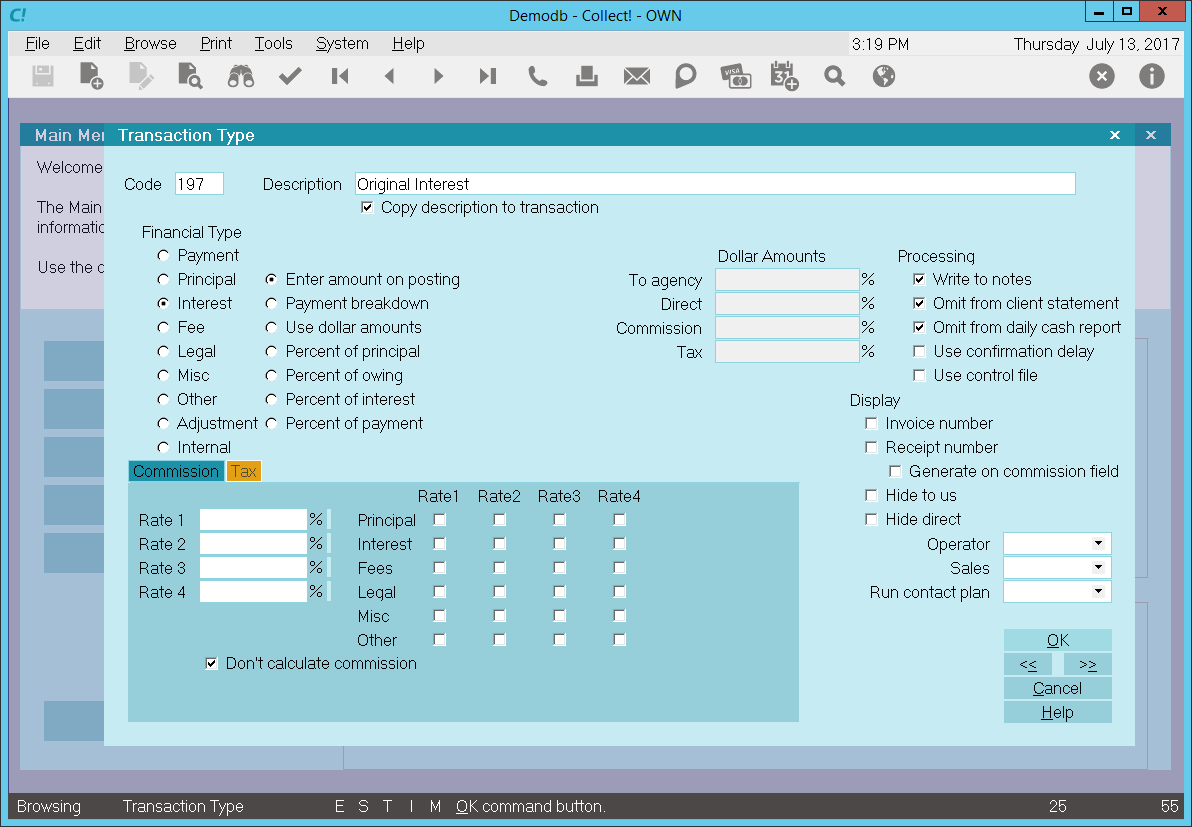
Original Interest - Interest Transaction Type
When you create a 197 Original Interest transaction on a debtor account, the Description from the
Transaction Type form is copied to the transaction being posted.
The 'Enter amount on posting' radio button is switched ON to allow you to enter the amount at the
time of posting the transaction.
Entering a negative amount in either the To Us or Direct field adds to the debtor's Original Interest
amount. The amount will be set in the Interest Details Original Interest field and displays as a
positive amount.
Entering a positive amount reduces the amount of Original Interest. Interest will be recalculated
accordingly.
 WARNING: If more than one Original Interest transaction types is posted to an account, only the
first original interest transaction will be displayed in the Original Interest field.
In this sample, the reporting check boxes tell Collect! to omit this transaction when creating a
statement for your client and also to omit the transaction when generating the Daily Cash Report.
Calculations are checked not to calculate commission and not to calculate tax on any commission
amount present.
Display is set to leave both the To Us and the Direct fields visible at all times when viewing the
transaction or Transactions List.
No operator or sales operator ID's have been set to be used as default values when posting this
transaction type. You may want to set the Operator or Sales values to HSE or OWN, if you wish to
always have operator and sales operator ID's on every transaction.
No contact plans have been set to be run when posting this transaction type.
No commission rate has been set to override the commission rate that may be set on the Debtor form.
All the above settings will be automatically filled in for you when you post a 197 Original Interest
transaction to an account. You may override any setting when posting the transaction.

Original Judgment Interest Sample
The Original Judgement Interest Transaction Type is needed to keep track of any original judgement
interest charged to the account as part of the Judgement. If you do not need to keep this information
separate, then you can skip this transaction type.
By default, Collect! ships and uses the 195 Original Judgement Interest transaction type shown below
when it is required to post an original judgement interest amount.
You may adjust or add to the Interest amount using Interest transaction types other than the 195
Original Judgement Interest transaction type. Unlike Principal transactions, only the first original
interest transaction type will populate the Original Judgement Interest field on the Financial Details
form. Any other 195 original transaction types will be ignored.
If you need to apply only original interest and no further interest, you may enter an Original
Judgement Interest amount using the Financial Details form accessed from the Debtor form's Principal
field. If you have no need of anything more complicated, this is all you have to do to record Original
Judgement Interest for the account.
For those users who use a more detailed or complex reporting method, posting an Original Judgement
Interest transaction provides more information about the interest amount. With a transaction you can
set Payment and Posted Dates, choose to show or not show the transaction on statements, and assign
operator ID's for tracking and commission purposes.
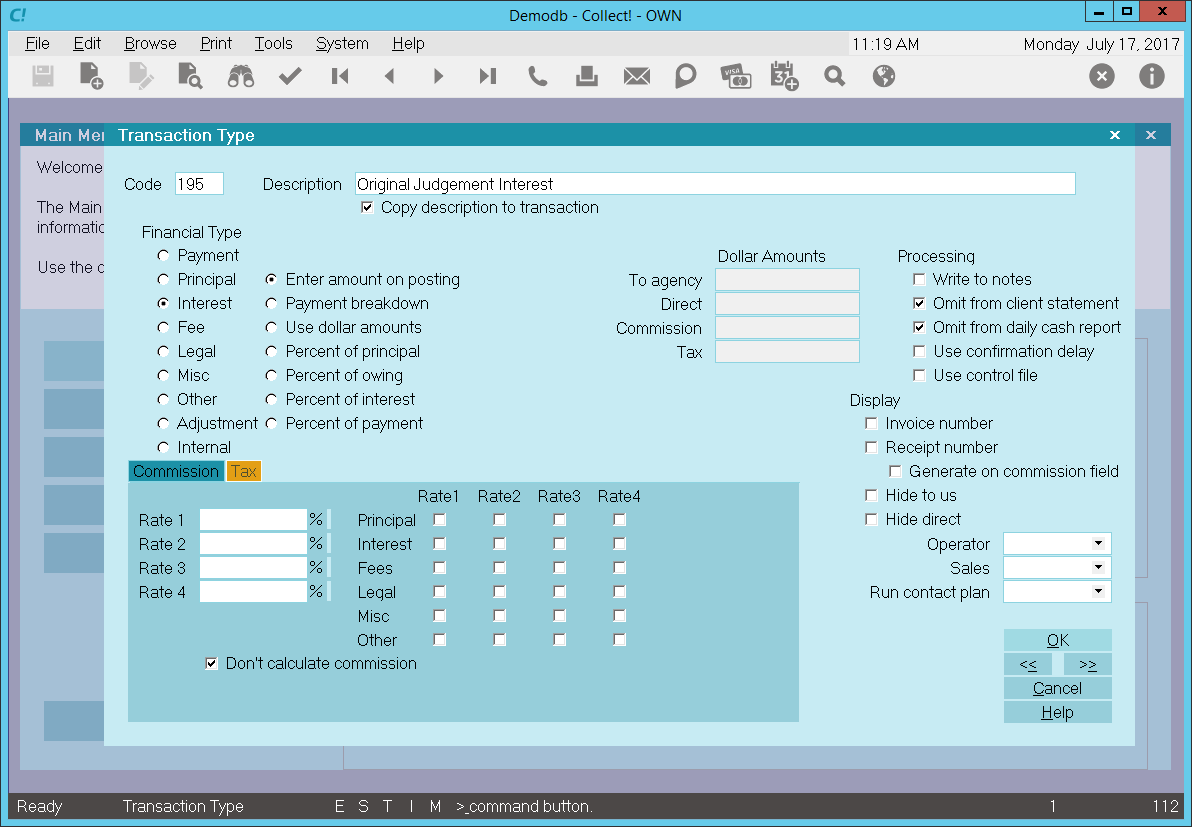
Original Judgment Interest - Interest Transaction Type
When you create a 195 Original Judgment Interest transaction on a debtor account, the Description
from the Transaction Type form is copied to the transaction being posted.
The 'Enter amount on posting' radio button is switched ON to allow you to enter the amount at the
time of posting the transaction.
Entering a negative amount in either the To Us or Direct field adds to the debtor's Original Interest
amount. The amount will be set in the Interest Details Original Interest field and displays as a
positive amount.
Entering a positive amount reduces the amount of Original Judgment Interest. Interest will be
recalculated accordingly.
 WARNING: If more than one Original Judgment Interest transaction types is posted to an account,
only the first original interest transaction will be displayed in the Original Judgment
Interest field.
In this sample, the reporting check boxes tell Collect! to omit this transaction when creating a
statement for your client and also to omit the transaction when generating the Daily Cash Report.
Calculations are checked not to calculate commission and not to calculate tax on any commission
amount present.
Display is set to leave both the To Us and the Direct fields visible at all times when viewing the
transaction or Transactions List.
No operator or sales operator ID's have been set to be used as default values when posting this
transaction type. You may want to set the Operator or Sales values to HSE or OWN, if you wish to
always have operator and sales operator ID's on every transaction.
No contact plans have been set to be run when posting this transaction type.
No commission rate has been set to override the commission rate that may be set on the Debtor form.
All the above settings will be automatically filled in for you when you post a 195 Original Judgment
Interest transaction to an account. You may override any setting when posting the transaction.

Interest Adjustment Sample
You may adjust or add to the interest amount using Interest Transaction Types. Multiple interest
transaction types are added together and the total is set in the Interest field on the Debtor form.
Collect! ships with a default Interest Adjustment transaction type 401. Use this transaction type
to adjust the Interest amount for an account.
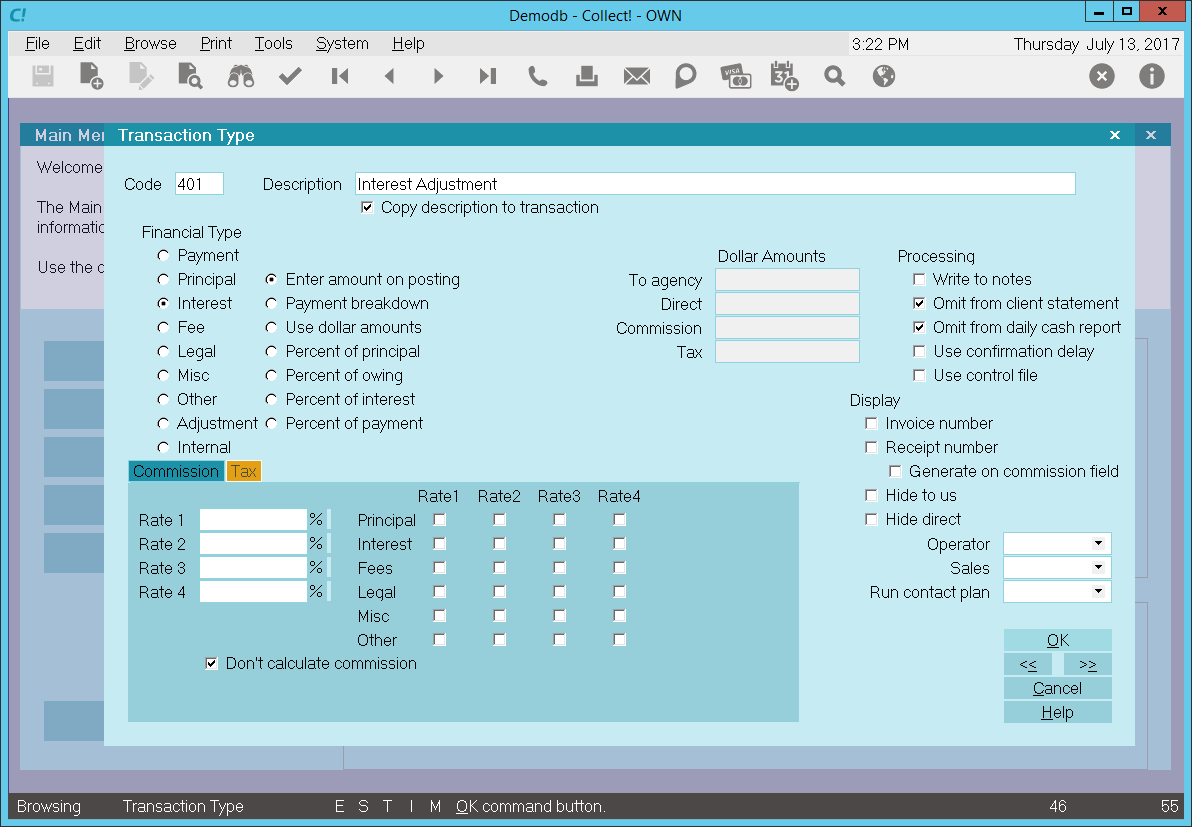
Interest Adjustment - Interest Transaction Type
When posting a 401, Interest Adjustment transaction to a Debtor account, the Description from the
Transaction Type form is copied to the transaction being posted.
The 'Enter amount on Posting' radio button is switched ON to allow you enter the amount you wish to
be used at the time of posting the transaction.
Entering a negative amount in either the To Us or Direct field adds to the debtor's Interest amount.
Entering a positive amount reduces the amount of Interest on the debtor's account. Interest will be
recalculated accordingly.
In this sample, the reporting check boxes tell Collect! to omit this transaction when creating a
statement for your client and also to omit the transaction when generating the Daily Cash Report.
Calculations are checked not to calculate commission and not to calculate tax on any commission
amount present.
Display is set to leave both the To Us and the Direct fields visible at all times when viewing the
transaction or Transactions List.
No operator or sales operator ID's have been set to be used as default values when posting this
transaction type. You may want to set the Operator or Sales values to HSE or OWN, if you wish to
always have operator and sales operator ID's on every transaction.
No contact plans have been set to be run when posting this transaction type.
No commission rate has been set to override the commission rate that may be set on the Debtor form.
All the above settings will be automatically filled in for you when you post a 401 Interest Adjustment
transaction to an account. You may override any setting when posting the transaction.

Total Accrued Interest Sample
You may adjust or add to the interest amount using Interest Transaction Types. You may use this
transaction type sample to get the total outstanding accrued interest before closing an account,
or when you wish to turn off interest calculations in the future.
By default, if you close an account, Collect! uses the default Total Accrued Interest transaction
type 499 to capture the amount of outstanding accrued interest. The 499 transaction is posted to the
debtor, interest calculating is switched off and the 'Calculate Interest From Date' is reset to
today's date. This is set in case you want to start calculating interest again in the future.
The sample shown below will add the total outstanding accrued Interest to any previous interest amount.
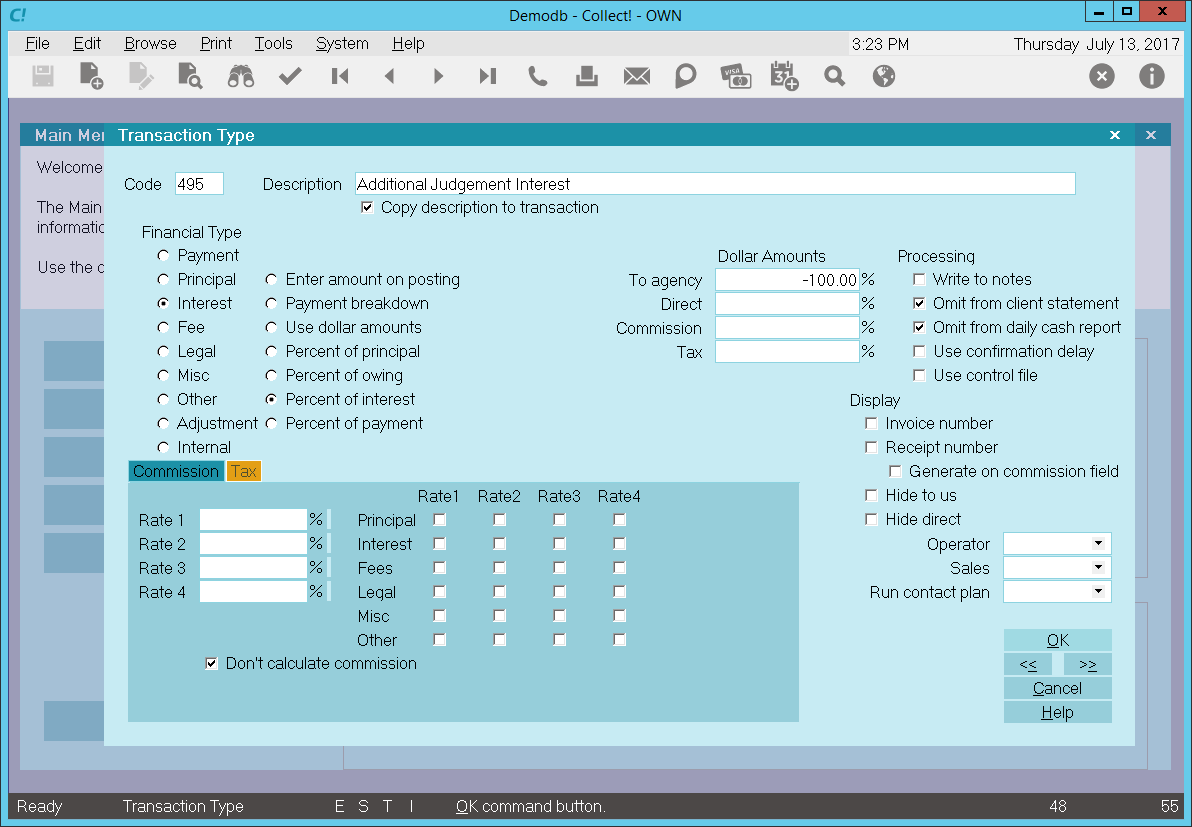
Total Accrued Interest - Interest Transaction Type
When posting a 499, Total Accrued Interest transaction to a debtor account, the Description from the
Transaction Type form is copied to the transaction being posted.
The 'Percent of Interest' radio button is switched ON to allow you set the amount you wish to be
used at the time of posting the transaction. In this sample, -100% will be automatically filled into
the To Us field when posting. Collect! uses the current Accrued Interest amount and adds 100% of this
value to the previous interest posted to the account.
Entering a negative percentage in either the To Us or Direct field adds to the debtor's Interest amount.
Entering a positive percentage reduces the amount of Interest. Interest will be recalculated accordingly.
In this sample, the reporting check boxes tell Collect! to omit this transaction when creating a
statement for your Client and also to omit the transaction when generating the Daily Cash Report.
In this sample, the reporting check boxes tell Collect! to omit this transaction when creating a
statement for your client and also to omit the transaction when generating the Daily Cash Report.
Calculations are checked not to calculate commission and not to calculate tax on any commission
amount present.
Display is set to leave both the To Us and the Direct fields visible at all times when viewing the
transaction or Transactions List.
No operator or sales operator ID's have been set to be used as default values when posting this
transaction type. You may want to set the Operator or Sales values to HSE or OWN, if you wish to
always have operator and sales operator ID's on every transaction.
No contact plans have been set to be run when posting this transaction type.
No commission rate has been set to override the commission rate that may be set on the Debtor form.
All the above settings will be automatically filled in for you when you post a 499 Total Accrued
Interest transaction to an account. You may override any setting when posting the transaction.

Payment By Check Sample
The Payment By Check Transaction Type may be used to post a check payment to an account.
The screen shot below shows the settings for the Payment By Check Transaction Type.
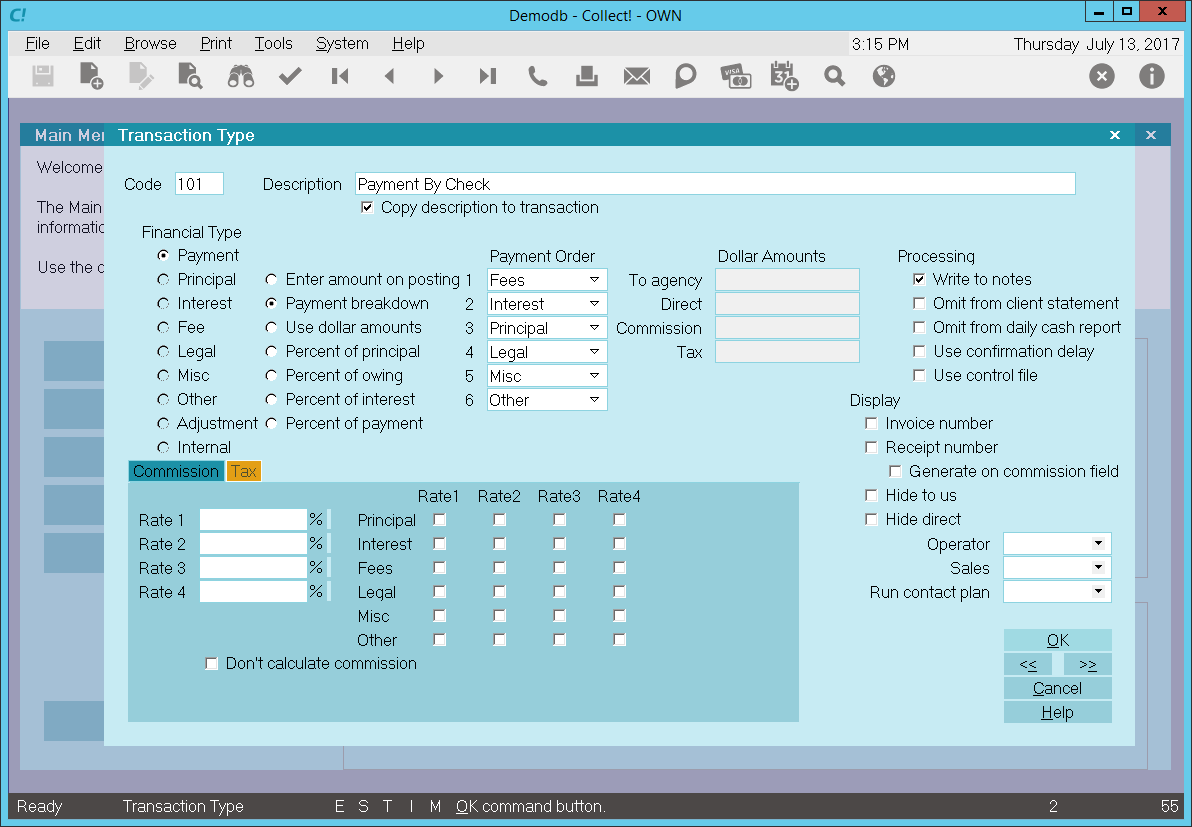
Payment By Check - Payment Transaction Type
The rest of this document explains the settings shown above.
By default, Collect! ships with a number of Payment type transaction samples. Collect! uses the 100
series for payment type transactions, but any Financial Type dotted as "Payment" will be processed
as a payment type transaction.
You can have many different payment transaction types for separating the various types of payments
you may receive. Payment By Cash, Payment By Check, Money Order and Check Payment Taken Over The
Phone are a few examples.
A check mark in the box labeled Copy Description To Transaction copies the
Description from the Transaction Type form when you post a 101 Payment By Check transaction.
The Payment radio button is dotted for keeping track of payments made on an account.
Any transaction flagged as a Payment type, with an amount either in the To Us or Direct field, will
affect the balance of the Owing amount displayed on the Debtor form.
An amount in the transaction's Commission field affects the commission amount shown on the statement
you generate for your client.
All payment transactions are totaled together and subtracted from the total debt. The result is
displayed in the Owing field of the Debtor form.
The radio button labeled Enter amount on Posting is switched ON so you can enter an
amount when you post the payment transaction to the account.
Reporting check boxes are left UNCHECKED so that this payment transaction is included in the client
statement and the amount of the payment is calculated into the total daily cash received by your agency.
Calculations check boxes are left UNCHECKED so that commission will be calculated on this payment
using the commission rate on the account and tax will be calculated on this payment using the tax
rate on the account.
The way you handle your business will help you decide whether or not to enable any other optional
settings.
Display is set to leave both the To Us and the Direct fields visible at all times when viewing the
transaction or Transactions List.
No operator or sales operator ID's have been set to be used as default values when posting this
transaction type. You may want to set the Operator or Sales values to HSE or OWN, if you wish to
always have operator and sales operator ID's on every transaction.
No contact plans have been set to be run when posting this transaction type.
No commission rate has been set to override the commission rate that may be set on the Debtor form.
All the above settings will be automatically filled in for you when you post a 101 Payment By Check
transaction to an account. You may override any setting when posting the transaction.
The Payment By Check transaction type has been set up to easily post check payments to an account.
When the transaction is posted, you will be able to enter the amount of the payment as a POSITIVE
value in the transaction's To Us or Direct field.

Check Taken By Phone Sample
The Check Taken By Phone Transaction Type may be used to post a check payment to an account where
the debtor has provided you the banking information and you need to print the check yourself.
The screen shot below shows the settings for the Check Taken by Phone Transaction Type.

Check Taken by Phone - Payment Transaction Type
The rest of this document explains the settings shown above.
By default, Collect! ships with a number of Payment type transaction samples. Collect! uses the 100
series for payment type transactions, but any Financial Type dotted as "Payment" will be processed
as a payment type transaction.
You can have many different payment transaction types for separating the various types of payments
you may receive. Payment By Cash, Payment By Check, Money Order and Check Payment Taken Over The
Phone are a few examples.
A check mark in the box labeled Copy Description To Transaction copies the
Description from the Transaction Type form when you post a 101 Payment By Check transaction.
The Payment radio button is dotted for keeping track of payments made on an account.
Any transaction flagged as a Payment type, with an amount either in the To Us or Direct field, will
affect the balance of the Owing amount displayed on the Debtor form.
An amount in the transaction's Commission field affects the commission amount shown on the statement
you generate for your client.
All payment transactions are totaled together and subtracted from the total debt. The result is
displayed in the Owing field of the Debtor form.
The radio button labeled Enter amount on Posting is switched ON so you can enter an
amount when you post the payment transaction to the account.
Reporting check boxes are left UNCHECKED so that this payment transaction is included in the client
statement and the amount of the payment is calculated into the total daily cash received by your agency.
Calculations check boxes are left UNCHECKED so that commission will be calculated on this payment
using the commission rate on the account and tax will be calculated on this payment using the tax
rate on the account.
The way you handle your business will help you decide whether or not to enable any other optional
settings.
Display is set to leave both the To Us and the Direct fields visible at all times when viewing the
transaction or Transactions List.
No operator or sales operator ID's have been set to be used as default values when posting this
transaction type. You may want to set the Operator or Sales values to HSE or OWN, if you wish to
always have operator and sales operator ID's on every transaction.
No contact plans have been set to be run when posting this transaction type.
No commission rate has been set to override the commission rate that may be set on the Debtor form.
All the above settings will be automatically filled in for you when you post a 101 Payment By Check
transaction to an account. You may override any setting when posting the transaction.
The Payment By Check transaction type has been set up to easily post check payments to an account.
When the transaction is posted, you will be able to enter the amount of the payment as a POSITIVE
value in the transaction's To Us or Direct field.

Down Payment Sample
The Down Payment Transaction Type may be used to post a down payment to an account when a payment
schedule is posted.
The screen shot below shows the settings for the Down Payment Transaction Type.
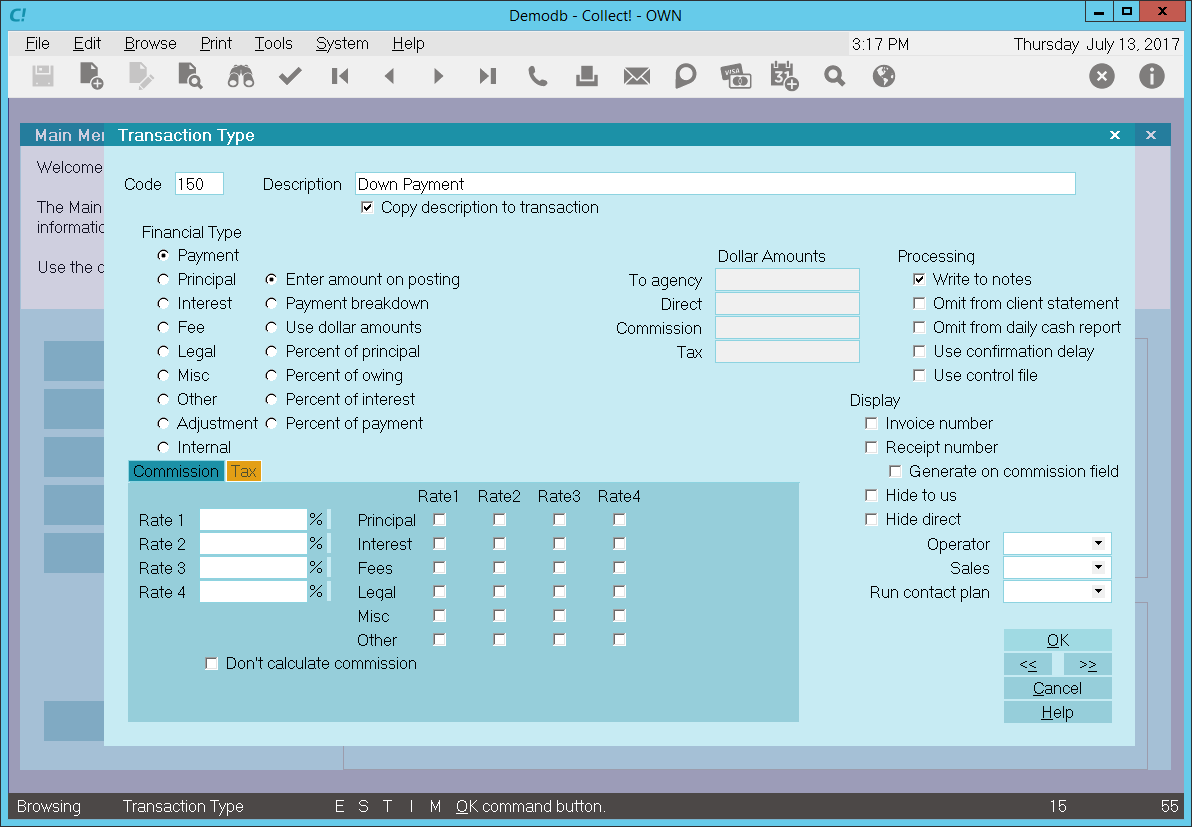
Down Payment - Payment Transaction Type
The rest of this document explains the settings shown above.
By default, Collect! ships with a number of Payment type transaction samples. Collect! uses the 100
series for payment type transactions, but any Financial Type dotted as "Payment" will be processed
as a payment type transaction.
You can have many different payment transaction types for separating the various types of payments
you may receive. The Down Payment transaction type is typically used when setting up loans or payment
plans. If the set up includes a down payment, Collect! will post the dollar amount using a 150 Down
Payment transaction, when you post the payment schedule to the account.
A check mark in the box labeled Copy Description To Transaction copies the
Description from the Transaction Type form when you post a 150 Down Payment transaction.
The Payment radio button is dotted for keeping track of payments made on an account.
Any transaction flagged as a Payment type, with an amount either in the To Us or Direct field, will
affect the balance of the Owing amount displayed on the Debtor form. An amount in the transaction's
Commission field affects the commission amount shown on the statement you generate for your client.
All payment transactions are totaled together and subtracted from the total debt. The result is
displayed in the Owing field of the Debtor form.
The radio button labeled Enter amount on Posting is switched ON. This enabled
Collect! to fill in the dollar amount set up on the account as a down payment.
The reporting check box, Omit from client statement is left UNCHECKED so that this
payment transaction is included in the client statement.
Reporting check box, Omit from daily cash report, is left UNCHECKED so that the
amount of this payment is calculated into the total daily cash received by your agency.
Calculations check box, Don't calculate commission is left UNCHECKED so that
commission will be calculated on this payment using the commission rate on the account.
Calculations check box, Don't calculate tax is left UNCHECKED so that tax will be
calculated on this payment using the tax rate on the account.
 The way you handle your business will help you decide whether or not to enable any other
optional settings.
A line will be written to the debtor's Notes when this Down Payment transaction is posted.
Display is set to leave both the To Us and the Direct fields visible at all times when viewing the
transaction or Transactions List.
No operator or sales operator ID's have been set to be used as default values when posting this
transaction type. You may want to set the Operator or Sales values to HSE or OWN, if you wish to
always have operator and sales operator ID's on every transaction.
No contact plans have been set to be run when posting this transaction type.
No commission rate has been set to override the commission rate that may be set on the Debtor form.
All the above settings will be automatically filled in for you when you post a 150 Down Payment
transaction to an account.
The Down Payment transaction type has been set up to handle down payments when a payment schedule
is posted to an account. The amount of the down payment is filled in automatically from the account's
financial settings.

Payment Plan Payment Sample
The Payment Plan Payment Transaction Type may be used to post a payment schedule to an account when
using payment plans or other scheduled loan payments.
The screen shot below shows the settings for the Payment Plan Payment Transaction Type.
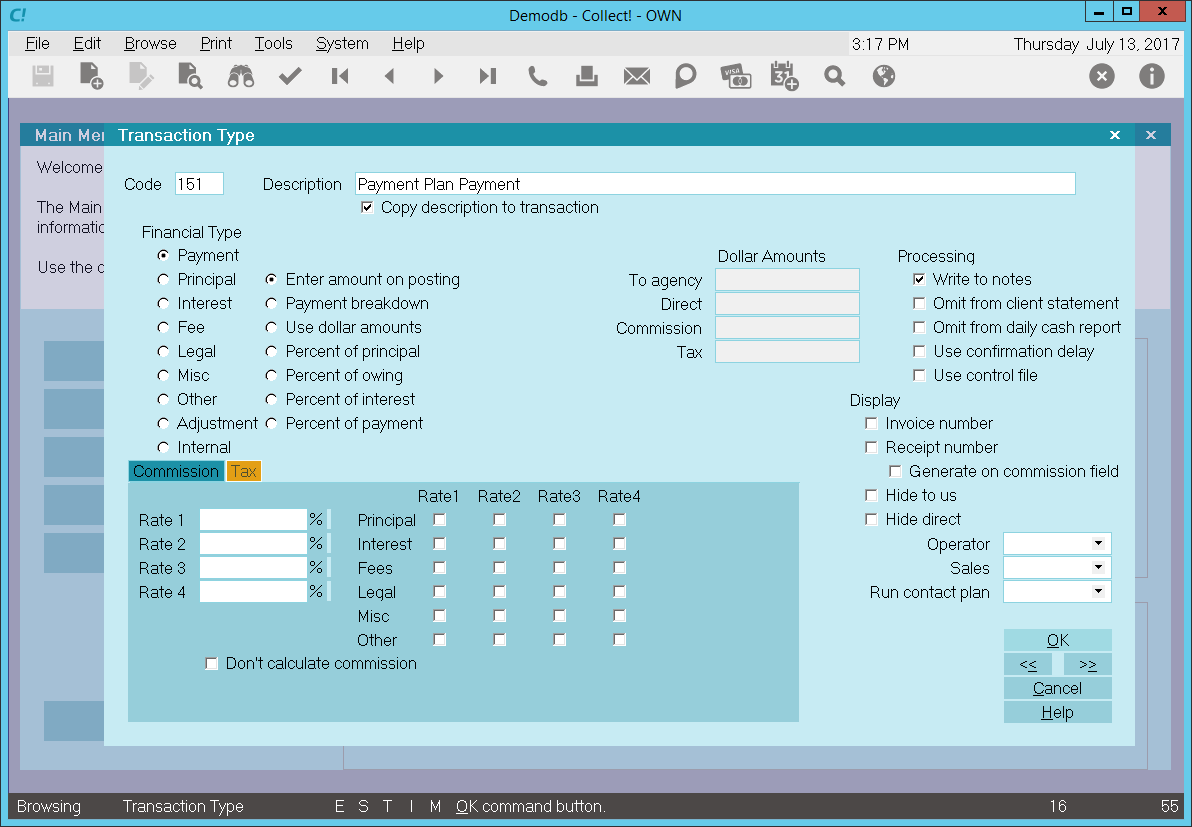
Payment Plan Payment Transaction Type
The rest of this document explains the settings shown above.
By default, Collect! ships with a number of Payment type transaction samples. Collect! uses the 100
series for payment type transactions, but any Financial Type dotted as "Payment" will be processed
as a payment type transaction.
You can have many different payment transaction types for separating the various types of payments
you may receive. The Payment Plan Payment transaction type is typically used when setting up loans
or payment plans. When Collect! posts all the promised transactions that make up the schedule of
payments, the 151 Payment Plan Payment transaction type is used.
A check mark in the box labeled Copy Description To Transaction copies the
Description from the Transaction Type form when you post a 151 Payment Plan Payment transaction.
The Payment radio button is dotted for keeping track of payments made on an account.
Any transaction flagged as a Payment type, with an amount either in the To Us or Direct field, will
affect the balance of the Owing amount displayed on the Debtor form. An amount in the transaction's
Commission field affects the commission amount shown on the statement you generate for your client.
All payment transactions are totaled together and subtracted from the total debt. The result is
displayed in the Owing field of the Debtor form.
The radio button labeled Enter amount on Posting is switched ON. This enabled
Collect! to fill in the dollar amount set up on the account as the payment amount.
The reporting check box, Omit from client statement is left UNCHECKED so that this
payment transaction is included in the client statement.
Reporting check box, Omit from daily cash report, is left UNCHECKED so that the
amount of this payment is calculated into the total daily cash received by your agency.
Calculations check box, Don't calculate commission is left UNCHECKED so that
commission will be calculated on this payment using the commission rate on the account.
Calculations check box, Don't calculate tax is left UNCHECKED so that tax will be
calculated on this payment using the tax rate on the account.
 The way you handle your business will help you decide whether or not to enable any other
optional settings.
A line will be written to the debtor's Notes when this Down Payment transaction is posted.
Display is set to leave both the To Us and the Direct fields visible at all times when viewing the
transaction or Transactions List.
No operator or sales operator ID's have been set to be used as default values when posting this
transaction type. You may want to set the Operator or Sales values to HSE or OWN, if you wish to
always have operator and sales operator ID's on every transaction.
No contact plans have been set to be run when posting this transaction type.
No commission rate has been set to override the commission rate that may be set on the Debtor form.
All the above settings will be automatically filled in for you when you post a 151 Payment Plan
Payment to an account.
The Payment Plan Payment transaction type has been set up to handle scheduled payments when a
payment plan is posted to an account. The amount of each payment is filled in automatically from
the account's financial settings.

Legal Fee Payment Sample
The Payment Transaction Type is needed to keep track of fees that have been paid on an account. Any
transaction flagged as a Payment type, with an amount either in the To Us or Direct field, will
affect the balance of the Owing amount displayed on the Debtor form. An amount in the transaction's
Commission field affects only the commission amount shown on the statement you generate for your client.
By default, Collect! ships with a number of Payment type transaction samples. Collect! uses the 100
series for payment type transactions, but any Financial Type dotted as "Payment" will be processed
as a payment type transaction.
You can have many different legal fee payment transaction types for separating the various legal
fees you may have entered. Filing Fee, Serving Fee, and Warrant Fee are a few examples.

Legal Fee Payment - Payment Transaction Type
All payment transactions are totaled together and subtracted from the total debt the result is
displayed in the Owing field of the Debtor form.
When you create a 120 Legal Fee Payment transaction on a debtor account, the Description from the
Transaction Type form is copied to the transaction being posted.
The 'Enter amount on Posting' radio button is switched ON to allow you enter the amount you wish to
be used at the time of posting the transaction.
Entering a positive amount in either the To Us or Direct field will reflect the amount of the legal
fee that has been paid.
In this sample, the reporting check boxes tell Collect! to omit this transaction when creating a
statement for your client. However the 'Omit from daily cash' is not checked as we want to keep
track of the amount of money that has come into our agency on our daily cash.
Calculations are all unchecked as we do want to calculate commission and we do want to calculate tax.
Display is set to leave both the To Us and the Direct fields visible at all times when viewing the
transaction or Transactions List.
No operator or sales operator ID's have been set to be used as default values when posting this
transaction type. You may want to set the Operator or Sales values to HSE or OWN, if you wish to
always have operator and sales operator ID's on every transaction.
No contact plans have been set to be run when posting this transaction type.
We will need to input a commission rate of 100.00 as we will be retaining 100% of this payment.
All the above settings will be automatically filled in for you when you post a 120 Legal Fee Payment
transaction to an account. You may override any setting when posting the transaction.

Legal Fee Advance Received Sample
The Payment Transaction Type is needed to keep track of fees that have been paid on an account. Any
transaction flagged as a Payment type, with an amount either in the To Us or Direct field, will
affect the balance of the Owing amount displayed on the Debtor form. An amount in the transaction's
Commission Amount field affects only the commission amount shown on the statement you generate for
your client.
By default, Collect! ships with a number of Payment type transaction samples. Collect! uses the 100
series for payment type transactions, but any Financial Type dotted as "Payment" will be processed
as a payment type transaction.
 Typically, you would use Payment Breakdown and post a single payment transaction, rather
than posting several payments to Fees, Principal, or Interest.
You can have many different legal fee payment transaction types for separating the various legal
fees you may have entered. The Legal Fee Advance Received transaction type is used to keep track of
monies received from your client to cover legal fees, such as court costs.
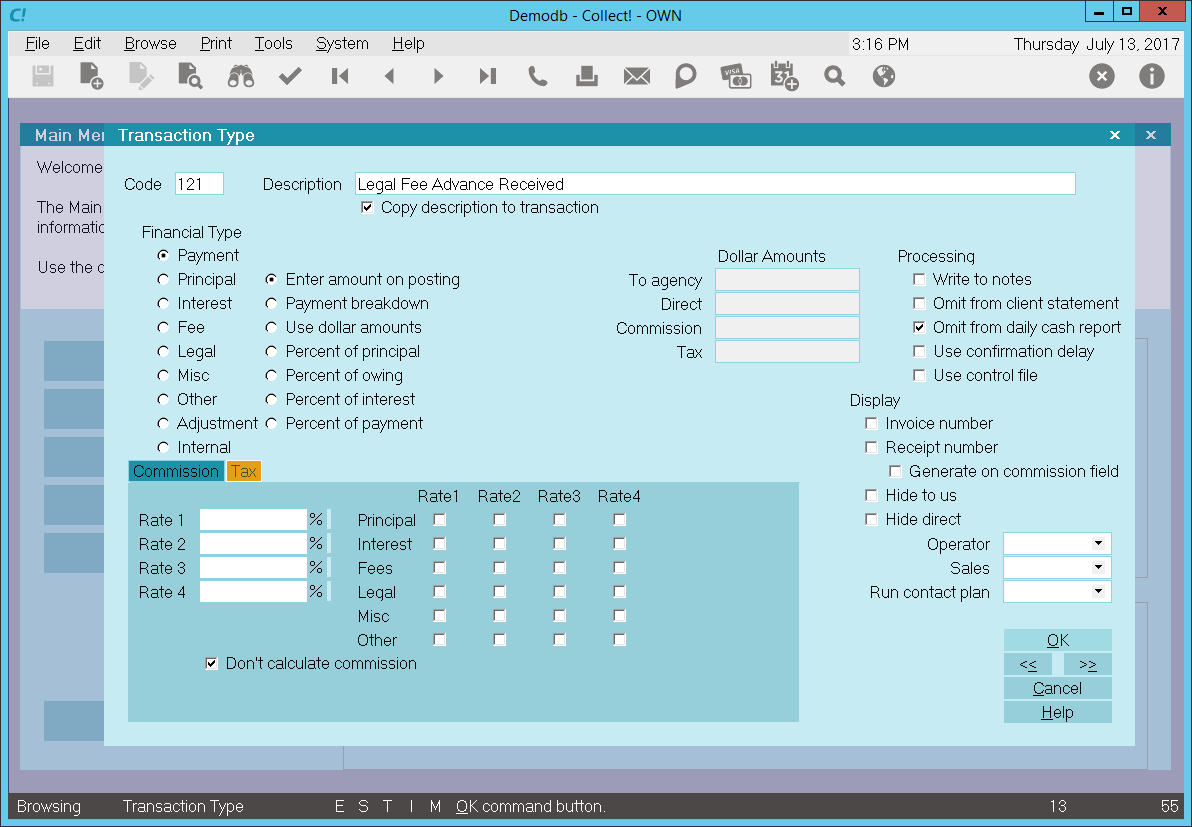
Legal Fee Advance Received - Payment Transaction Type
All payment transactions are totaled together and subtracted from the total debt the result is
displayed in the Owing field of the Debtor form.
When you create a 121 Legal Fee Advance Received transaction on a debtor account, the Description
from the Transaction Type form is copied to the transaction being posted.
The 'Enter amount on Posting' radio button is switched ON to allow you enter the amount you wish to
be used at the time of posting the transaction.
Entering a NEGATIVE amount in the Commission Amount field posts this as an advance received from
your client.
In this sample, the reporting check boxes tell Collect! to include this transaction when creating
a statement for your client. However the 'Omit from daily cash' is checked as this is not included
in the money that has come into our agency on our daily cash.
Calculations are all unchecked as we do want to calculate commission and we do want to calculate tax.
Display is set to leave both the To Us and the Direct fields visible at all times when viewing the
transaction or Transactions List.
No operator or sales operator ID's have been set to be used as default values when posting this
transaction type. You may want to set the Operator or Sales values to HSE or OWN, if you wish to
always have operator and sales operator ID's on every transaction.
No contact plans have been set to be run when posting this transaction type.
All the above settings will be automatically filled in for you when you post a 121 Legal Fee Advance
Received transaction to an account. You may override any setting when posting the transaction.

Legal Fee Advance Recovered Sample
The Payment Transaction Type is needed to keep track of fees that have been paid on an account. Any
transaction flagged as a Payment type, with an amount either in the To Us or Direct field, will
affect the balance of the Owing amount displayed on the Debtor form. An amount in the transaction's
Commission Amount field affects only the commission amount shown on the statement you generate for
your client.
By default, Collect! ships with a number of Payment type transaction samples. Collect! uses the 100
series for payment type transactions, but any Financial Type dotted as "Payment" will be processed
as a payment type transaction.
You can have many different legal fee payment transaction types for separating the various legal
fees you may have entered. The Legal Fee Advance Recovered transaction type is used to post a payment
for legal fees, such as court costs. This is used when you have already received an advance from
your client and you need to reimburse the client for the amount of the advance. When you recover the
amount from your debtor, you may post a Legal Fee Advance Recovered payment transaction.

Legal Fee Advance Recovered - Payment Transaction Type
All payment transactions are totaled together and subtracted from the total debt the result is
displayed in the Owing field of the Debtor form.
When you create a 122 Legal Fee Advance Recovered transaction on a debtor account, the Description
from the Transaction Type form is copied to the transaction being posted.
The 'Enter amount on Posting' radio button is switched ON to allow you enter the amount you wish to
be used at the time of posting the transaction.
Entering a POSITIVE amount in either the To Us or Direct field will reflect the amount of the legal
fee that has been recovered.
Leave the Commission Amount field empty so that the entire amount is reimbursed to your client.
In this sample, the reporting check boxes tell Collect! to include this transaction when creating a
statement for your client. However the 'Omit from daily cash' is checked as this is not included in
the money that has come into our agency on our daily cash.
Calculations are all unchecked as we do want to calculate commission and we do want to calculate tax.
Display is set to leave both the To Us and the Direct fields visible at all times when viewing the
transaction or Transactions List.
No operator or sales operator ID's have been set to be used as default values when posting this
transaction type. You may want to set the Operator or Sales values to HSE or OWN, if you wish to
always have operator and sales operator ID's on every transaction.
No contact plans have been set to be run when posting this transaction type.
All the above settings will be automatically filled in for you when you post a 122 Legal Fee Advance
Recovered transaction to an account. You may override any setting when posting the transaction.

Payment Of Agency NSF Fee Sample
Let's assume that an operator posts a check payment to a debtor account. A few days later, the check
is returned to you NSF. You process the check, including your NSF fee. Later on, you receive another
payment from the debtor to cover both the NSF check and your NSF fee.
How do you post the payment for the NSF fee?
You may use the Payment of Agency NSF Fee transaction type to post the portion of the check that
pays the NSF fee.
The screen shot below shows the settings for the Payment Of Agency NSF Fee Transaction Type.
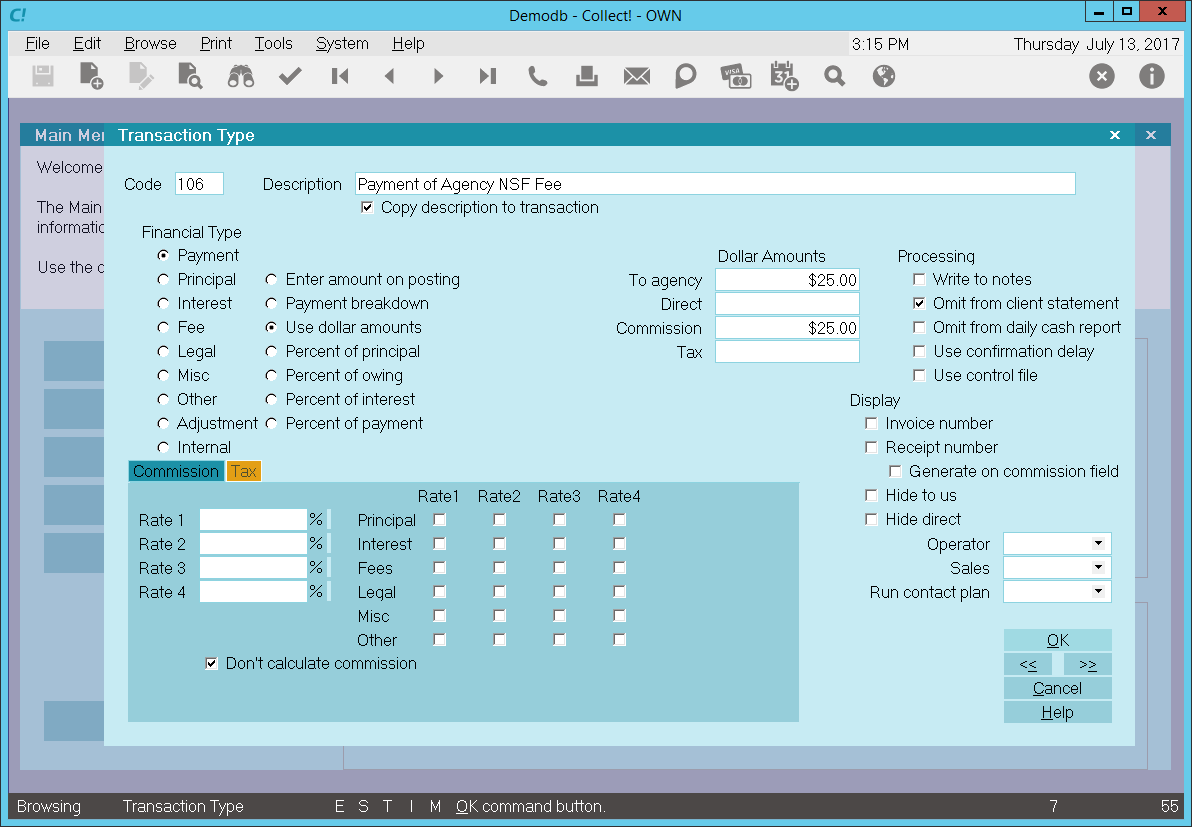
Payment of Agency NSF Fee - Payment Transaction Type
The rest of this document explains the settings shown above.
By default, Collect! ships with a number of Payment type transaction samples. Collect! uses the 100
series for payment type transactions, but any Financial Type dotted as "Payment" will be processed
as a payment type transaction.
You can have many different payment transaction types for separating the various types of payments
you may receive. This includes any fee payments as well as payments on the account balance. Payment
By Check, Monthly Payment, and Payment of Agency NSF Fee are a few examples of different types of
payments.
A check mark in the box labeled Copy Description To Transaction copies the
Description from the Transaction Type form when you create a 106 Payment of Agency NSF Fee
transaction on a debtor account.
The Payment radio button is dotted to keep track of payments that are made on an account.
Any transaction flagged as a Payment type, with an amount either in the To Us or Direct field, will
affect the balance of the Owing amount displayed on the Debtor form.
An amount in the transaction's Commission field affects your agency commission amount.
All payment transactions are totaled together and subtracted from the total debt. The result is
displayed in the Owing field of the Debtor form.
The radio button labeled Use dollar amounts is selected and a fixed amount has been
entered in the To Agency field and in the Commission field. Entered
as a POSITIVE amount, this is adds to the total commission amount collected by your agency and
decreases the debtor's Owing.
Reporting check box, Omit from client statement. is switched ON with a check mark
so that this payment transaction in not included in the client statement. This transaction is for
your own internal accounting and your client will not be made aware of it.
Reporting check box, Omit from daily cash report is left UNCHECKED so that the
amount of this payment is calculated into the total daily cash received by your agency. This payment
is part of the cash flowing into your agency.
Calculations check box, Don't calculate commission is switched ON with a check mark
so that commission is not calculated on this payment. The amount in the Commission field will be
used. This will not be overridden by any commission rate that is set on the account.
Calculations check box, Don't calculate tax is switched ON with a check mark so
that tax is not calculated on this payment.
 The way you handle your business will help you decide whether or not to enable any other
optional settings.
Display is set to leave both the To Us and the Direct fields visible at all times when viewing the
transaction or Transactions List.
No operator or sales operator ID's have been set to be used as default values when posting this
transaction type. You may want to set the Operator or Sales values to HSE or OWN, if you wish to
always have operator and sales operator ID's on every transaction.
No contact plans have been set to be run when posting this transaction type.
No commission rate has been set to override the commission rate that may be set on the Debtor form.
All the above settings will be automatically filled in for you when you post a 106 Payment Of Agency
NSF Fee transaction to an account. You may override any setting when posting the transaction.
The Payment Of Agency NSF Fee transaction type has been set up to easily post payment of the NSF fee
portion when you receive a "good" payment that covers both a check that previously went NSF and your
agency's NSF fee that you charged to the account. In the sample, when the transaction is posted, the
To Us and Commission fields will display $25 as the amount of the NSF Fee payment. This would
decrease the debtor's Owing and increase your agency's commission totals.
 For the remaining portion of the payment that covers the NSF check amount, you would use the
Payment By Check transaction type. Please refer to How To Post a Transaction for more
information.

Legal Fees Sample
The Legal Transaction Type is needed to keep track of legal fees charged to an account. Any
transaction flagged as a Legal type, with an amount either in the To Us or Direct field, will
affect the balance of the Legal amount displayed on the Debtor form. An amount in the transaction's
Commission field affects only the commission amount shown on the statement you generate for your
client.
By default, Collect! ships with a number of Legal type transaction samples. These are Transaction
Types in the Legal Expenses, or 200 series, that have "Legal" selected for Financial Type in the
Transaction Type settings. Collect! typically uses a transaction code between 200 to 299 for legal
fees. Other types of fees may be set as "Fee" and stored in the 300 series for convenience.
You can have many different legal fee transaction types for separating the various legal fees you
may need to enter. Filing Fee, Serving Fee, and Warrant Fee are a few examples.

Legal Fees - Fees Transaction Type
All Legal transactions are totaled together and the result is displayed in the Legal Fees field of
the Debtor form. Legal fees are totaled separately from other types of fees and total legal costs
may be found in the Legal field found in the Financial Detail form, accessed through the Debtor form.
When you create a 201 Legal Fees transaction on a debtor account, the Description from the
Transaction Type form is copied to the transaction being posted.
The 'Enter amount on Posting' radio button is switched ON to allow you enter the amount you wish to
be used at the time of posting the transaction.
Entering a negative amount in either the To Us or Direct field adds to the debtor's Legal Fees amount.
Entering a positive amount reduces the amount of Legal Fees on the debtor's account. Interest will be
recalculated accordingly.
In this sample, the reporting check boxes tell Collect! to omit this transaction when creating a
statement for your client and also to omit the transaction when generating the Daily Cash Report.
Calculations are checked not to calculate commission and not to calculate tax on any commission
amount present.
Display is set to leave both the To Us and the Direct fields visible at all times when viewing the
transaction or Transactions List.
No operator or sales operator ID's have been set to be used as default values when posting this
transaction type. You may want to set the Operator or Sales values to HSE or OWN, if you wish to
always have operator and sales operator ID's on every transaction.
No contact plans have been set to be run when posting this transaction type.
No commission rate has been set to override the commission rate that may be set on the Debtor form.
All the above settings will be automatically filled in for you when you post a 201 Legal Fees
transaction to an account. You may override any setting when posting the transaction.

Legal Fee Advance Request Sample
The Legal Transaction Type is needed to keep track of legal fees charged to an account. Any
transaction flagged as a Legal type, with an amount either in the To Us or Direct field, will
affect the balance of the Legal Fees amount displayed on the Debtor form. An amount in the
transaction's Commission Amount field affects only the commission amount shown on the statement you
generate for your client.
By default, Collect! ships with a number of Legal type transaction samples for Legal Fee
information. These are generally stored in the 200 series, for conveniences. In the Financial Type
setting, the "Legal" radio button would be dotted.
Other types of fees may be stored in the 300 series for convenience. These typically would be
treated as an agency or other fee and would have the "Fee" radio button dotted in the Financial
Type setting.
You can have many different Legal transaction types for separating the various legal fees you may
need to enter. The Legal Fee Advance Request may be used to request an advance payment from your
client to cover legal fees, such as court costs. Settings are shown below.

Legal Fee Advance Request - Fees Transaction Type
All Legal transactions are totaled together and the result is displayed in the Legal Fees field of
the Debtor form. Legal fees are totaled separately from other types of fees and total legal costs
may be found in the Legal field found in the Financial Detail form, accessed through the Debtor form.
When you create a 205 Legal Fee Advance Request transaction on a debtor account, the Description
from the Transaction Type form is copied to the transaction being posted.
The 'Enter amount on Posting' radio button is switched ON to allow you enter the amount you wish to
be used at the time of posting the transaction.
Entering a positive amount in the Commission Amount field charges this fee to your client.
In this sample, the reporting check boxes tell Collect! to omit this transaction when generating
the Daily Cash Report. The transaction will be included in the client's month end statement.
Calculations are checked not to calculate commission and not to calculate tax on any commission
amount present.
Display is set to leave both the To Us and the Direct fields visible at all times when viewing the
transaction or Transactions List.
No operator or sales operator ID's have been set to be used as default values when posting this
transaction type. You may want to set the Operator or Sales values to HSE or OWN, if you wish to
always have operator and sales operator ID's on every transaction.
No contact plans have been set to be run when posting this transaction type.
No commission rate has been set to override the commission rate that may be set on the Debtor form.
All the above settings will be automatically filled in for you when you post a 205 Legal Fee Advance
Request transaction to an account. You may override any setting when posting the transaction.

Late Fee Sample
The Fee Transaction Type is needed to keep track of fees charged to an account. Any transaction
flagged as a Fee type, with an amount either in the To Us or Direct field, will affect the balance
of the Fee amount displayed on the Debtor form. An amount in the transaction's Commission field
affects only the commission amount shown on the statement you generate for your client.
By default, Collect! ships with a number of Fee type transaction samples for miscellaneous charges
to an account. These are generally stored in the 300 series, for conveniences. In the Financial Type
setting, the "Fee" selection would be dotted.
The 351 Late Fee transaction type is used whenever a the debtor make a payment later than the
payment's due date and there is a late charge set up for the account. The amount posted depends on
the financial setup. For instance, this transaction type will post a late fee to an amortized
interest account, calculated according to the settings in the Interest Detail form. It will also
post the late fee for a payment plan according to the settings in the Payment Plan Setup form.
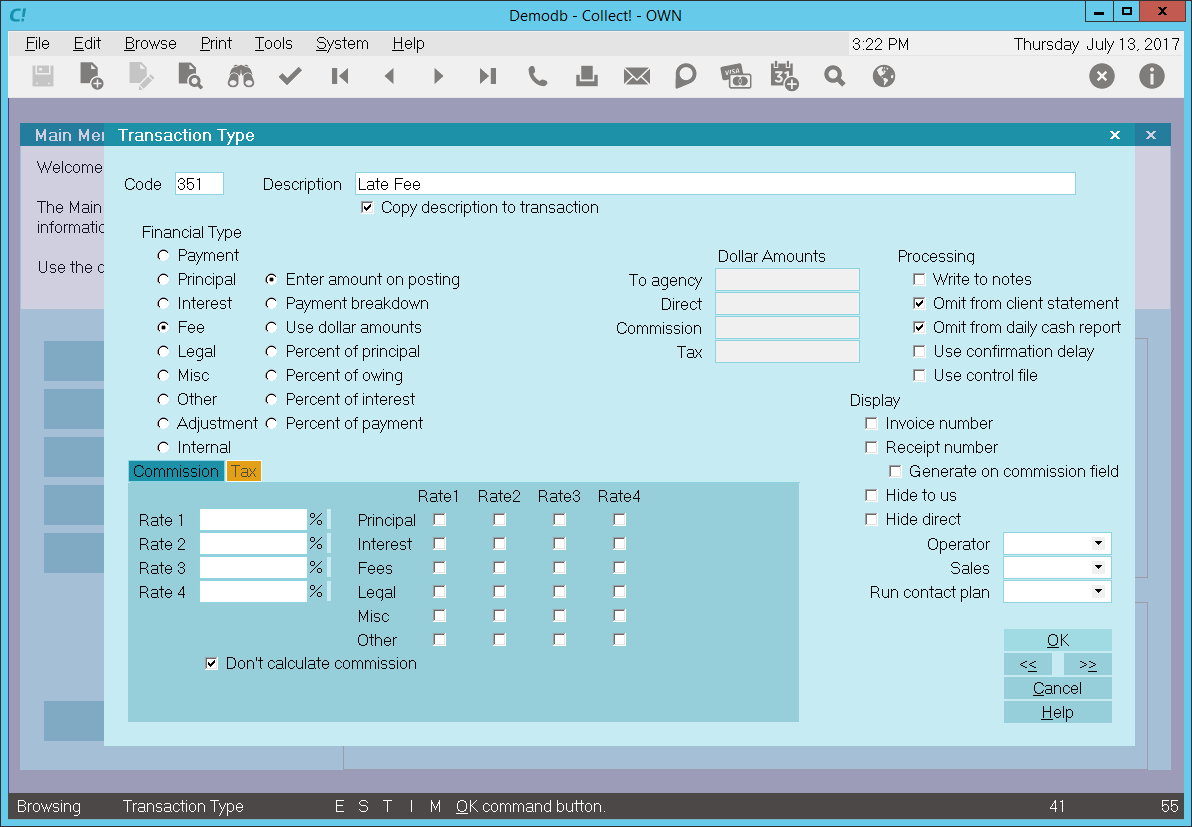
Late Fee
All Fee transactions are totaled together and the result is displayed in the Fees field of the
Debtor form.
When a 351 Late Fee transaction is posted to an account, the Description from the Transaction Type
form is copied to the transaction being posted.
The 'Enter amount on Posting' radio button is switched ON to enable Collect! to fill in the amount
stored in the account's financial settings. This is entered as a negative amount in the transaction's
To Us field and increases the debtor's Owing.
In this sample, the reporting check boxes tell Collect! to omit this transaction when creating a
statement for your client and also to omit the transaction when generating the Daily Cash Report.
Calculations are checked not to calculate commission and not to calculate tax on any commission
amount present.
Display is set to leave both the To Us and the Direct fields visible at all times when viewing the
transaction or Transactions List.
No contact plans have been set to be run when posting this transaction type.
No commission rate has been set to override the commission rate that may be set on the Debtor form.
All the above settings will be automatically filled in for you when you post a late payment to an
account with a late fee set up in the account's financial settings.

Collection Fee Sample
The Fee Transaction Type is needed to keep track of fees charged to an account. Any transaction
flagged as a Fee type, with an amount either in the To Us or Direct field, will affect the balance
of the Fee amount displayed on the Debtor form. An amount in the transaction's Commission field
affects only the commission amount shown on the statement you generate for your client.
By default, Collect! ships with a number of Fee type transaction samples for miscellaneous charges
to an account. These are generally stored in the 300 series, for conveniences. In the Financial Type
setting, the "Fee" selection would be dotted.
The 399 Collection Fee transaction type is used whenever a the debtor is paying collections fees
instead of the client. The amount posted depends on the agency's arrangement with the client.
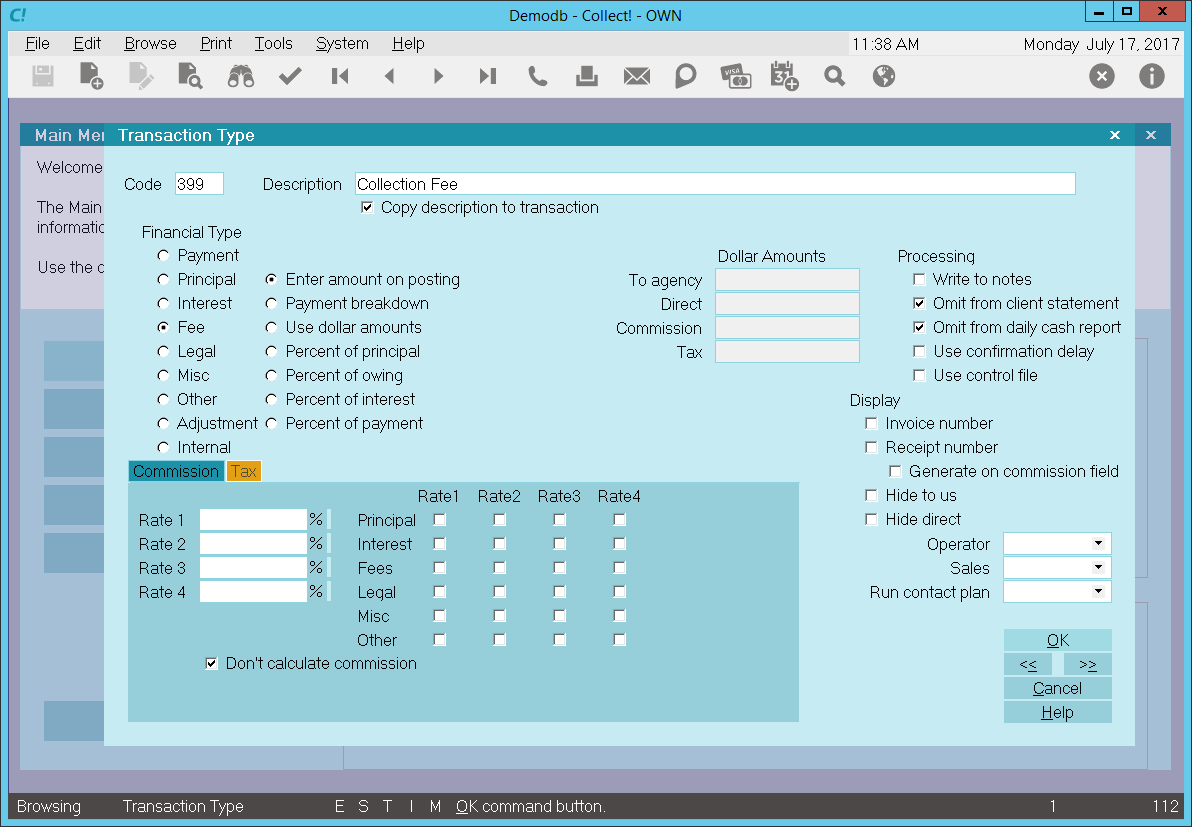
Collection Fee
All Fee transactions are totaled together and the result is displayed in the Fees field of the
Debtor form.
When a 399 Collection Fee transaction is posted to an account, the Description from the Transaction
Type form is copied to the transaction being posted.
The 'Enter amount on Posting' radio button is switched ON to enable Collect! to fill in the amount
based on the account's financial settings. This is entered as a negative amount in the transaction's
To Us field and increases the debtor's Owing.
In this sample, the reporting check boxes tell Collect! to omit this transaction when creating a
statement for your client and also to omit the transaction when generating the Daily Cash Report.
Calculations are checked not to calculate commission and not to calculate tax on any commission
amount present.
Display is set to leave both the To Us and the Direct fields visible at all times when viewing the
transaction or Transactions List.
No contact plans have been set to be run when posting this transaction type.
No commission rate has been set to override the commission rate that may be set on the Debtor form.
All the above settings will be automatically filled in for you when you post a collection fee to
an account.

Convenience Fee Sample
Does your client allow you to charge convenience fees to your debtors?
If you have answered 'yes' to the above question, you may use the Convenience Fee Fee Transaction
Type to post the fee to the debtor's account.
The screen shot below shows the settings for the Convenience Fee Transaction Type.

Convenience Fee Transaction Type
The rest of this document explains the settings shown above.
By default, Collect! ships with a number of Fee type transaction samples. These are Transaction
Types in the Other Expenses, or 300 series, that have "Fee" selected for Financial Type in the
Transaction Type settings. Collect! uses codes between 300 to 399 for other expenses, such as a
Convenience fee, but it is actually the "Fee" dot in the Financial Type that causes Collect! to
process the transaction as a fee.
You can have many different agency fee transaction types for separating the various types of fees
that you may need to enter. Collection Fee, Closing Fee, NSF Account Fee, and NSF Charge Due Agency
are a few examples.
A check mark in the box labeled Copy Description To Transaction copies the
Description from the Transaction Type form when you post a 305 Convenience Fee transaction to a
debtor account.
The Fee radio button is dotted to keep track of fees charged to an account.
Any transaction flagged as a Fee type, with an amount either in the To Us or Direct field, will
affect the balance of the Fee amount displayed on the Debtor form.
All Fee transactions are totaled together and the result is displayed in the Fees field of the
Debtor form.
The radio button labeled Use dollar amounts is selected and a fixed amount has been
entered in the To Agency field. Entered as a NEGATIVE amount, this adds to the
debtor's Fees amount.
 The amount in the To Agency field is a POSITIVE value. When an Convenience transaction is
posted via the Payment Processing Module, this amount is converted to a NEGATIVE number
and displayed in the transaction's To Us field. In the sample, this
would add $5 to the debtor's Owing when an Convenience transaction is posted to an account.
 Collect! does support Percentage of payment with the same logic as above
where POSITIVE values will add to the Fee. Enter a value in to the Commission field to set
the max value. For example, 5% of $100 would be a $5.00 fee. 5% in the To us field with
the Commission field set to $5.00 means that a payment of $125 will still only charge a
$5.00 fee.
 WARNING: Percentage of Convenience Fees are only allow under certain circumstances. Please consult
your legal counsel if you have any questions.
Reporting check box, Omit from client statement, is switched ON with a check mark
to omit this transaction when creating a statement for your client. The decision to switch ON this
setting depends on how you handle fees and what you want to show your client.
Reporting check box, Omit from daily cash report, is switched ON with a check mark
to omit the transaction when generating the Daily Cash Report. This transaction is not part of the
cash flowing into your agency.
Don't calculate commission is switched ON with a check mark so that commission is
not calculated on this transaction.
Don't calculate tax is switched ON with a check mark so that tax is not calculated
on this transaction.
 The way you handle your business will help you decide whether or not to enable any other
optional settings.
Display is set to leave both the To Us and the Direct fields visible at all times when viewing the
transaction or Transactions List.
No operator or sales operator ID's have been set to be used as default values when posting this
transaction type. You may want to set the Operator or Sales values to HSE or OWN, if you wish to
always have operator and sales operator ID's on every transaction.
No contact plans have been set to be run when posting this transaction type.
No commission rate has been set to override the commission rate that may be set on the Debtor form.
All the above settings will be automatically filled in for you when you post a 305 NSF Account Fee
transaction to an account. You may override any setting when posting the transaction.
The Convenience transaction type has been set up specifically for those agencies who process
convenience fees when posting credit card or ACH payments.

NSF Charge Due Agency Sample
Let's assume that an operator posts a check payment to a debtor account. A few days later, the check
is returned to you NSF.
Do you need to charge a fee for this check payment that was returned to you as NSF?
If the answer is 'yes', the NSF Charge Due Agency is a Fee transaction type that you can use to post
this NSF fee to an account.
The screen shot below shows the settings for the NSF Charge Due Agency Transaction Type.
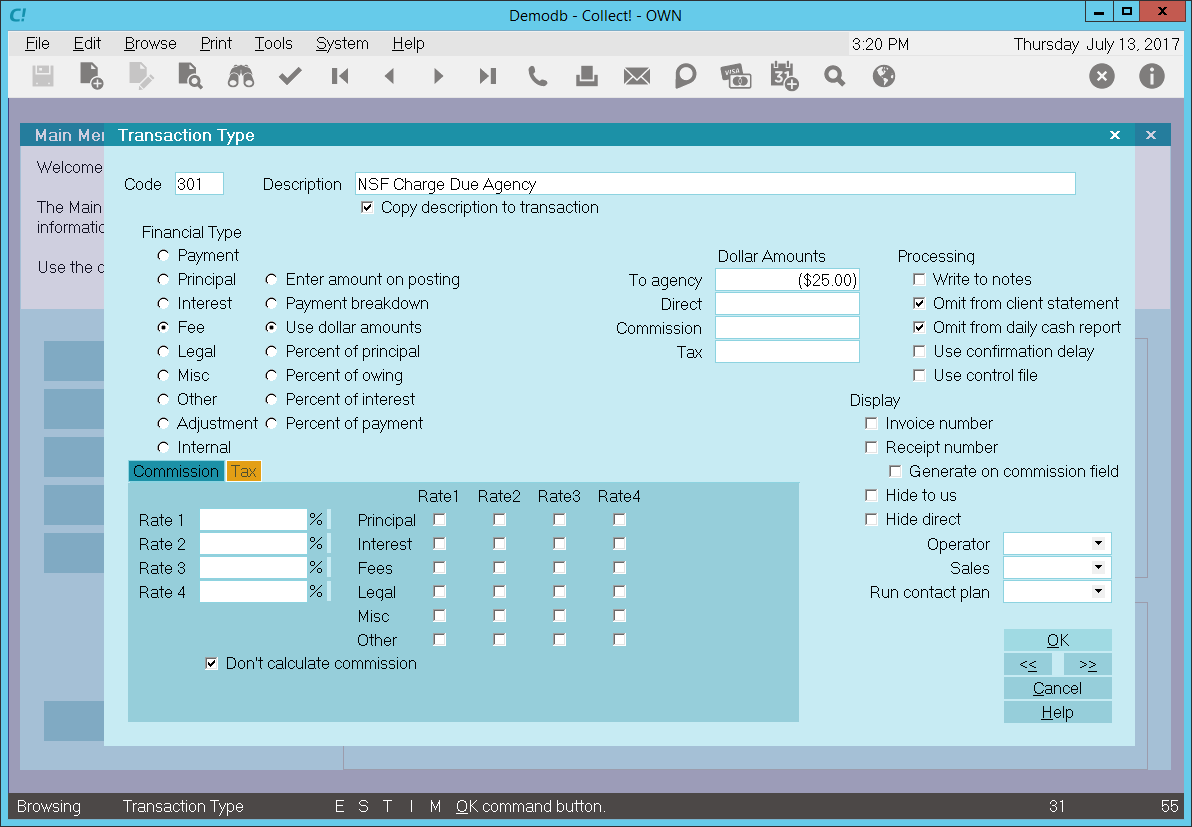
NSF Charge Due Agency - Fees Transaction Type
The rest of this document explains the settings shown above.
By default, Collect! ships with a number of Fee type transaction samples. These are Transaction Types
in the Other Expenses, or 300 series, that have "Fee" selected for Financial Type in the Transaction
Type settings. Collect! uses codes between 300 to 399 for other expenses, such as an NSF Account fee,
but it is actually the "Fee" dot in the Financial Type that causes Collect! to process the transaction
as a fee.
Collect! regards an agency or miscellaneous fee those dotted as "Fee" for Financial Type, "Legal" is
reserved for Legal fees (and Collect! generally reserves the 200 series for these.)
You can have many different agency fee transaction types for separating the various types of fees
that you may need to enter. Collection Fee, Closing Fee, Late Fee, Service Charge and NSF Charge Due
Agency are a few examples.
A check mark in the box labeled Copy Description To Transaction copies the
Description from the Transaction Type form when you create a 301 NSF Charge Due Agency transaction
on a debtor account.
The Fee radio button is dotted to keep track of fees charged to an account.
Any transaction flagged as a Fee type, with an amount either in the To Us or Direct field, will affect
the balance of the Fee amount displayed on the Debtor form.
All Fee transactions are totaled together and the result is displayed in the Fees field of the
Debtor form.
The radio button labeled Use dollar amounts is selected and a fixed amount has been
entered in the To Agency field. Entered as a NEGATIVE amount, this adds to the
debtor's Fees amount.
The amount in the To Agency field is a NEGATIVE value. When an NSF Account Fee transaction is posted,
this amount is displayed in the transaction's To Us field. In the sample, this
would add $25 to the debtor's Owing when an NSF Charge Due Agency transaction is posted to an account.
Reporting check box, Omit from client statement, is switched ON with a check mark to
omit this transaction when creating a statement for your client. The decision to switch ON this
setting depends on how you handle fees and what you want to show your client.
Reporting check box, Omit from daily cash report, is switched ON with a check mark
to omit the transaction when generating the Daily Cash Report. This transaction is not part of the
cash flowing into your agency.
Don't calculate commission is switched ON with a check mark so that commission is
not calculated on this transaction.
Don't calculate tax is switched ON with a check mark so that tax is not calculated
on this transaction.
 The way you handle your business will help you decide whether or not to enable any other
optional settings.
Display is set to leave both the To Us and the Direct fields visible at all times when viewing the
transaction or Transactions List.
No operator or sales operator ID's have been set to be used as default values when posting this
transaction type. You may want to set the Operator or Sales values to HSE or OWN, if you wish to
always have operator and sales operator ID's on every transaction.
No contact plans have been set to be run when posting this transaction type.
No commission rate has been set to override the commission rate that may be set on the Debtor form.
All the above settings will be automatically filled in for you when you post a 301 NSF Charge Due
Agency transaction to an account. You may override any setting when posting the transaction.
The NSF Charge Due Agency transaction type has been set up specifically for those times when a check
payment comes back to you as NSF and you need to charge an NSF fee.
If you need to charge NSF fees for other types of accounts, please use one of the other Fee
Transaction Types demonstrated in the samples.

Payment Plan Service Charge Sample
The Fee Transaction Type is needed to keep track of fees charged to an account. Any transaction
flagged as a Fee type, with an amount either in the To Us or Direct field, will affect the balance
of the Fee amount displayed on the Debtor form. An amount in the transaction's Commission field
affects only the commission amount shown on the statement you generate for your client.
By default, Collect! ships with a number of Fee type transaction samples for miscellaneous charges
to an account. Collect! reserves the codes 300 to 399 for these fees.
The 350 Payment Plan Service Charge transaction type is used when a payment plan is set up on an
account. The amount entered as the Service Charge will be posted to the account using this
Transaction Type 350.

Payment Plan Service Charge
All Fee transactions are totaled together and the result is displayed in the Fees field of the
Debtor form.
When a 350 Payment Plan Service Charge transaction is posted to an account, the Description from
the Transaction Type form is copied to the transaction being posted.
The 'Enter amount on Posting' radio button is switched ON to enable Collect! to fill in the amount
stored in the payment plan settings. This is entered as a negative amount in the transaction's To Us
field and increases the debtor's Owing.
In this sample, the reporting check boxes tell Collect! to omit this transaction when creating a
statement for your client and also to omit the transaction when generating the Daily Cash Report.
Display is set to leave both the To Us and the Direct fields visible at all times when viewing the
transaction or Transactions List.
No contact plans have been set to be run when posting this transaction type.
No commission rate has been set to override the commission rate that may be set on the Debtor form.
All the above settings will be automatically filled in for you when you post a payment plan with a
service charge to an account.

Adjustment By Client Sample
The Adjustment by Client transaction type is used to post an adjustment to the debtor's balance.
The screen shot below shows the settings for the Adjustment by Client Transaction Type.
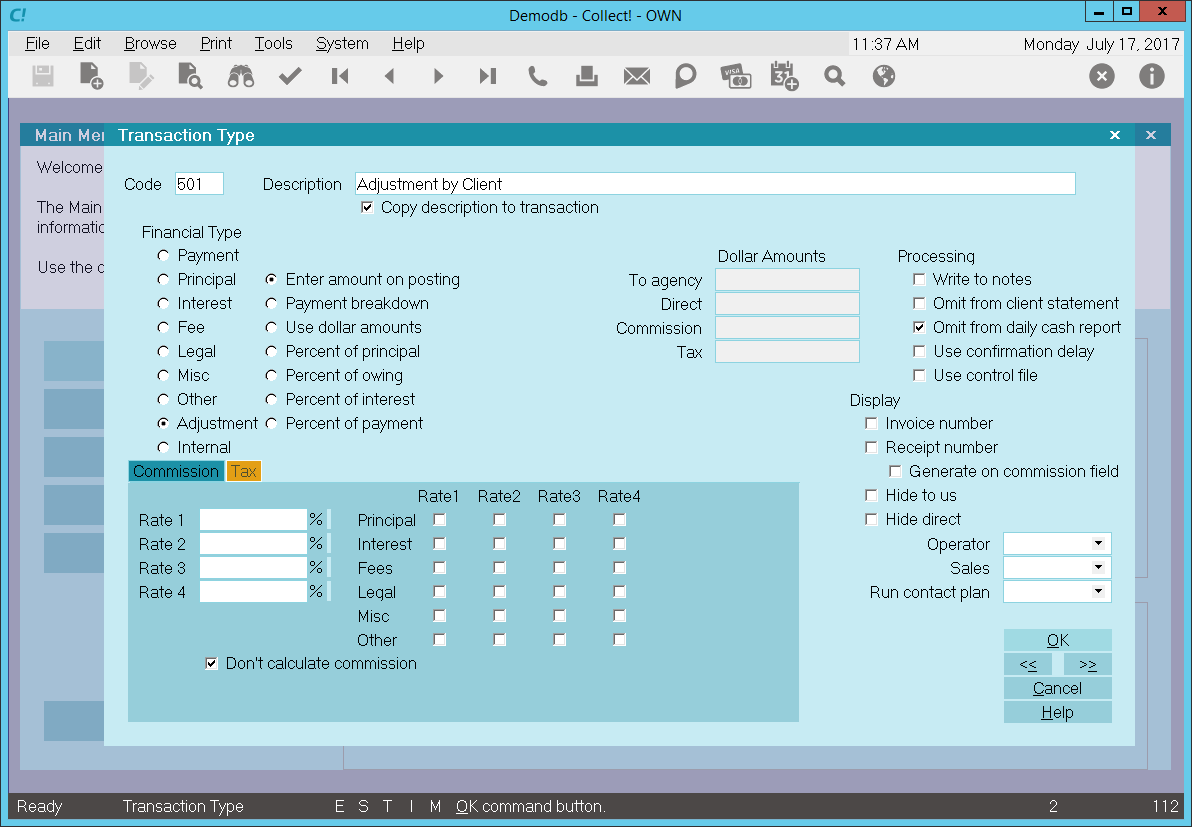
Adjustment by Client
The rest of this document explains the settings shown above.
In the Account section, ADJUSTMENT is selected for this transaction type.
When you create a 501 Adjustment by Client transaction on a debtor account, the Description from the
Transaction Type form will be copied to the transaction being posted.
The 'Enter amount on Posting' radio button is switched ON to allow you enter the amount you wish to
be used at the time of posting the transaction.
The dollar amount of the adjustment is displayed in the Adjustment field on the Debtor form as a
Negative amount. This reduces the debtor's Owing.
In this sample, the reporting check boxes tell Collect! to omit this transaction when creating a
statement for your client and also to omit the transaction when generating the Daily Cash Report.
Display is set to leave both the To Us and the Direct fields visible at all times when viewing the
transaction or Transactions List.
No operator or sales operator ID's have been set to be used as default values when posting this
transaction type.
No contact plans have been set to be run when posting this transaction type.
No commission rate has been set to override the commission rate that may be set on the Debtor form.
All the above settings will be automatically filled in for you when you post a 501 Adjustment by
Client transaction to an account.

Payment Plan Initial Discount Sample
The Payment Plan Initial Discount transaction type is used to post an initial discount when using
Payment Plans. If you are not using plans, then you can skip this transaction type.
The screen shot below shows the settings for the Payment Plan Initial Discount Transaction Type.
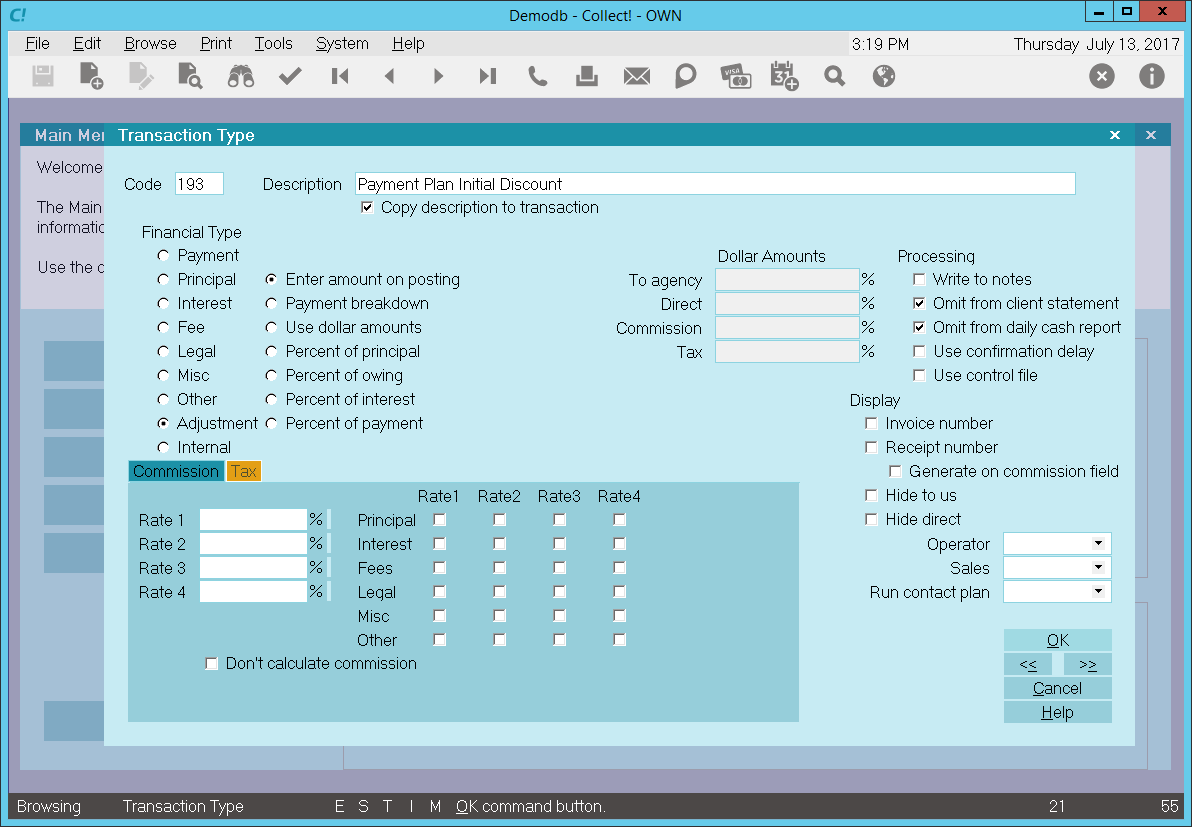
Payment Plan Initial Discount
The rest of this document explains the settings shown above.
In the Account section, ADJUSTMENT is selected for this transaction type. The dollar amount to post
is taken from the Payment Plan form or the Payment Plan Setup form.
When you create a 193 Payment Plan Initial Discount transaction on a debtor account, the Description
from the Transaction Type form will be copied to the transaction being posted.
The 'Enter amount on posting' radio button is switched ON to enable Collect! to fill in the value
of this discount from the payment plan settings as a positive dollar amount. This reduces the amount
of the payment plan and is posted as an Adjustment to the debtor's account.
The dollar amount of the Initial Discount is displayed in the Adjustment field on the Debtor form
as a Negative amount. This reduces the debtor's Owing.
In this sample, the reporting check boxes tell Collect! to omit this transaction when creating a
statement for your client and also to omit the transaction when generating the Daily Cash Report.
Display is set to leave both the To Us and the Direct fields visible at all times when viewing the
transaction or Transactions List.
No operator or sales operator ID's have been set to be used as default values when posting this
transaction type.
No contact plans have been set to be run when posting this transaction type.
No commission rate has been set to override the commission rate that may be set on the Debtor form.
All the above settings will be automatically filled in for you when you post a 193 Payment Plan
Initial Discount transaction to an account. The dollar amount will be filled in from the payment
plan settings.

Agency Internal Expenditure Sample
The Internal transaction type enables you to track expenses incurred by you for a particular account.
When you cannot recoup your expenses from the Debtor or the Client, you may still want to track them
for the account.
An Internal transaction does not affect the Debtor's Owing or any Client financials, such as
Commission or Return. It simply gives you a way to track internal expenses on an account.
The screen shot below shows the settings for the Agency Internal Expenditure Transaction Type.

Agency Internal Expenditure - Internal Transaction Type
The rest of this document explains the settings shown above.
By default, Collect! ships with a number of Payment type transaction samples. Collect! uses the 600
series for internal type transactions, but any Financial Type dotted as "Internal" will be processed
as an internal type transaction.
A check mark in the box labeled Copy Description To Transaction copies the
Description from the Transaction Type form when you create a 601 Agency Internal Expenditure
transaction on a debtor account.
The Internal radio button is dotted to keep track of internal expenses for the account.
Any transaction flagged as an Internal type, with an amount either in the To Us or Direct field,
will NOT affect the balance of the Owing amount displayed on the Debtor form.
An amount in the transaction's Commission field will NOT affect your agency commission amount.
 The Internal transaction type is used for tracking expenses on an account that are borne
entirely by the agency. They do not affect either the Debtor's or the Client's financials
in any way.
Reporting check box, Omit from client statement. is switched ON with a check mark
so that this transaction in not included in the client statement. This transaction is for your own
internal accounting and your client will not be made aware of it.
Reporting check box, Omit from daily cash report is switched ON with a check mark.
This transaction is for your own internal accounting and will not be reflected in your Daily Cash
report.
Calculations check box, Don't calculate commission is switched ON with a check mark
so that commission is not calculated on this transaction.
Calculations check box, Don't calculate tax is switched ON with a check mark so
that tax is not calculated on transaction.
 The way you handle your business will help you decide whether or not to enable any other
optional settings.
Display is set to leave both the To Us and the Direct fields visible at all times when viewing the
transaction or Transactions List.
No operator or sales operator ID's have been set to be used as default values when posting this
transaction type. You may want to set the Operator or Sales values to HSE or OWN, if you wish to
always have operator and sales operator ID's on every transaction.
No contact plans have been set to be run when posting this transaction type.
No commission rate has been set to override the commission rate that may be set on the Debtor form.
All the above settings will be automatically filled in for you when you post a 601 Agency Internal
Expenditure transaction to an account. You may override any setting when posting the transaction.
 To view all Internal transactions posted to an account, open the Debtor Financial Summary
and select the Internal tab. To access this form, select the Fees field on the Debtor form.


Multi User Networking
Collect! seamlessly integrates many users into the system at all levels of operation. Predefined
levels allow you to set functions each operator may perform. Screens and menus may be edited to
display pertinent labels in one or several languages. Set up the necessary areas right from the
start so that your workers can use the system the way you want.

Operator Setup
Each operator accessing Collect! needs their own ID and User Password. This allows you, the
administrator, to control work queues for each user and to determine which aspects of Collect! each
user has the right to edit or delete. It also defines their ability to access certain parts of the
system.
Each operator will have a unique ID and password with their special access rights and their name,
title, and phone number. This information can be printed on letters. Special User IDs may be set for
clients with limited access rights. All operators may be defined as to their position in the company,
i.e. collector, administrator, and so on. They may sign in as a collector with no need to see the
administrative aspects, or they may be involved in administrative tasks necessitating far more freedom.
Click Here to View this Form.
Click Here to Close this Form.
This topic discusses setting up your Operators to access and use Collect!. This requires that you
have access rights to the various menus and forms in Collect!.
 Examine settings for different Operators by using the Record Navigation keys [<<] BACK and
[>>] FORWARD from the Operator form. As you scroll through the records, you can examine the
settings for each Operator.
Please press F1 for an explanation of the fields in the Operator form.
Operator ID Guidelines
Each Operator must be set up with a UNIQUE ID.
Each Operator must also have a Password. It is advised to make the Password unique for each Operator,
although it is permissible to give the same Password to multiple users.
The password is used to sign on, but the ID is used to set every parameter that relates to the operator.
For your convenience, Collect!'s Demonstration database contains a predefined set of Operator IDs and
Passwords.
For Example:
- OWN for owner
- SYS for system administrator
- MGR for office manager
- SC for senior collector
For each of the IDs, the Password is the default password same as the ID. For example, for ID OWN the
Password is own, and for ID SYS the Password is sys.
 WARNING: For security reasons, we recommend changing the default password, especially for ID 99.
- Use up to 7 characters for the Operator ID.
- Make sure each of your Operators has his/her own UNIQUE ID. (Passwords can be shared.)
- Use a different means of identifying your Distribution Teams, such as, ST1, ST2, ST3.
Distribution Team IDs are not Signon IDs, but are used to classify Distribution Team
information where it is needed.
 Using 1JC, 2JC, 3JC is acceptable, but we advise assigning distinct, different IDs, derived
perhaps from the user's name. For example, JM for John Miller, SD for Sally Douglas, and JMC
for Jayne McCaul.
 You cannot use "System" or "Admin" for your ID. These are reserved words.

Password
You must first commit the Operator to the database by clicking OK before you can set a password.
Once the record is committed, you can go back in and use the CHANGE PASSWORD button to set the
password.

Using The Operator ID
When your Operators have been set up, you can use the Operator ID in many places in Collect! to
customize routines and direct them to a particular Operator's attention. This pertains to the WIP
(Work In Progress) To Do List, assigning accounts, building Distribution Teams, running
Contact Plans, assigning commission rates, and other procedures.

Personal Information
Fill in the personal information fields as needed. If the Operator has an Email address, put that
in the Email field and Email can be sent to the Operator.

Operator Form

Type
There are various types of user that can be chosen. Each of these results in a different series of
events when the Operator signs into Collect!.
SYSTEM takes the user to the Main Menu upon signing on.
COLLECTOR takes the user directly to the WIP list when signing on. Other settings can be chosen in
the WIP Options to affect how the Operator works the WIP list.
DIAL OPERATOR begins to dial contacts for this Operator as soon as they sign in, provided Auto Dialer
is installed and set up.
CLIENT takes the user directly to a Client record that is specified in the Operator form field
labeled Client #. This field appears when you select Client for the Operator Type.
If the Client does not exist, the user is not admitted to Collect! no matter what User Level you
select. The Client Type Operator can only see accounts belonging to the Client # you select.
 The Browse Find By functionality for Client Operators is tied to a hierarchical client
ownership system that also allows you to use the "Owned by Client" in the Client form.
Clients who own other clients will be able to see all records in their hierarchical tree,
but no others.
WEB HOST opens Collect! in Web Host mode when this Operator signs on. Additional settings may be
chosen in the Operator Detail and Operator Security sections.
SCHEDULER opens Collect! in Scheduler mode when this Operator signs on. This setting displays the
Scheduler as soon as the operator signs in, allowing you to set tasks to be performed automatically,
such as database snapshot, import routine, recalculate totals, and print report. Please refer to
Help topic, Scheduler, for details.
DISTRIBUTION is not used to sign on an Operator. The ID is used to calculate commissions shown on
the Debtor form. It is not a valid Signon ID. When you select Sales Team, other fields become visible
on the Operator form where you can set up the team members.
 The Sales Team Operator Type can be used for account access security. Please refer to Help
topic, How to Restrict Access to Accounts for details.

Distribution Operator
Create an Operator form for each of your Operators, assigning each of them a unique ID. Then you can
create a Sales Team form with its own Sales Team ID and add the Operators to the team.
 Before a Sales Team is constructed, each Operator must have their own Operator form filled
out with a unique ID.
Distribution Teams provide a convenient way to keep track of commissions owed to a group of your
operators. A Sales Team has its own ID. We recommend that you use a code such as ST1, ST2, or TM1,
TM2, to designate a Sales Team. You should try to make the ID distinctly different from your
individual Operator IDs so that you can clearly identify Distribution Teams.
When the Sales Team choice is selected, fields appear on the Operator form to hold Sales Team
information. Operators are listed in the Sales Team fields by their unique individual ID. This can
be chosen from a drop-down box.
Enter the Sales Team ID in the Debtor's form. Any commissions will be calculated and divided up among
the Sales Team members using the commission percentages recorded in the Sales Team information on the
Operator form.
Distribution Teams also provide a way to group Operator IDs for account security purposes. This can
be used with Account Access Control to restrict access to accounts based on Team ID or nested Teams.
 Before a Sales Team is constructed, each Operator must have their own Operator form filled
out with a unique ID.

Operator Security
In the Operator Security tab:
Enable Verification
This feature gives you the ability to force verification of field data. Switch this ON when you want
the operator to confirm important information in a certain field before they can exit a form. This
is very useful for confirming data or simply to make sure the operator has important information
that you need. There are a few steps necessary to set up this procedure. Please see Help topic,
How to Prompt To Verify a Field On Exiting A Form for details.
User Levels and Security
There are many possibilities for using the Security section. User Level is the primary way to limit
or grant access to areas of your system. There are also several other settings that can be used to
control access to accounts in many different ways to suit your needs. Please refer to Help topic,
How to Restrict Access to Accounts, for details.
 You should only use User Level 99 for administrative purposes. Assigning a User Level 99 may
result in losing functionality that relies on Collect!'s access rights system.
If you attempt to set an Operator's user level to 99, Collect! will display a cautionary message.
Setting User Level 99
Operators who sign into Collect! at user level 99 will see a similar message.
Signing on with User Level 99
The Operator 99 shipped with Collect! does not display this message. That is, Operator ID 99, User
Level 99.
 You can change the Password for ID 99 and Collect! will not display the message, as long as
you are using ID 99 with User Level 99. Any other use of user level 99 displays the
cautionary message.
When creating a new operator, Collect! prompts about entering a password if you attempt to leave
the form without creating a password.
 You cannot use the reserved ID "system" or "admin". Also, you cannot use a password of
******** ( 8 asterisks).
If an error occurs when you create a Password, you will be sent back to the Operator form to correct
the error. You can still leave the Operator without correcting the error by pressing ESC on your
keyboard.
Adjusting User Rights
When you set up each operator, it is best to choose a User Level that most closely fits the access
rights you want this operator to have. However, you may discover that they cannot access certain
areas that they need or maybe they can view forms they need not see, or they can change data in
fields you want left alone. You can fine tune the user's permissions to suit your needs.
 Every Operator must have a User Level assigned.
Please refer to How To Use Access Rights for guidelines on customizing user rights.
Planning User Levels
Setup of Operators uses the Collect! feature User Levels. By means of these levels, your users can
be monitored to access only the areas of Collect! they need to, to change only the information that
they must, to view only the data and forms that pertain to their work. You can guide users to the
areas that they should address, displaying records tailored to their work load.
Users that need to access more of your system's forms and data can easily be set up to do so.
 It is recommended that you plan before assigning User Levels. What tasks do your different
workers do? What do you want them to be able to do in Collect!? Do you have a good idea of
the Access Rights each User Level allows?
It is recommended that you try out the User Levels that are supplied before you create your own.
Please refer to the User Level Samples in the DEMODB for more details.
 You must sign out of Collect! completely, returning to the Desktop, whenever you change to
a different User Level, or some of the rights from the previous level that you were signed
in as may still be in effect.
Allow Browser Signon
This switch is used to activate the Operator's access to Collect! over the Internet using Web Host.
When the Operator attempts to connect to Collect! to enter new information or view existing accounts,
Collect! verifies that this switch is ON for the Operator before allowing them to access the database.
Please refer to Help topic, How to use Web Host for more information.

Operator Details
In the Operator Detail tab:
Messaging
Although you may have users that are very experienced, it is advised to choose NORMAL level, at least
at first, to give more prompts and messages for error checking.
After your users have experience, you can elect to use Advanced. It will not require users to type
in the word DELETE to confirm the deletion.
It is not recommended to use Expert. Records will be deleted without any prompts.
Use Softphone for Dialer
You can use a softphone for your Collect! auto dialed calls. Switch ON "Use softphone for dialer"
and put the softphone protocol prefix in the Note 2 field. Collect! will use this softphone for all
the Operator's auto dialed calls.
This requires that your operating system is set up to handle the softphone protocol of your choice.
Please refer to Help topic, How to Setup the Auto Dialer for more information.
Disable Popup Help
You can disable popup help at the Operator level. It can still be enabled if needed by pulling down
the Help menu and choosing Enable popup help.
Automatic Recalc
Switch this ON for any operator. This will force Collect! to recalculate an account whenever the
operator opens a Debtor form. This will ensure that, when you are viewing the account form, all
dollar amounts are current and up to date.
Perhaps an operator does not need to see updated financial information when viewing an account. Then
you may choose to leave this switched OFF. If you have many users, you may prefer to switch it OFF
to optimize your network resources for increased performance.
If you do not use Automatic Recalc, there are several other options for recalculating dollar amounts
to bring account balances up to date.
You may use the Tools menu, Recalculate option at any time to bring all account balances up to date.
You may use the RECALC button on the Debtor form to recalculate the dollar amounts for the account
you are viewing.
Printing
Various printing options are available, as explained in F1 help. The settings here override the
global switches set in the Report and Printer Setup. This is useful, for instance, if you want to
assign certain reports or certain types of printing to one Operator's queue and not affect the
general printer setup.

Operator Email
In the Operator Email tab:
Enable SMTP
Select this to switch ON Simple Mail Transfer Protocol, a standard mail transfer protocol that
Collect! can use with the Email feature. This setting is switched ON when sending emails directly
to a mail server. Please refer to How To Send Email as HTML for details.

WIP Settings
Operator level settings can be saved as a configuration (CFG) file when you are setting up your
operators. You can also set the configuration for all operators of the same User Level once you have
saved the CFG file for one of the operators of that user level. Please see Help topic
Copy Operator Configuration for details.


User Level And Access Rights
This option lists all Forms, Fields and Menus in the system, and shows which user groups are allowed
to access them. The fields, forms and tasks your operators may view or perform are controlled by the
settings within these forms.
 You must sign out of Collect! completely, returning to the Desktop, whenever you change to
a different User Level, or some of the rights from the previous level that you were signed
in as may still be in effect.
 WARNING: This area can be very complex. It is advised not to delve into this area unless you are
COMPLETELY familiar with Collect! and its forms. Instead, try altering the user level on
an operator's form. It may be possible for you to find a combination of activities which
is the closest to your requirements, rather than making changes to access rights.
Click Here to View this Form.
Click Here to Close this Form.
Do you have some accounts that you want only specific operators to access?
The absolutely correct approach to account isolation involves separate networks, physical offices,
and LANs. Anything else has complications. For example, how would data segregation affect your
compliance to laws limiting the calls your company can make to the debtor in a day, or do you need
to worry about a sharp operator that sets up a sniffer on your network?
Ours is a simple and comprehensive solution, but it may not apply if you require legally contracted
segregation procedures. For those types of account isolation, please consult your local technical
security experts to set up a secure environment for you, with separate servers, networks, and
offices, as needed to fulfill your contract.
Collect!'s Account Access Control cannot promise complete assurance that an unauthorized user will
not gain access to confidential account information, (only the correct approach described above can
offer that) but it does offer you very flexible and comprehensive options that are easy to implement.
These are outlined below.
 The security options also work for client operators like sales people. When enabled, you can
restrict access to clients to operators by filling in the Client Operator, Assign Accounts
to Operator, or Assign Sales to Operator fields. If you have Distribution Teams, you can
specify a team on the Client Operator field.
Our solutions provide these features:
- You can mark accounts confidential, and access to a confidential account can be restricted to
a specific operator or group of operators.
- You can designate which operators have limited access to files, and which operators have full
access for administrative purposes and you can organize your operators into security groups
of arbitrary size.
- You can select from two levels of isolation, the most strict where the confidential accounts
do not show up at all when the restricted operator searches, and a second level intended to
allow your staff to answer and route incoming phone calls while severely limiting the
information displayed to the restricted operator answering the call.
Our solutions involve the following:
- An Operator is granted access to any account that has their ID in the Operator or Sales field
on the Debtor form.
- The Debtor Detail form has two fields that may be used to fine-tune account access further.
These fields are named Clerk and Access. You can select
from the list of IDs to pick an operator or team for either of these fields.
- An Operator is granted access to any account that has their ID in one of these fields or
the Team ID of a team to which they belong.
- An Operator is granted access to any account which has nothing set in these fields, unless
the operator is "locked out" as described below.
- The account access control security capability allows very flexible user groupings. An Operator
can belong to a team that belongs to a team that belongs to a team, nesting levels up to an
arbitrary number of levels.
- The Operator Security form has several switches pertaining to security.
- A switch to enable Security (with a check mark).
- A switch Strict to control whether accounts the user does not have access
to are shown with limited data or not at all.
- A switch Locked out by default to lock the Operator out of all accounts
that do not have their ID in the areas noted above, including accounts that have no other
access control settings set in the Debtor Detail. (By default, if there are no settings
set in the Debtor Detail, the account is accessible to all operators.)
- A field Client # to specify a particular Client whose accounts the Operator
can access. This includes any Clients "Owned by" the Client # you specify.
- A switch Apply to Client Accounts to restrict browsing Clients to the
particular Client or Client hierarchy you have specified in the "Client #" field.
How To Set Up Account Access Control
Account access control may be set up from the Debtor form or the Operator Security form, depending
on how you intend to restrict your accounts.
There are four main ways to set up account access control:
- Restrict by Account
- Restrict by Lock Out
- Restrict by Client
- Restrict with Client Type Operator
Each of these is described below.

Restrict By Account
This method restricts access on an account by account basis.
- For each Debtor that you want to restrict access to, place an operator ID or a security team
ID into the Access field in the Debtor Detail form. This will enable the
Operator or Team to see this account.
- For each restricted operator, switch ON Security with a check mark, and
optionally, switch ON 'Strict'. This must be done for every operator for whom
security applies. An Operator with these switches off can see everything, regardless
of any other settings.
- If you want groups of people to access accounts, create an Operator Team for each security group
and use that team ID in the Debtor Detail Access or Clerk
field.

Restrict By Lock Out
This method restricts all accounts based on Operator settings.
- For each Operator that you want to restrict from accessing accounts, in the Operator Security
section of the Operator form, switch ON Security with a check mark, and
optionally, switch ON Strict.
- Switch ON Locked out by default.
These settings will prevent the Operator from viewing any account that does not have their ID in
one or several of the following fields, or the Team ID of a team that they belong to.
- Debtor Operator field
- Debtor Sales field
- Debtor Detail Clerk field
- Debtor Detail Access field
 Operators are also UNABLE TO VIEW accounts with no settings at all in the Debtor Detail.

Restrict By Client
This method restricts access based on Operator settings and Client #.
- Put the a Client # in the Operator Security section of the Operator form. This will restrict
the Operator to viewing only the accounts belonging to that Client #.
- Switch ON Security with a check mark, and optionally, switch ON
Strict. These switches must be set to enable access control by client.
An Operator with these switches off can see everything, regardless other
settings.
 Client ownership is a hierarchical system that allows you to use the Owned by
client in the Client form. If the Client # you enter for the Operator owns other
clients, they will also be visible to the particular operator through the Browse Debtors or
Find By menus.
- Optionally, switch ON Apply to client accounts if you want this Operator to
be able to browse and edit Clients or add a new Client. This will restrict viewing to only the
Client # specified in the "Client #" field or any Clients "owned by" that Client #.
 If an Operator creates a new Client when Apply to client accounts is
switched ON, the new Client will automatically be "owned by" the Operator Security Client #
setting. Collect! will write the Client # to the "Owned by" field on the new Client.

Restrict With Client Type Operator
This method simply sets up a Client Operator with access to their own accounts.
- In the Operator form, select Client in the Type field and put in a Client #
in the Client # field that becomes visible beneath the field labeled
Actual. This will restrict the Operator to only view accounts for the Client
you specify.
Leaving the Client # empty for a Client type Operator will produce wrong results.
- We recommend that you try out User Level 98, Guest, for your Client operators. Then you can
enable other fields or menu items as needed.
 Client ownership is a hierarchical system that allows you to use the Owned by
client in the Client form. You can enable your Clients to search for debtors using
the Browse Find By menu. They will not be able to view records that they do not own. Clients
who own other clients are able to see all records in their hierarchical tree, but no others.

How To Use Account Access Control
Sign on as an operator who does not have access to a specific account. You should see the following.
If you have Strict turned ON:
You cannot find the Debtor when you Browse All Debtors, use Browse Find By, or print a report. If
you have been assigned accounts in your WIP that you do not have access to, (an account assignment
error) the account is displayed as described when Strict is turned OFF below.
If you have Strict turned OFF:
The idea is that in a small office all people will answer the phone, and basic information is needed
to be able to route incoming calls to appropriately authorized people, while keeping as much
information as possible private.
You will see a mostly empty Debtor as an account placeholder for each confidential account. The name
shows N/A. Only the information shown below is displayed on the confidential account.
- File number
- Last worked date
- Operator assigned to the account
- Current amount owing on the account
- Group number
- Group member number
When you use Browse Find By functions, you will be able to locate the account, but it will mostly
be blank as described above. No demographic information is displayed. This ensures the privacy of
the individual and you cannot access any related information.
- To route an incoming call, you have a File number and an Operator ID to help you find an
appropriate authority with access to that account.
- To answer questions about an account in a group, the Owing is shown.
- To help avoid making more than one call per day to an account, the Worked date field is also
displayed.
Beyond that, the Operator has no further information about the account. This ensures account
privacy, yet enables your office to seamlessly operate as a team.
If you are a CLIENT OPERATOR:
If you sign in as a Client Operator, you should only be able to see your own accounts. When using
Browse Find By functions, you can only find accounts for your Client #. Client ownership is a
hierarchical system that allows you to use the Owned by client in the Client form.
Clients who own other clients are able to browse for all records in their hierarchical tree, but
no others.

How The System Determines Access
How does the system decide if an operator has access to an account?
A restricted operator has access to an account if:
- The account does not have an Access ID entered in the Debtor Detail form, UNLESS the operator
is "Locked out by default," as described above.
- The Operator, Sales, Clerk or Access fields contain the ID of the operator or the Team ID of
a team the operator belongs to.
- The account belongs to a client whose Client # matches the entry in the Operator Security
Client #, also includes Client #'s that client owns.
- For Client type Operators, the Client # matches the client the account belongs to, also includes
Client #'s that client owns.
 Collect! determines whether or not an Operator is granted access to an account in the
following order.
- Client Access
- Locked Out By Default
- Operator ID
- Sales ID
- Debtor Detail - Clerk ID
- Debtor Detail - Access ID
- Team List
What happens when a user arrives on a confidential account?
There may be some instances in the system where, due to account assignment error or some other error,
the operator sees an account that is confidential to them. In that case, only the fields listed
above are displayed to the operator. They also have no control over the account and only the OK,
Next and Prior command buttons are active. All other access to the confidential account information
is prohibited.
How does account access control work with Web Host?
When a user that has security enabled logs on to the Web Host, their team membership is enumerated
and the associated team IDs stored in the web user's team List. Each user has connection information
and the team List is associated with the user ID.
When a Web Host user signs on, Collect! creates a new connection information record and attaches the
user's team list to the user's connection information structure. When the user logs out, the team
List associated with the user is deleted.
As each request is received from the web, Collect! switches the user context and replaces the system
team List pointer with the team List of the operator. This allows the web based data access to
transparently use the operator's access control settings.

Limitations To Account Security
The following important conditions and limitations apply when using account access control.
Speed
The user rights are not indexed and are transparent to your searches except that debtors the user
hasn't got access to are discarded at a low level in the system. If a user has rights to only 1
record in 10,000 then the system will likely have to search all 10,00 records before it finds the
one the user has rights to.
Limited Use
Do not use a security enabled operator incorrectly. If you want to do a batch operation or anything
complex, such as statistical calculations, then you should sign on as an unrestricted operator.
The Account Security function is not intended to work with batch operations, or anything complex
unless the complex task is specifically planned for and is designed to support Security in both
Strict and Non-strict forms, depending on your requirements.
If you use complex plans or control files that look at debtor groups please be aware that account
security will restrict the data available to unauthorized users.


Pick Lists
Most fields in Collect! can display a list of items to choose from to speed data entry. You can assign
a Pick List to just about any field on any form. This is a convenient way of letting your operators
select from lists of items with the click of a button. This aspect speeds up data entry and reduces
typographical errors when entering repetitive information. This enforces data entry integrity as well.
If you want the State of Idaho to be displayed or printed consistently as ID rather than IO or any
other variation, create a pick list which contains the abbreviations you wish to use. Pick lists are
attached to a field or form using the Access Rights form.
Click Here to View this Form.
Click Here to Close this Form.
This document discusses how to modify or create a pick list. Pick lists show predefined choices for
any field. This speeds up data entry and minimizes errors. Virtually any field in the system can
have a pick list attached to it.
To View The Pick List File For A Field
You must have access rights to form and field properties. These rights depend on your user level.
 User level 99 does not display pick lists when you open forms, except for internal pick lists
created by Collect!. Please sign in as a user level other than 99 to see how pick lists will
be displayed to the end user.
 WARNING: Do not modify System pick lists. System pick lists are identified by having an underscore in
front of the name and no .pck extension. These lists will automatically regenerate during
the upgrade process.
- Tab into the field or click in it with your mouse.
- Press Alt+F1, or Right click the field, and choose Properties from the popup menu. Or, select
System from the top menu bar and then select Field Properties from the drop-down choices.
Either way, the Access Rights form will open.
- To make sure you have accessed the right field, look in the Name field of the Access Rights
form. It must contain the name of the field whose pick list you are about to modify.
- Look in the Pick List File field. You will see the name of the pick list file that is attached
to this field. (For example, 7.pck or field1) All legacy
pick lists in Collect! have the *.pck extension as they used to be stored as files. As pick
lists are stored in the database, the name can be any value as long as there is a corresponding
record that in the Pick Lists list. If there is no pick list on the field, Collect! will
automatically generate a unique name and create the Pick List record.
- Tab into the Pick List field and press F2 to view the contents of the pick list file, or select
the small folder icon to the right of the field. The pick list Editor will open with information
about the data type of the field and a list of choices formatted in a special way. When you
add to this list, or modify an entry, please be sure to enter the same type of data in the
same format. See details below under "Entering Choices In Your Pick List."

Pick List Form

Pick List Entry Form

To Create A New Pick List On A Field
- Follow Steps 1 through 3 above to open the Access Rights form and ensure that you are on the
right field.
- Select the small folder icon to the right of the Pick List File field to open the pick list
Editor. You will see information about the data type of the field and a few sample entries
showing you how to format your entries for pick list choices. Please be sure to enter the
same type of data in the same format. See details below under "Entering Choices In Your
Pick List."

To Remove A Pick List From A Field
- Follow the steps above to open the Access Rights form for the field.
- Click into the Pick List File field and use the Backspace key to delete the *.pck filename.
This removes the pick list from the field, but it does not delete it. You would do this if
you wanted to disassociate a pick list with a field, but keep it in the database for other
fields.
- Press OK to exit the form.

To Delete A Pick List File
 WARNING: BE CAREFUL as this actually deletes the pick list from the Collect! database. It will
be gone.
- Follow the steps above to open the Access Rights form for the field.
- Select the "X" icon next to the pick list field.
- Select the OK button when the prompt displays if you are sure that you want to DELETE the
file.
- Press OK to close the Access Rights form.
 If you are not sure about actually deleting the file, you can simply remove it from the field
by backspacing as described above. This leaves the file in the pick list folder but removes
it from the field.
 For information about using the shortcut buttons next to the Pick List File field, please see
below under "Buttons On The Pick List Field."

Import A Pick List
If you obtain a pick list from another system, database, or from the Member Center, these quick steps
will assist you with importing it into Collect!.
- Navigate to the Collect\database\picklist folder. If a picklist folder does not exist, create
one.
- Place the file in the picklist folder. Note the name of the file (EX: state.pck).
- Sign into Collect! and navigate to System -> Rights -> Pick Lists
- Check the list for an existing pick list with the same name from step 2. If so, rename the
file in picklist folder with to be unique.
- Navigate to the form and field that you want to put the pick list on. Please refer to the
TO VIEW THE PICK LIST FILE FOR A FIELD section above on how to get to the Access Rights for
a field.
- In the Pick List File field, type in the name of the file from step 2. Do NOT use any of the
buttons to the right of the field to select the list.
- After the file name is in the field, click the Open File icon. It's the first icon on the right
side of the Pick List File field.
- You will get a prompt that states that the pick list was not found, but a legacy version was
found. Click Yes to import the file.

Entering Choices In Your Pick List
- Use any method above to navigate to a Pick List record.
- Click in to the Entries list and either create a new entry or select an existing one.
- The Order field will pre-fill for new entries. Edit it, if required.
 When creating a new pick list, you can create an entry with a blank Key and Text. This will
allow users to type in their own text instead of the pre-defined choices in the pick list.
 WARNING: When using a blank entry, keep in mind that the value entered still needs to match the
data type for the field. Please see below for more information.
- Fill in the Key field. This is the value that will be stored in the database for this
field.
- Fill in the Text field. This is the text that will display to the end user on the screen when
this item is selected.
 You can leave this field blank and Collect! will display the Key value to the end user. This
is useful, particularly in string fields where the value stored in the database will be the
value displayed to the end user (Example: Yes or No). As a note, using numbers in the database
is faster when doing SQL queries. Please see below on field data types for information on what
can be stored in a field.
- If desired, fill in the Red Green Blue (RGB) fields with the applicable RGB values of a
color.
- Click OK on the Pick List Entry form to save the entry and click OK on the Pick List form to
save the list.
WORDS OF CAUTION
* * *
Each field has limitations regarding the kind of information it holds. If you are unsure of the
fields data type, please refer to the Printable Field Help page. Find the field in the list and
look at the Record Type and Field Length columns.
Text, AN means that any alphanumeric value can be stored, up to the value in the Field Length
column.
Text, N means that only whole numbers can be stored in the field.
Currency means that a floating point number, up to 2 decimals can be stored.
Percent means that a floating point number, up to 3 decimals can be stored.
Date is a special case. You can place a pick list on a date field as long as the values in the Key
field are dates.
In reports, when you output a field (Example: @de.ty), Collect! will display the Text value of the
pick list. If you want to output the Key value, you can place it in a variable using the @PV command.
See the "Printing Pick Lists" section below.
When running SQL queries on fields with pick lists, the result you get back will always be the
database or KEY value. Your query, or post query process, will need a translation table to convert
the database value into the pick list value if you want it displayed in a report.
 You can join the pick list table in SQL queries to return the text value of a field.
This is an advanced reporting topic.
When importing to a field with a pick list, ensure that the data you are loading will fit in the
field. Also, if you are using FILL VALUE, only fill the value that will be stored in the database.
For example, if you use fill value on the Mode field when importing new accounts, use a fill value
of A, not ACTIVE.
* * *

Examples
For large text fields:
Key:
"First Choice "
"Second Choice"
"Third Choice "
" "
In this example, the choices of First Choice, Second Choice and Third Choice would appear in the
drop-down list. The example also allows for users to enter their own choice. See the Words of Caution
above.
If First Choice were selected, then First Choice would appear in the field. Its value would be
entered in the database as well.
For small fields using an identifier:
| Key |
Text
|
| "01" |
First Choice |
| "02" |
Second Choice |
| "03" |
Third Choice |
In this example, the choices of "First Choice," "Second Choice," and "Third Choice" would appear in
the drop-down list. If First Choice were selected, then it would display in the field and 01 would
be placed into the database.
Also, in the second example, no other option could be entered because the empty entry is missing from
this example. This is an easy way to ensure that only valid entries are entered in any given field.

Buttons On The Pick List Field
In the Access Rights form, the pick list field has four shortcut buttons to the right of it. Use
these buttons to quickly do the following.
- Open the pick list record: If the Pick List field already contains the name
of a pick list, click this button to open the pick list Editor. Then you can modify the file
if needed. If the Pick List field is empty, selecting the Open button will open a new pick
list for you.
- Print a pick list record: To Print the displayed pick list select the Print
button.
- Delete a pick list record: To delete the pick list, select the button with
the stylized X on it. This prompts you to delete the record. CAUTION!! This actually deletes
the record from your Collect! database.
- Select a pick list record: To attach an existing pick list to the field, click
the Magnifying Glass button. Collect! will open a dialog displaying the list of pick lists in
the database. NOTE -- You should already know which list you want to select.

Setting User Level Pick Lists
The Form Rights Pick List field gives you the ability to assign a special pick list to a particular
user level. This is very useful for limiting the operator's choices. For instance, you can create
one pick list for your system level users and another for your collectors. An example would be the
Debtor Status field. Perhaps you want your collectors to be able to change the Status, but limit
them to a few choices. This is where you could benefit from setting the pick list in Form Rights
for the user level you have assigned to your collectors.

Printing Pick Lists
The @PV command enables you to populate a variable with the database value of a
pick list. This command is useful if you need the database value for an export or SQL query.
Use @PV to:
- Return the database or numeric value of a pick list to a variable.
Syntax: @varReturn* = @PV()
Examples
@varReturn* = @PV(@de.st)
Sample pick list on the state field:
"CA" California
"OR" Oregon
"WA" Washington
In normaly use, @de.st would return the readable text (California, Oregon, Washington).
@varReturn* = @PV(@de.st) will return the first column to the @varReturn variable (CA, OR, WA).
The @PT command enables you to populate a variable with the human readable text of
a pick list. This command is useful if you obtained the database value of a pick list from and SQL
query and need it converted back into the display text.
Syntax: @varReturn* = @PT({fieldname}, {value})
Example 1:
@varReturn* = @PT(@de.st, CA)
Sample pick list on the state field:
"CA" California
"OR" Oregon
"WA" Washington
In normal use, @de.st would return the readable text (California, Oregon, Washington), but when
retrieved via SQL directly, you will get the database value (CA, OR, WA).
@varReturn* = @PT(@de.st, CA) will return the second column to the @varReturn variable (California,
Oregon, Washington).
Example 2:
@varValue* = @varArray[1][1]
@varReturn* = @PT(@de.st, @varValue)
Example 3:
It is possible to put the field into a variable with the quotes.
@varField* = "@de.st"
@varReturn* = @PT(@varField, CA)


Screen Labels
You can show, change, or hide the Field Labels/Names in all the forms in the program. If you want
to use a field to show date of insurance label as (DOI), rather than a birth date (DOB) you can
change the way the screen looks so that it actually reads DOI. This feature can be very powerful.
You can set up Collect! to display for different operators, dialogs that have been modified for a
specific purpose. For example, if one of your operators works only on Medical Accounts, when this
operator signs into Collect!, they can see the field label PATIENT while another operator in the
same database may see the field label DEBTOR.
Click Here to View this Form.
Click Here to Close this Form.
The Access Rights form contains many settings that
control security and properties for menus, forms, fields
and buttons in Collect!. This provides great flexibility and
control over all aspects of your use of Collect!
Using the Access Rights form, you can change
form and field labels, set a field color, attach a pick list
or a control file. Read/write privileges for various user
levels can be set, including who is allowed to access
particular menus, form and fields in your system. You can
also switch on logging changes to notes or verify that
correct data is entered in a field.
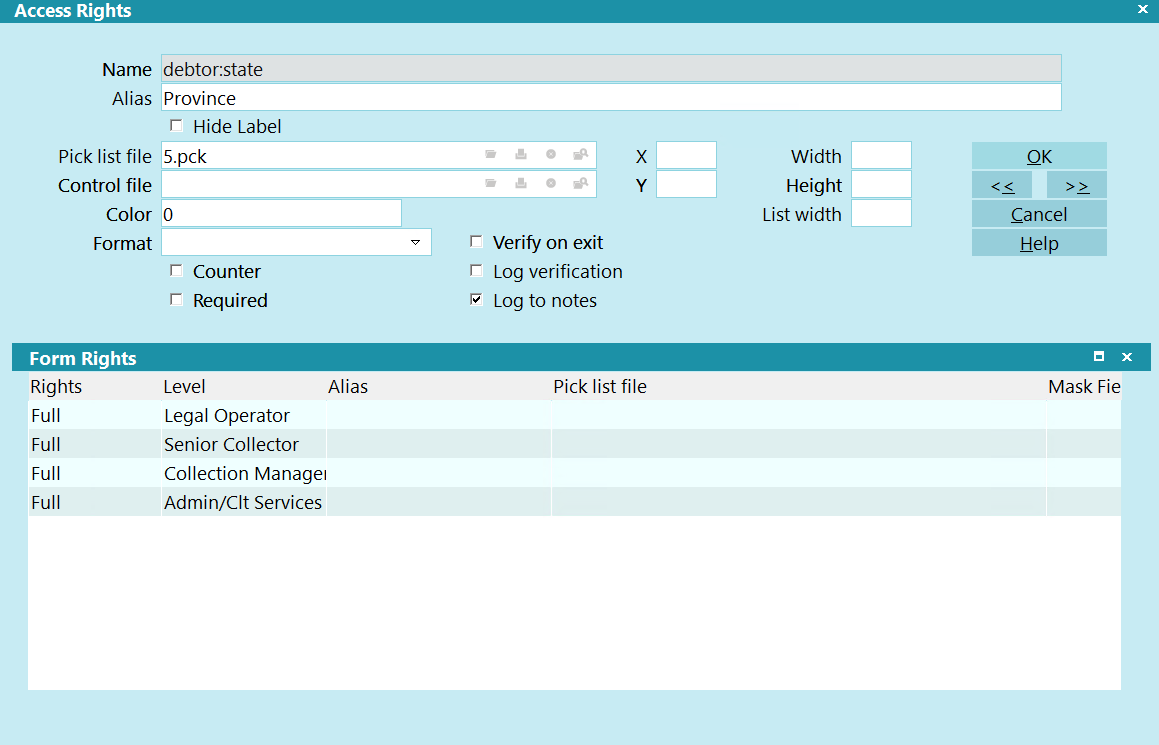
Access Rights
 WARNING: The Access Rights that begin with the hash (#)
symbol are for data level rights in the REST API.
They do not affect User Interface level rights.
No Access Rights
When a user tries to perform function that they do not have
access rights to, Collect! will display a message indicating
the Access Rights number that you can change to grant
access to the particular function.
Access Rights Prompt
The Name and Number displayed in this message helps
you locate the particular form in the Access Rights list.

Access Rights Item in List

Access Rights Form Name

Name
This is the form, field or menu name.
For Forms, the name is shown on the top line of the
form. Field names are displayed to the left of the field,
and Menu names are as you see in the pull down Menus.
In the Access Rights form, the Name field is grayed
out and cannot be changed. Collect! needs to read
this information for its internal work. However, Collect!
allows you to change the name that is displayed for
the item.
To modify or change the name that appears
after Collect! is run, use the ALIAS field.

Alias
This is a name you can use to override the default form
or field name. If you enter a name into this field, the
name you enter will replace the default name ordinarily
displayed by Collect! for that item. The change will take
effect the next time you sign into Collect! This Alias can be
overridden on a User Level because there is also an Alias
field in the Form Rights form.
 WARNING: If you decide to use aliases,
DO NOT rebuild the form rights or
printable information lists when signed
in as a User with aliases.

Hide Label
Switch this ON to hide the label for this field
when a form opens.

Pick List File
Click one of the buttons on this field to select
a Pick List or edit one that is already attached
to this field.
Pick lists can be attached to just about any
field in the system. A Pick List gives the user
a list choices to choose from for the field.

Control File
Click one of the buttons on this field
to select a Control File or edit one that
is already attached to this field.
Control Files can be attached to just about
any form or field in the system. A Control
File can cause actions to occur depending
on the value entered in the field. For
instance, if the user enters "New York", the
field could change color and a Contact Plan
could run.

X
This specifies the x coordinate on the
screen where the field is located. This
allows you to move a field on a form.

Y
This specifies the y coordinate on the
screen where the field is located. This
allows you to move a field on a form.

Width
This is the number of character units
the field displays on the screen. This
allows you to change the displayed
width of a field on a form.

Height
This is the height of the field displayed
on the screen. This is only valid for lists.
It allows you to change the number of
rows that show when the list is displayed
on the screen.

List Width
This controls the display of the field in lists. Setting
this value to zero stops the field from displaying in
lists. Giving it a value causes the field to show up
in lists.
You can use this setting to cause a field of your
choice to show up in a list in Collect!. For instance,
the Debtor list could also display the Country
field.

Color
This controls the default background color of a field
when it is displayed. By default, this field is set to 0
which results in a white background. To change the
background color for a field, enter a valid six character
RGB color code in hexadecimal form, as in standard
HTML color usage.

Format
This option allows you to reformat the text of a field
using a selection of predefined formats. Only one option
can be selected.
 This field is only visible for Alphanumeric
String fields.

Counter
Switch ON the Counter switch to make the field
a counter.
Counter fields automatically increment by 1
when a new record of the given type is created.
Counters, if they are used, have a folder under
the database folder. In the counter folder, each
counter has a file named {form}{field}.cnt. The
file contains the next available count for the field.
When a new record is created, the system
checks the counter files for any counter fields
in the record, reads the file, updates the counter
and rewrites the file with the next available value.

Verify On Exit
Switch this ON with a check mark to prompt the user to
verify the data in this field before exiting the form. There
are a few steps necessary to perform this procedure.
Please refer to the Help topic
How to Prompt To Verify Field On Exiting A Form for details.
This will explain how to proceed with verification on the
field of your choice.
The verification prompt will only appear if the data in the
field has changed.

Log Verification
Switch this ON with a check mark to write to the debtor's
Notes whenever the user verifies the data in this field.
There are a few steps necessary to perform this procedure.
Please refer to the Help topic
How to Prompt To Verify Field On Exiting A Form for details.
This will explain how to proceed with verification on the
field of your choice.

Log To Notes
Switch this ON with a check mark to write to the
debtor's Notes whenever a change is made to
this field.
If you are importing data into a field with this option enabled,
it will log the change to the notes.

Required
Switch this ON with a check mark to enforce this field
to be required when filling in this form. There
are a few steps necessary to perform this procedure.
Please refer to the Help topic
How to Prompt to Verify a Field on Exiting a Form for details.
This will explain how to proceed with verification on the
field of your choice.

User Levels
The Form Rights list displays those Users who have rights
to access a given form, field, or menu, and the extent of
their rights.
Press F5 or select the Form Rights list to activate it.
Notice that its title bar changes color and buttons
appear at the bottom of the form. You may create a
new line or edit an existing line item. Press F1 for
help on the Form Rights form and fields.
RIGHTS
This field displays the Access Level rights
allowed to this field or form.
LEVEL
This column displays an Operator Level that
is allowed to access the item.
ALIAS
If you have changed the field label for this
item for a particular User group, the Alias
is displayed in this column.
PICK LIST FILE
If there is a Pick List file attached to this field
for a particular User group, it will be displayed
in this column.

Help
Press this button for help on the Access Rights
form and links to related topics.

Cancel
Select this button to ignore any changes
you have made and return you to the
previous form.

OK
Select this button to save any changes
you have made and return you to the
previous form.
<<
Select this button to go to the previous
record in the database.
>>
Select this button to go to the next record
in the database.

Rebuild
This choice is only available on the Access Rights List.
Select it to refresh the list.
The list of access rights contains every field, menu item, form and
button in Collect!. Whenever you make changes to access rights on
a form or field level, it is necessary to rebuild this list so that your
changes will take effect.
Also, there are other times when it is necessary to rebuild this list:
To correct settings for operator levels.
This occurs when you upgrade your database. If you find that
you cannot sign into Collect! using your former ID and Password
after an upgrade, you will have to rebuild the list of access rights.
To correct access rights to forms or fields.
If you find that your operators cannot access a form or a field
that they accessed formerly, rebuilding the list of access rights
often sets things right again.
To correct some printing issues.
Sometimes a report or letter does not print correctly due to an
access rights issue. In that case it is especially important to
rebuild your Printable Information list as well as your
Access Rights list. This is described below.
Each form, field and menu item is listed in the Access Rights
table. For each item in the Access Rights list, you can assign
Users who are allowed to access the form, menu or field, and
you can determine if they can only read or read and write to
the item. Please refer to help on Access Rights and
How To Use Access Rights for information about
assigning rights to users.
Collect! rebuilds this table automatically whenever it detects
changes. It only needs to be rebuilt manually if you experience
difficulties with User Access Rights as described above or if
you make changes to rights for certain forms or fields.
If you choose to rebuild the table, you may have to reassign
rights to some User levels, although the program takes great
pains to leave your rights designations intact.
 WARNING: If you are using aliases, you must sign in
as User Level 99 to rebuild this list or it will not be
built correctly.

Rebuild Access Rights
- Sign into Collect! as User Level 99.
- Select System from the top menu bar and then select Rights,
Access Rights.
- Click the Rebuild button at the bottom of the screen.
- Your Access Rights will be updated.
- Sign out of Collect! completely and return to the
Desktop. Then sign into Collect! at various User Levels to
ensure that your access rights are working properly.
 You must sign out of Collect! completely, returning
to the Desktop, whenever you change to a different User Level,
or some of the rights from the previous level that you were
signed in as may still be in effect.
After rebuilding the Access Rights list, rebuild your
Printable Information list as well and your Import Definitions.
These three lists relate to fields and forms in Collect! and they
are related to each other. It is always a good idea to rebuild
them all at once.

Rebuild Import Field Definitions
- Sign into Collect! as User Level 99.
- Select File from the top menu bar and then select Import/Export.
- Choose Update Definitions. (Choose 'Yes' if prompted)
- Your Import Field Definitions will be updated.

Rebuild Printable Information
- Sign into Collect! as User Level 99.
- Select Print from the top menu bar and then select
Settings, Report and Printer Setup.
- Choose Printable Information. The Printable Field list will display.
- Click the Rebuild button at the bottom of the screen.
- When Collect! rebuilds this list it will shut down to take effect.
- Sign in again and your Printable Information is now updated.


Commission Rate Plans
Are your clients needing any complex tiered commission plans or are they all flat rates. If tiered
rate plans are going to be needed, set them up in advance so that as you data enter your clients,
the codes for these are available for streamlined use as you input clients.
Click Here to View this Form.
Click Here to Close this Form.
Commission Rate Plans allow you to specify a sliding scale for the commission rate to be used when
calculating commission amounts on transactions posted to an account. These plans are used when you
need more than two rates for calculating commission due on a transaction.
Sample commission rate plans found below will give you an idea of how commission rate plans can be
used to quickly and accurately calculate commission using a sliding scale. Experiment with the
commission rate plan choices to see the effects each plan has on the debtor's commission rate.
Some commission rate plans set the commission rate when you have completed entering a new debtor.
If the rate depends on values only from the Debtor form, then the commission rate can be calculated
and established immediately.
Other commission rate plans depend on posting a transaction before Collect! can establish the
appropriate commission rate. This may result in a Debtor form that does not show a commission rate
percentage, at first. This is quite normal. Once a payment is posted, Collect! will calculate the
commission rate and set it appropriately.
Commission rates set by certain types of commission rate plans are averaged before being displayed
in Collect! The data evaluated may need to be calculated over more than one commission rate step
set in the plan. The two steps are averaged in these cases. You can view more details by trying the
sample plans that have this effect.
Using Minimum and Maximum values can also result in calculation and display of an unexpected
commission rate percentage.
 Commission rate plans are most efficient when you have commission rates that slide many
levels. If you only change the commission rate once, for instance, when an account goes
Legal, you should consider using a Rate type contact to change the commission rate at the
required time. For example, if your commission rate changes from 30% to 50% when you send
an account to Legal, use a contact event to change the rate to 50% instead of using a
commission rate plan.
To Use a Rate Plan, simply fill in the Rate Plan field on the Client Settings form.
Commission Rate Plan Form

Setting Min And Max Values
When designing your commission rate plans, there are fields where you can specify minimum and maximum
payment amounts to be considered when posting transactions.
When using MIN or MAX values, it may be confusing when the commission rate is displayed. For example,
you have a commission rate plan based on Payment Amount, but you have an agreement with your client
that the minimum commission amount on any transaction will be set to $25.00.
Setting the minimum values as shown below will guarantee that no matter how small a payment is
received, you will always be guaranteed $25.00 (unless, of course, the payment is $15.00. Collect!
would then take the complete $15.00.)
When you create a transaction to post a payment of $50.00, Collect! will calculate the rate to be
35%, which would result in a commission amount of $17.50. Then Collect! would check the minimum and
maximum values in the appropriate range of the commission rate plan, seeing that a minimum value of
$25.00 is set, Collect! would overwrite the commission amount of $17.50 with $25.00. Because $25.00
is equal to 50% of the $50.00 being posted, the commission rate value will be changed from 35% to 50%.
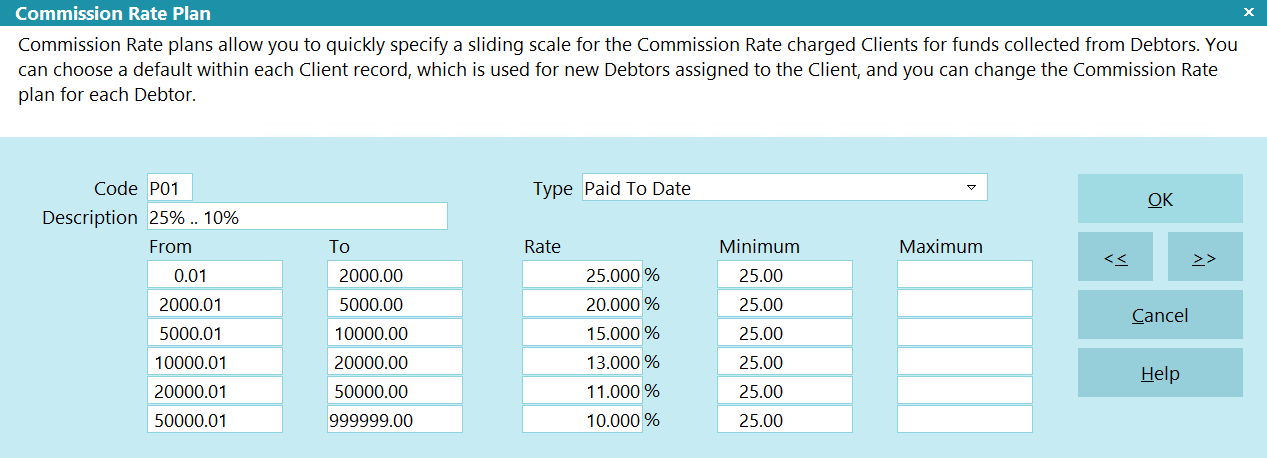
Commission Rate Plan - Min and Max Values
You can also set maximum values for Collect! to consider when posting transactions. The same
theory applies.
When you use minimum or maximum values, if they replace the commission amount, Collect! will
calculate the percentage of the payment amount they represent and reset the commission rate percent
accordingly.
If you are using commission rate plans and feel that the commission is not calculating as it should,
check out the commission rate plan. Maybe there are minimum and maximum values present.

Commission Rate Plan Sample - Age - Charged
Age commission rate plans use the number of days between the Listed Date and the Charged Date to
determine which commission rate should be set. Therefore to use this commission rate plan you must
have entered a Charged Date and a Listed Date.
The sample below will show you how Collect! determines the commission rate to set when you have
assigned this commission rate plan to the account.
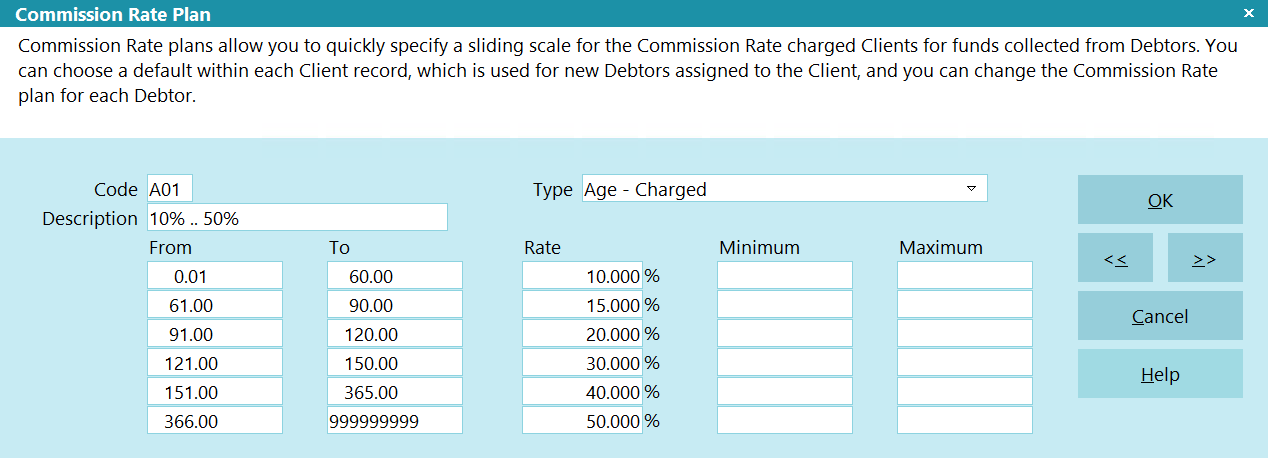
Commission Rate Plan - Age
With this sample:
If the difference between the Listed Date and the Charged Date is less than or equal to 60 days, the
commission rate set for the debtor will be 10%. Any time you post a transaction that is set to
calculate a commission amount, 10% of the To Us or Direct amount will be calculated.
If the difference between the Listed Date and the Charged Date is greater than or 60 days, or less
than or equal to 90 days, the commission rate set for the debtor will be 15%. Any time you post a
transaction that is set to calculate a commission amount, 15% of the To Us or Direct amount will be
calculated.
If the difference between the Listed Date and the Charged Date is greater than or 90 days, or less
than or equal to 120 days, the commission rate set for the debtor will be 20%. Any time you post a
transaction that is set to calculate a commission amount, 20% of the To Us or Direct amount will be
calculated.
If the difference between the Listed Date and the Charged Date is greater than or 120 days, or less
than or equal to 150 days, the commission rate set for the debtor will be 30%. Any time you post a
transaction that is set to calculate a commission amount, 30% of the To Us or Direct amount will be
calculated.
If the difference between the Listed Date and the Charged Date is greater than or 150 days, or less
than or equal to 365 days, the commission rate set for the debtor will be 40%. Any time you post a
transaction that is set to calculate a commission amount, 40% of the To Us or Direct amount will be
calculated.
If the difference between the Listed Date and the Charged Date is greater than or 365 days, or less
than or equal to 9999999 days, the commission rate set for the debtor will be 50%. Any time you post a
transaction that is set to calculate a commission amount, 50% of the To Us or Direct amount will be
calculated.
With this commission rate plan type, no minimum or maximum values should be set. If you enter values
for the minimum or maximum values, Collect! will ignore them when calculating a commission.

Commission Rate Plan Sample - Age - Delinquent
Age commission rate plans use the number of days between the Listed Date and the Delnqnt Date to
determine which commission rate should be set. Therefore to use this commission rate plan you must
have entered a Delnqnt Date and a Listed Date.
The sample below will show you how Collect! determines the commission rate to set when you have
assigned this commission rate plan to the account.
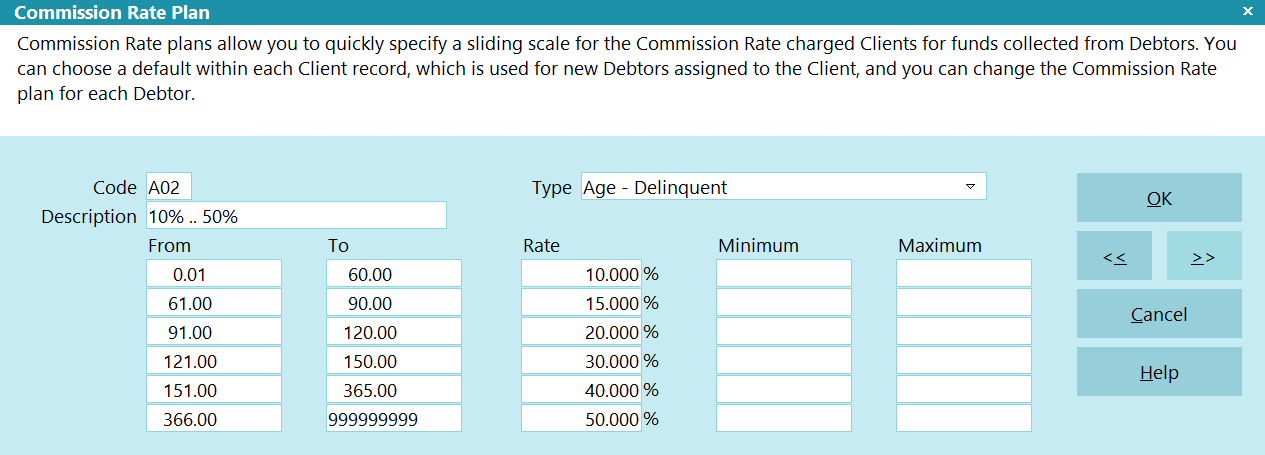
Commission Rate Plan - Age
With this sample:
If the difference between the Listed Date and the Delnqnt Date is less than or equal to 60 days, the
commission rate set for the debtor will be 10%. Any time you post a transaction that is set to
calculate a commission amount, 10% of the To Us or Direct amount will be calculated.
If the difference between the Listed Date and the Delnqnt Date is greater than or 60 days, or less
than or equal to 90 days, the commission rate set for the debtor will be 15%. Any time you post a
transaction that is set to calculate a commission amount, 15% of the To Us or Direct amount will be
calculated.
If the difference between the Listed Date and the Delnqnt Date is greater than or 90 days, or less
than or equal to 120 days, the commission rate set for the debtor will be 20%. Any time you post a
transaction that is set to calculate a commission amount, 20% of the To Us or Direct amount will be
calculated.
If the difference between the Listed Date and the Delnqnt Date is greater than or 120 days, or less
than or equal to 150 days, the commission rate set for the debtor will be 30%. Any time you post a
transaction that is set to calculate a commission amount, 30% of the To Us or Direct amount will be
calculated.
If the difference between the Listed Date and the Delnqnt Date is greater than or 150 days, or less
than or equal to 365 days, the commission rate set for the debtor will be 40%. Any time you post a
transaction that is set to calculate a commission amount, 40% of the To Us or Direct amount will be
calculated.
If the difference between the Listed Date and the Delnqnt Date is greater than or 365 days, or less
than or equal to 9999999 days, the commission rate set for the debtor will be 50%. Any time you post a
transaction that is set to calculate a commission amount, 50% of the To Us or Direct amount will be
calculated.
With this commission rate plan type, no minimum or maximum values should be set. If you enter values
for the minimum or maximum values, Collect! will ignore them when calculating a commission.

Commission Rate Plan Sample - List Amount
The List Amount commission rate plan uses the Original Principal and Original Interest amounts
together when calculating the commission rate. If you wish the commission rate plan to use only the
Original Principal, then you must post an interest transaction adjustment to set the interest amount.
Do not use the 197 Original Interest transaction type, as this also sets the Original Interest field
on the Interest Detail form on the debtor. Adding to the original principal or original interest may
reset the commission rate.
The sample below will show you how Collect! determines the commission rate to set when you have
assigned this commission rate plan to the account.
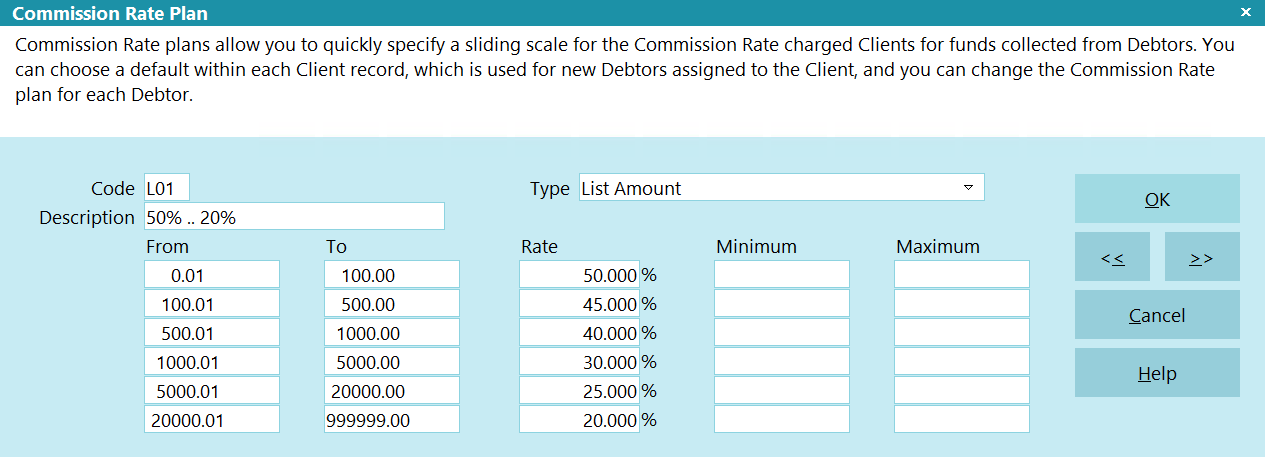
Commission Rate Plan - List Amount
With this sample:
If the total of the Original Principal and Original Interest is between $00.0 and $100.00, the
commission rate of 50% will be set in the Rate field on the Debtor form.
If the total of the Original Principal and Original Interest is between $100.01 and $500.00, the
commission rate of 45% will be set in the Rate field on the Debtor form.
If the total of the Original Principal and Original Interest is between $500.01 and $1000.00, the
commission rate of 40% will be set in the Rate field on the Debtor form.
If the total of the Original Principal and Original Interest is between $1000.01 and $5000.00, the
commission rate of 30% will be set in the Rate field on the Debtor form.
If the total of the Original Principal and Original Interest is between $5000.01 and $20000.00, the
commission rate of 25% will be set in the Rate field on the Debtor form.
If the total of the Original Principal and Original Interest is between $20000.01 and $999,999.00, the
commission rate of 20% will be set in the Rate field on the Debtor form.
Posting transactions that change the total of Original Principal and Original Interest will force
the commission rate plan to recalculate and reset the commission rate. This new rate will apply to
any further transactions posted.
With this commission rate play type, no minimum or maximum values should be set. If you enter values
for the minimum or maximum values, Collect! will ignore them when calculating a commission.

Commission Rate Plan Sample - Payment Amount
Payment amount plans look at each individual payment and use that amount to determine which
commission rate to use when posting a payment. The commission rate is set at data entry and when
working with financials.
The sample below will show you how Collect! determines which commission rate to set when you have
assigned this commission rate plan to an account.
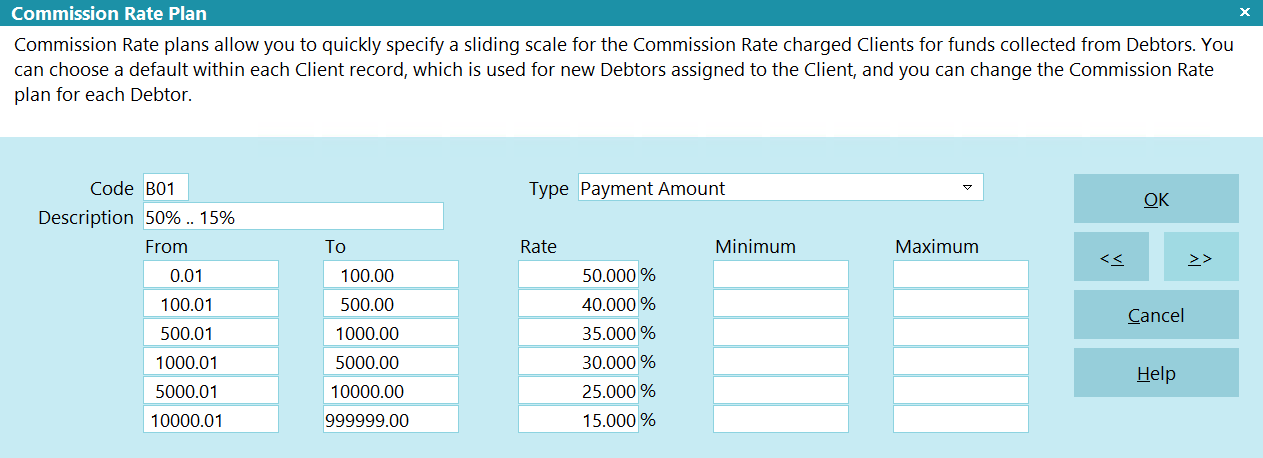
Commission Rate Plan - Payment Amount
When using this type of commission rate plan, you will notice Collect! does not assign any
commission rate on the Debtor form. The field labeled Rate will always be empty. The commission
rate is calculated and applied to each payment transaction when posting. This commission rate plan
evaluates the amount of the payment entered in the To Us or Direct field on the payment transaction.
Collect! determines the commission rate percentage to use when you exit the To Us or Direct fields,
or when you uncheck the 'Don't calculate commission' check box, or when you select OK on the
transaction.
The commission rate is calculated each time a transaction type is posted that requires commission
or when an existing transaction is modified.
With this sample:
When posting a transaction for anywhere between $0.01 to $100.00, the commission rate on the
transaction will be set to 50% automatically.
When posting a transaction for anywhere between $100.01 to $500.00, the commission rate on the
transaction will be set to 40% automatically.
When posting a transaction for anywhere between $500.01 to $1000.00, the commission rate on the
transaction will be set to 35% automatically.
When posting a transaction for anywhere between $1000.01 to $5000.00, the commission rate on the
transaction will be set to 30% automatically.
When posting a transaction for anywhere between $5000.01 to $10000.00, the commission rate on the
transaction will be set to 25% automatically.
When posting a transaction for anywhere between $10000.01 to $999,999.00, the commission rate on the
transaction will be set to 15% automatically.
With this sample, no minimum or maximum values have been set. If you enter values for the appropriate
minimum or maximum values, Collect! will reset the commission amount accordingly when posting a
transaction that calculates commissions. If you are going to use minimum and maximum commission
amounts, you should view the section above called Setting Min And Max Values.

Commission Rate Plan Sample - Paid To Date
Paid to date plans look at the Paid field on the Debtor form to evaluate the commission rate to set.
The total paid, including the current payment transaction, is used to calculate the commission rate.
This may cause a commission percentage to display erroneously. This is a progressive commission rate
plan example. It is possible at the time of posting the transaction, that the amount posted causes
Collect! to use multiple levels of your commission rate plan to come to the appropriate rate. Please
review the example below to be completely comfortable and confident that the true commission rate
percentage is being calculated.
Collect! will display the commission rate percentage of the current level set in the commission rate
plan. If your total paid to date is below $2,000.00 then 25% will be set on the Debtor form in the
Rate field. If the total paid to date is between $2,000.01 and $5,000.00 the rate will display as
20%, for example. This commission rate plan is used each time you post a transaction that effects
the Paid field and is set to calculate a commission rate.
The sample below will show you how Collect! determines the commission rate to set when you have
assigned this commission rate plan to an account.
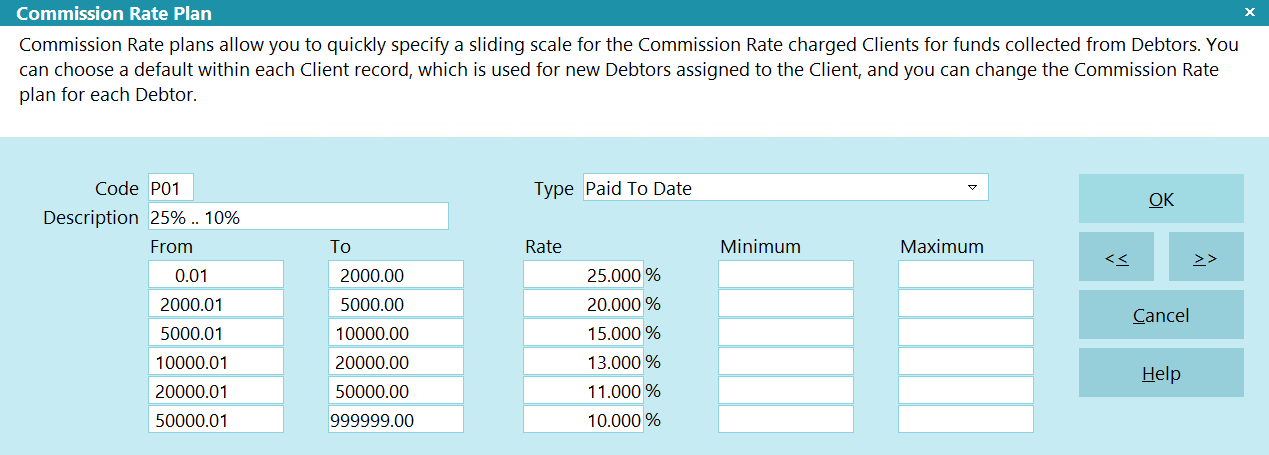
Commission Rate Plan - Paid To Date
The commission rate is automatically set to your first level when entering a new account. (No payments
will have been made yet, so the rate is set for the first level.) Then the rate is recalculated and
applied to each payment transaction when posting. This commission rate plans evaluates the amount
of the payment entered in the To Us or Direct field on the payment transaction. Collect! determines
the commission rate percentage to use when you exit the To Us or Direct fields, or when you uncheck
the 'Don't calculate commission' check box, or when you select OK on the transaction.
The commission rate is calculated each time a transaction type is posted that requires commission
or when modifying an existing transaction. Caution should be taken if you need to modify any amount
on previously payments. You may want to make an adjustment for any error or delete all payments
posted after the modified transaction.
With this sample:
The first $2,000.00 dollars paid will have commission calculated at 25%.
The next $2,000.01 to $5,000.00 dollars paid will be have commission calculated at 20%.
The next $5,000.01 to $10,000.00 dollars paid will be have commission calculated at 15%.
The next $10,000.01 to $20,000.00 dollars paid will be have commission calculated at 13%.
The next $20,000.01 to $50,000.00 dollars paid will be have commission calculated at 11%.
The next $50,000.01 to $99,999,999.00 dollars paid will be have commission calculated at 10%.
Because the amount paid to date can actually span multiple ranges set in the commission rate plan,
sometimes the resulting commission rate percentage can look erroneous. The examples below will help
you to understand the commission rate percentage displayed on each transaction.
We list a debtor with $50,000.00 Principal.
Post the first $500.00 payment. You will see the commission rate set to 25% and the calculated
commission amount of $125.00. Total paid to date is $500.00 and you are still in the $0.00 to
$2,000.00 range at 25%.
Post the next $1,000.00 payment. You will see the commission rate set to 25% and the calculated
commission amount of $250.00. Total paid to date is $1,500 and you are still in the $0.00 to
$2,000.00 range at 25%.
Post the next $1,000.00 payment. You will see the commission rate set to 22.50% and the calculated
commission amount of $225.00. Total paid to date is $2,500.00. This payment has taken us into the
next range of $2,000.01 to $5,000.00 at 20%.
Collect! has calculated the portion of $500.00 at 25% for you for $125.00, bringing the total paid
to date to $2,000.00. Then the remainder of $500.00 is calculated at 20% for a commission amount of
$100.00. This results in a total commission amount of $225.00 which happens to be 22.50% of the
$1,000.00 posted.
Post the next $2,000.00 payment and you will see the commission rate set to 20% for a calculated
commission amount of $400.00. The total paid to date is $4,500.00. This payment was completely in
the range of $2,000.01 and $5,000.00 for a 20% commission rate.
Post the next $2,000.00 payment and you will see the commission rate set to 16.25% and the calculated
commission amount of $325.00. Total paid to date is $6,500.00. This payment has taken us into the
next range of $5,000.01 to $10,000.00 at 15%. Collect! has calculated the portion of $500.00 at 20%
for you for $100.00, bringing the total paid to date to $5,000.00. Then the remaining $1500 is
calculated at 15% for a commission amount of $225.00. This results in a total commission amount of
$325.00 which happens to be 16.25% of the $2,000.00 posted.
Collect! will continue to use the settings from your commission rate plan to calculate the commission
rate to use for any transaction. Experiment with transactions in the Demonstration database to become
completely confident with how Collect! calculates commission rates and commission amounts.
With this sample, no minimum or maximum values have been set. If you enter values for the appropriate
minimum or maximum values, Collect! will reset the commission amount accordingly when posting a
transaction that calculates commissions. If you are going to use minimum and maximum commission
amounts, you should view the section above called Setting Min And Max Values.

Commission Rate Plan Sample - Remaining Balance
Remaining balance commission rate plans use the current Owing on the Debtor form to calculate the
appropriate commission rate. You need to be extra careful when you use this type of plan. Collect!
evaluates the balance remaining prior to posting the transaction, so caution is needed if you enter
an NSF payment or if you need to modify any previously entered transactions.
The sample below will show you how Collect! determines the commission rate to set when you have
assigned this commission rate plan to the account.

Commission Rate Plan - Remaining Balance
With this sample:
If the balance owing on a debtor account is between $5,000.01 and $99,999.00 when posting a
transaction, Collect! will set the commission rate of 15% and set calculate the commission amount
accordingly.
If the balance owing on a debtor account is between $2,000.01 and $5,000.00 when posting a
transaction, Collect! will set the commission rate of 20% and set calculate the commission amount
accordingly.
If the balance owing on a debtor account is between $1,000.01 and $2,000.00 when posting a
transaction, Collect! will set the commission rate of 25% and set calculate the commission amount
accordingly.
If the balance owing on a debtor account is between $500.01 and $1,000.00 when posting a
transaction, Collect! will set the commission rate of 30% and set calculate the commission amount
accordingly.
If the balance owing on a debtor account is between $50.01 and $500.00 when posting a transaction,
Collect! will set the commission rate of 35% and set calculate the commission amount accordingly.
If the balance owing on a debtor account is between $0.00 and $50.00 when posting a transaction,
Collect! will set the commission rate of 40% and set calculate the commission amount accordingly.
With this sample, no minimum or maximum values have been set. If you enter values for the appropriate
minimum or maximum values, Collect! will reset the commission amount accordingly when posting a
transaction that calculates commissions. If you are going to use minimum and maximum commission
amounts, you should view the section above called Setting Min And Max Values.

Commission Rate Plan Sample - Payment Days From Listing
Payment days from listing commission rate plans calculate the number of days difference from the
Listed Date to the Payment Date used when posting a transaction that requires commission to be
calculated. Because Collect! evaluates the difference in days when entering the Payment Date on the
transaction being posted, you will need to be very careful if you need to modify any previously
entered transactions.
The sample below will show you how Collect! determines the commission rate to set when you have
assigned this commission rate plan to the account.

Commission Rate Plan - Payment Days From Listing
Collect! will calculate and set the commission rate percentage on the Debtor form immediately after
you select the commission rate plan in the Financial Detail form accessed through the Debtor form's
Rate field. Select the Commission tab.
With this sample:
If the difference between the Listed Date and the Payment Date on the transaction when posting is
between 0 days and 14 days, Collect! will set the commission rate of 10% and set calculate the
commission amount accordingly.
If the difference between the Listed Date and the Payment Date on the transaction when posting is
between 15 days and 30 days, Collect! will set the commission rate of 15% and set calculate the
commission amount accordingly.
If the difference between the Listed Date and the Payment Date on the transaction when posting is
between 31 days and 60 days, Collect! will set the commission rate of 20% and set calculate the
commission amount accordingly.
If the difference between the Listed Date and the Payment Date on the transaction when posting is
between 61 days and 90 days, Collect! will set the commission rate of 25% and set calculate the
commission amount accordingly.
If the difference between the Listed Date and the Payment Date on the transaction when posting is
between 91 days and 365 days, Collect! will set the commission rate of 35% and set calculate the
commission amount accordingly.
If the difference between the Listed Date and the Payment Date on the transaction when posting is
between 366 days and 99999999 days, Collect! will set the commission rate of 50% and set calculate
the commission amount accordingly.
With this sample, no minimum or maximum values have been set. If you enter values for the appropriate
minimum or maximum values, Collect! will reset the commission amount accordingly when posting a
transaction that calculates commissions. If you are going to use minimum and maximum commission
amounts, you should view the section above called Setting Min And Max Values.

Commission Rate Plan Sample - Payment Days From Charged
Payment days from charged commission rate plans calculate the number of days difference from the
Charged Date to the Payment Date used when posting a transaction that requires commission to be
calculated. Because Collect! evaluates the difference in days when entering the Payment Date on the
transaction being posted, you will need to be very careful if you need to modify any previously
entered transactions.
The sample below will show you how Collect! determines the commission rate to set when you have
assigned this commission rate plan to the account.
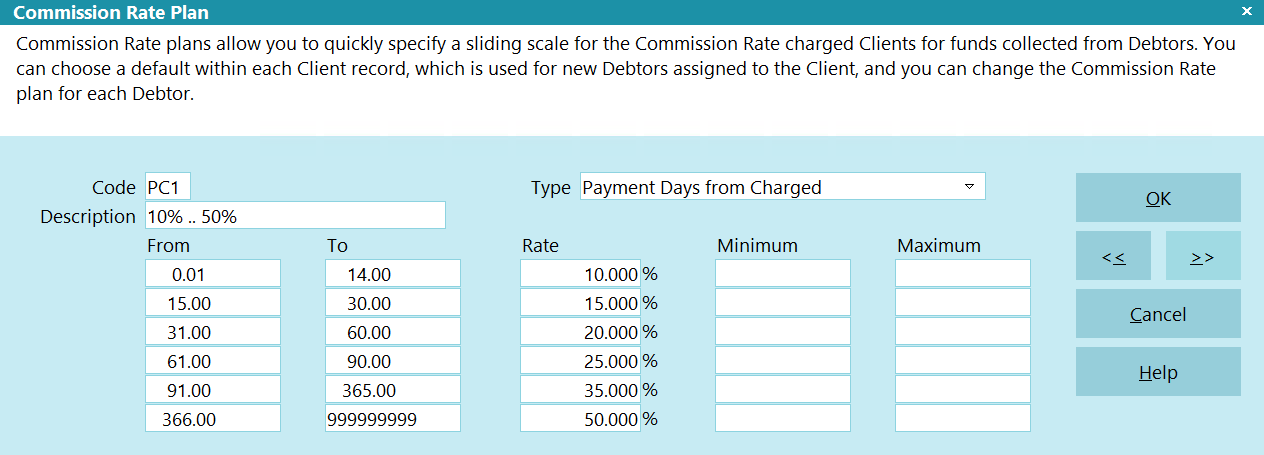
Commission Rate Plan - Payment Days From Charged
Collect! will calculate and set the commission rate percentage on the Debtor form immediately after
you select the commission rate plan in the Financial Detail form accessed through the Debtor form's
Rate field. Select the Commission tab.
With this sample:
If the difference between the Charged Date and the Payment Date on the transaction when posting is
between 0 days and 14 days, Collect! will set the commission rate of 10% and set calculate the
commission amount accordingly.
If the difference between the Charged Date and the Payment Date on the transaction when posting is
between 15 days and 30 days, Collect! will set the commission rate of 15% and set calculate the
commission amount accordingly.
If the difference between the Charged Date and the Payment Date on the transaction when posting is
between 31 days and 60 days, Collect! will set the commission rate of 20% and set calculate the
commission amount accordingly.
If the difference between the Charged Date and the Payment Date on the transaction when posting is
between 61 days and 90 days, Collect! will set the commission rate of 25% and set calculate the
commission amount accordingly.
If the difference between the Charged Date and the Payment Date on the transaction when posting is
between 91 days and 365 days, Collect! will set the commission rate of 35% and set calculate the
commission amount accordingly.
If the difference between the Charged Date and the Payment Date on the transaction when posting is
between 366 days and 99999999 days, Collect! will set the commission rate of 50% and set calculate
the commission amount accordingly.
With this sample, no minimum or maximum values have been set. If you enter values for the appropriate
minimum or maximum values, Collect! will reset the commission amount accordingly when posting a
transaction that calculates commissions. If you are going to use minimum and maximum commission
amounts, you should view the section above called Setting Min And Max Values.

Commission Rate Plan Sample - Payment Days From Delinquent
Payment days from delinquent commission rate plans calculate the number of days difference from the
Delnqnt Date to the Payment Date used when posting a transaction that requires commission to be
calculated. Because Collect! evaluates the difference in days when entering the Payment Date on the
transaction being posted, you will need to be very careful if you need to modify any previously
entered transactions.
The sample below will show you how Collect! determines the commission rate to set when you have
assigned this commission rate plan to the account.
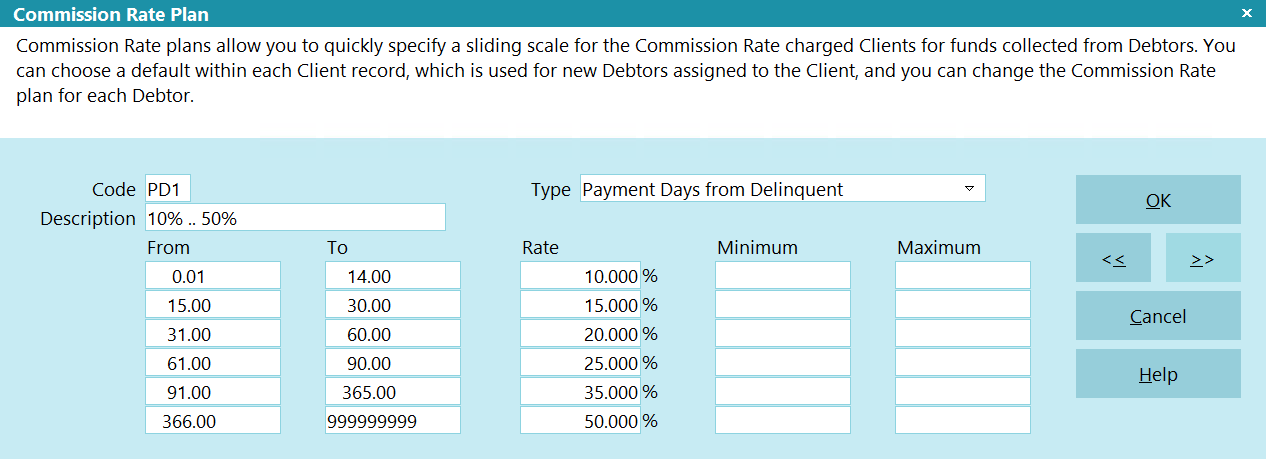
Commission Rate Plan - Payment Days From Delinquent
Collect! will calculate and set the commission rate percentage on the Debtor form immediately after
you select the commission rate plan in the Financial Detail form accessed through the Debtor form's
Rate field. Select the Commission tab.
With this sample:
If the difference between the Delnqnt Date and the Payment Date on the transaction when posting is
between 0 days and 14 days, Collect! will set the commission rate of 10% and set calculate the
commission amount accordingly.
If the difference between the Delnqnt Date and the Payment Date on the transaction when posting is
between 15 days and 30 days, Collect! will set the commission rate of 15% and set calculate the
commission amount accordingly.
If the difference between the Delnqnt Date and the Payment Date on the transaction when posting is
between 31 days and 60 days, Collect! will set the commission rate of 20% and set calculate the
commission amount accordingly.
If the difference between the Delnqnt Date and the Payment Date on the transaction when posting is
between 61 days and 90 days, Collect! will set the commission rate of 25% and set calculate the
commission amount accordingly.
If the difference between the Delnqnt Date and the Payment Date on the transaction when posting is
between 91 days and 365 days, Collect! will set the commission rate of 35% and set calculate the
commission amount accordingly.
If the difference between the Delnqnt Date and the Payment Date on the transaction when posting is
between 366 days and 99999999 days, Collect! will set the commission rate of 50% and set calculate
the commission amount accordingly.
With this sample, no minimum or maximum values have been set. If you enter values for the appropriate
minimum or maximum values, Collect! will reset the commission amount accordingly when posting a
transaction that calculates commissions. If you are going to use minimum and maximum commission
amounts, you should view the section above called Setting Min And Max Values.


Startup Automation
Collect! offers a number of options when starting up the program. For example, you may always want
to sign on with a specific user ID from a particular workstation, or you might want to stop the user
from exiting Collect!. There are quite a number of functions you can perform, including running a
macro on startup, automating routine maintenance, changing the logo on the splash screen, inhibiting
display of the Welcome To Collect! screen and more.
 Right click your Collect! desktop icon, choose Properties, Shortcut tab. Add the extension
/? to the executable's path to display a complete list of command line startup options.
You'll have to remove the extension to sign into Collect!.
Click Here to View this Form.
Click Here to Close this Form.
To use command line arguments, either use the Run command
from the Start menu, or create an icon for the program, and
change the options in the shortcut.
This is a very useful feature of Collect! if you and your
operators work on the same machine all the time.
You can set up these shortcuts for different operators and they
will each be able to start Collect! with their own customized
variations of logging into a Collect! database.
Collect! command line arguments:
| Argument |
Use |
Applies To Collect! |
Applies To Web Host |
| /a{file} |
Startup using macro file {file} |
X |
|
| /b |
Beep sounds off |
X |
|
| /c{filename} |
Enable Flex Screen{Use this INI instead of uidefault.ini} |
X |
|
| /calclog |
The calc log is a debugging tool to assist in troubleshooting
financial calculations. When enabled, every time you recalc a
debtor, the financial calculations are written to
Collect\bin\calclog.txt. This file is tab delimited and can be
copied into Excel. |
X |
X |
| /claddress |
This tool will convert legacy addresses from City/State/Zip
format to the respective fields. This utility also updates
any reports that reference @cl.a3 to the respective
fields. This command can only be used with user level 99. |
X |
|
| /d |
Enable internal checks |
X |
|
| /db{database} |
Path to database. (e.g. /dbmasterdb) |
X |
X |
| /dl |
Disable locale |
X |
|
| /e |
Error beep OFF |
X |
|
| /encrypt |
Enable Encryption in Transit for the ODBC Driver. Note
that ODBC Driver 18 enabled Encryption in Transit by
default and does not need this parameter. |
X |
|
| /f{nn} |
Use font size indicated by {nn} for Collect! display. |
X |
X |
| /fbold |
Use a bold font for Collect! display. |
X |
X |
| /flegacy |
Use the legacy font for Collect! display. |
X |
X |
| /f_ExtractBlobImages |
Extracts all images from contact Metafiles and store them in
styles/metaref. This is only needed if upgrading from 11.5
or lower. 11.6 and higher store the images in the styles\metaref
folder by default |
X |
|
| /h |
Turn off the progress graph in the status bar at the
bottom of the Collect! window |
X |
X |
| /i{ID} |
User's ID. If ID and password are set then sign on |
X |
X |
| /ini:{filename.ini} |
Load a custom collectcfg file when starting Collect! |
X |
|
| /m |
Allow multiple instances of the program to run at one time |
X |
X |
| /min |
Starts Collect! minimized |
X |
X |
| /n |
Don't remove my ID from netbios name table on exit |
X |
|
| /p{pwd} |
Password. If ID and password are set then sign on |
X |
X |
| /q |
User cannot exit from Collect!, except User levels 1 and 99 |
X |
|
| /s |
Skip the splash screen |
X |
X |
| /sch:{filename.sch} |
Load this Scheduler Tasks file when starting Collect! |
X |
|
| /s_disablesmartpaging |
Turn off smart paging, which measures server performance and
reduces the records per-page if it is slow. This should only
be used for opening Collect! over a Wide Area Network. |
X |
|
| /stackd |
Turns the ability to open the same record more than once (stacking). |
X |
|
| /T{hh:mm} |
Causes the Collect! program to terminate at the specified
time of day. This useful for backups and scheduled maintenance
tasks. This shuts down the Collect! instance but NOT the
SQL Server. |
X |
X |
| /v |
Verbose. Frequent messages ON |
X |
|
| /x{mm} |
Causes the Collect! program to terminate after {mm} minutes. This
closes only the particular Collect! instance. |
X |
X |
| /z |
Turns ON DDE. Used with Merge Documents and also with Predictive Dialer |
X |
|
| /? |
Show an abbreviated version of this list |
X |
|
| /W1 |
Puts Collect! into HTTP web server/host mode,
without SSL security enabled. All menus are disabled. |
|
X |
| /W1s |
Web Host in HTTPS secure mode with a third party SSL tool. |
|
X |
| /W1ss |
Web Host in HTTPS secure mode with Collect!'s internal SSL handling using TLS1.2.
See "SSL Encryption For Web Host" below for additional information. |
|
X |
| /W1ss0 |
HTTPS web server mode using same encryption as /W1ss. |
|
X |
| /W1ss1 |
HTTPS web server mode using SSL2.0. |
|
X |
| /W1ss2 |
HTTPS web server mode using SSL2.3. |
|
X |
| /W1ss3 |
HTTPS web server mode using TLS1.0. |
|
X |
| /W1ss4 |
HTTPS web server mode using DTLS1.0. |
|
X |
| /W1ss5 |
HTTPS web server mode using TLS1.1. |
|
X |
| /W1ss6 |
HTTPS web server mode using SSL3.0. |
|
X |
| /Wt1 |
Starts Web Host in "test mode" with all menus enabled,
without SSL security enabled. |
|
X |
| /Wt1s, /Wt1ss, /Wt1ss{n} |
Web Host in "test mode" with SSL security enabled. |
|
X |
| /W2, /W2ss |
Puts Collect! into HTTP listening mode for receiving requests
from your VoIP and IP-PBX dialing systems. Used with Predictive Dialer.
Adding ss will enable SSL security, if you have it configured. |
X |
|
| /W2b |
Enables Predictive Dialer in background mode so you don't need
to select Predictive Dialer from the Tools menu. |
X |
|
| /W3 |
Causes Web Host to bypass system password authentication.
This is used for real time updates via XML. This may be
limited to Trusted Hosts for security. |
|
X |
| /whl |
Enables Web Host packet logging. This is for advanced developer
troubleshooting. This will generate a text file,
"webhostpacketlog.txt," in your Collect\bin folder. It will also
prevent the deletion of the temporary CSV files used by XML Data
Pump. |
|
X |
| /wh_ddrg |
Disables Dynamic Report Generation. By default, when pages are
visited, the data is streamed to the browser. With this option
enabled, the data is written to an HTML file first, then the
file is served to the browser. |
|
X |
| /S{nn} |
Used to specify the Web Host Port {nn} for insecure mode (HTTP) |
|
X |
| /y{nn} |
Used to specify the Web Host Port {nn} for secure mode (HTTPS) |
|
X |
Examples
C:\Collect\bin\cv13.exe /iUser1 /ppassword1 /m /q /dbmasterdb
Sign directly into masterdb database
using ID User1 and Password password1.
Allow multiple instances of Collect! to be started. Do not allow users to exit
from Collect!.
 When specifying a database to sign into, Collect! hides the
SELECT DATABASE button in the Welcome To Collect! screen. With
a User ID and Password specified, as in the example above, the
Welcome To Collect! screen is bypassed altogether.
C:\Collect\bin\cv13.exe /S80 /W1ss /y443
Web Data Entry secure mode
C:\Collect\bin\cv13.exe /T1:30
Shut down Collect! at 1:30 AM (Uses 24 hour clock). This shuts
down only the instance of Collect! on the workstation. It does not
shut down the SQL server.
C:\Collect\bin\cv13.exe /x30
Shut down Collect! after 30 minutes of inactivity. This shuts down
only the instance of Collect! on the workstation. This does not
work with Web Host or the Scheduler.
 This is useful if you want user specific settings. If
you want a global setting that applies to all users and
all Collect! databases, please use Auto Log Out After,
which is set in Database Preferences.
C:\Collect\bin\cv13.exe /dl
Disable Locale
C:\Collect\bin\cv13.exe /sch:demo.sch
Load the Scheduler Tasks file named demo.sch
when Collect! starts.
 You must have already saved a Scheduler Tasks file if
you want to use it in this command line argument.
 The /sch setting takes precedence over
any file specified in the Scheduler Settings "Default scheduler
task file."
 You can also display this table of command line options
by using the /? option. This will display the list to the screen. You
will have to remove this option to enter Collect! normally.

Collect! Screen Display Size
The Flex Screen feature automatically expands Collect!'s screen
to fit the monitor you are viewing. Command line startup option
/c enables you to call a different INI file if
you want to customize Flex Screen or adjust the default settings
for a particular workstation.
Example:
C:\Collect\bin\cv13.exe /c
Use the settings in the uidefault.ini to set
the Collect! screen dimensions. This default INI is shipped
with Collect! and must be located in your Collect\bin folder.
 Used by itself, this command is just like Collect!'s
default behavior. It just looks for the uidefault.ini
in the Collect\bin. But, if you specify a different INI, Collect!
will read that for all the Flex Screen settings.
C:\Collect\bin\cv13.exe /cmyui.ini
Use the settings in myui.ini to set the
Collect! screen dimensions. The specified INI file must be
located in your Collect\bin folder
Please refer to Help topic, How to Use Flex Screen for details.

Collect! Font Size
With this command, larger numbers display a larger font size
and larger Collect! windows. Smaller numbers display a smaller
font size and smaller Collect! windows.
Example:
C:\Collect\bin\cv13.exe /f16
Start Collect! with 16 pt font size for display.
 For resizing Collect!, the /c option
should be used instead of /f in most cases.
It is more comprehensive, enables more customization and
generally gives better results.

Disable Locale
Upper and lowercase case functions in importing respond to the
user's Regional Settings in Windows to be able to work with
foreign languages better. Collect! automatically sets the Locale
internally, given the language code returned from the operating
system. This allows converting language characters to upper
case during the import process.
To turn OFF this feature the command line switch /dl
must be used.

Web Host Packet Logging
This option, /whl, is used for
troubleshooting transmission of Web Host data.
This will also prevent the deletion of the CSV files that
Collect! uses for XML Data Pump.
Example:
C:\Collect\bin\cv13.exe /S80 /W3 /y443 /whl
Web Host Packet Logging Enabled
This will generate a text file in your Collect\bin folder,
i.e. "webhostpacketlog.txt." This is for advanced developer
troubleshooting. This file can be used to reproduce HTTP
headers and payload content, for instance in XML data
pump troubleshooting.
 This will also allow you to log SSL encrypted
sessions too, since Collect! writes to these files after
the decryption phase.
 WARNING: The packet log does not delete itself periodically,
which means it will continue to grow. As the file
gets larger, it may slow down your system or backups.
The packet log should be disabled when you no longer
need it for troubleshooting.

Web Predictive Dialer
The /w2 option starts Collect! in Web Dialer Server
mode.
/s80 /w2Starts the Web Dialer Server on port 80.
/s80 /w2ssstarts the Secure Web Dialer Server
on port 80.
These arguments are used with Predictive Dialer to receive
HTTP and HTTPS requests. Please refer to Help topic,
How to Use the Predictive Dialer for details.

SSL Encryption For Web Host
Collect! supports all common encryption methods. To enable a
specific encryption method, you can simply use one of the
arguments defined above in the Web Host shortcut.
Please refer to the Help topic SSL Keys And Certs for more
information.
Example:
C:\Collect\bin\cv13.exe /W1ss2 /S80 /y443 /m
The latest support encryption method will always be set without
specification.
Example:
C:\Collect\bin\cv13.exe /W1ss /S80 /y443 /m
 When you open the Web Host, the read-only "Security"
field displays the encryption method Web Host is currently
using.

Collect! Web Host using Encryption
 It is recommended that your Internet browser encryption
method setting matches the encryption level you are using for
Web Host.
 You can use Collect! with Apache to offload the encryption
to a third party. Apache also allows for load balancing
multiple Web Host instances. Please refer to the Help topic
How to Setup Apache with Web Host for more information.

Web Host Test Mode
When Collect! is started in Web Host mode, menus are disabled.
They can be re-enabled by signing in as User Level 99.
As a command line argument, the letter 't' is also available if
you want to start the Web Host in "test mode" based on the
current user level rights. For example, /wt1s or /wt1ss will start
up Web Host in test mode with all menus enabled.


Optional Module Setup
The below modules should be setup if you plan to use them. Some modules are included and some are
add-on modules that need to be paid for. Please contact Sales or Administration for more information.

Import/Export Module
If you receive data files from your clients that need to be imported, you will need to build and
import map that maps the columns in the file to the fields in Collect!. The import modules support
a variety of ASCII text format.
Click Here to View this Form.
Click Here to Close this Form.
Collect!'s import module is a very powerful tool for importing data into Collect! from other
databases, instantly giving you all that valuable information at your fingertips within the
Collect! program. This process requires an import map. To get you started, this document steps
through the creation of a simple single record import map. It is necessary that you are familiar
with the use of Collect!'s Client and Debtor screens.
Collect! can import a variety of file formats, as long as they are saved in an ASCII text file.
The following formats are the most common:
Setup A Client
If your importing Debtor accounts, then you need to create a Client first, if one does not already
exist. If you are not importing accounts, then proceed to the next section.
Please refer to the Help topic How To Enter A Client for more information on adding a client.
If the Client already exists, and has accounts on it, we recommend creating a TEST Client that
mirrors the settings of the existing Client. You can do this in your production or test database.
Once testing is complete, you can delete the TEST Client.

Prepare The Data File
Before doing anything, make a copy of the data file. ASCII files can be opened in MS Excel, but
Excel will alter the data, so you want an untouched copy of the file first.
CSV files can be opened directly with MS Excel. Other delimters and Fixed Length Files need to be
imported. Please refer to Microsoft Excel documentation on how to import Text files.
Once you have the COPY of the file open in Excel, insert 2 rows at the top of the file. In row 1,
you are going to track the name of the record/form that the data will be stored in (EX: Debtor,
Cosigner, Debtor Detail, etc.). In row 2, you are going to track the name of the field that the data
will be stored in (EX: Name, Address, etc.).
Save the copy with your notes. Open the original file with a TEXT editor. We recommend Notepad++.
Make note of any columns with the following:
- Leading zeros
- Numbers longer than 15 characters
- Date formats
 Typically files from the same source will have the same format for all dates, but don't rely
on this. Check all date columns for consistency.
- Phone number formats
- SSN number formats

Delimited File Format
Delimited Files are file types where each record of data is on its own row. Each field of data is
separated by a delimiter. The most common delimiter is comma (CSV), but Collect! supports other
delimiters like Pipe or Tab.
Example Delimited File
Name,Address,City,State,Zip,Balance
"Doe, John","123 Main Street",Los Angeles,CA,90210,"15,000.00"

CSV Sample File Viewed In Notepad
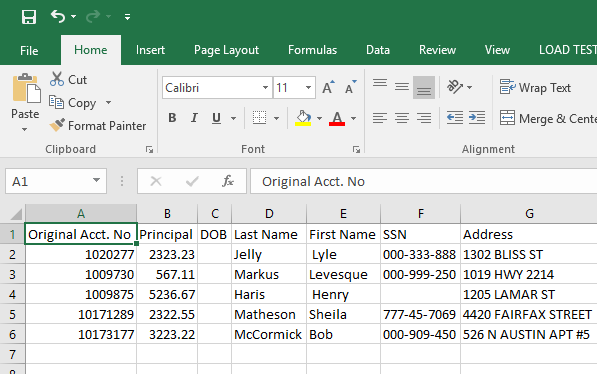
CSV Sample File Viewed In MS Excel
Dynamic Field Indexing
When importing a delimited file, you are simply creating Import Field Specifications without
referencing an Offsets or Lengths, as you would with Fixed Length.
Fields can be created with or without the use of Dynamic Field Indexing.
Without Dynamic Indexing: Each field is assumed to represent a column. The first field will be
column A, the second field will be column B, and so on. The issue with this design is if you are
skipping a column, you need to create blank field references. If you are importing multiple record
types (EX: Cosigners), you need to load the blank fields for any columns that don't belong on the
second record type (EX: all the Debtor fields). Another issue with this method is you cannot reference
the same column multiple times for the same record (EX: Transaction Payment Date and Posted Date both
needing to reference the date in column O).
With Dynamic Indexing: You can specify the column in the data file that you want to use. This method
is the preferred method as it doesn't require blank Field Specification records and you can reuse
columns for different fields.

Fixed Length Format
Fixed Length Files are file types that don't use delimiters to separate data. Each piece of information
is stored in the same location for each record. There are 2 types of Fixed Length Files:
- Each record is on its own line. Each field is stored in specific offsets and lengths.
- Each record is multiple lines with a record identifier. Each field is stored in specific
line numbers from the Record Identifier at specific offsets and lengths.
Example Fixed Length File - Single Line
Doe, John       123 Main Street    Los Angeles  CA  90210  15000.00
Smith, Jack     12 5th Avenue      Los Angeles  CA  90211   6000.00
Example Fixed Length File - Multiple Line
RECORD
Doe, John
123 Main Street, CA 90210
15000.00


RECORD
Smith, Jack
12 5th Avenue, CA 90211
6000.00
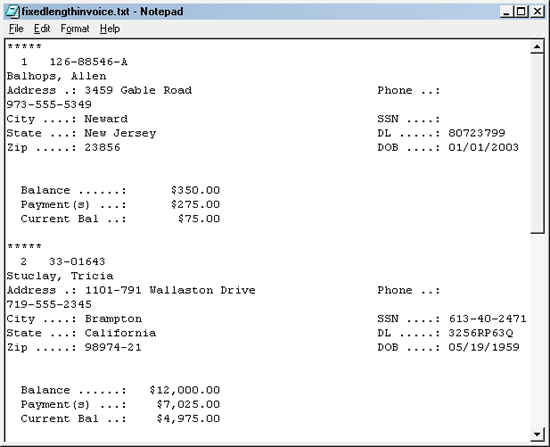
Fixed Length Invoice Text File
Below the identifier *****, there are several lines of information.
- Each piece of data is located at a specific character position on one of these lines. This
position is called an Offset and is a key in determining where the piece of data begins on the
specific line within the block of data.
- Each piece of data has a character length called Length which is the number of character spaces
allotted to the piece of data in the block of text.
- Each specific line of data has a value called Lines After Identifier which is the line number
where the piece of data is located.
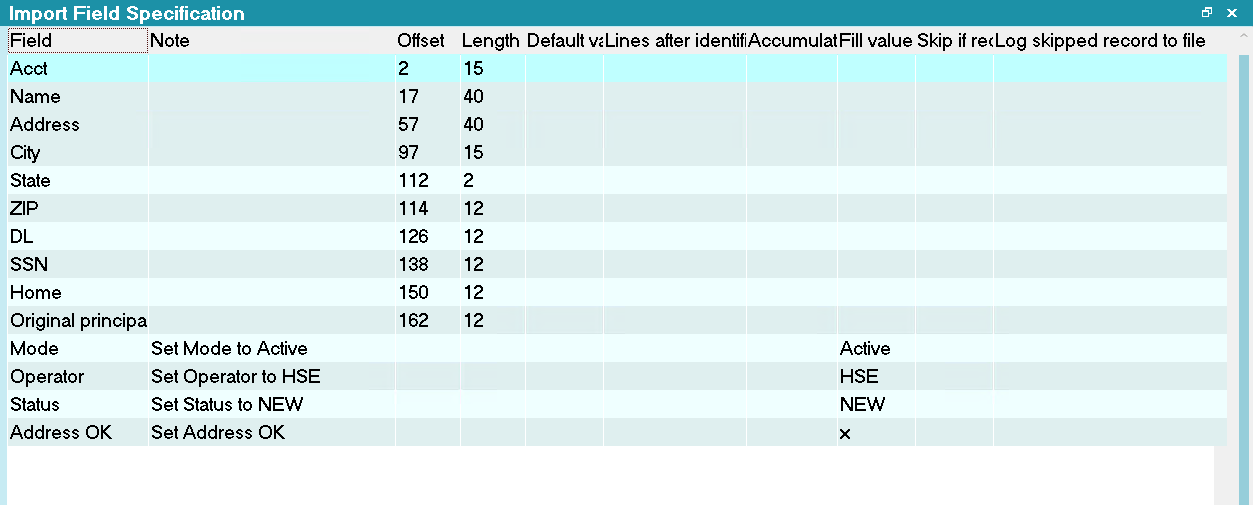
Field Specifications
The import map that we will create will state the line, length and position of each piece of data
that is going to be pulled into the database from the fixed length text file. There will be no blank
Import Field Specification records. As the data uses offsets and lengths, the same data can be used
multiple times.

Setting Date Formats
You must always make sure that the Date Options are set correctly when importing dates.
Date Formats must be set prior to importing, as these have a bearing on how the Date information is
formatted. As mentioned above, you want to set the global format for the Import Date Options, then,
if needed, set the Import Field Date Format.
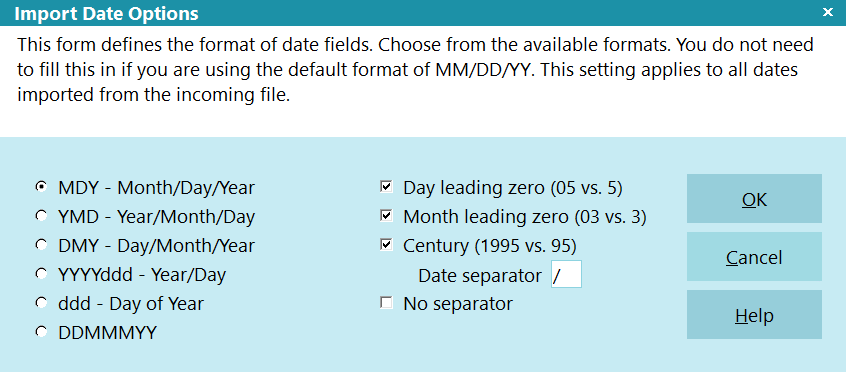
Date Options Settings
Collect! supports:
- Month Day Year
- Year Month Day
- Day Month Year
- Year, then Number of Days into the Year (1-366)
- Number of Days into the Current Year (1-366)
- Day Month Year, where the Month is the 3 Letter abbreviation (EX: JAN)
Once selected, set whether the Day and Month have leading zeros. Then select whether the year us
2 or 4 digits. Finally, set the date separator.

Importing Notes
When importing notes, you must build a proper date/time stamp. The proper format is:
DATE TIME STATUS OPERATOR : TEXT (Example: 01/01/2029 15:30 NEW OWN : Review New Account )
For detailed instructions on how to import a note line, please refer to the TEXT CONCATENATION
WITH APPENDING section below.
 The status is optional when importing Client notes.
You can build the date/time stamp by putting of the elements into the import map using the Text field
and 'append to existing data.' If the date/time is in the spreadsheet, then you can reference the
spreadsheet when building the map.
 The notes field is considered a text field, so special steps are required to indicate that
you are importing a date into the notes. On the Import Field Specification form, click the
Date Options buttons to open the date options for this field. Set the date format to match
the format in the data file.
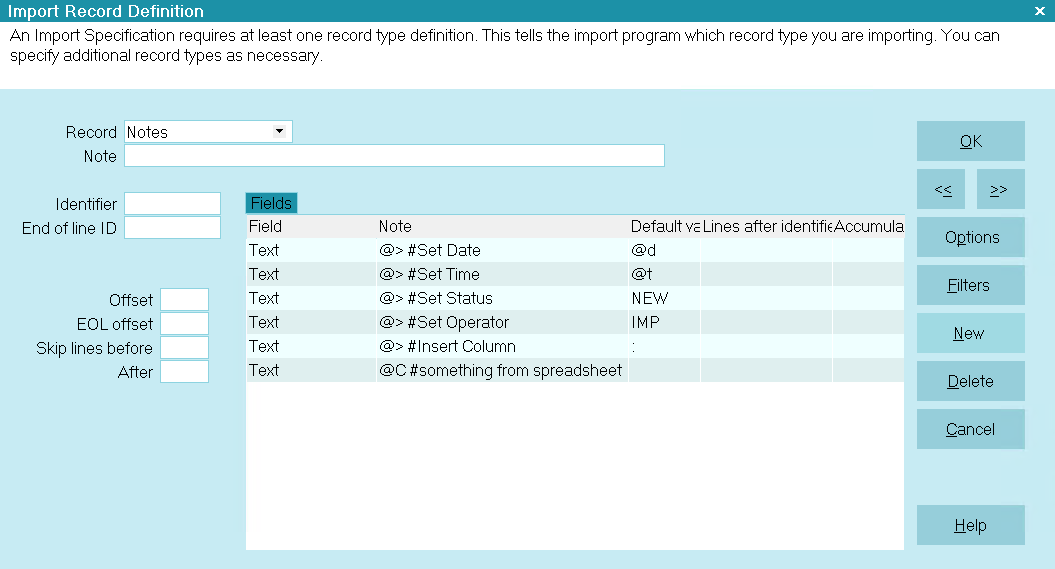
Importing Full Note Line
Alternatively, if the information is not available and you want to put in the current date, time,
status, and operator, then all you have to import is just the text. In the event that you only import
the note text, or if you don't build a proper date/time stamp, Collect! will not
automatically create the date/time stamp, so the test will be appended to the bottom of the note file.
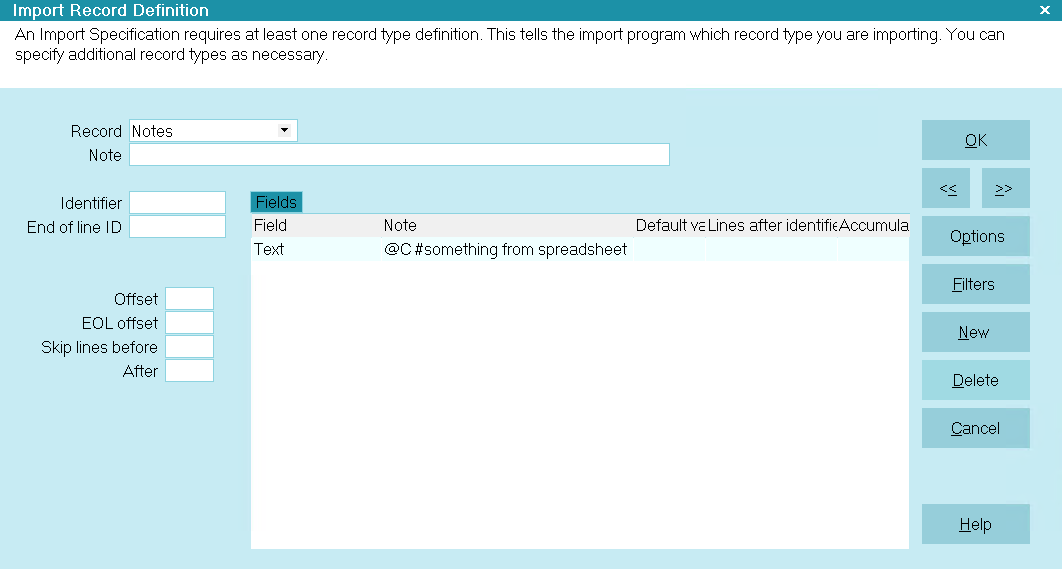
Importing Partial Note Line
Multi-Line Notes
In order to import notes that have multiple lines, you can place @x0A (case sensitive) in the
following places:
- Default Value
- Fill Value
- Text File being Imported
Collect! will replace the @x0A string with proper carraige returns in the database.
 This only works with in a single Import Record Definition for a note line. If you have
multiple import record definitions, they will be treated as separate entries in the
database (same behaviour as contacts, transactions, etc.).

Importing Financials
Usually money amounts already exist with their decimal placements, as you will see in our sample.
If they do not, you would set a value using the Multiple by field on the
Import Field Specification for the money field.
When importing money amounts, we have to be careful of where we are placing them in Collect!. Values
in certain fields may affect other data fields. For this sample, we are using Principal. You may
think that it is correct to choose Principal from the Field Type list to put this value in the
Principal field on the Debtor form. This is correct in a sense. However, Collect! actually gets the
Principal amount from the 196 transaction on the Transactions tab.
Method 1: Automatically Create Transactions
This should be used if you only have 1 Principal balance to load for an account. This method will
automatically create the applicable transactions after the Debtor is created. It is the same
behavior as creating an account manually.
- In the Debtor Import Record Definition, add Fields for importing the Original Principal,
Original Interest, Fees, etc.
- On the Import Options screen, check the boxes for Apply Client Settings and Include Transaction
Posting.
Method 2: Manually Create Transactions
This method is for importing individual transactions yourself. This gives you more control over the
process, but add steps.
- Click OK to go to the list of Import Record Definitions. Create a new record definition and
select Transaction from the list in the Record field.
- Create a new Field and leave the field blank. Put 'A - Account Number' into the note field.
 Reminder, with Dynamic Indexing, blank fields are not required.
- Create a new Field and select TO US from the field list.
 As the values in the to us field on transactions are negative for transactions that should
increase the balance, you need to put a value of -1.0 in the multiply by field to convert
the principal into a negative number.
- If your *.csv file had the decimal stripped from the money amount, you would also fill in
0.01 in the field labeled Multiply By. However, this is not
needed in this exercise.
- Create and new field and leave the field blank and put '196' into either the Default Value or
Fill Value fields.
 By selecting "use transaction type - after" in the import options, Collect! will automatically
fill in the rest of the transaction details like the description and financial type. There
is a time and place to use either the transaction type - before or transaction type - after.
Please press F1 on those fields for more information.
- You should now have a field in the map for each field/column in MS Excel, in the same
order.
 To make sure you have all the fields, you can select the << or
>> button to go forward or back through fields, or select the
OK button to view the Import Field Specification list. Use your Up/Down arrow keys to scroll
through this list.
In addition to these fields, we will set a few default values in our import map.

Set Commission Rates And Tax During Import
Typically, you would use the Apply Client Settings box on the Import Options form to automatically
load the Commissions and Taxes, but in some cases, you may need to set specific values.
Several hidden fields on the Client, Debtor and Transaction forms enable you to access tax and
commission rate fields directly within the import field specifications. This enables you to easily
set commission and tax percentages and their breakdown settings during an import.
Commission Rate Field Names for Client
The field definitions for the fields on the Client's Commission Rates form are:
Commission Rate
Commission Rate 1
Commission Rate 2
Commission Rate 3
The field definition for the commission breakdown check boxes is:
Comm Rate Options
The Comm Rate Option value is actually a combination of bit values for all the check boxes on the
Commission Rates form. It is easy to figure out the value and then set it in the Default for the
field specification. How to find this value is described later in this document.
Commission Rate Field Names for Debtor
The field definitions for the fields on the Debtor's Commission Rates form are:
Commission Rate 1
Commission Rate 2
Commission Rate 3
Commission Rate 4
The field definition for the commission breakdown check boxes is:
Comm Rate Option
Commission Rate Field Names for Transaction
The field definitions for the fields on the Transaction's Commission Rates form are:
Commission Rate
Commission Rate 1
Commission Rate 2
Commission Rate 3
The field definition for the commission breakdown check boxes is:
Comm Rate Option
Tax Rate Field Names for Client
The field definitions for the fields on the Client's Tax form are:
Tax Rate
Tax Rate 1
Tax Rate 2
Tax Rate 3
The field definition for the tax breakdown check boxes is:
Tax Rate Options
The Tax Rate Options value is actually a combination of bit values for all the check boxes on the
Tax form. It is easy to figure out the value and then set it in the Default for the field
specification. How to find this value is described later in this document.
Tax Rate Field Names for Debtor
The field definitions for the fields on the Debtor's Tax form are:
Tax Rate 1
Tax Rate 2
Tax Rate 3
Tax Rate 4
The field definition for the tax breakdown check boxes is:
Tax Rate Option
Tax Rate Field Names for Transaction
The field definitions for the fields on the Transaction's Tax form are:
Tax Rate
Tax Rate 1
Tax Rate 2
Tax Rate 3
The field definition for the tax breakdown check boxes is:
Tax Rate Options
Accessing the Bit Values for Check Boxes
Before you can set the value for Commission or Tax Rate Options, you need to obtain the bit values
for the options. Once you know what the values are, you can just use this value as the Default in
the import field specification for the Comm Rate Option or the Tax Rate Option.
To determine the value that sets the switches you need, go to one debtor and set up the Commission
Rates and Tax exactly as you want them to be, switching ON check boxes with a check mark as needed.
Then, go off the Debtor form to commit the settings. Then print to screen @de.cro and @de.tro. This
will give you two numbers, for example. 3843 and 290 or 16386 and 258. The numbers won't seem to make
any logical sense, but actually they are a combination of switch values and Collect! knows exactly
what they mean. In your import field specifications, you can simply put these values in to the
Default field and Collect! will set the switches when the import runs.
You can do the same for the Client Comm Rate Options and Tax Rate Options, and the Transaction Comm
Rate and Tax Rate Options. If you are setting the same values at the Client or the Transaction level,
you can use the same values that you obtained above. They are the same behind the scenes. The same
number sets the same switches in each case.

File Format Specification Form
An Import Map (File Format Specification) has 3 levels:
- File Format Specification: Global Settings for the Map
- Import Record Definition: Record that is being imported (EX: Debtor, Cosigner, Attachment, etc.)
- Import Field Specification: Field data that is being imported (EX: Name, Address, etc.)
Here are the related help pages for more information on each form.

Import Options Form

Import Date Options Form

Import Record Definition Form

Import Field Specification Form

Import Field Options Form

Creating The Import Map - File Format Specification
- Sign into Collect! and stop at the Main Menu. Select File from the top menu bar and a drop-down
list of choices will display. Select Import/Export from the list. A sub-menu of choices will
be displayed.
- From the Import/Export sub-menu, select Customize Import/Export and then select Edit File
Format. This will display a list of import map examples that are already in your database.
- Press F3 or select the NEW button to open a new File Format Specification form to use for our
import map.
- Fill in the Name field.
- The File field is optional. If the file will always be in the same location with the same
filename, you can fill in the path and name here; otherwise, leave blank.
- The Note field is optional and for you reference only.
- Select the Fixed Length, Comma Separated, or Other radio, depending on your data file.
 Collect! supports any plain text ASCII file, so if you need to import a file with another
delimiter (; | {TAB}), select the 'Other' radio button and fill in the HEX codes for the
field delimiter. You will also have to fill in the record delimiter (line feed, carriage
return, etc.).
- If your file has multi-lines notes that use use Line Feeds, not
Carriage Returns, then check the CRLF Line Endings box; otherwise,
leave unchecked.
- Select the Import Options button to display the screen control panel where you may make
selections for preferences on how you want the import to pre-treat or post-treat the incoming
data. Key items to select for standard Debtor Imports:
- Client/Number: if this map is for a specific Client
- Apply Client Settings: if you would like the commission and tax information copied to
the Debtors
- Include Transaction Posting: if you are not importing the Transactions as separate
Import Record Definitions and would like the applicable Transactions created automatically
- First Line Contains Labels: if there is a header row in the data file
- Last Line Contains Footer: if there is a footer row in the data file
- Recalculate Accounts: if you are importing interest bearing accounts
- Manage Promises: if you are importing payments
- Use Transaction Type - After: if you are importing Transactions and want the default
information from the Transaction Type record to be populated on the Transaction
- Auto-Create Phone, Email, and Address Records: if you want to automatically create
the sub-records for these record types
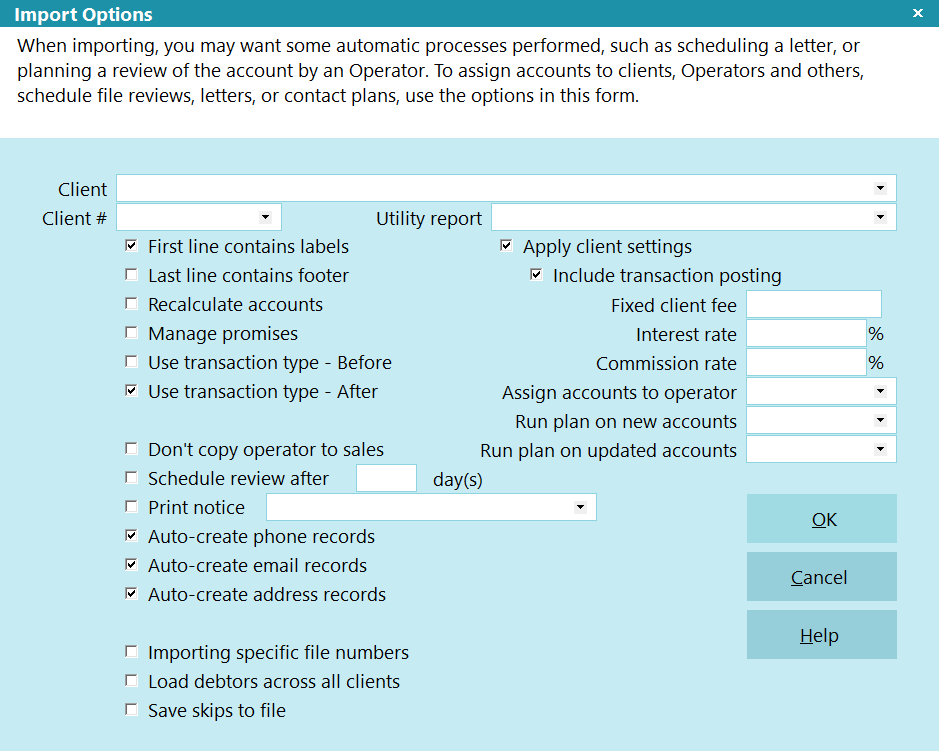
Import Options Dialog
- Select the OK button to close the form and return to the File Format Specification form.
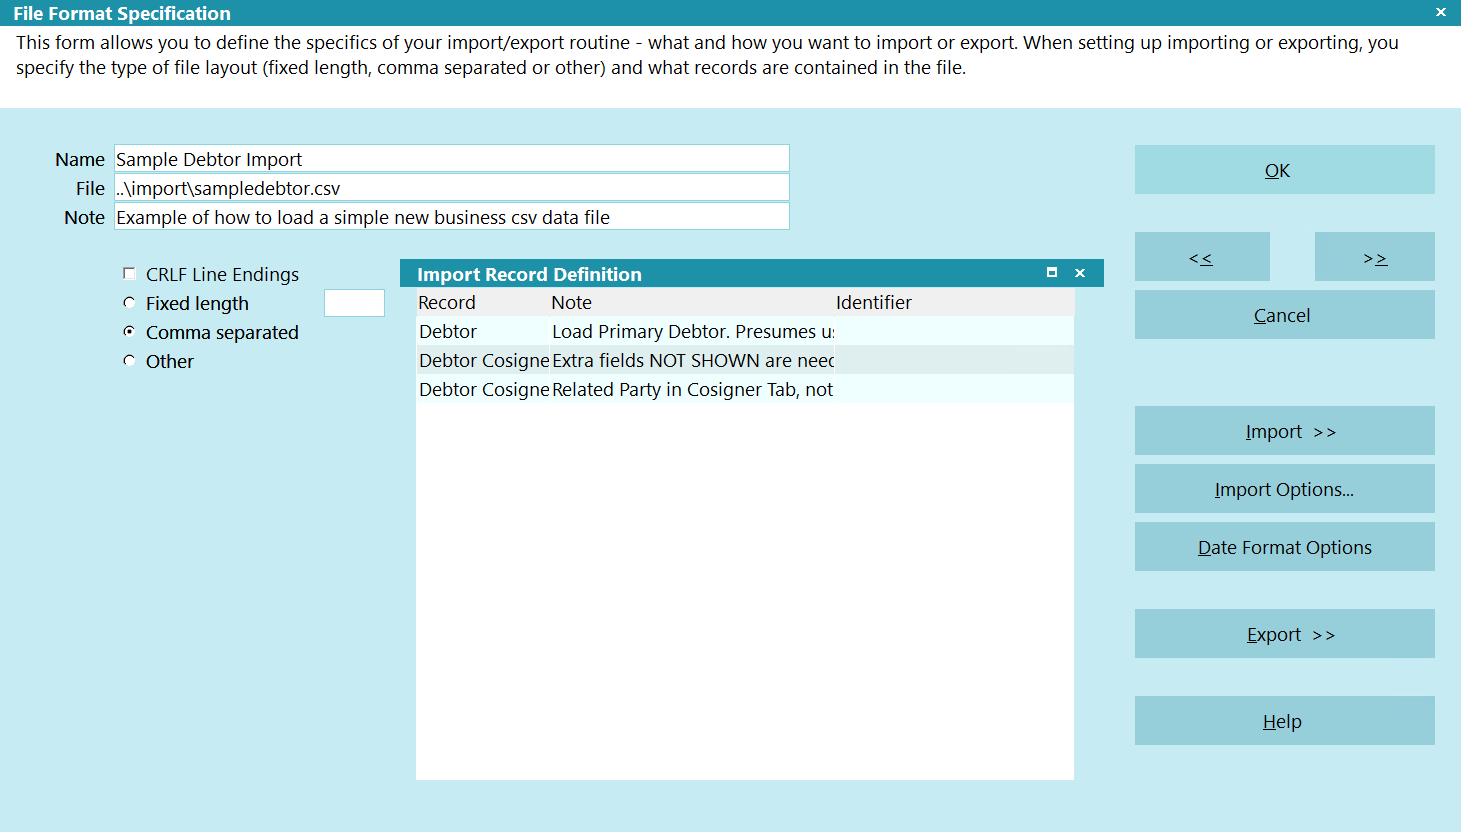
File Format Specification Form
- Click the Date Format Options button. Select the default date format and separator. Please
refer to the SETTING DATE FORMATS section above. Click OK.
- Click your mouse in the Import Record Definition sub-form to activate it.
- Click NEW to create a new record.

Creating The Import Map - Import Record Definition
Record Hierarchy
In a Collect! database, records have "owners." This is very important to consider when you are
creating an import routine. Owners are imported before the records that they own. For instance,
Debtors are owned by Clients, so you must create or import a client first. Transactions and Cosigners
are owned by Debtors, so the Debtors must be imported first.
Fill in the Record
- Select the Down arrow next to the field labeled Record. You will see the list
of all types of records that you can import using the import module.
- Choose the first record that you need to import. In most cases this will be
Debtor.
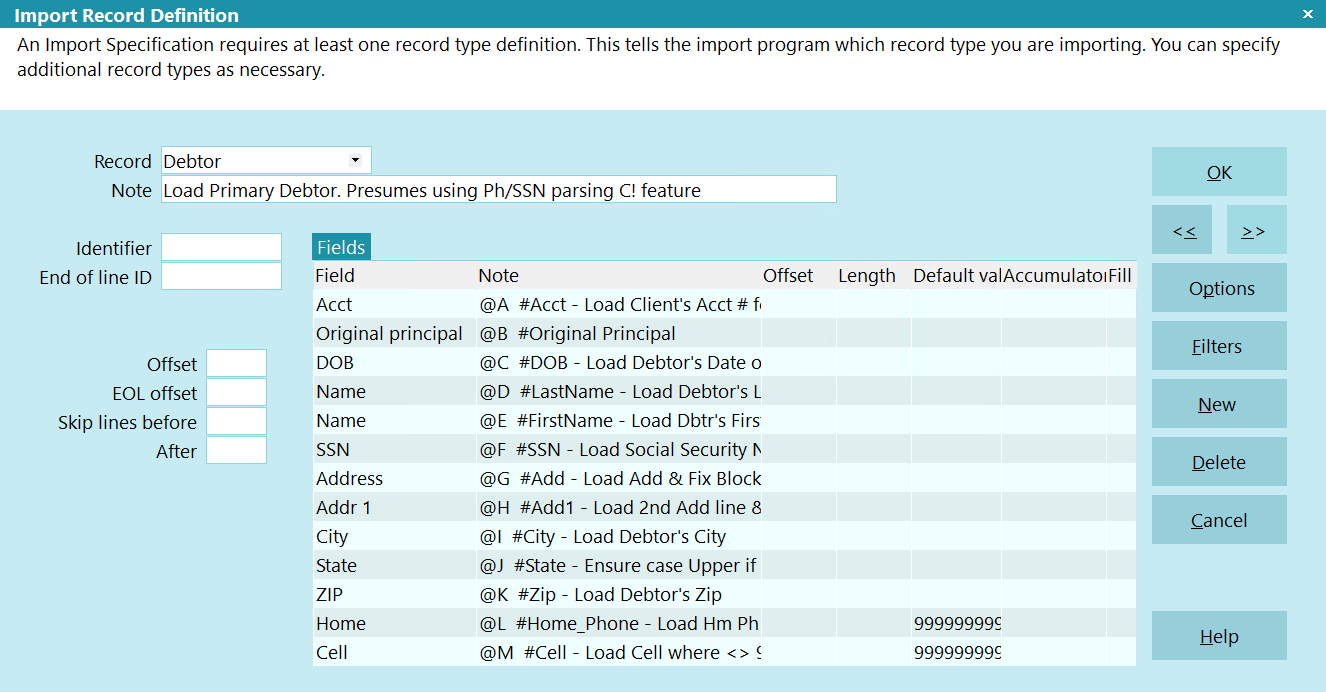
Record Definition Form
- Fixed Length Files:
- Identifier: Enter the Record Identifier (EX: RECORD or ***** in the examples above)
- Offset: If the Identifier is not on the left margin of the file, enter the number
of characters from the left margin where the Identifier starts. Blank means 0.
- The remaining fields and the Options button are too complex for this tutorial.
Please contact Support for more information.
- Click your mouse in the Import Field Specification sub-form to activate it.
- Click NEW to create a new record.

Creating The Import Map - Import Field Specification
We are going to import information into fields in the applicable form. We will need a Field Specification
for each field.
- Select the Down arrow next to the field labeled Field. This will display a list of all the
fields on the record's form that you could include in your import map. Scroll
through the Field Type list and select the field for column A (or the first segment if fixed
length).
 WARNING: The list of fields will display all fields on the record AND related
records. For example, the Debtor record will also display fields for Debtor Detail,
Misc, Principal Detail, Financial Summary Totals, and more. Pay special attention to
the value in the Form Name column. Some fields are in the list multiple
times like Name, which appears on the Debtor form and the Group Member Setup form twice.
If you are unsure on which one you should select, go into Collect!, click in to the field
that you want to load the data in to, select the System menu, go to Layout and Languages,
and click Form Properties. This will tell you the Form Name. You should also select
Field Properties under Layout and Languages. This will tell you the actual Field Name without
any Aliases.
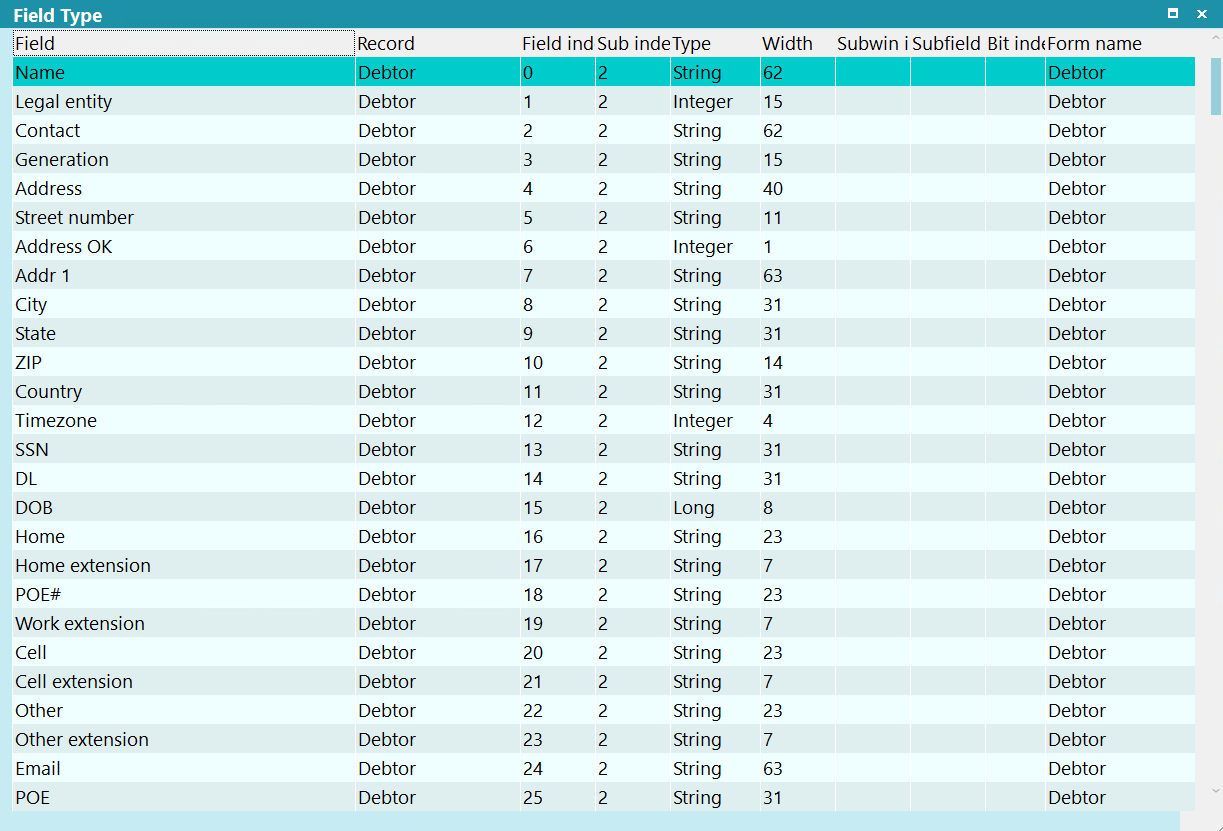
Field Specifications List
- Note:
- Delimited Format without Dynamic Indexing: What you enter here does not get imported. It
is for your reference only. We typically recommend putting in the column letter to make it
easier to read.
- Delimited Format with Dynamic Indexing: Enter the @ symbol followed by the
column letter or number. After that, you can add a # symbol with a comment following it. This
helps to make the file readable.
 For Delimited files, Dynamic Indexing is the preferred method (EX: @A #Account Number). Collect!
also support the numeric value (EX: @0 #Account Number).
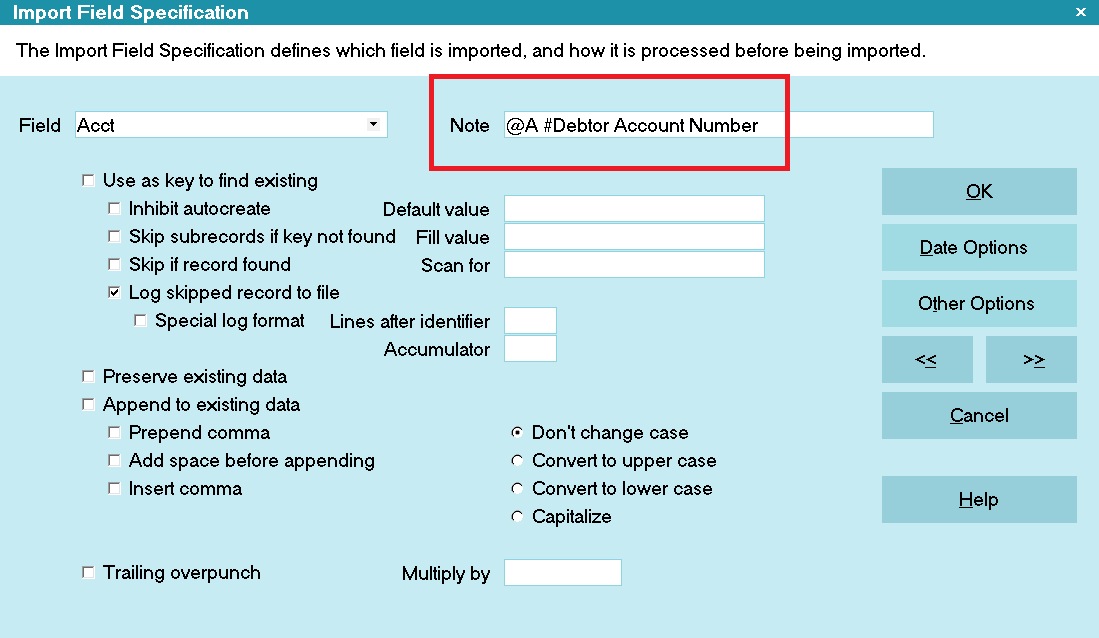
Dynamic CSV Import Indexing
 @[space] does not result in any output but allows the user to enter static
data prior to the data being imported.

Inserting Static Data Prior to Column Data
 The @[>] symbol instructs the CSV parser to advance to the next CSV column
after processing this Dynamic CSV field. You would need to use this if you are placing static
text in the middle of an import, such as Debtor Mode or Address OK.
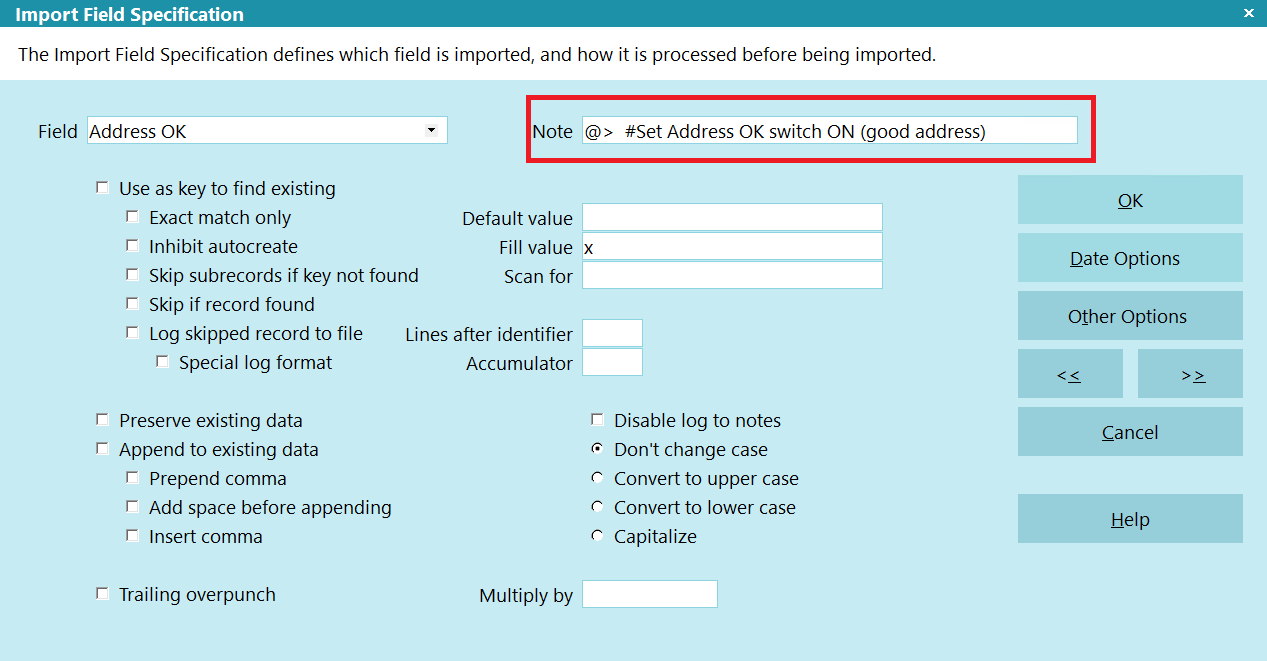
Forcing Collect! to Read the Next CSV Column
- Fixed Length: What you enter here does not get imported. It is for your reference only.
- Offset: This only applies to Fixed Length files. Enter the number of characters from the left
margin of the file where the data starts. For example, 0 (or blank) means that the data segment
starts on the left side of the file. 7 means that there are 7 characters to the left of the
segment.
- Length: This only applies to Fixed Length files. Enter the number of characters that the segment
is in length. Form example, 40 means that there can be up to 40 characters in the data segment.
Collect! will not import any white-space after the end of the last text character.
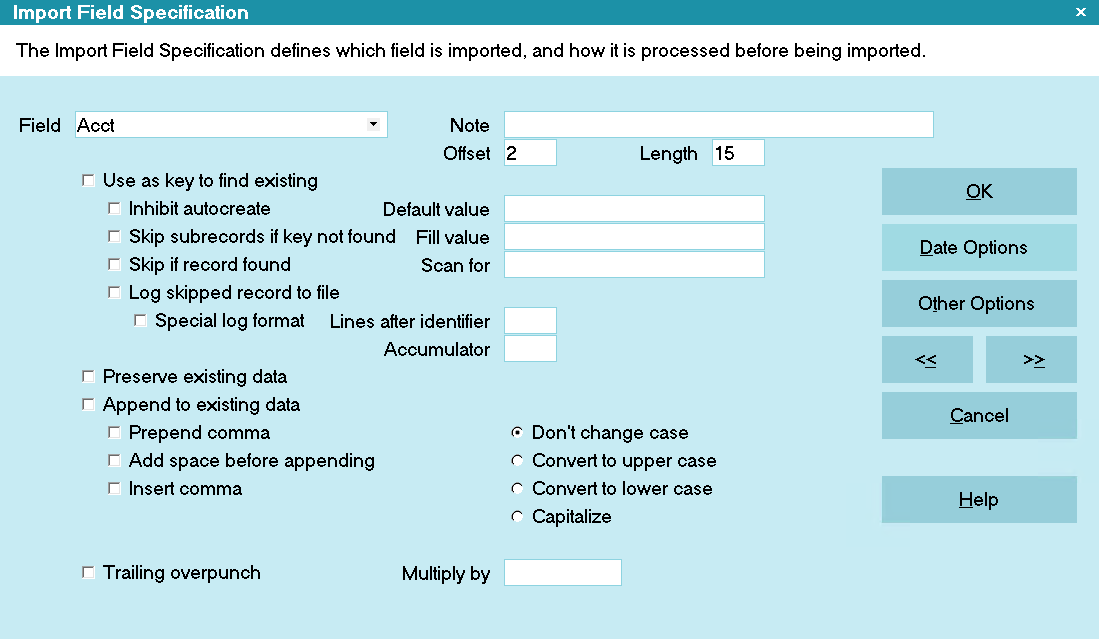
Debtor Acct Field Specification
- Lines After Identifier: This only applies to multi-line Fixed Length files.
Enter the number of lines after the Identifier specified on the Import Record Definition form.
- For the remaining fields, please refer to the Import Field Specification form section above.
Some key fields to be aware of:
- Use Key to Find Existing: This section of fields can be used if you are expecting accounts
to already be in your database. For example, skip trace return files, payment imports, or
dialer results.
- Preserve Existing Data: Don't overwrite data in the field, if it is already populated.
- Disable Log to Notes: If you are overwriting existing data in the field, you can disable
the Log to Notes functionality.
- Append to Existing Data: This section of fields can be used to concatenate multiple columns.
For example, Last Name in column B, then a comma, then a space, then First Name in column C.
- Change Case: This radio selection allows you to indicate the case for text.
- Multiply By: If you are importing Financials and you need to do math on the data, you can
enter a multiplication value here. For example, Principal and other charges need to be entered
in Transactions as negative value, so you can enter -1.000. If your data file has an interest
rate as a decimal (EX: 0.1255), you can enter 100 to convert it into a rate that Collect!
will recognize (EX: 12.55). Please refer to the IMPORTING FINANCIALS section above.
- Default Value and Fill Value: Without any conditional checks, Collect! will populate the data
directly into the field as it is typed. These 2 fields can also be used to do comparisons.
For example, you can put a value in the Default Value field, check the "Must Equal Default
Value" radio on the Import Field Options form, then if the data in the file matched the
value in the Default Value field, then the value in the Fill Value will be written to the
field on the record.
- Scan For: You can use the ScanF functionality to parse data. Please refer to the Help topic
How To Use Scanf for more information.
- Click the Other Options button:
- Conditional Criteria: As already mentioned with the Default Value field, you can use the
bottom 4 radio options to compare against the Default Value field. If true, the value in
the Fill Value will be written to the record. The compare against zero only works for
numeric data. Blank permitted and Must Be filled apply to all data types, but keep in mind
that a value of 0.00 in the data field is still technically filled. Select the applicable
value. Typically, this is left as Blank Permitted. If a condition is set and it fails, the
entire record is skipped, UNLESS you have the Fail Cancels Field Only box checked.
 You should set the Must Be Filled on one field in each record that should always be populated.
For example, the Name or Last Name field for Debtor and Cosigners. Or you can set the To Us
field for Transactions to be Must be Non Zero. This will prevent blank records from being
created.
- Fail Cancels Field Only: Check this if you have a condition that you only want to fail
on this field, rather than the whole record.
- Strip Non-Numerics, Spaces, Decimal Point: If you want to remove un-needed characters.
 We recommend using the Strip Non-Numerics in conjunction with the Only Numerics in Phone
and SSN fields on the Screen and Messages form. This will allow you to only store the
numeric data in the database, but apply a field mask on the display.
- Refer to the form section above for the remaining fields.
- Click OK to close the form.
- If this field has a different date format than what was specified as the global date format
for the import map, click the Date Options button and set the applicable date format.
- Click OK to return to the Field list.
 Instead of clicking OK, you can use Ctrl + N or F3 to save the Import Field Specification and
display a blank form for the next field.
- Repeat the above process for all remaining fields for this record type.
 Not all data is in the data file. You can use records with @> in the note field to load
default data like Operator/Sales (if not set in the Client Settings), Status Code,
Address OK, or Interest Details. For fields that are check boxes, use the letter X in
the Default or Fill value field. You can use Printable Information codes. These should
be placed into the Default Value field.
- Once you have finished the remaining fields for this record type, repeat the above process
for any other Import Record Definitions and their Import Field Specifications.
When you have completed the Import Map's Record Definitions, you should have something that looks
like the following.
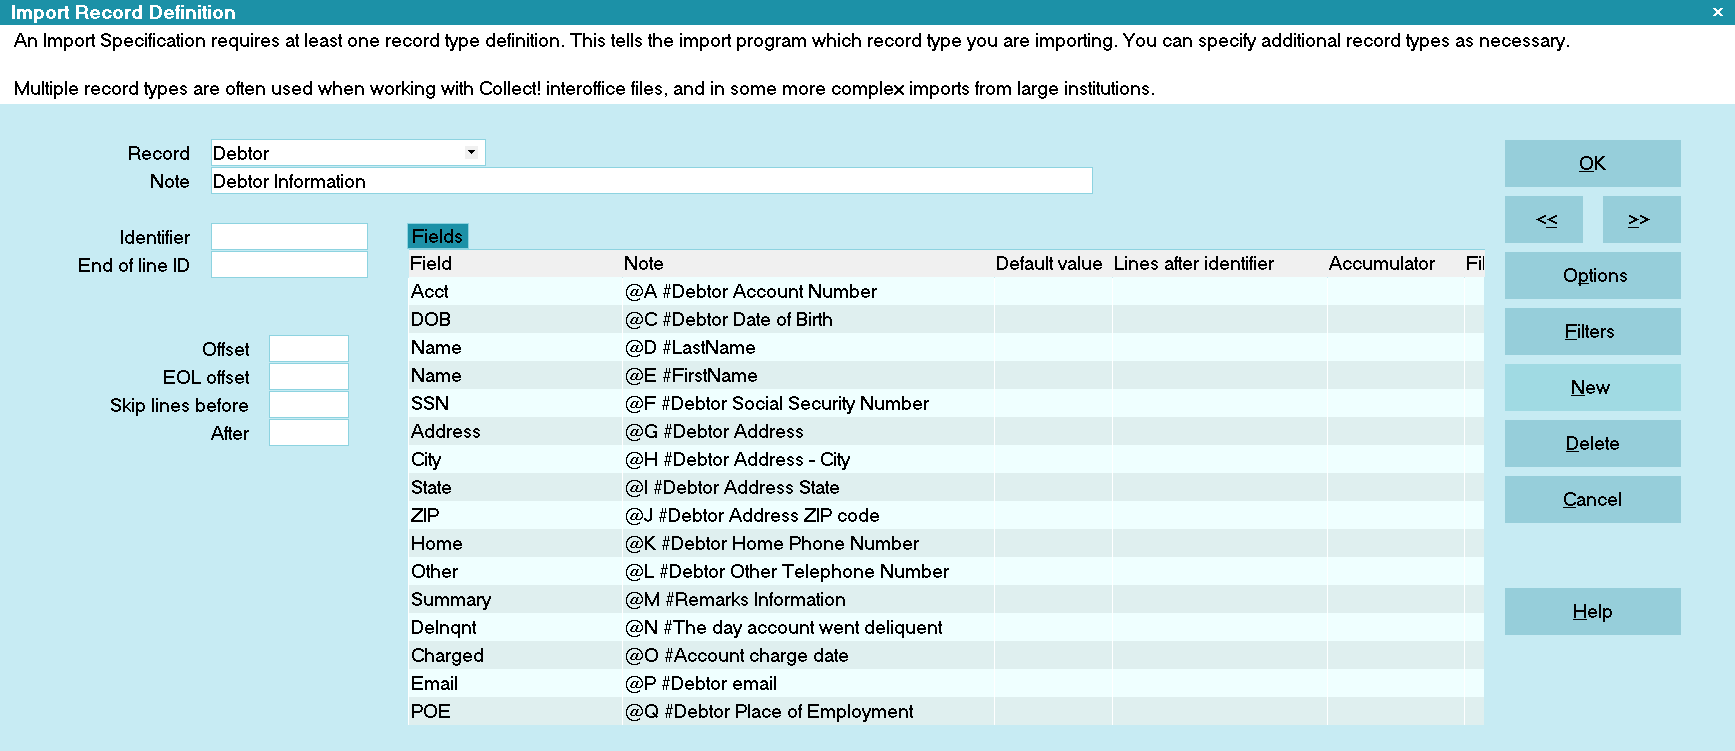
Completed Record
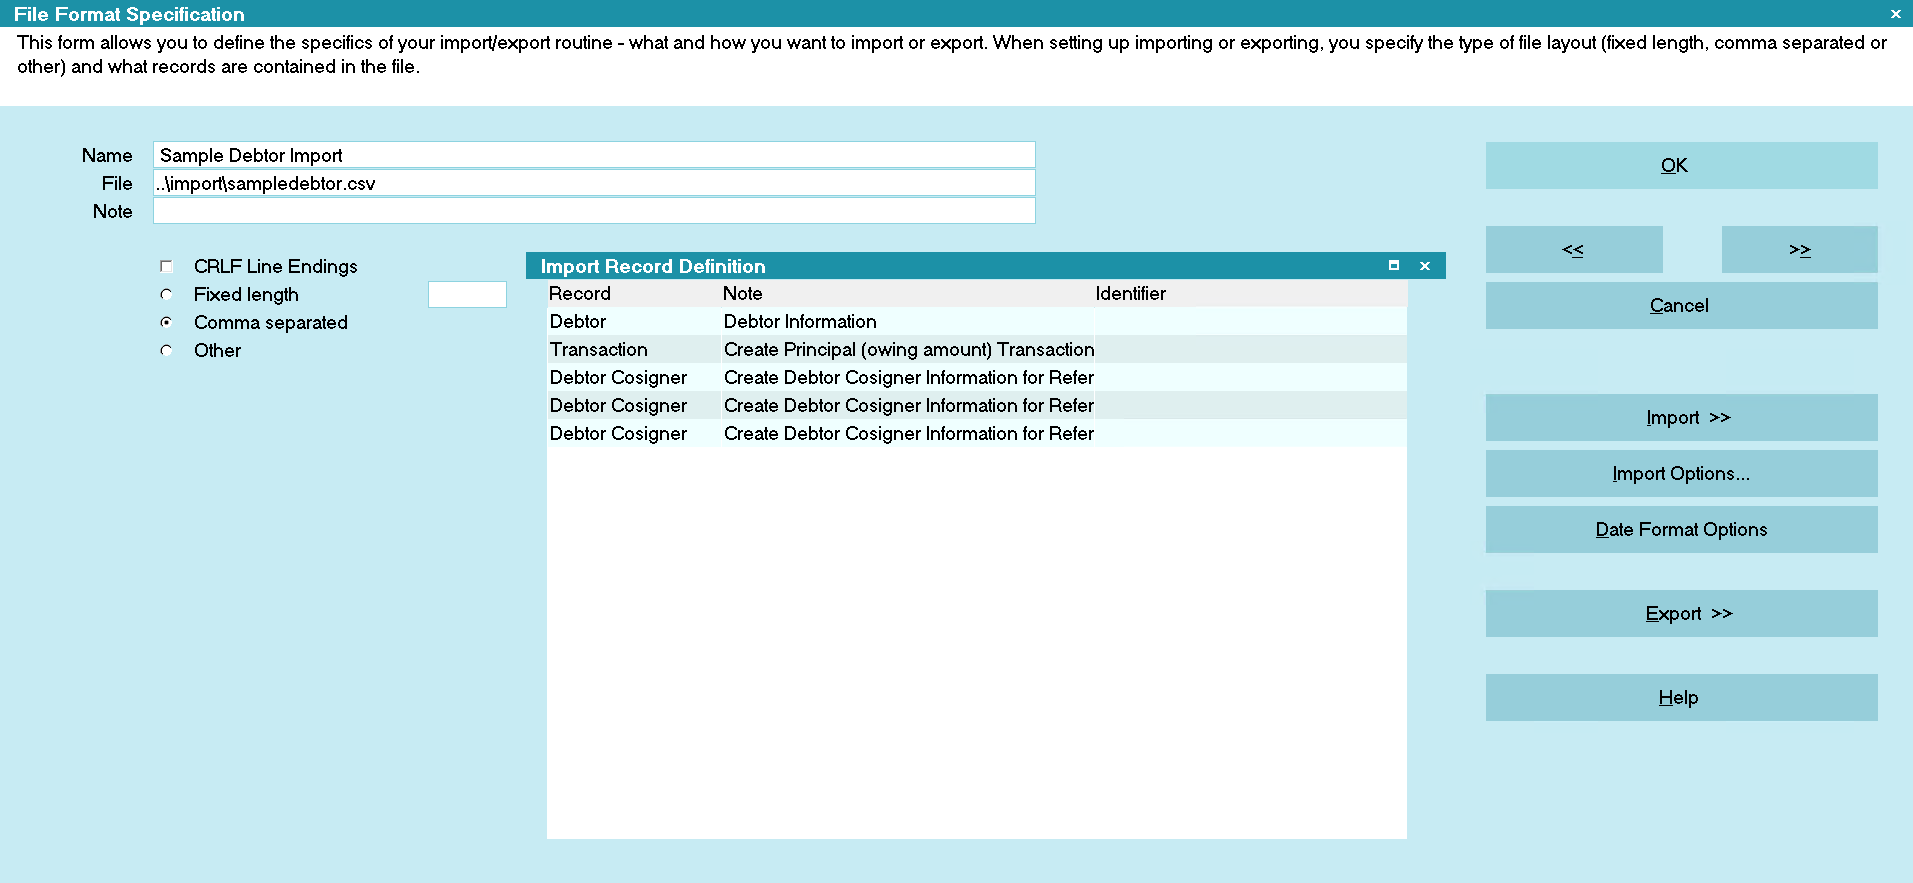
Completed Import Map

Using Keys To Find Existing Records
The Import module has lookup capabilities based on values in the data file or Default Value field.
- In a field that you want to use for data lookup, check the Use as Key to Find Existing box.
If the data is referencing the data file, it will use that value to look up a record; otherwise,
it will use the value in the Default Value field.
 You should use a field that is unique like file number, or a combination of field like
Acct and Client Number. Please note that if you select a Client on the Import Options
or Import Menu, it will automatically be used as a key.
- Exact Match Only should only be checked if you want to do an exact match on a Text field.
Numeric fields will always do an exact match. For text fields, if this is not checked,
then Collect! will return the first partial match.
- Inhibit Autocreate should be checked if you are not loading new records, like a payment import,
that way blank records won't be created if the key is not found.
- Skip Subrecords if Key Not Found should be checked in most cases to prevent sub-records, like
Transactions, from being created on random records.
- Skip if Record Found should only be checked if you want to skip an existing record. For example,
you are importing a payment file and you are key on the Transaction ID and want to prevent
duplicate payments from posting.
 Check both the Skip Subrecords if Key Not Found and Skip if Record Found to emulate "Skip
Subrecords if Key Found" where you don't want to import sub-records. For example, you don't
want to import Cosigners if the Debtor already existed.
- Log Skipped Record to File can be checked if you want the skipped records to be written to the
Collect! Application Log.
- Repeat for any other fields that you want to use as keys.
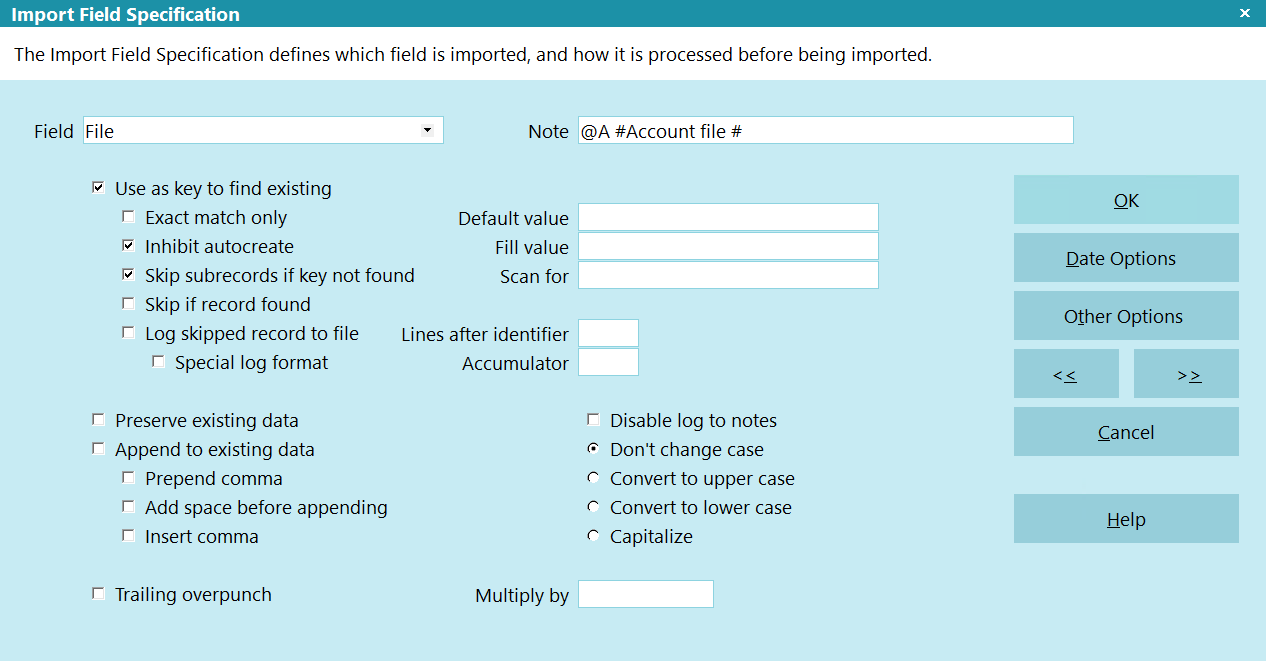
Use Keys to Find Existing

Text Concatenation With Appending
In some cases, like Debtor Name or Notes, you may want concatenate strings from multiple sources into
a single field. You can use the Append to Existing Data section to accomplish this.
Debtor Name Example
- Set the first Import Field Specification record as you normally would to reference the last
name in the data file (EX: column A) and save to the Name field.
- On the second record, which references the first name (EX: column B), check the Append to
Existing Data, Prepend Comma, and Add Space before Appending fields.
 The logical process that the import is programmed to do is to store the last name from
column A in the name field. Once saved, the next Import Field Specification is set to append
data. First, a comma is prepended to the data from column B (after the data already in the
field). Then, a space is added before appending (after the comma, before the data from
column B). Finally, the data is imported from column B.
 When populating the Name field, Collect! will automatically populate the Contact field, and
vice versa.
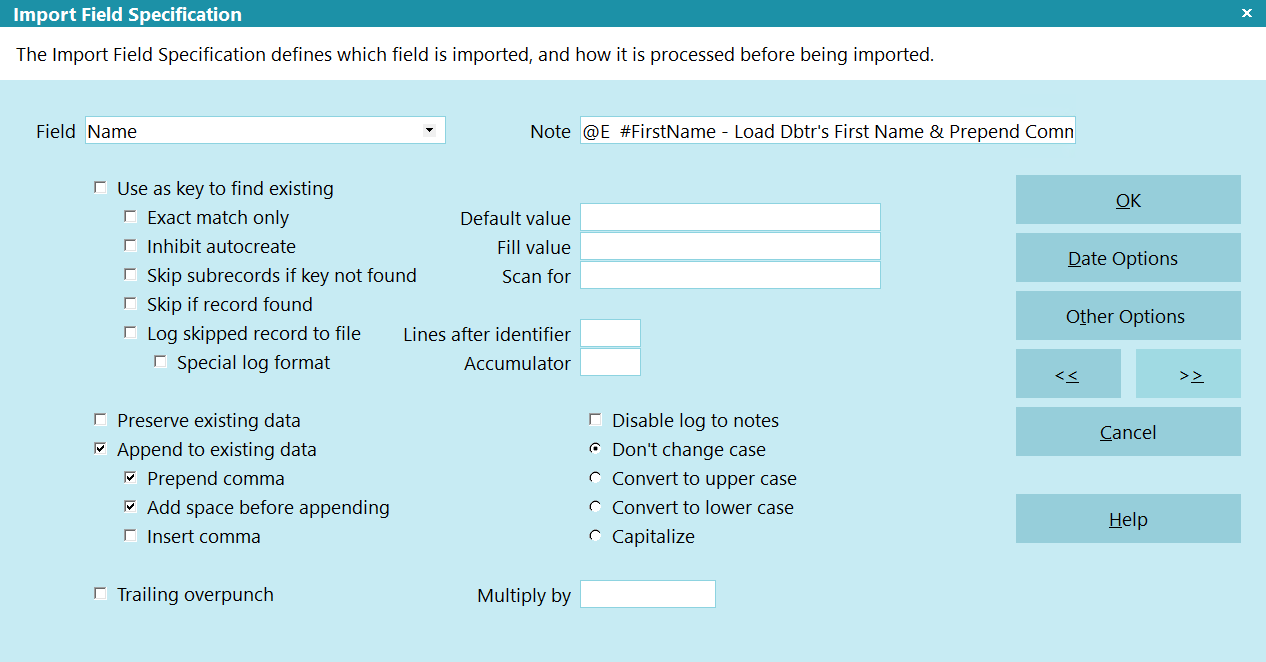
Loading First Name
Note Line Example
All notes are imported into the TEXT field. The other fields in the import modules for notes can be
ignored. Each step in the list below represents an Import Field Specification.
- If a date exists in the file, then reference it; otherwise, put @d in the Default Value field,
and put @> in the Note field, if this is a delimited file.
- If a timestamp exists in the file, then reference it; otherwise, put @t in the Default Value
field, and put @> in the Note field, if this is a delimited file. Then check the Append to
Existing Data and Add Space before Appending boxes.
- If a status exists in the file, then reference it; otherwise, put a Status in the Default
Value field, and put @> in the Note field, if this is a delimited file. Then check the
Append to Existing Data and Add Space before Appending boxes.
- If an Operator code exists in the file, then reference it; otherwise, put an Operator code
in the Default Value field, and put @> in the Note field, if this is a delimited file. Then
check the Append to Existing Data and Add Space before Appending boxes.
- Put a : in the Default Value field, and put @> in the Note field, if this is a delimited
file. Then check the Append to Existing Data and Add Space before Appending boxes.
- Reference the applicable data text from the data file. Then check the Append to Existing Data
and Add Space before Appending boxes.

Importing Note Line

Comparing Data With Default Value
There may be cases where you want to read a value from the data file and fill with something else.
Some example include:
- Payment Files that use an identifier like P for purchase, R for return, V for Visa, M for
Mastercard, etc.
- Converting full text states to the abbreviation.
- Status or Operator code conversion from another system to Collect!.
- On the Import Field Specification, enter a value into the Default Value field that you want to
compare to a value in the data file.
- Click the Other Options button.
- Click the Must Equal Default Value radio button.
 You can check the Must not Equal Value, Greater than Value, or Less than Value radio options
for those applicable comparisons.
- Check the Fail Cancels Field Only box, IF this comparison is for this field only and should
not stop the entire record.
 You would not check the Fail Cancels Field Only box if you are writing a payment import and
used different Import Record Specifications for each Transactions Type.
- If you are doing multiple comparisons, like States, and want to stop when a match is made,
check the Skip Remaining Field References box.
 Skip Remaining Field References is primarily used with the Must not Equal value option.
- Click OK.
- Enter a value into the Fill Value field. This will be written to the selected field if the
condition is met.
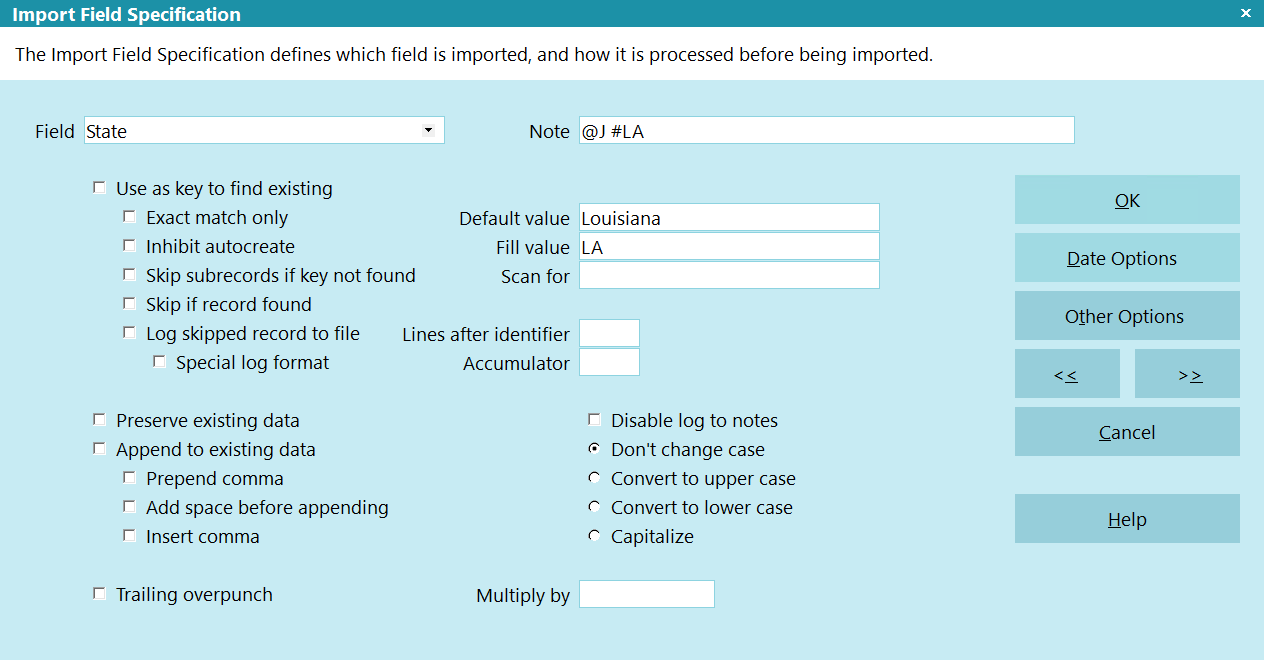
Default Value to Compare Data

Testing The Import Map
 If you are running complex imports, you may want to backup your database before running the
import.
Whenever you build an import routine, it is a good idea to test it at various stages. Depending on
the complexity, you can test either when the map is finished or when you have finished an
Import Record Definition.
At various stages below, you will be asked to correct errors, if they exist. After you go back and
correct the errors, repeat the steps below up to where you left off.
Initiate the Import
- Navigate back to the File Format Specification screen.
- Click the Import button (above the Import Options button) to display the Import Menu screen.
- Select the Down arrow next to the field labeled File Format. The File Format Specification
list is displayed.
- Select Import Map that you are working on.
- Review any fields that were auto-populated. If there are any errors, click the CLOSE button
to go back to the map and correct the issues. Possible errors:
- Wrong data in the fields
- Fields were populated that should have been blank (ignore the Starting File Number field)
- Fields were empty that should have been populated
- File Name: If you specified a file name in the Import Map, this will be populated. If you didn't
specify a file name, click the Browse button.
- On the Open Import File dialog box, navigate to the location of the file that you are
importing, then select the file, and click the Open button. Now the file and its location
will be displayed in the field labeled File Name.
- Client/Number: If you specified a Client in the Import Map, this will be populated. If you didn't
specify a client, or the specified client has accounts already, open either Client pick list and
select the Client that you want to run the test import on.
 Do not import test accounts in to a live Client. If this is a new client, without accounts,
that is fine, but if it's a client with existing accounts, then we highly recommend using a
TEST Client with the same settings as the live Client.
 Not all Imports Maps require you select a Client. For example, if you are importing payment
files, skip trace results, or dialer results, the Import Map should already be setup to
key on a unique identifier like File Number. If your key is on Client Account Number, then
you would select a Client to create a combined key for the lookup.
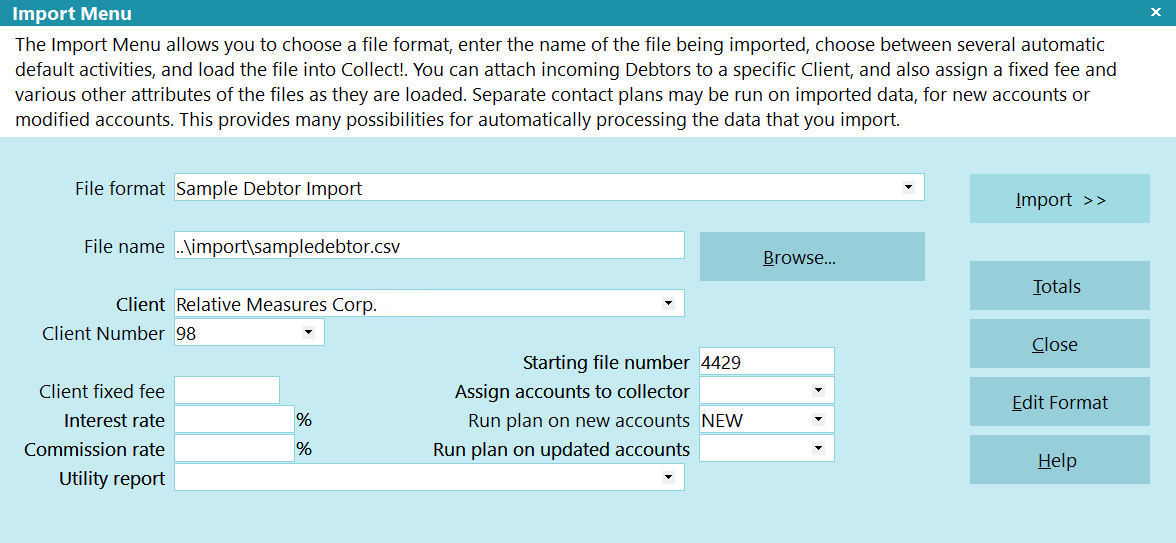
Import Menu Settings
- Select the Import button. You will see the first record that is being imported.
 When you run an import, you will get the following prompt asking if you want to disable
record tagging. Select NO if you plan to run batch processing or recalc after the accounts
are imported.

Disable Record Tagging
Examining Records as They are Imported
When you import records, it is very important to examine the results that you are getting. For this
reason, the import routine pauses as each record is imported. This gives you an opportunity to refuse
the record, cancel the import, or proceed.
Notice at the bottom of the Collect! screen, in the status bar, that you are being prompted for a
response. In white letters, you will see Update Debtor? (Yes/No/All/Cancel) Do not
choose anything yet!
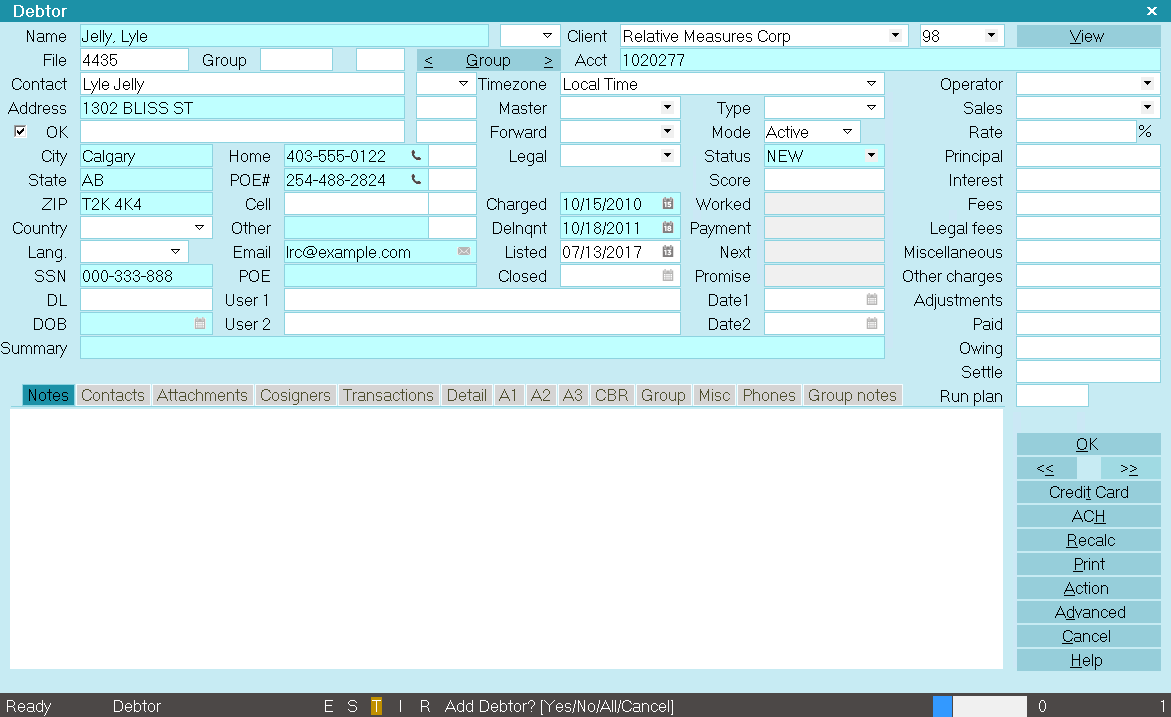
Debtor Record Being Imported
 You may have to auto hide your Windows taskbar if it is hiding the status bar in Collect!.
You have four choices:
- Yes [y] accepts the record, imports it and displays the next record ready to import.
- No [n] refuses the record, skips it and displays the next record ready to import.
- All [a] runs the whole import with no more prompts.
- Cancel [c] aborts the importing routine. Whatever you accepted up to this point is imported.
 Once an import begins, these are your only choices. We will always choose one of these
letters. Clicking on the screen with your mouse may cause import issues. This is not an
active form, but rather a snapshot for you to verify.
- If everything looks correct, press the y key on your keyboard to accept the
record. If there are errors, press the c key on your keyboard to cancel the
import and go back to correct the errors.
- The next record will now appear. Check for errors and proceed accordingly.
- Repeat this process until you have reviewed a large enough sample that is error free.
- When you are comfortable that the import is working, press the y key on your
keyboard to import all remaining data.
- After the data has been imported, a summary window will appear. Review it and click OK.

Import Summary
- If you selected the Recalculate Accounts box on the Import Options, you will be prompted to
recalculate the debtors. If you imported dollar amounts, select the Yes button.
 If you do not recalculate, you can always do it after the import. Select Tools from the top
menu bar and select Recalculate from the drop-down choices.
- After the import, close the window and check out the new debtors to make sure the data is
correct.
 After an import, newly imported records remain tagged. Select Browse from the top menu and
select All Debtors from the drop-down choices. Then Select Edit from the top menu bar and
select View Tags from the drop-down choices. You will be viewing a list of all your newly
imported records.

Clean Up The Test And Do Live Import
Once you have reviewed the accounts and validated the data (data in correct fields, financials are
accurate, etc.), then you need to clean up the data and do the live import.
- Navigate to the Main Menu.
- Click on the Edit menu and select Clear Tags. If you are unsure, you can close and reopen
Collect!.
- Navigate to the Client that you imported the accounts to.
- Delete the imported Debtor Accounts:
- If this was a new Client, open the Client, click in to the Debtors tab, use Ctrl + A (or
Edit -> Select All) to tag all records, then delete them.
- If this was a TEST Client created specifically for this test import, then delete the Client.
- Navigate to the Main Menu.
- Run the LIVE import as per the Help document: How to Import Records

Troubleshooting
If you find that the import overwrites data, check your import map. Overwriting will occur if you
have the 'Use as key to find existing' and/or 'Exact match only' turned ON for a field. This switch
will cause overwriting if a match is found. Consider turning OFF all 'Use as key' fields.


Credit Bureau Reporting
Collect! generates credit bureau reports in a Metro 2 (426 character) format which is accepted by
all the major credit bureaus. You can report to one or multiple credit bureaus at one time.
There are several areas in Collect! where setup information MUST be entered prior to reporting to
the credit bureaus through Collect!. Setup your company ID, client classification and enter debtor
credit reporting details as required.
Click Here to View this Form.
Click Here to Close this Form.
Once you have set up your account with the Credit Bureau(s) of your choice, you should have the
information needed to set up credit reporting in Collect!.
This Help topic describes how to setup the credit reporting features and how Collect!'s credit
reporting functions work. This requires familiarity with setting up Company Details and Debtors in
Collect!, as well as experience using Collect! in your day to day business operations.
When you set up your credit bureau reporting correctly, Collect! takes care of all the details by
automatically scheduling a Metro contact for each debtor that you want to report. After you report,
Collect! forwards this contact for the next reporting period. Collect! tracks changes in the debtor's
profile for credit bureau purposes and reports the correct codes to the bureau.
 The Credit Bureau Reporting module is optional and must be purchased prior to use for
reporting credit.
You can easily send credit reports to the major credit bureaus using the standard Metro2
(426 character format) file format.
 WARNING: Reporting credit is a legal matter. You are responsible for ensuring that the information
you are sending is accurate and complete. Do not report credit without being ABSOLUTELY SURE
about your legal rights and the legal rights of the person or entity you are reporting.
We will go through several steps in this topic:
Setting Company Details
Your Company Details need to be entered. Some of this information is output to the credit bureau
file. Also, in the DETAIL tab for the Company Details form there is one setting you need to use
ONLY IF you are a Credit Grantor.

Report AS Credit Grantor
The 'Credit Grantor' field is only switched ON if you are reporting as a Credit Grantor. This setting
affects othercredit reporting settings so only switch it ON if you are a Credit Grantor.
When you set this switch, the Delinquency Date is used to report the Date of Occurrence for all
status codes except 4, 10, 13 and 61 to 68. In those cases, the date the contact was scheduled is
sent as the date of occurrence. When you leave this switch off, the Date of Occurrence is always
taken from the Delinquency date, regardless of status code.
Leave this switch off if you are operating a collection agency.
 If you are not sure if you are a credit grantor, discuss this with your CBR representative.

Delinquency Date For Credit Grantor
When you have switched ON 'Report as credit grantor' in the Company Details form, an unmet promise
will show up as delinquent in the debtor's Delnqnt field.
 You must also switch ON 'Calculate delinquency date' in the debtor's Financial Detail form.
The 'Calculate delinquency date' check box is visible only when you are in Credit Grantor mode.
If you are a Credit Grantor, a number of things affect the Delinquency Date based on your settings.
The Delinquency Date is normally set to 31 days after the promise date. Thus, if you set a promise
contact on the account and no payment is received, when 31 days have lapsed, the Delinquency Date
will be set to the promise date plus 31 days.
 Promise contacts contain a dollar Amount, and the promise is only satisfied when the full Amount
has been paid. Set the term Payment Amount in the Interest Detail form and Collect! can manage
payments, underpayments and overpayments. Please refer to How To Manage Contacts for details.
In the Credit Bureau Setup form, you can switch ON 'No posted date mods delinquency'. When this is
switched ON, Collect! uses the Payment Date of the promise transaction as the ' Delinquency Date '
for the account, rather than allowing the default 31 day delay in determining delinquency.

Credit Bureau Setup
The Credit Bureau Setup form holds many global settings for your Credit Bureau information.
 When you set up your Account/Contract with the Credit Bureau of you choice, they supply some
information that will help you set up the fields in the Credit Bureau Setup form.
Open the Credit Bureau Setup form form System/Preference/Credit Bureau Setup.
Now that you are looking at the Credit Bureau Setup form, let's discuss the fields. You will notice
that there are 3 rows of fields called TU (Trans Union), Experian and Equifax.
These are the names of the Credit Bureaus. Here you will input your member information from the
Credit Bureau.
You can report to one or several bureaus. If you are reporting to Trans Union, you will fill in the
fields under TU. If you are reporting to Experian, you will fill in the fields under Experian. If
you are reporting to Equifax, you will fill in the fields under Equifax. Please refer to the
Credit Bureau Setup form in this link for more
details on each of the fields.
 Before going on, make sure you know which Credit Bureau or Credit Bureaus you will be reporting
to and that you have the information the Credit Bureau supplied to you in front of you to
help you fill in the fields.

Default Values For CBR Settings
Your unique subscriber codes will be placed at the top of the file that Collect! creates for you to
send to the credit bureau.
- If reporting to Equifax and/or Trans Union, place the Subscriber ID they give you into
the "Credit Grantor" field.
- If reporting to Experian, place the D-Number into the "Control Number" field.
- Other fields are filled with defaults as shown in the screen shot.
It is important to fill in all fields for the credit bureau(s) of your choice in the Credit Bureau Setup
form. Only a few fields hold actual values as indicated below. The rest of the fields should be
filled with a default value, such as zeroes and one, as shown.

Credit Bureau Setup Settings

Credit Report Preferences

Credit Report Preferences
Select the DEFAULTS button on the Credit Bureau Setup form to view the Credit Report Preferences.
These default settings are used for every account you switch ON for reporting. They can be changed
globally or on a per debtor basis.
Default values from the Metro2 Standard are provided for normal collection and credit management.
If you are not sure which default values you should use, please discuss with your credit bureau
representative.

Client Type
The Client Type field is used. In credit reporting terms, this is the Creditor Classification.
Open one of the Clients you wish to report and select the down arrow beside the Type field and pick
a Creditor Classification from the list of choices.
 You must choose a valid creditor classification for each Client that you intend to report.
If the choice you need is not in this list, please discuss this with your representative as
these choices come directly from the Credit Reporting Guidelines.

Client Settings
The Client Settings form stores several selections used by Collect! when reporting is switched ON
for a Debtor and when the file is produced.
- Open one of the Clients you wish to report and select the ADVANCED button.

Client Form
- Select ADVANCED and the Client Settings form will now be displayed.

Client Settings Form
You will notice in the Client Settings form, that on the right side, two of the boxes relating to
Credit Bureau reporting are checked.
Report accounts to bureaus When this is checked, Collect! knows that the Client
is set to report credit. When this Switch is off, Collect will warn you that it is not set up to
report credit.
Send client detail to bureaus When this is checked, the client's details will be
sent to the Bureau. This is a requirement for Collection Agency reporting.
 WARNING: You must provide a delinquency date for all accounts reported to the Credit Bureau.
The delinquency date appears on the Debtor form and is defined as the date of the first
delinquency that led to the derogatory status being reported.

K1 Segment Original Creditor Client Detail
If you are not a Credit Grantor, You must be sure put a check in the box labeled Send client
detail to bureaus in the Client Settings form to send the K1 segment.
The date an account is charged off or placed for collection is not the delinquency date. The
delinquency date should be the date the account became past due. The date of the delinquency is
necessary to purge accounts from the Credit Bureau database in accordance with the
Fair Credit Reporting Act (FCRA).

Debtor Information
 WARNING: Reporting credit is a legal matter. You are responsible for ensuring that the information
you are sending is accurate and complete. Do not report credit without being
ABSOLUTELY SURE about your legal rights and the legal rights of the person or entity you
are reporting.
Many fields on the Debtor form are included in the credit report, so you need to make sure they are
filled in correctly.
When sending reports to credit bureaus, it is the user's responsibility to make sure that the name
and the address fields are in the required format.
The following information is entered in the Debtor form.

File Number
By default, Collect! sends the Debtor File Number of the account to the credit bureau. Once you start
reporting to the credit bureaus, the Debtor's File Number must not change while the account is being
reported.
You must not have duplicate File Numbers in your database. This is Collect!'s UNIQUE identifier for
each account.
 The CBR module allows you to report Client Account Number instead of file number. Please note
that this makes troubleshooting more difficult as you may have multiple accounts numbers
across different clients. In either case of File or Acct, you must make a decision on which
one to use before you start reporting because you cannot change it after your first report
is sent.

Name
The Name of the Debtor entered as 'Last, First Middle Initial'. Please ensure your spelling is
correct. If you do not type a comma in the name, Collect! will assume the name is a business name.
Multiple last names must be hyphenated. e.g. Van-Deusen, Jack.
 Only enter one Debtor's Name in this field. If you have a Cosigner, use the Cosigner form.

Generation
Use this field for generation, not the Name field. (Jr., Sr., II, III, etc.)

Address
For accurate reporting of addresses, checkout the handbook called Postal Addressing Standards at
your local US Post Office. Use standard postal abbreviations for type of street.
 Do not include the # symbol in the apartment number. The Credit Bureau rejects addresses
with the # sign. If no zip code is found, THE ACCOUNT WILL STILL BE REPORTED, but the missing
Zip will be logged to the CBR log if the Address OK box is checked.

Addr 1
Do not use words like "Suite", "Apt.", etc. or the '#' symbol, just enter the Number of the suite
or apartment.

City
Truncate the rightmost portion of this field to 20 characters, or use the standard 13-character
U.S. Postal Service city abbreviations.

State
Enter the State or Province code in this field. Us the correct Postal Service codes.
For Example: WA for Washington
 You can use a Pick List on the State field to control the output.

ZIP Codes
The zip code may be either 5 or 9 digits for U.S. zip codes, or 6 digits for Canadian postal codes.

Country
Enter the standard two-character country abbreviation.
 You can use a Pick List on the Country field to control the output.

SSN
If SSN is not known, LEAVE BLANK. Although the bureaus do accept 0 or 9 filled positions, filling
a placeholder value could disrupt Account Matching and Find By.

DOB
If DOB is not known, LEAVE BLANK.
 Some locations require either SSN or DOB. By default, Collect! will not include accounts in
reports where both fields are blank.

Delinquency Date
You MUST not manufacture dates for accounts reported to credit bureaus. This date
must be provided by client. The Delinquency Date is defined as the date of the first delinquency
that led to the derogatory status being reported. The date of delinquency is necessary to purge
accounts from the bureau databases in accordance with the Fair Credit Reporting Act (FCRA).
If you do not fill in a Delinquency Date, the credit reporting function will use the Charged date,
also known as the 'Date of Last Service' or 'Service Date.'
 The date an account is charged off or placed for collection, is NOT the Delinquency Date.
The Delinquency Date should be the date the account became past due.

Credit Report Details
This form holds all the current settings for an individual who is being reported. This is where you
switch ON Credit Bureau Reporting for an account. Most of the fields fill automatically based on your
other settings. Any field can be changed as needed provided you follow correct reporting practices.
The options used as default values when you report Debtor credit are set in the Credit Report Preferences
form. These settings can be changed here, at the individual Debtor level, if necessary. In most
cases, the defaults should be fine.
Collect! will update some of these settings throughout the life cycle of the debt. For instance,
when an account balance reaches zero and the account is paid in full, Collect! automatically changes
the Status Code that gets reported to the bureau. You may need to adjust settings manually, if you
delete an account from the bureau or close it as "Settled in full," for instance.
Please press F1 from the Credit Report Details form for more information about these settings.
- Select the CBR tab on the Debtor form to access this form.
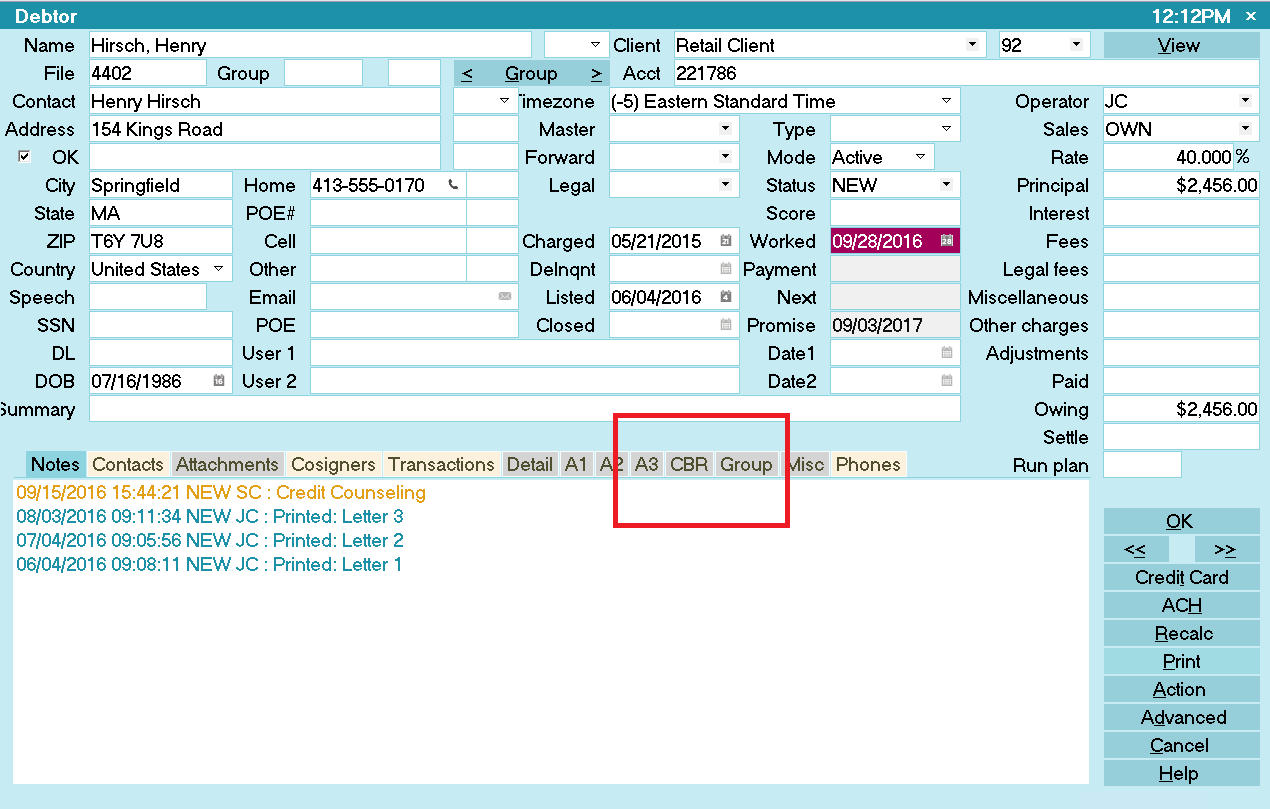
Selecting the CBR tab for the Debtor
- When you select the CBR tab, the Credit Report Details form is displayed.
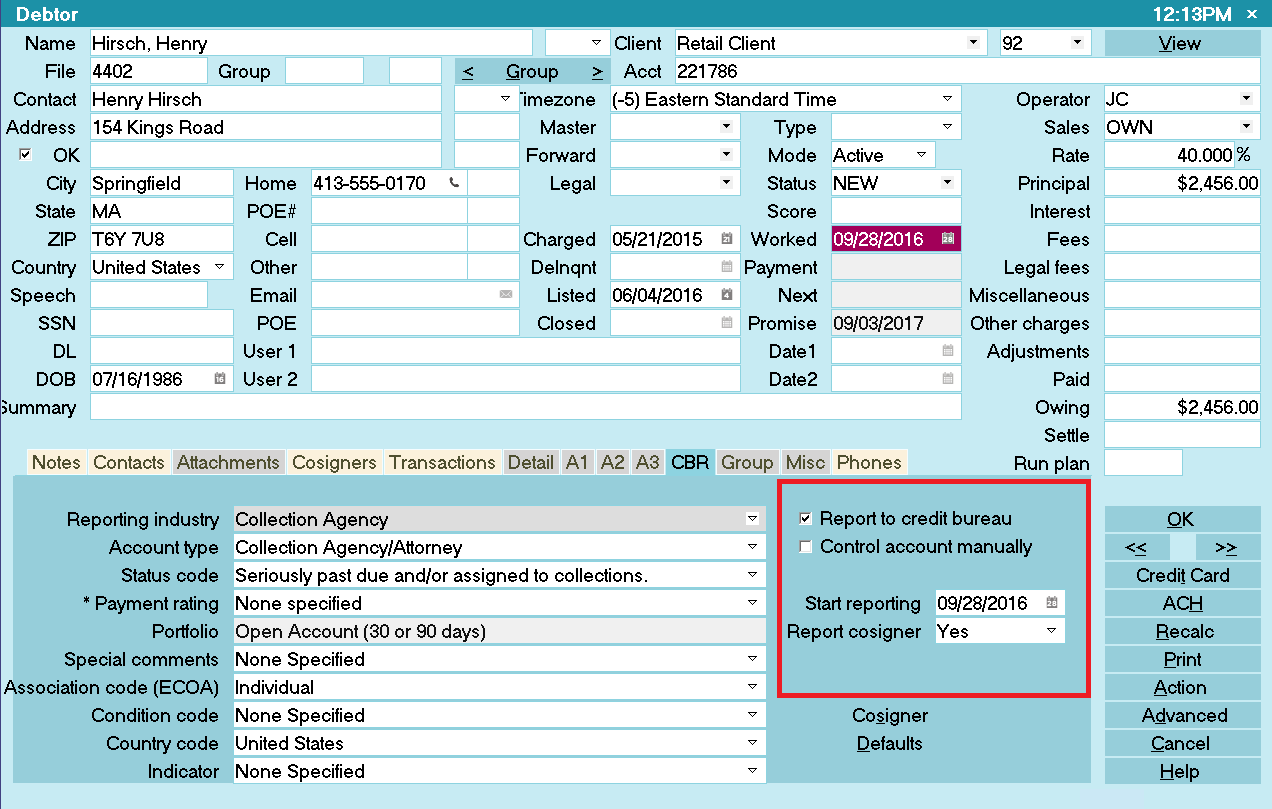
Credit Report Details
- Place a check mark in the Report to credit bureau box. Now this Debtor is set to be reported
to the Credit Bureaus.
- The rest of the fields are set up by default in Collect!, but it is your responsibility to
ensure that they are correct.

Start Reporting Field
Press F2 while in this field will bring up the Calendar where you can select the date that you wish
to start reporting this Debtor to the Credit Bureau. You may also enter a date in the MM/DD/YY format.
 WARNING: If you are using Delay Days, this date will populate automatically. Do not change it, unless
are you are fully aware of the implications.

Set The Account's CBR Status
Collect! automatically sets the CBR Account Status as you work your accounts. If you need to manually
change the status due to deleting an account from the bureau or reporting a bankruptcy, you can select
the CBR tab at any time to display the current Credit Report Details and change the settings as needed.

Reporting Cosigners
If you selected YES to report Cosigners, you must switch ON reporting in the Cosigner form for each
cosigner that you wish to report.

Cosigner Settings
If you are reporting Cosigners, additional fields need to be set up on each Cosigner that you are
reporting. Select the COSIGNER tab on the Debtor form to access the Cosigners. Here is an example
setup.
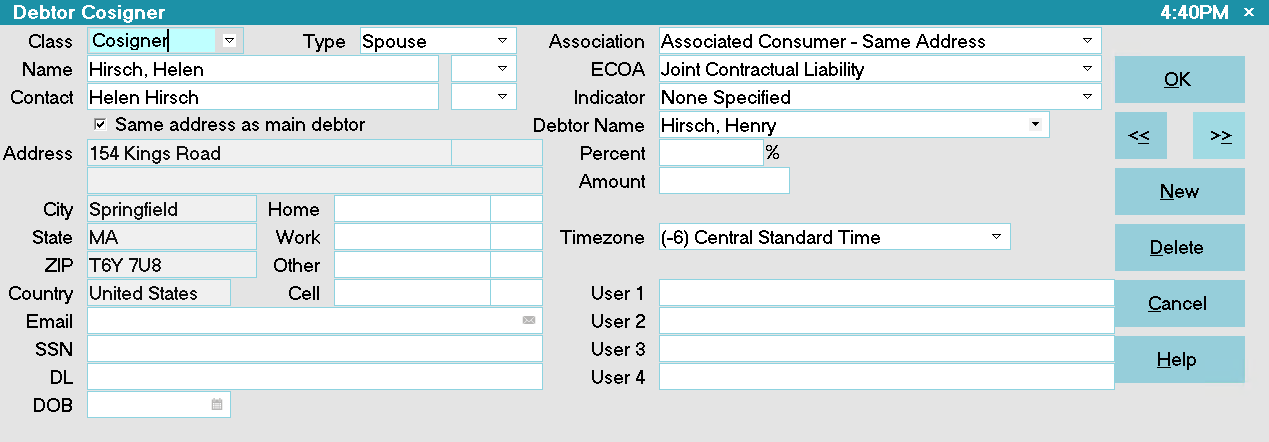
Cosigner with Credit Reporting Setup
 Press F1 when you are on the Cosigner form for details. Look for information labeled "FOR CBR:"
Please note that Name and Address fields on the Cosigner form must be filled in correctly, just as
for the Debtor, if you are reporting the Cosigner to the Credit Bureau.

Run A Credit Bureau Report Test
Testing a credit bureau report helps you see what happens in Collect! when you run a credit bureau
report to report a number of accounts to the credit bureau. It will show you where the finished file
is placed. Also, it gives you the opportunity to go through the motions of physically sending the
generated file to your credit bureau provider.
When your provider receives the test file, they, too, will treat it as a test run and let you know
if it is correct. Also, they will supply you with an error report if something is not appropriate
in the data set. Because you will have informed them that it is simply a test run, they will not
automatically update their files with your information.
When you run through this test for credit bureau reporting, do NOT mark the contacts as
done. If the file is accepted, then the accounts will still be prepared for the first live
credit bureau report.
Follow the instructions for How To Run A Credit Bureau Report using only the few debtor accounts
you set up in the first part of preparing for credit bureau reporting.
Keep your test data set small. If the bureau does send back an error report, it is much easier to
deal with correcting the test debtors than correcting hundreds of accounts.


Letter Service Outsourcing
You may want to use an external company to print your bulk letters for you. These large houses can
print, fold, stuff and stamp your correspondence generally at a lower cost than that of the stamp
itself. This is worth investigating if you are mailing large volumes of letters.
We can supply you with contact names of Letter Service Companies which currently serve the needs of Collect! users.
Click Here to View this Form.
Click Here to Close this Form.
For an agency which has considerable volume of debtor letters to be printed a day, where time and
wear & tear on your printers are excessive and your staff can't keep up with folding/envelope
stuffing to get your mailings out in a timely manner, you may be ready to consider outsourcing your
daily debtor letter batches to a professional mail house. The benefit of these service providers
is that they have the industrial equipment to output your thousands of letters daily without delay
and at a cost savings as compared to what you currently spend on supplies, equipment, time and labor.
Letter Service is a functionality that allows you to output to electronic file the "insert" portions
of your letters which are sent to the provider of your choice. You Letter Service provider has set
up your letters in advance and is able to read your data files, outputting hard-copy letters in their
entirety from the variable data field content only data you provide.
Item Check List of what you need to be able to do, or have already taken care of doing, in
advance of utilizing the Letter Service feature are:
- You are able to print a letter to one or more debtors.
- Understand and use Letter Contacts on batches of debtor accounts
- Have contracted with a Letter Service provider and have already provided them with template
output of your letter templates, or are in the process of having your letter templates set
up with said provider. See the end of this document for a few providers of this type of
service.
- You are able to save and retrieve a file from a prescribed path on your workstation or from a
path on a network drive.
- You have you purchased a license for the add-on Letter Service module from Administration at
250-391-0466 option 3.
When you use Letter Service, the transmission of your daily file from your office to your provider
can take place by sending them the file via an email attachment, internet drop-off on a website or
via an online FTP transfer. Our Technical Services team have successfully installed processes which
delivers your daily file by FTP drop-off using a .bat file in a Windows Scheduler. Contact us for
pricing if you would like to explore this convenient automation for your own site.
Setup With Your Provider
Assign a alphanumeric code to each of the letters that you will be using for letter service. Create
a full printout of the letter populated with realistic data so that they can see exactly how each
letter is to look and where all the data insert fields are within each letter form. Find out from
your provider whether they prefer Ontario or Non-Ontario standard format for the data files, as you
have the choice of which type you can output. If they prefer a custom format, Collect! may be able
to support it. Please refer to the help topic
How to Setup Letter Service File Format - Not Ontario Format for more information.
Once your provider has all the letters set up on their end, it is time to create a test file on your
side to submit to them.
 Letter Service output is completely separate and apart from inhouse hard-copy letter
printing. Your company can still print internally and generate any letter you need to either
on a per file basis or batch, when needed.

Creating A Debtor Letter For Letter Service
Choose the menu path "Print\Customize Printing\Edit Report Templates".
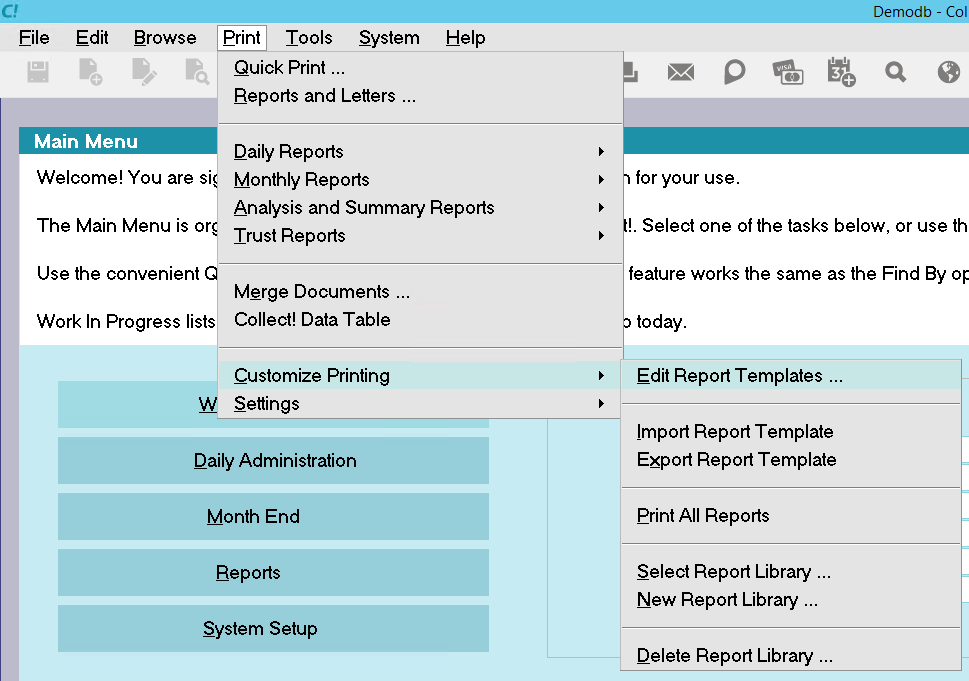
Print Menu - Edit Reports
This will display a list of all reports in your system print menu.
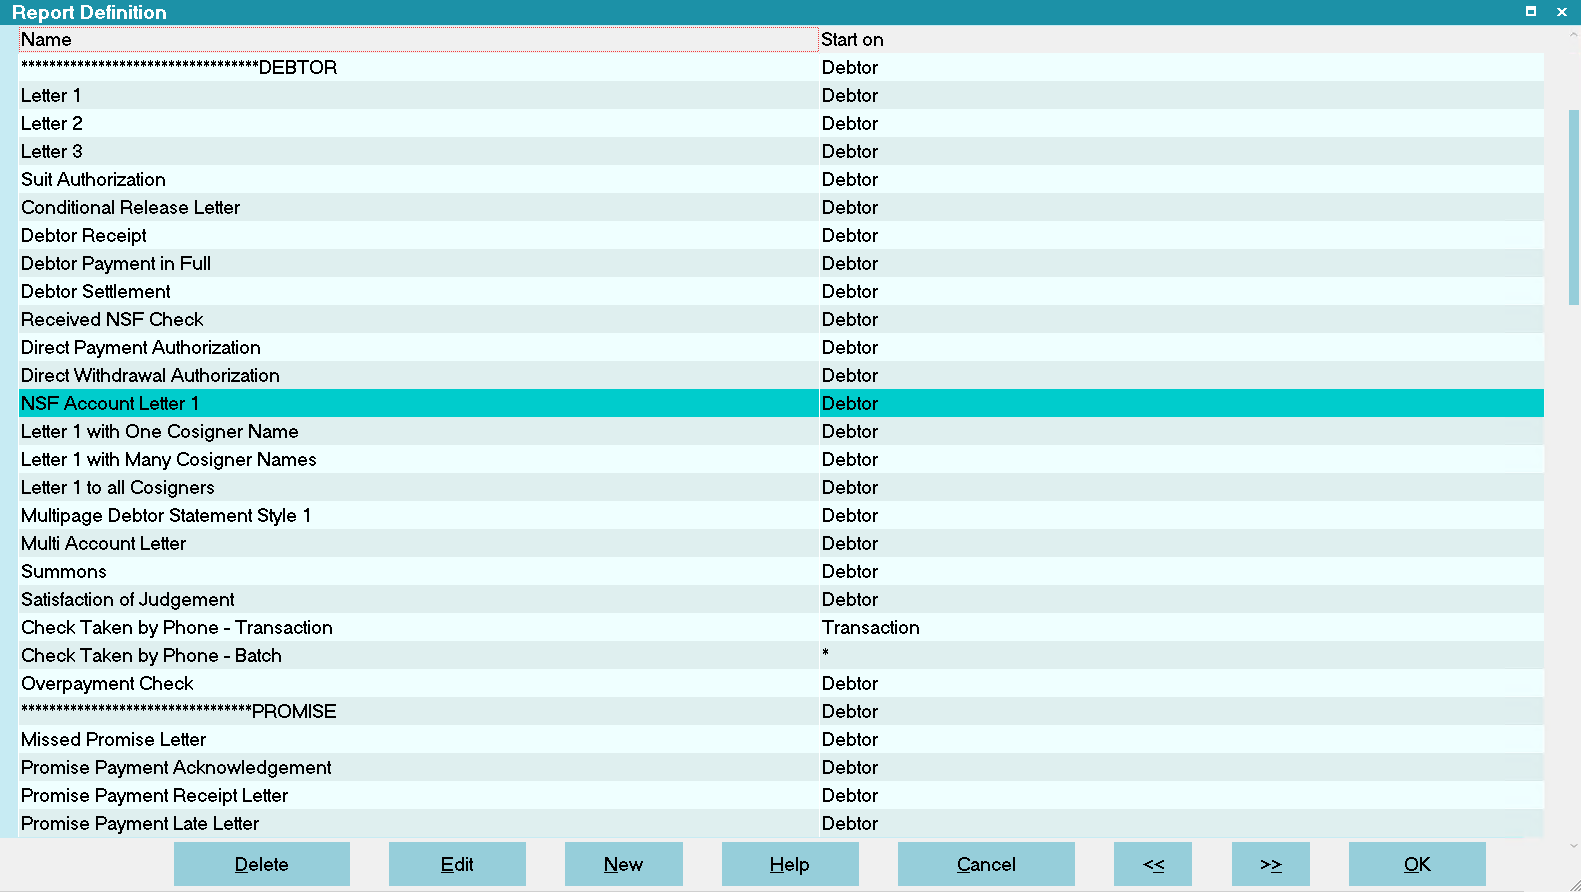
Report Definition List
Use your arrow keys to navigate to the first letter you plan to use in Letter Service and stop when
your letter name is highlighted. Press your spacebar to highlight this letter name. Click Ctrl+C to
copy, then Ctrl+V to paste. Now you will have two versions of this letter in your print menu. Rename
the new copy you just made by adding "LS" to the end of the Name. You will be making changes to both
the inside of the letter body and the Report Options to change this to a Letter Service style output.
For simple letters (that do not contain complex use of variables, conditional logic or record loops),
your Report Body will end up appearing as only the Printable Field Codes showing that are to be
inserted into your letters. The Letter Service company does not need or want you to have the whole
letter, static content and all, in the text file you will delivery to them daily - just the the
variable data for the individual debtors and the indicators as to which letter number to use on their
end.

Modify Your Letter Report Body
Update the letter code as per the format that you want to use. Please refer to the Help topics
How To Setup Letter Service File Format - Not Ontario Format and
How To Setup Letter Service File Format - Ontario Format for more information.
The original letter may have looked like:
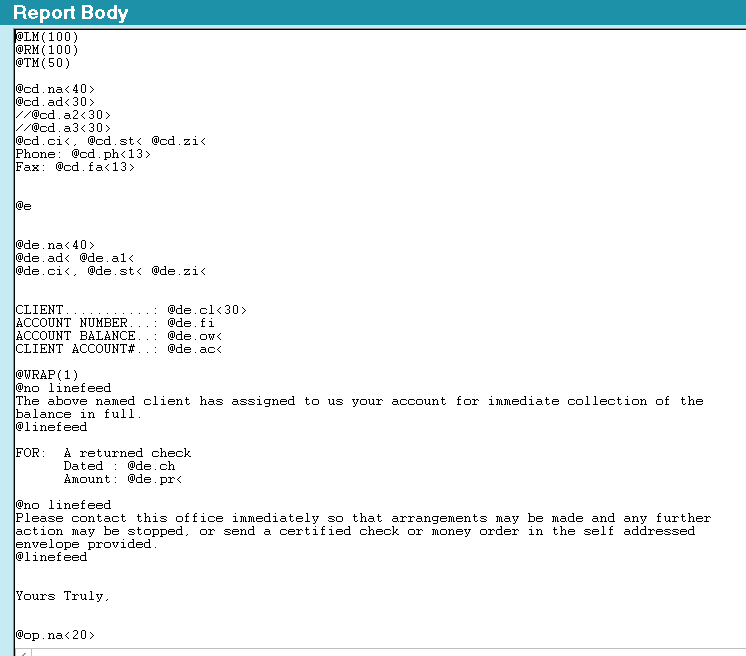
Report Body BEFORE Letter Service Edit
After you have modified the Report Body, may look like:
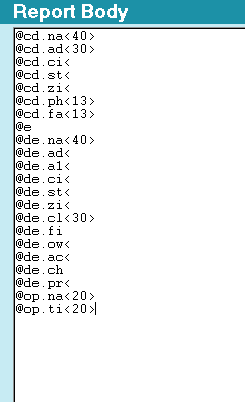
Report Body AFTER Letter Service Edit
Now that you have prepared the inside of the Report Body to output only that which your provider
needs, the next step is to set the Letter Service options. With the Report Definitions screen still
open, click the Options button in the lower left corner of the window.
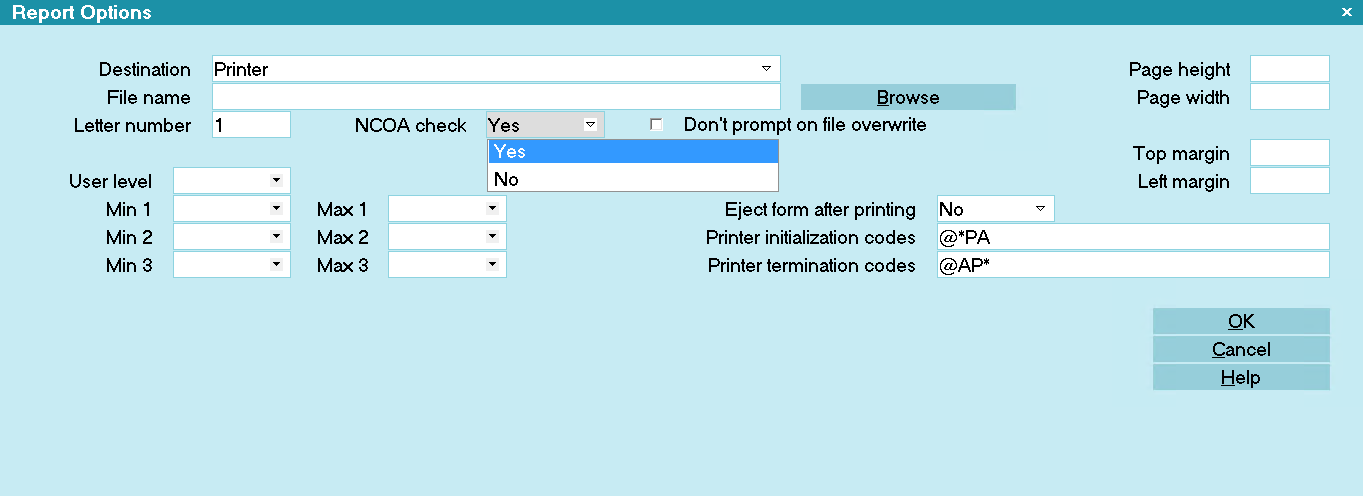
Report Options Screen

Report Options Form
Destination
Set this field to "File".
File Name
Leave this blank. When you create a letter service batch output every day, you will define the
filename when prompted to do so during the creation of the output text file you will send to your
provider.
Letter Number
Enter the template ID in the Letter Number field supplied by the letter vendor.
NCOA Check
This switch can be checked On if you have enabled this address checking service with your letter
service provider. This switch checked ON alerts your provider to do an address check on any account
that you have flagged as Address Not OK. That means the check box labeled
Address OK on the main debtor screen is switched OFF, indicating that the address
is either not verified or return mail was received previously. Each site has their own interpretation
of this switch being Off or On. The Letter Service module construes the Address OK switch being Off
as qualifying for an NCOA check.

Test Your Letter
This letter must now be set up a Letter contact on some test accounts in order to create a test file
for your Letter Service provider. Make sure to send them a pdf test templates containing ALL of the
letters you will be sending them during the course of normal operations. They need to set up each
letter format separately in THEIR system, just like you had to set up the letters in your system.
Navigate to a test debtor and click into the Contacts Tab. Click New to create a new Contact. Choose
the Type to be Letter, then click the drop-down arrow at the far right of the Description field, then
navigate to the Letter Service Letter template and select it. Set the Due Date as today.
After you have set up a Letter contact for all of Letter Service templates that you are testing, you
are ready to create a test output text file.

Running Letter Service On Scheduled Letters
To generate the data file to send to your service provider:
- Select the menu path "Print\Daily Reports\Letter Service Bureau".

Print - Daily Reports - Letter Service Bureau
- You will get a Batch Letter Options popup that looks exactly the same as the one you normally
get to print hard-copy letters in-house.
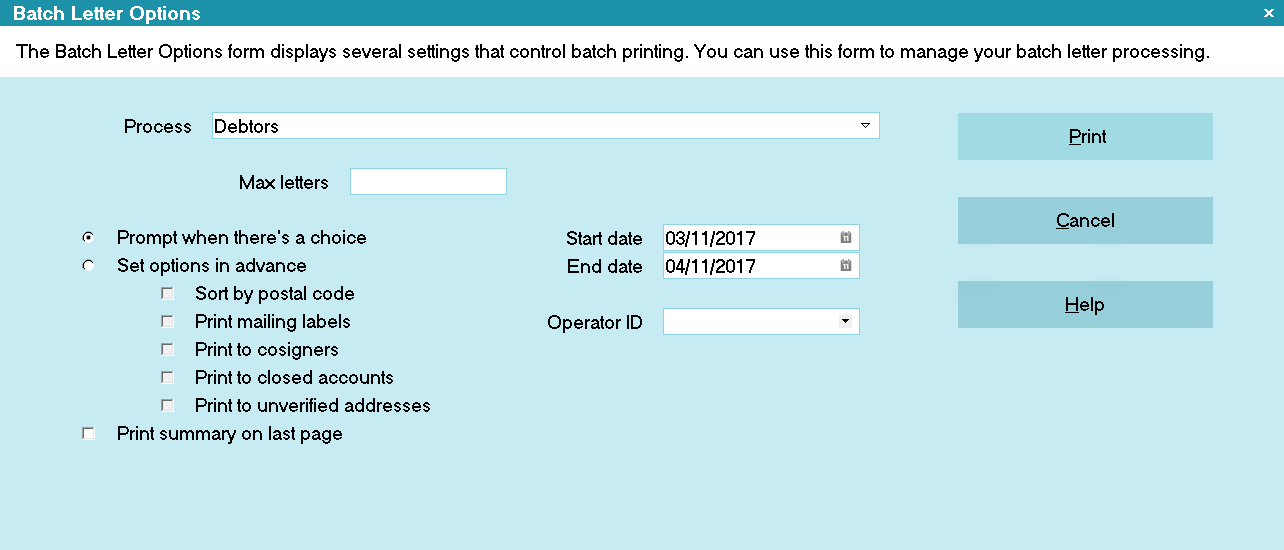
Batch Letter Options
Like with hard-copy printed batches, you have the same areas of control where you can opt to increase
or decrease the default date range or modify any of the settings on the screen.
 If you select Set options in advance, you can eliminate prompts for Address
Not OK, Cosigners and Closed accounts. This frees you up from having to monitor the batch
process and be available to answer the prompts on a per file basis because you've already
decisioned this for the whole batch. There will be no prompts to answer questions if you set
this switch.
- When you are ready, click the PRINT button on the Batch Letter Options screen to continue. The
process knows it is writing out to a file, it is not really going to print anything. Most
importantly, it does NOT cause any of your non-letter service letters to be launched. Only the
templates you have indicated with a value in the Letter Number field on the Report Options
screen will be processed.
When the next window pops up, you will see that it is called "Letter Service" and that it has the
"Letter service" output indicated as well as "Save to file only" radio buttons activated.
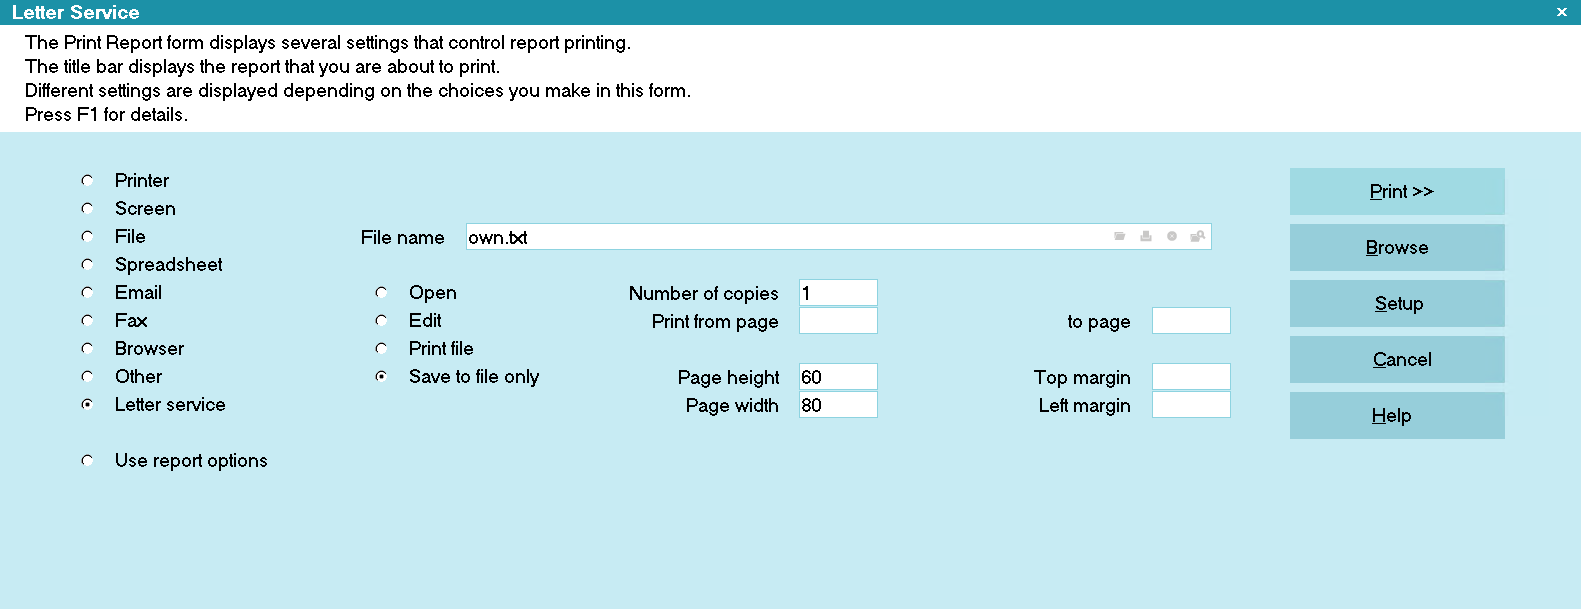
Report Output Options
By default, the output file will be saved in Collect\bin\global\masterdb\letters. You can change the
path and/or the name of the file that is output as you wish. If your letter service vendor requested
a file extension, then ensure to use that; otherwise, use ".txt" as the extension.
- Select the PRINT button to output your letter service file.

NCOA Check Through Letter Service
The NCOA check (National Change Of Address) is an option that your letter service provider may
provide, but there is an additional fee for each address they attempt to verify.
As mentioned, the NCOA check is enabled through the Report Options screen on a per Letter format basis.
When NCOA check is enabled for a letter, the process will output an NCOA code for every debtor or
cosigner letter printed to an unverified address - meaning the "Address OK" switch on the debtor
screen is NOT checked. Depending on your internal processes, this switch being unchecked can be a
function of return mail previously and/or a known bad address OR it could be unchecked in the absence
of a formal verification that the address is good. The code output with the letter service file
triggers your letter service provider to check that address and return NCOA information to you.
If you did not enable NCOA check and your process includes debtors with Address OK switches unchecked,
you will be prompted as below, if you had clicked 'Prompt when there is a choice' in Batch Letter Options.
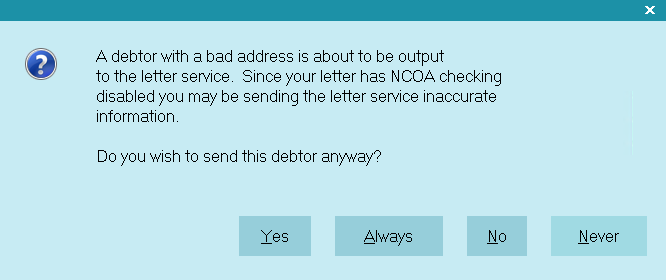
Bad Address Prompt
If you select YES, this debtor's information will be included in the letter service file, but
without the NCOA code.
If you select NO, the debtor will be ignored and not output to the file.
If you select ALL, all unverified addresses - meaning any addresses in your system that have the
Address OK switch unchecked on debtor or cosigner screens - they will be printed with no further
prompts.
 You may choose to set options in advance and select Print to unverified
addresses in Batch Letter Options to output all unchecked Address OK accounts with
no further prompts.
#K#03 Segment
The #K#03 segment is an addition to the letter service module to match new file format standards
required by letter service providers. This switch is enabled via the menu path
"System\Preferences\Reports and Printing\Printer and Report Setup\Insert #K#03 segment".
 This is the same setup screen where you indicate whether you are outputting to your
letter service provider in Ontario or Non-Ontario letter service output format.
A letter sent to letter service with NCOA enabled will print letters to debtors with bad addresses
preceded by the #K#02 segment. This tells the letter service that this debtor has a bad address. It
also attaches a "D" for Debtor and "C" for Cosigner to the File Number.
Example: ^D1400^ for Debtor, or ^C1400^ for Cosigner.
 The Dfilenumber and Cfilenumber are used by Collect!'s Import NCOA feature to update records
returned from NCOA.
All other debtor letters print normally, with no special formatting. With the #K#03 Segment switch
ON, debtors with bad addresses will still receive the #K#02 segment, but in addition, debtors with
good addresses will now be preceded by the #K#03 segment. This means that even good addresses will
have the Dfilenumber or the Cfilenumber, as described above. That way, you can also update good
addresses when NCOA returns data.
 When you use the Import NCOA option to update records after an NCOA check, Collect! expects
to find the Debtor and Cosigner identifiers. These will be correct only if you have switched
ON NCOA as described above. If you wish to check "OK" addresses as well, you need to have
the #K#03 preference set to insert the segment.

Sending To Cosigners
If you chose 'Prompt when there is a choice' in the Batch Letter Options screen, you will also
receive a prompt asking you if you would like to send the letter to the cosigners, if your debtors
have cosigners.

Print To Cosigners Prompt
 Select "Set options in advance" to decision all the questions needed to be answered pre-batch
and negate being prompted on a per file basis throughout the batch.
The Cosigner Tab can contain many kinds of "other" parties, inclusive of those that are not
responsible on the debt. You can restrict printing to records with the "Class" set to "Cosigner" by
checking the switch in the menu path "System\Preferences\Reports and Printing\Printer and Report Setup",
and check the "Restrict to cosigners only". Refer to the Help Topic, Report and Printer Setups for
more details.

Additional Prompts
You may receive additional popup questions or warnings depending on situations that Collect!
encounters. Answer YES or NO, according to your requirements.

Mark Batch AS Completed
This screen will ask whether you would like this letter batch marked as completed. If you select YES,
this batch of letters will be marked as Completed and it will be removed from the pending queue.
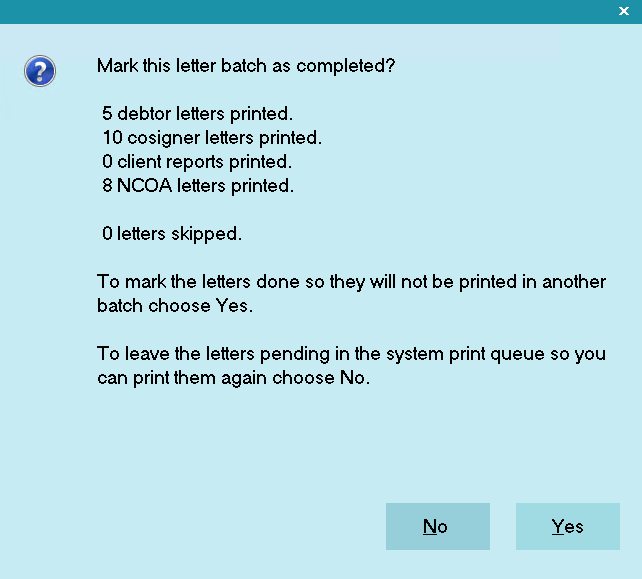
Prompt To Mark Contacts Done
You will receive a popup message acknowledging how many letters were processed to the file.

You will also be given the option of printing a summary report. You do not need to do this unless
your site requires logging of successful batch completions. If you do opt to receive this, the
file will be saved to the Collect\Log Files folder with a date/time stamp.

Print Summary Report To WIP List

Address Not OK
If a Debtor or Cosigner was skipped because of a bad address, the Letter contact is not marked
Completed, but is instead left "In Progress" with an indicator written to the contact's Attachment
field. It will say 0 indicates that the Debtor was skipped, OR 1
indicates that the Cosigner was skipped. If the Address OK switch is checked back ON at a future
date, then this contact will be processed the next time you print your Letter Service file from the
date that the address was put back in OK standing. Using the indicator as a safeguard, Collect!
will not print the same letter twice to the same Debtor or Cosigner.
 You can also view the Application Log via the menu path \System\Diagnostics to determine
which Debtors and Cosigners were skipped when the batch was processed.

Letter Service File
If you would like to confirm that the letters that you wanted sent out to your mailing house provider
were output to the file, open your output file in Notepad (or the pure text editor of your choice)
and review it. You will need to navigate the path to where you saved the file, right click on it
and use the option to "Open with" in your windows File Explorer, and open it with Notepad.
 WARNING: Do NOT open these text files in a word processor application like Word or Wordpad. The
control codes inserted and/or modification of file extensions will change the nature of
the data file, which will render it unreadable by your letter service provider.
The contents of your file should look something like the following:
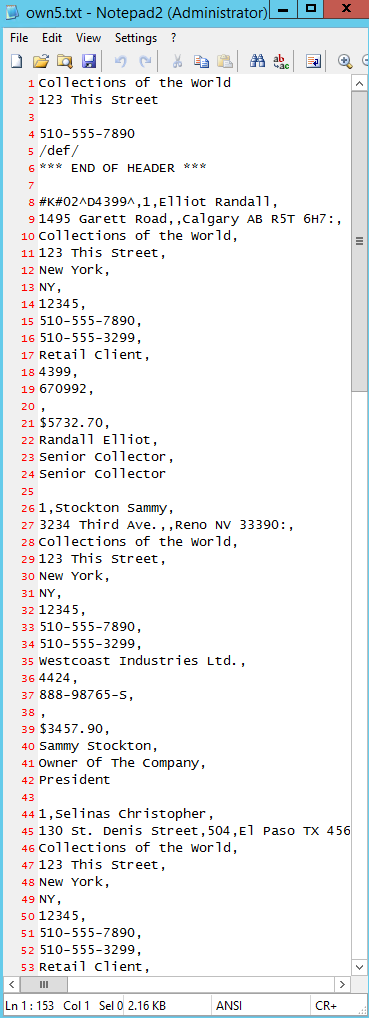
Letter Service File Contents
If you have enabled the switch 'Insert #K#03 segment' in the Report And Printer Setup, your file
would look slightly different.
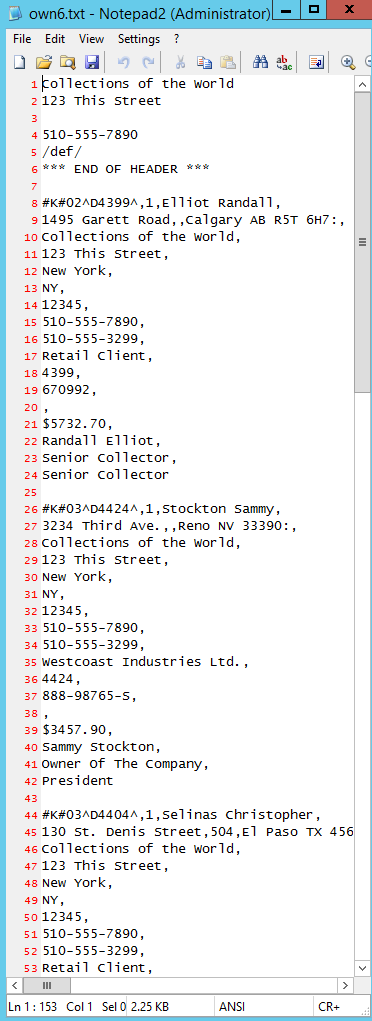
Letter Service File With #K#03 Segment
In this case, the NCOA code will be #K#03 for each account that does not have a #K#02 segment.

Sending Your File To Letter Service
Now you should be ready to send your data to your Letter Service provider by the method agreed upon
between yourselves and your provider.
For information about outsourcing your printing to a professional letter service provider, check
your local listings or Internet searches. To assist you, we have listed a few such established
companies who service this market here:
https://www.collect.org/partners/


Auto Dialer Setup
Easily dial phone numbers using Collect!'s Auto Dial feature.
When you are on an account and double-click into any phone number field, the Auto Dialer module will
begin dialing the debtor's number. Use the normal dialing time to review the Notes on the account.
 When working accounts through your WIP List, selecting a Phone type contact will display the
Auto Dialer if you have "Automatically display dialer" switched on in the WIP Options.
Click Here to View this Form.
Click Here to Close this Form.
The Auto Dialer (Click to Dial) in Collect! works with your Windows Dialer/TAPI settings,
softphones/protocols (SIP, TEL, SKYPE, etc.), or URL strings. This document describes how to connect
your phone lines, your computer's modem and telephone handset, and then enable the auto dialer.
Auto Dialer Preferences
Select System from the top menu bar and then select Preferences and then select Auto Dialer Setup.
Make sure any settings you want customized are correct for your operations. All other settings
should be left as they are.
Click on Save System to save the settings.
 WARNING: Auto Dialer preferences can be overridden by each Operator. This allows operators
in different locations or using different phone configurations to be able to make calls
without affect other Operators. If an Operator as an configuration file in their config
folder, then any changes to the System Settings will not propagate to that user.
When an Operator signs in for the first time, they will inherit the Systems Settings for
Auto Dialing. If they configure their WIP List Options or change the Auto Dialer preferences
and click SAVE OPERATOR, then that will create a personalized configuration file in the
Collect\config\{Operator_ID} folder. Any future changes will require Operators to update
themselves.

Auto Dial From The Work In Progress
This module is called "Auto Dialer" rather than "Click to Dial" for it's WIP list functionality
of automatically dialing the number when an Operator opens a Phone Contact from the WIP.
To enable this feature, go to the WIP Options form by clicking the Reload button on the WIP list.
Check the box labeled Automatically Display Dialer then click either Save System
for everyone or Save Operator for the current Operator.
 Uncheck the Prompt Before Dialing box on the Autodialer Preferences screen to force
a call to go out as soon as the Phone Contact is opened from the WIP list.

Operator Detail Form
The Operator dialer configuration is done on the Operator Detail form, typically with the
Use Softphone for Dialer and Note 2 fields. More information is below.

TAPI
By default, Collect! uses the TAPI protocol with no extra configuration.
When you make a call, Collect! will connect the call via the Windows Dialer.
With Computer Modem
All you need is a modem in your computer that is connected to a phone line.
Without Computer Modem
If you have a local phone server using Voice over IP (VoIP), the software provider may have TAPI
drivers available.
If so, install and configure the drivers as per their documentation. No further Collect!
configuration is required.

Softphone - Protocols
Modern phone systems have moved away from TAPI into locally installed application or API's.
Local applications will typically use a protocol like TEL or SIP.
This option is set at the \System\Rights\Operator screen.
- Open the Operator window for the user you want to set up for softphone, and click into
Detail Tab.
- Click the check box beside "Use softphone for dialer" to enable this setting.
- Enter the prefix for the protocol you want the system to use for your automated dialing in the
"Note 2" field. For example: "sip:" or "tel:"
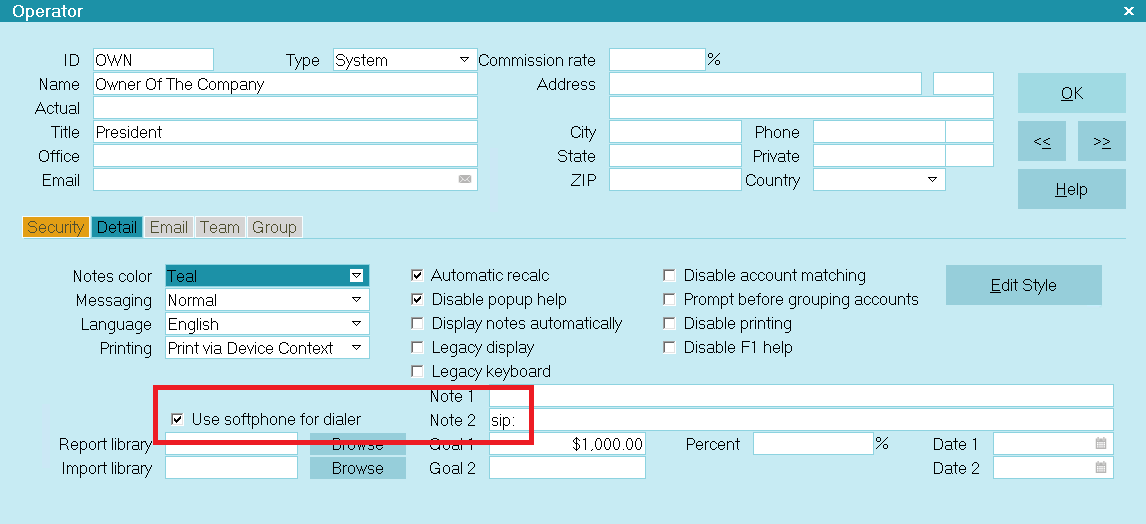
Softphone Settings in Operator Detail
Once you have enabled these settings, all use of the dialing features will be sent to the program
registered with your O/S as the default protocol handler for softphone calls.

UDP Protocol Dialing
With of a few configuration settings, Collect! can be made to integrate with UDP Protocol dialing
systems.
The UDP dial string is constructed in the following way:
UDP/:[ipaddress]:[port];[extension]#authcode (optional)
UDP/: This static string starts the setup.
[ipaddress]: This is the IP Address of the dialer. *** MUST be followed by a colon.
[port]: This is the Port the dialer's IP Address is listening on. *** MUST be followed
by a colon.
[extension] This is the Operator's Phone Extension.
#authcode This static string is an optional command to add ClientNumber[4]DebtorNumber[8]
to the UDP dial string.
UDP Redirect Setup
- From the menu path \System\Rights\Operator screen, enter the Detail Tab and switch ON
"Use softphone for dialer" for every user that you wish to be using the automatic dial
feature.
- In the "Note 2" field, enter the command string in the following format:
UDP:/ipaddress:port:extension
Example:
UDP:/192.168.2.122:1544:452
When the user clicks a phone number, Collect! will send "extension,number" to the IP Address and
Port via UDP protocol.
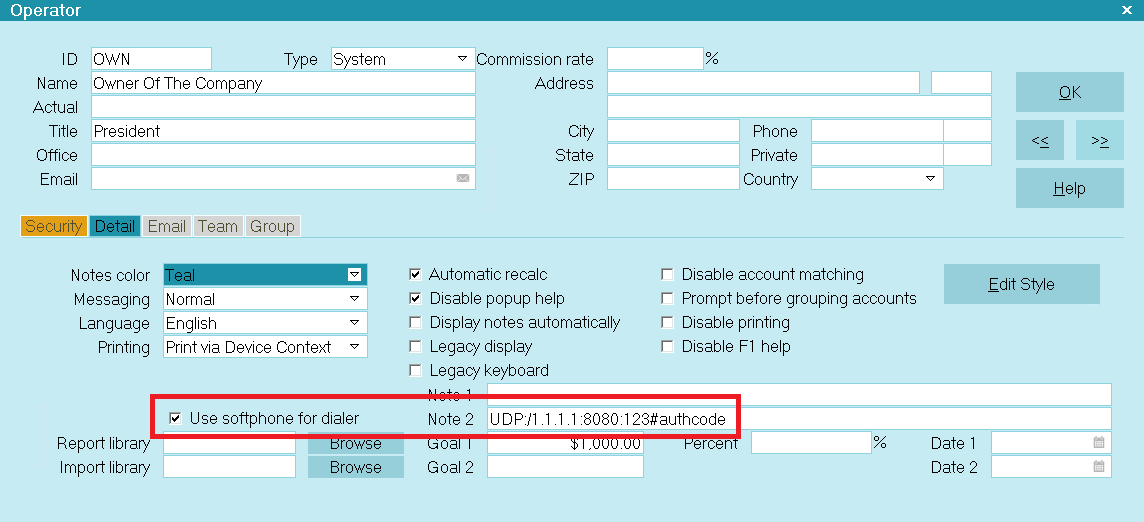
UDP Redirect Setup
Example of Resulting String Sent:
452,5551237777
 This requires that your dialing system is able to read the dialing string that Collect!
submits. This may require custom programming for implementation. Contact Tech Services if
you have questions or requests for integration with third party dialing systems.
Authorization Code for UDP String
There is an optional parameter in the UDP string configuration that enables you to send an
"Auth Code" with your UDP string by using the command #authcode. This is required
for security with some systems.
By default, the #authcode command will send 4 digits of the Client Number followed
immediately by 8 digits of the Debtor File Number. The resulting Authorization Code is ALWAYS 12
digits.
In the \System\Rights\Operator screen, enter the Detail Tab and enter the command string in the
"Note 2" field in the following format:
UDP:/ipaddress:port:extension#authcode
Example:
UDP:/1.1.1.1:8080:123#authcode
When the user clicks a phone number, the system will send "extension,number,ClientNumber[4]DebtorNumber[8]"
to the IP Address and Port via UDP protocol.

UDP Redirect Setup with Authorization Code
Example of Resulting String Sent:
452,5551237777,123412345678
Example - Auth Code Format
When Collect! detects the parameter #authcode, it pulls 4 digits of the Client
Number, immediately followed by 8 digits of the Debtor Number, to create a unique 12 digit Auth Code
to add to the UDP string.
- Client Number: LAST FOUR digits.
- Debtor Number: LAST EIGHT digits.
- Insert LEADING ZEROES if needed.
Example:
Client # 24
Debtor File # 4585
Collector Extension 109
Dialing phone number 818-555-1111
Resulting UDP string:
109,8185551111,002400004585
 If the user dials clicks to dial from any area in Collect! where the Client Number and/or
Debtor Number are not applicable, the #authcode command is ignored.
Resulting UDP string:
109,8185551111

URL Dialing
The Auto Dial functionality is capable of URL softdialing with compatible phone systems, allowing
the use of an IP Address to dial their API from Collect!.
Operator Setup and Requirements:
- 'Use softphone for dialer' must be selected on the Operator Detail tab
- The Operator Detail Note 2 field must contain the file name of the dialstrings file stored
in the config\dialstrings folder with the file extension ".dialstring"
- The Operator Detail Note 1 field may contain the username and password of the API, if the API
requires one. The username and password must be separated by an "&" which means that the
username cannot contain this character
- In the config\dialstrings folder, you need to have a file containing the API URL that will be
passed to the web browser
- In the dialstring file, you can use the following commands to pass the appropriate information
to the URL:
- @phone - the phone number being dialed
- @user - the username for the API (left of the & character)
- @pass - the password for the API (right of the & character)
 You can have a generic dialstring file (global.dialstring) that all users use that is
controlled by the username and password, or if your API is specific to each operator,
you can have an operator specific file (own.dialstring).
Grandstream - Dialstring Example
 This instructions have been tested with the GPX models. For other models, please refer
to the phones user manual.
First you need to configure your phones. Each phone must be done individually. Obtain the login
information from your phone provider. The default username is admin and password is admin, but
if you use a VOIP provider to provision your settings, then the provider may have changed the
password.
Once signed in, go to the Settings menu, then to the Call Features sub-menu. In the list, look
for Click-To-Dial Feature, enable it, and click Save and Apply.
Grandstream phones have 2 API accounts: Admin (0) and User (1). For the examples below, we will
use the Admin account with the default password. Please edit where applicable.
Once the phone is ready, you can now configure your Operators. There are 2 methods:
- Generic: All Operators use the same config file with the same account. The only settings that
change for each operator is there phone's IP address and possibly the phone password. This
method is easier to maintain as you don't need to have dialstring files for each Operator.
You simply need to set them up in Collect!.
- Operator Specific: Each Operator has their own config file. This is useful if each phone has
a different username and password.
Generic:
Navigate to the config\dialstrings folder. Create one, if it does not exist. Create or open the
global.dialstring file. Copy the following into the file:
http://@user/cgi-bin/api-make_call?phonenumber=@phone&account=0&password=@pass
 We have created a sample file here
that you can download and put into your dialstrings folder. Once downloaded, rename the file to
global.dialstring and place it into your config\dialstrings folder. If you are running a Client
installation, you will need to put this file in the client version of the dialstrings folder.
Navigate to an Operator, go to the Operator Detail tab and configure the following:
- Use softphone for dialer: check it
- Note 1: 192.168.99.99&admin - where the IP address is the IP address of the phone
- Note 2: global.dialstring
Operator Specific:
Navigate to the config\dialstrings folder. Create one, if it does not exist. Create or open the
.dialstring file where is the ID of the Operator that you are configuring.
Copy the following into the file and update the IP address to match the Operator's IP address of
their phone:
http://192.168.99.99/cgi-bin/api-make_call?phonenumber=@phone&account=@user&password=@pass
Navigate to an Operator, go to the Operator Detail tab and configure the following:
- Use softphone for dialer: check it
- Note 1: 0&admin - where 0 is either 0 or 1 for the account and replace admin with the actual
password
- Note 2: .dialstring
Yealink - Dialstring Example
 This instructions have been tested with the T46S model. For other models, please refer
to the phones user manual.
First you need to configure your phones. Each phone must be done individually. Obtain the login
information from your phone provider. The default username is admin and password is admin, but
if you use a VOIP provider to provision your settings, then the provider may have changed the
password.
Once signed in, go to the Features menu, then to the Remote Control sub-menu. In the list, look
for Action URI Allow IP List, fill in either the Operators workstation IP or type in the word
'any' without quotes, and click Confirm.
Yealink phones have several Outgoing Identities. For the one that you are using, go to the Directory
menu, then to the Phone Call Info sub-menu, and take note of Outgoing Identity value, herein
referred to as {Identity}.
Once the phone is ready, you can now configure your Operators. Due to the design of the Yealink API,
there is only 1 method:
Generic: All Operators use the same config file with the same account. The only settings that change
for each operator is there phone's IP address and possibly the phone password. This method is easier
to maintain as you don't need to have dialstring files for each Operator. You simply need to set them
up in Collect!.
Generic:
Navigate to the config\dialstrings folder. Create one, if it does not exist. Create or open the
global.dialstring file. Copy the following into the file:
http://@user/servlet?key=number=@phone&outgoing_uri=@pass
 We have created a sample file here
that you can download and put into your dialstrings folder. Once downloaded, rename the file to
global.dialstring and place it into your config\dialstrings folder. If you are running a Client
installation, you will need to put this file in the client version of the dialstrings folder.
Navigate to an Operator, go to the Operator Detail tab and configure the following:
- Use softphone for dialer: check it
- Note 1: 192.168.99.99&{Identity} - where the IP address is the IP address of the phone and
{Identity} is the value that you noted above (EX: 192.168.2.154&2011)
- Note 2: global.dialstring

Calling A Report To Dial A Number
The Auto Dial functionality is capable of calling a report. This allows for complex scenarios as reports
can output to a web link to then submit a call using web forms or Javascript. Reports can also use
SQL to make API calls for cloud phone systems where the provider has not developed a softphone.
Operator Setup and Requirements:
- 'Use softphone for dialer' must be selected on the Operator Detail tab
- The Operator Detail Note 2 field must contain the name of the report prefixed with the text "report:"
(Example: report:dialer_report).
 As the report won't have access to the Autodialer's @phone command, you will need to reference
the @dph.nu field in the report.


Predictive Dialer
You can use a predictive dialer with Collect! to enhance collector productivity. After this is set up,
the operator that is assigned a Predictive Dialer Operator status can sign into Collect! using their
usual password and ID and sit and wait for the phones to start ringing. When a connection to a debtor
has been established, the related debtor information will appear on the operator's Collect! screen.
In order to interface properly with Collect!, after you have chosen your equipment, you must send
details of the file format that the equipment requires. We will inform you of any modifications
necessary to the Collect! system to accommodate the equipment.
We strongly recommend that you send us pertinent information before investing in predictive
dialer hardware.
Click Here to View this Form.
Click Here to Close this Form.
Predictive dialers automatically dial a set of phone numbers and route calls to available collectors
when what the dialer system perceives as live human connections are made on the phone. Busy signals,
no answers, operator intercepts, and what are perceived by the dialer system as answering machines
are call result logged.
The objective of a dialer system in predictive mode is to have a live-voice call available for a
collector when that collector is statistically likely to be available to take it.
The dialer is constantly computing stats while the campaign is running, making adjustments in how
many lines are dialing per head of collector on the campaign, speeding up/slowing down its pacing,
clocking and revising how long it takes to get a live-voice on the phone and factoring into its
computations the average call times of each collector. With all these parameters and calculations
in place, the dialer will determine how far in advance it should be actively dialing numbers to have
a call ready at the statistically anticipated time of availability for each collector signed into
the campaign.
The quality of your data that you are uploading to a dialer system greatly impacts the success and
efficiency of the campaign, which in turn impacts the revenue generated from use of call campaigns.
If bad/confirmed wrong numbers are not be removed from the phone fields on the accounts, then the
resource time is being mismanaged (as well as that of the collectors) because the same numbers are
being repeatedly called after verified as bad. If you lists are very long, that can mean that every
day, there are numbers not being dialed because the list keeps restarting from the same order as the
last download - numbers in the lower part of the list are never being attempted.
To ensure optimized inventory penetration rates, it is important to segment and rotate your call
lists so that all callable files are being actually dialed.
Reviewing your call results is important. They will show you with hard numbers and percentages what
days and times of day your call lists are reaching the most people.
The quality of your data will impact the success and effectiveness of your call campaigns. Whether
you use a premise dialer product or an off-site provider, it should be possible to obtain a variety
of analysis reports that provide you with details about your campaigns separate and apart from
straight call results such as busy, no answer, passed to live collector/agent. Campaign stats
generally will show you hard numbers/percentages in summary, then with detail breakdown of those
summary figures for categories such as # contacts, # no answers, # busy, # operator intercepts,
# machines detected, # live contacts passed to agent, # wrong numbers (if you agents press a key for
this call result). It should be possible to get account number and phone number details in the
summarized categories. Using these reports to keep your data clean so that your future call lists
will be better aimed at right party contacts will continually raise your campaign success ratios and
actual inventory penetration rates.
The following are areas where if detailed reports are available, assigning admin/clerical staff to
review and update files will contribute to your call campaigns being better each time.
- Operator Intercepts. If you have the manpower to support it, having someone manually dial
these numbers to confirm whether they are a true NIS or possibly a Phone Number Has Changed
is useful. There will always be many more NIS numbers than forwarder moves but the percentage
of free locates that easy can be worth the verification step. Making sure that NIS numbers
are removed from phone fields so that they don't waste future dialer time.
- If your collector has entered a "wrong number" code into the dialer prompt after a live-voice
contact has confirmed that that the number is wrong for the debtor on file. If the collector
forgets to remove the number in the heat of the campaign, then the same uninvolved consumer
will continue to be called and this can spark a harassment complaint. Make sure that wrong
numbers confirmed get removed from your phone fields. If you extract from the Phone Tab into
your call lists, it is recommended to have your staff use the Active Yes/No field so that
selection of phone numbers from this tab are only those that are deemed Active Yes.
- Accounts with no phone numbers that are being included in your lists. You may wish to devise
an inventory strategy to segregate uncallable/skip files from the pools you are sourcing for
your call lists. How many head of collector needed versus skip tracing decisioning can be made
from accurate stats in these areas. Many premise dialer systems and off-site providers
automatically discard no phone records when they build the call list. If you are not aware
of what percentage of your lists are not callable, your staffing and locate work plans may not
be aligned with the actuality of your inventory.
The basic predictive dialer operation is a three-step process:
- Send a list of phone numbers to the dialer to dial.
- Wait for calls, and as calls are made Collect! pops up the file being called.
- Import the completion status of calls made or attempted by the dialer.
Send Call List To Dialer
First, you must send a list of phone numbers to the dialer to dial.
You do this by exporting a list of accounts that you want dialed out of the Collect! system. You
can use the export module to create such a file; or, you can also use the report system to generate
an appropriate list and then save that list to a file.
 Collect! searches on the File Number to pop up accounts.
The format of this list is completely up to your dialer manufacturer. Please contact your dialer
manufacturer for more information.
We have included a sample report for the TCN Module, which exports a file listing of accounts that
have "TCN" in the Status field. This can be used with any Predictive Dialer dialing software.

Contact Controls
If you have created Contact Controls for Phone types, then your export report should reference the
@CCCALLOK command to prevent numbers from being sent to the dialer that should not be called.
Please refer to the Help topic How To Use The Report Writer Commands for more information.

Wait For Calls From The Dialer
Wait for calls, and as calls are made, Collect! pops up the file being called.
Sign in to your database, select the Tools menu, and choose the Predictive Dialer Link option. This
pops up the Predictive Dialer Link form, and Collect! is ready to receive calls from the dialer.
 Your dialer manufacturer must set up each workstation properly to allow Collect! to
communicate with the dialer.
 You can create an Operator ID where the Operator type is 'Dialer Operator'. Then, upon signing
on, Collect! will go directly to the Predictive Dialer Link screen, waiting for calls. This
type of Operator cannot do anything but receive predictive dialer calls.

Import Completion Status
Import the completion status of calls made or attempted by the dialer
At the end of the call campaign, you can load the call results in to the Collect! system by running
an import program to import. Set this program to import any call result logs generated by the dialer
during the campaign.

Setup Predictive Dialer With Dynamic Data Exchange
Collect! supports the following Dynamic Data Exchange (DDE) scenario:
Connection
Connect using:
Service: 'collect'
Topic: 'dialer'
Command Line Startup Options
Turn on DDE by using /z in Collect!'s Command Line Startup Options.
 Right-click the Collect! icon on your Desktop, choose Properties, and add the /z option to
the Target line.
Example: Target: X:\Collect\bin\cv13.exe /z
Ready Indicator
The interaction between Collect! and a Predictive Dialer system relies on the Collect! session
sending out a "Ready" signal when the collector is available for a call or a "Busy" signal when
the collector is on a call or otherwise unavailable to the dialer.
It is the DDE Request command that manages these "Ready" and "Busy" signals.
DDE Execute Command
We use the DDE Execute command in the following format.
[open(debtor,file,FileNumber)]
Where the strings 'open', 'debtor' and 'file' are string literals, FileNumber is the ASCII
representation of the file number of the Debtor Collect! is to display. Brackets are used as shown.
Example DDE Execute String: [open(debtor,file,1438)]
The result of this command is that the Debtor screen pops up and the collector can edit the file.
During this time, the DDE Request commands return the string 'Busy,' as the collector is handling
the call.
When the collector closes the Debtor by clicking OK, Collect! returns to the Predictive Dialer
waiting for file screen. Now the DDE Request command returns the string 'Ready'.
If the file number is invalid, the collector will receive a message that the file could not be found
in the database. Collect! DDE functions return a DDE_FACK, to acknowledge receiving the number. An
invalid file number passed via DDE should not occur and indicates a serious campaign build issue on
the predictive dialer side. If a collector were to see such a message, they should immediately
contact their system administrator.
If the format of the command is incorrect, the DDE return value is DDE_FNOTPROCESSED. If this error
occurs, please check the format of the Execute command you are sending. This error indicates that
the Predictive dialer software has a problem.
If, for any reason, Collect! is not in the correct state for the DDE Execute function to succeed,
the DDE return value is DDE_FNOTPROCESSED. The DDE caller should respond by trying again later.
DDE Functions And Callbacks
Collect! uses a limited subset of DDE command to enable predictive dialer links.
DDEInitialize - using the following parameters:
- APPCMD_FILTERINITS
- CBF_SKIP_CONNECT_CONFIRMS
- CBF_FAIL_SELFCONNECTIONS
- CBF_FAIL_POKES
DDECreateStringHandle: 'collect'
DdeConnectList: establishes a conversation with all server applications that
support the 'collect' Service and 'collect' Topic names.
The data format we use is CF_TEXT - i.e. the standard text format.
Collect!'s responses to the following commands:
XTYP_CONNECT: Returns TRUE.
XTYP_ADVREQ: Returns "Ready" or "Busy".
XTYP_REQUEST: Returns "Ready" or "Busy".
XTYP_ADVSTART: Checks that the format is CF_TEXT and checks if the hszItem is the
same as the application name "collect". Returns TRUE if the condition fails and FALSE if the condition
succeeds.
XTYP_EXECUTE: If Collect! is busy, it returns DDE_FBUSY. If it doesn't understand
the command/syntax, it returns DDE_FNOTPROCESSED. If it gets a file number, it returns DDE_FACK.
XTYP_REGISTER: Returns a DdeConnectList, then posts a DDE ADVSTART Transaction.
STYP_DISCONNECT: Returns a FALSE.

Setup Predictive Dialer With URL Strings
Collect!'s Web Predictive Dialer enables you to easily integrate your Predictive Dialer with VoIP
and IP-PBX dialing systems. You simply start Collect! with the /w2 Web Host mode, start
Predictive Dialer in Collect! and wait for calls. Collect! pops up the Debtor on your screen. If
several accounts are found with the same phone number, Collect! returns all results in a Find by
Phone list.
 This feature requires that you have confirmed that your predictive dialer provider can
communicate with your browser and send URL requests to it. Also, you must have licensed
the Predictive Dialer module in Collect!.
Using the existing Predictive Dialer functionality, a dialing system can connect to Collect! via
HTTP and pass a URL string containing a phone number.
Collect! listens in a special Web Host mode for HTTP requests and processes dial strings in the
following formats.
 Your dialing service must be able to pass the URL string in one of these formats. Collect!
can process numbers with or without dashes. It is most efficient if you store numbers in
the same format that your dialer uses.
Collect! Startup Parameters
Collect! Startup Parameters: /s80 /w2
Collect! Startup Parameters for Background Mode: /s80 /w2b
Regular mode requires that you select the Predictive Dialer option under the Tools menu. Background
mode will enable the predictive dialer at all times. This is designed to allow incoming calls while
working the Work in Progress.
Phone Number
Syntax: http://ipaddress/dialer?phone={phone_number}
Examples:
http://192.168.0.100/dialer?phone=5551111222
http://192.168.0.100/dialer?phone=555-111-1222
File Number
Syntax: http://ipaddress/dialer?file={file_number}
Example:
http://192.168.0.100/dialer?file=1430
SSN
Syntax: http://ipaddress/dialer?ssn={ssn_number}
Examples:
http://192.168.0.100/dialer?ssn=777888999
http://192.168.0.100/dialer?ssn=777-888-999
Email
Syntax: http://ipaddress/dialer?email={email_address}
Example:
http://192.168.0.100/dialer?email=email@example.com
Client Account Number
Syntax: http://ipaddress/dialer?acct={acct_number}
Example:
http://192.168.0.100/dialer?acct=ABC123
 Collect! will search the database for the value against the specified field and if
a match is found, display the debtor. If multiple matches are found for different debtors,
a list of matches is presented instead.
 If required, you can add ss to the W2 command to enter in SSL mode (EX: /w2ss).
Please note that this requires a valid SSL certificate in the bin folder. Please refer to
the Help topic How To Setup Web Host for more information.

Using The Predictive Dialer
Start Collect! from a shortcut with the special arguments outlined above.
Select Tools->Predictive Dialer to start the Predictive Dialer. Collect! will
display a message box and begin waiting for phone number packets to arrive via HTTP.
 You can use /w2b to start the Predictive Dialer in background mode. This will allow you to
work your To Do List while waiting for calls.
Waiting for Calls
As soon as a match is encountered, Collect! will display the Debtor.
If multiple matches are found, Collect! will display the list of matches.
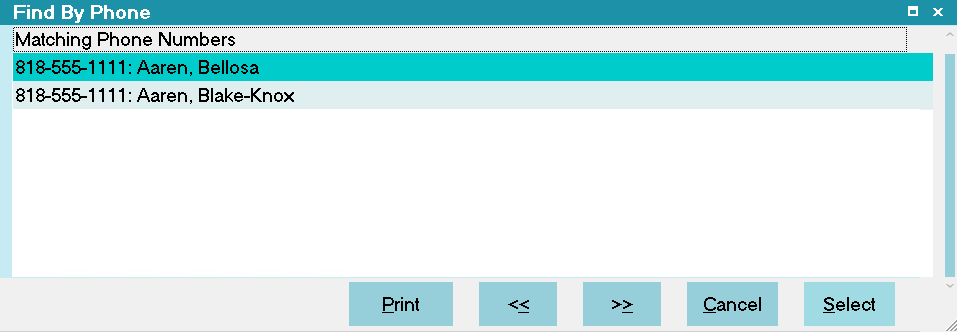
Multiple Matches Found
 If your Operator is Type Dialer, then when you sign in to Collect!, the system will start
waiting for calls automatically.

Testing
To test, run the Predictive Dialer, "Tools->Predictive Dialer".
Then open up a browser and type http://ipaddress/dialer?phone=phone number where
ipaddress is the IP address of your machine.
 You should be able to just type 127.0.0.1 if you are testing from the same machine.
Examples:
http://127.0.0.1/dialer?phone=5551111222
http://127.0.0.1/dialer?file=1430
If collect is operating in "Secure Web Dialer" mode, then use "https" instead of "http."


TCN Broadcasting Module
Collect! and TCN work together to enable you to deliver messages to any phone, any time. You complete
your setup with TCN, select the accounts for your campaign and let TCN and Collect! take care of the
rest. The TCN Module saves valuable time, increases productivity and maximizes your returns.
Collect!'s Batch Processing feature enables you to schedule TCN call campaigns and to process returns.
Campaign scheduling and reporting are easily accomplished without leaving the Collect! interface.
Behind the scenes, Collect! logs into the TCN web site for you, uploading data, retrieving results
and updating your database records.
 TCN supports international dialing. Please get in touch with Client Services
at TCN for international pricing and information. TCN Contact
Information
Click Here to View this Form.
Click Here to Close this Form.
Before covering customization, the next several paragraphs will revisit general function and
shipping defaults of the module and then progress into modification.
Recap
Use of the interface requires that you have established an account with TCN Broadcasting and that
you have entered your TCN login credentials in the TCN Setup screen in Collect!.
Collect! ships with 2 default reports for outputting to csv format the accounts you have selected
to be in the call campaign. It also includes 4 default imports maps to incorporate the call results
into your system after each campaign has completed. Your collectors who take live calls and notate
their accounts is only one aspect of campaign call result. The campaign call results download
contains all the unattended results such as No Answer, Busy, Operator Intercept, Answering Machine
Detected etc. Having these call results on your files is necessary if you are needing to provide
audit trail of account worked frequency in your Notes and/or Contacts Tabs on your debtor accounts.
Both the reports that generate the call list to upload and the import maps to bring in the call
results to your system can be modified to suit individual company needs. However, if you make
modifications on the Collect! side that add, remove or change the order of the csv file columns,
you will also need to modify the templates on the TCN website to match your new versions. Failing
to do this will cause your call lists to be rejected as not being formatted correctly to be read
by TCN and your call results not being imported properly into Collect!.
This topic will cover basic template customizing. You may wish to obtain TCN tech support to assist
you with creating or customizing the templates on their so that the corresponding processes on the
TCN side map correctly with the changes or new formats you have chosen to use.
 To position you for efficient communications with TCN Technicians, please be advised that
there is a reverse terminology that exists depending on which side of the interface is being
considered. If you are wanting to speak of your call report that you send them, then to them,
that is an import. If you are wanting to speak to them about a download of call results,
then that is a report to them and an import to you.
When you process campaign results into Collect! with an import map, you are writing the dialer
attempt history that did NOT result in a live contact into your system. You have the choice of
having these results updated to debtor accounts Notes only, a completed Phone Contact event only,
or BOTH if you run the import process twice and select each import map option.
On the Collect! side of the interface, there are two processing functions in the menu path
"Tools\Batch Processing\Process TCN Campaign":
Schedule Calls
This process uses a Collect! report from "Print\Reports and Letters" to create a call list to send
to TCN. The default Collect! reports use the same layout as the default Collect!/TCN
Import under the Import Templates on the TCN portal.
TCN Reports shipped with Collect!:
- TCN Export Sample - Dialer Contact - looks for a Phone Contact with Dialer in the
Description field
- TCN Export Sample - TCN Status - looks for Debtors with TCN in the Status field
Download Report
This process uses a Collect! import, from "File\Import/Export\Import File\" to incorporate call
results obtained from TCN back into Collect! Example, if the campaign had Tel Res/No Answer as
a result for a specific debtor, that information goes back to the account it pertains to.
Each import map uses the Default Call Report under Report Templates on the
TCN portal.
TCN Import maps shipped with Collect!:
- TCN Call Report: Rec - with call recording and no note line
- TCN Call Report: Rec & Note - with call recording and note line
- TCN Call Report: No Rec - without call recording and no note line
- TCN Call Report: No Rec & Note - without call recording and with note line

Customizing
You can modify all of the Collect! report/import templates AND the TCN templates imports/reports,
as long as you make sure that there is parity between both sides of the process.
For example, consider when your clients send you a new business csv data file. If they inserted a
column in the middle of the spreadsheet, then your import map wouldn't work anymore because
everything would be out of alignment. The simple rule of editing or creating whole new routines
for campaigns is this: make sure your output matches their input for number of columns and content,
and that their output for your import also has the same one-to-one field mapping.
Alternatively, you may wish to have Technical Services on both sides provide you with pricing for
custom services to set up new templates for you.

TCN Report Template
Here is an example of a TCN Report Template.
TCN Report Template
This template is used by TCN to generate a csv results report.
Sample TCN csv with Campaign Results

TCN Import Template
At the TCN website, you can store your own templates and Collect! will retrieve them when it
populates the pick lists in the TCN batch processes.
Here is an example of a TCN Import Template.
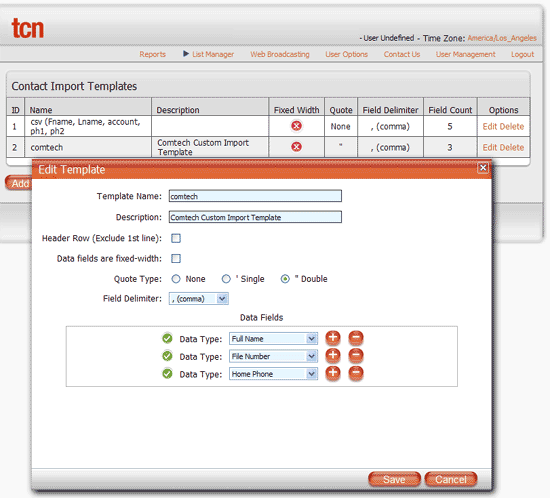
TCN Import Template
This template is used by TCN when Collect! sends a call campaign. TCN imports the data in the order
specified in the template.

Verifying A Call Campaign
Please ensure that you are sending only the accounts that you intend to be dialed when generating
your call campaign lists. Running the report directly from your Print Menu and examining the
output prior to uploading to TCN will ensure you are sending lists which contain what you intended.
 You can add conditions to filter results to include or exclude specific criteria to fine-tune
your call campaigns for best results. See the Help page called How To Use Where and If
Condition for details on these higher order Report Writer functions.
Example: You can exclude statuses such as DIS or BAN which may still be Mode Active in your database;
impose list date ranges to control call list size to optimize new(er) account campaigns
from shelf inventory campaigns; create a min-max balance threshold to be dialed, etc.
If you are handy with report writer logic, you can make custom modifications to the default call
campaign reports that you receive with your system OR contact Technical Services to inquire about
pricing for the changes you'd like to have made.
 Keep your data clean.
If your collectors become aware of bad or invalid phone numbers, they are best to be removed from
phone fields so as to not waste dialer time or risk complaint of a number continuing to be called
after it was advised that the number wasn't correct for the debtor on the file. As well, discourage
your staff from using all 9's, 0's, 1's, 2's etc. or any other garbage data in the phone fields.
Your campaign result metrics available through TCN will not have valuable stats if your call lists
are inflated with uncallable accounts - it will minimize your campaign's effectiveness, mask your
true contact percentages and erroneously inflate your inventory penetration rates if your lists
contain account uncallable but extracted due to garbage data in the phone fields.
If you wish to retain audit trail information of phone numbers tried and removed, you have two ways:
- Use the Access Rights preference switch turned On for "Log to Notes" for each phone field, OR
- Use the Phone Tab to maintain historical records by using the Active Yes/No pick list for disabled phones as well as
removal from the front, main debtor screen.

TCN Scrub By ZIP
Scrub by ZIP is a service that TCN provides for establishing Do Not Call areas. You must activate
this with your TCN provider and they will ensure that your TCN templates are updated to process
ZIP codes.
 Currently, Scrub By ZIP only works with United States Zip Codes. Canadian sites can check
with their TCN representatives to determine if a similar service exists for Canadian
Postal Codes.


Payment Processing Module
The Payment Processing Module enables you to process credit card and ACH payments electronically
through Collect!'s Payment Processing connection. This is a full-featured solution for managing
single and recurring payments made by credit card or by bank draft. External payments posted at
the Payment Provider web site are also reconciled and posted within Collect!. Recurring scheduled
payments are fully managed within Collect!'s promised payment system.
Click Here to View this Form.
Click Here to Close this Form.
This page is the guide for processing electronic (ACH and card) payments in Collect! via the
integrated Payment Processing module.
 Before beginning, Payment Processing must be setup first. Please refer to the Help document
How to Setup Electronic Payment Processing for more information.
Payment Processing Form

Taking A Payment
A payment can be processed on both a Debtor and a Client.
- To access the payment form, click the "Pymt Form" button (Payment Form on Clients) in the
bottom right section, below the OK button.
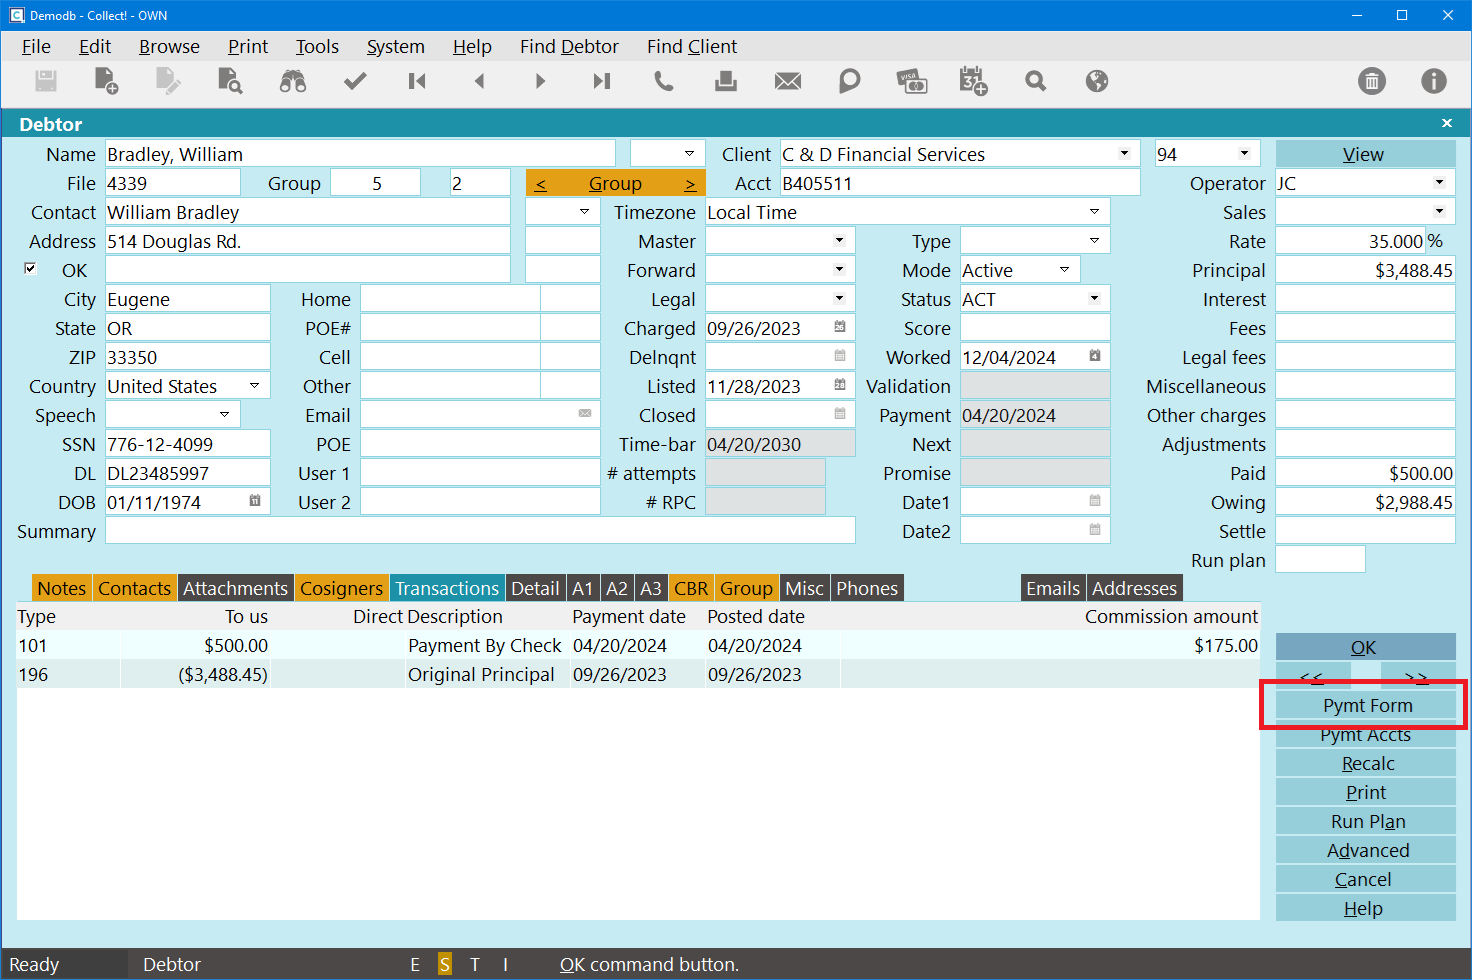
Debtor Form - Payment Form Button
- Select a Payment Processor.
- Select a Payment Method. If one does not exist, click "Add New Account" to create one,
then select it from the list.

Add a New Payment Account
- Enter the Payment Date.
- Leave the Frequency as "No Repeat" for a single payment. See Setting Up a Payment Plan
below for recurring payments.
- Enter the Payment Amount.
- In some cases, you may be presented with a script to read back to the Debtor about the
convenience fee. If you are presented with this script, read it back to the Debtor
and click OK. You can click View Script, above the fee, to see it again.
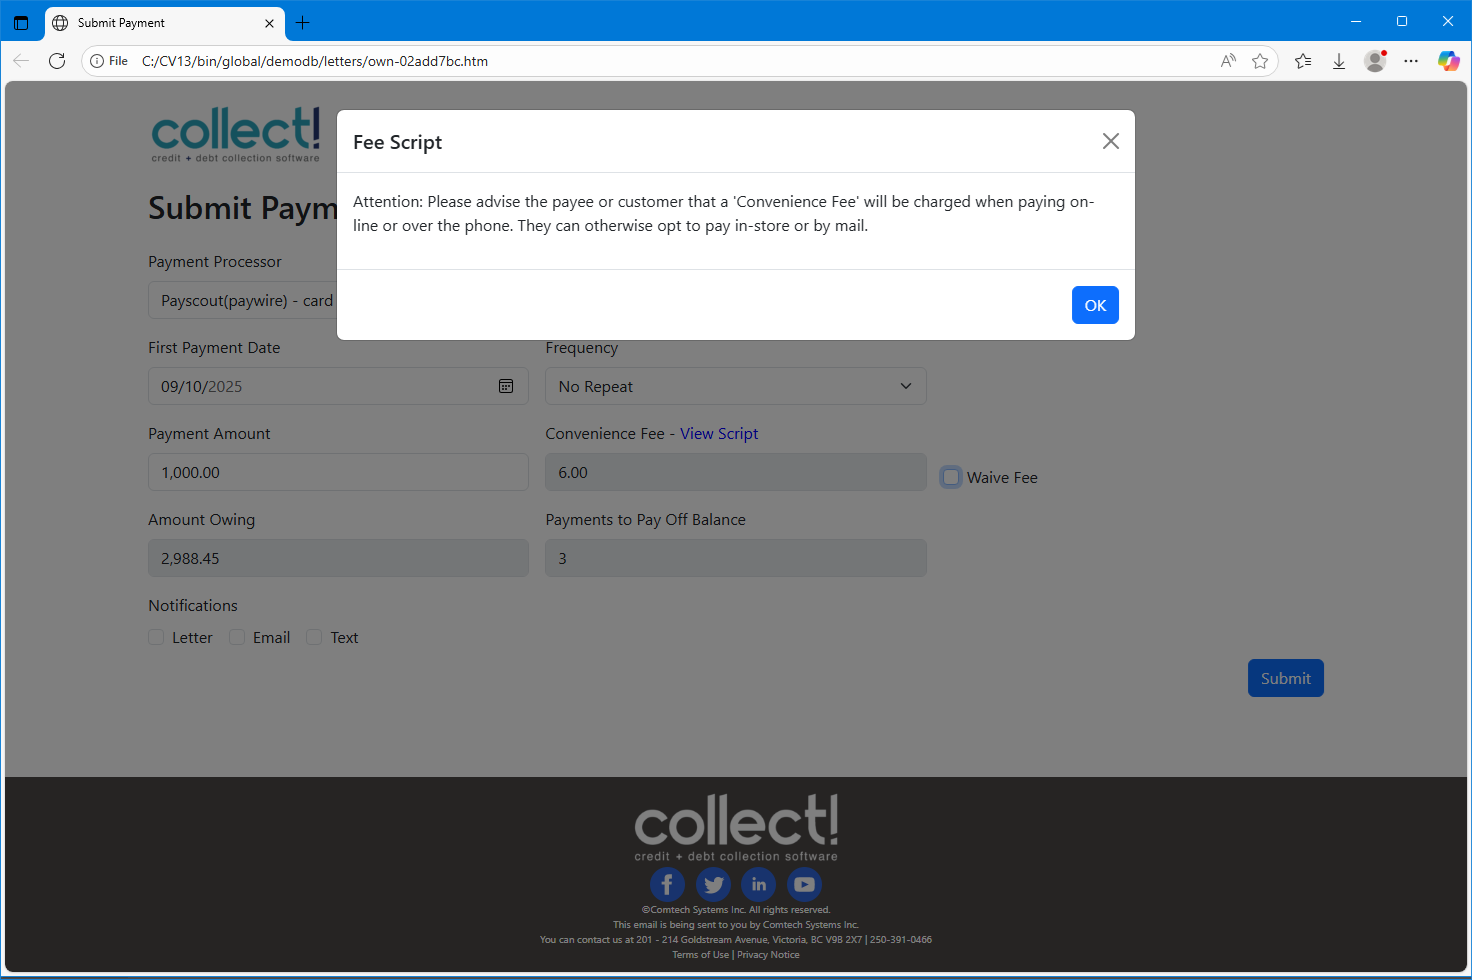
Convenience Fee Script
- If you have a gateway that support fee waiving, you can check the Waive Fee box to waive
fees for this payment.
- If this payment is to apply to the whole Debtor Group, instead of just the single account,
check the "Apply Plan to Group" box. This box only appears if the feature is enabled on
the Gateway.
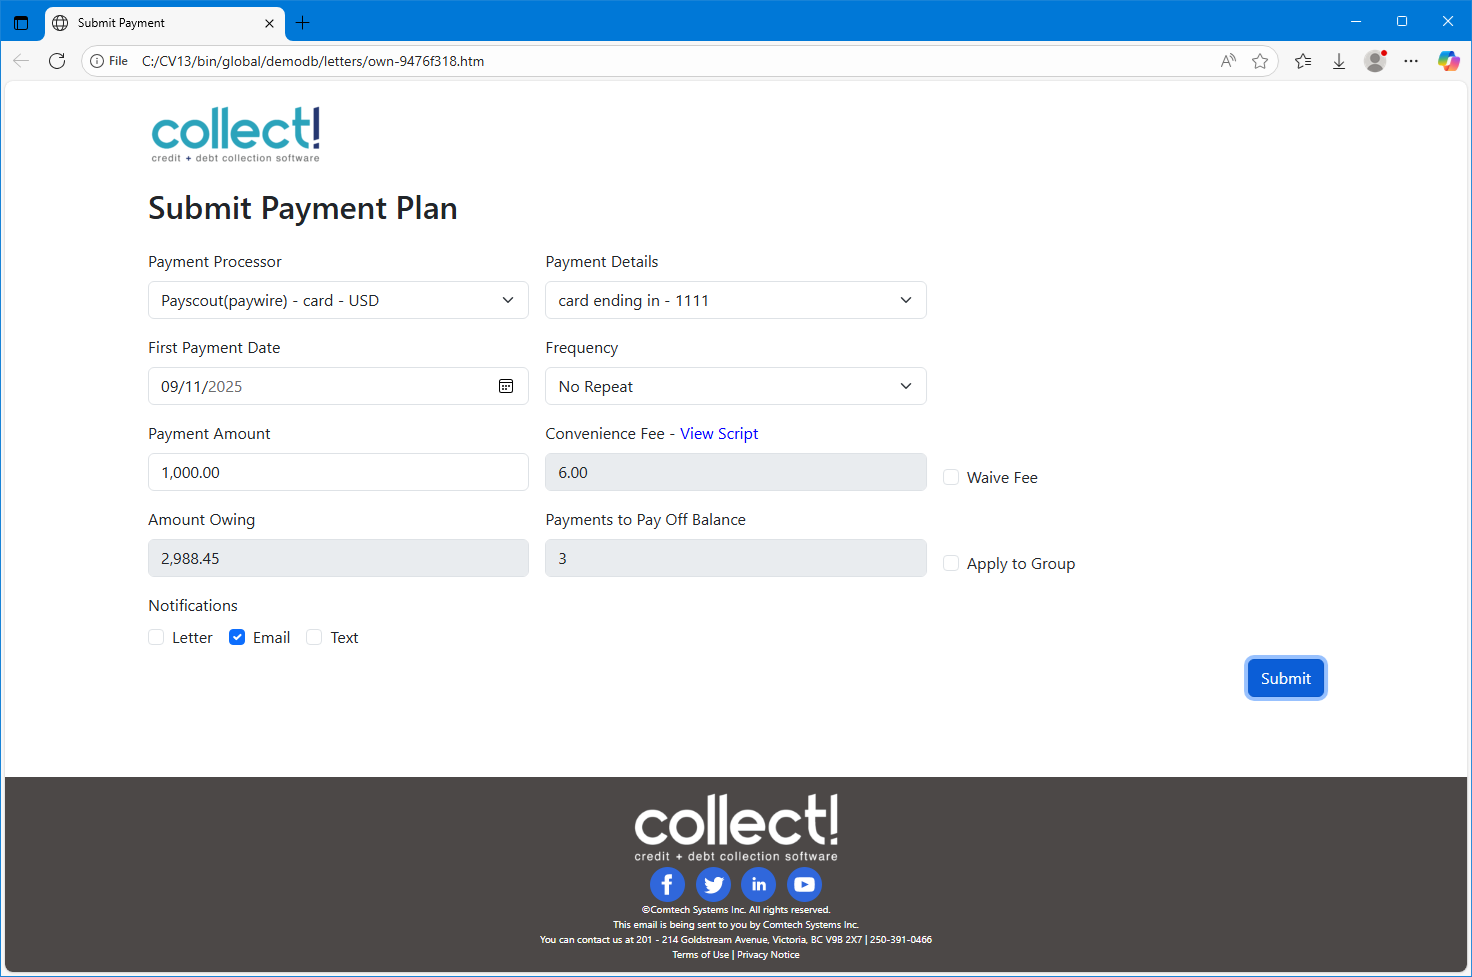
Payment Form - Single Payment
- Once the details have all been entered, click the Submit button to submit the payment.
 If the payment encounters an error, the system will create a post-dated transaction
and retry it when the system next reconciles.

Setting Up A Payment Plan
Setting up a payment plan is almost the same as the Taking a Payment section above. The main
differences are the Payment Frequency and Notifications.
- Open the Payment form.
- Select a Payment Processor.
- Select a Payment Method.
- Enter the Date for the First Payment.
- Select the Payment Frequency.
- Enter the Payment Amount.
- If applicable, read the Convenience Fee script to the Debtor.
- If applicable, check the Waive Fee box to waive fees for this payment plan.
- If applicable, check the "Apply Plan to Group" box.
- Enter the Number of Payments to process.
- If notification letters are configured, and the Debtor would like to receive a reminder
notice before the payment is due, select the Debtor's communication preference.
- Once the details have all been entered, click the Submit button to submit the payment.
 You can create multiple payment plans on the same account. For example, a monthly plan
on the 5th of the month and a monthly plan on the 20th of the month.
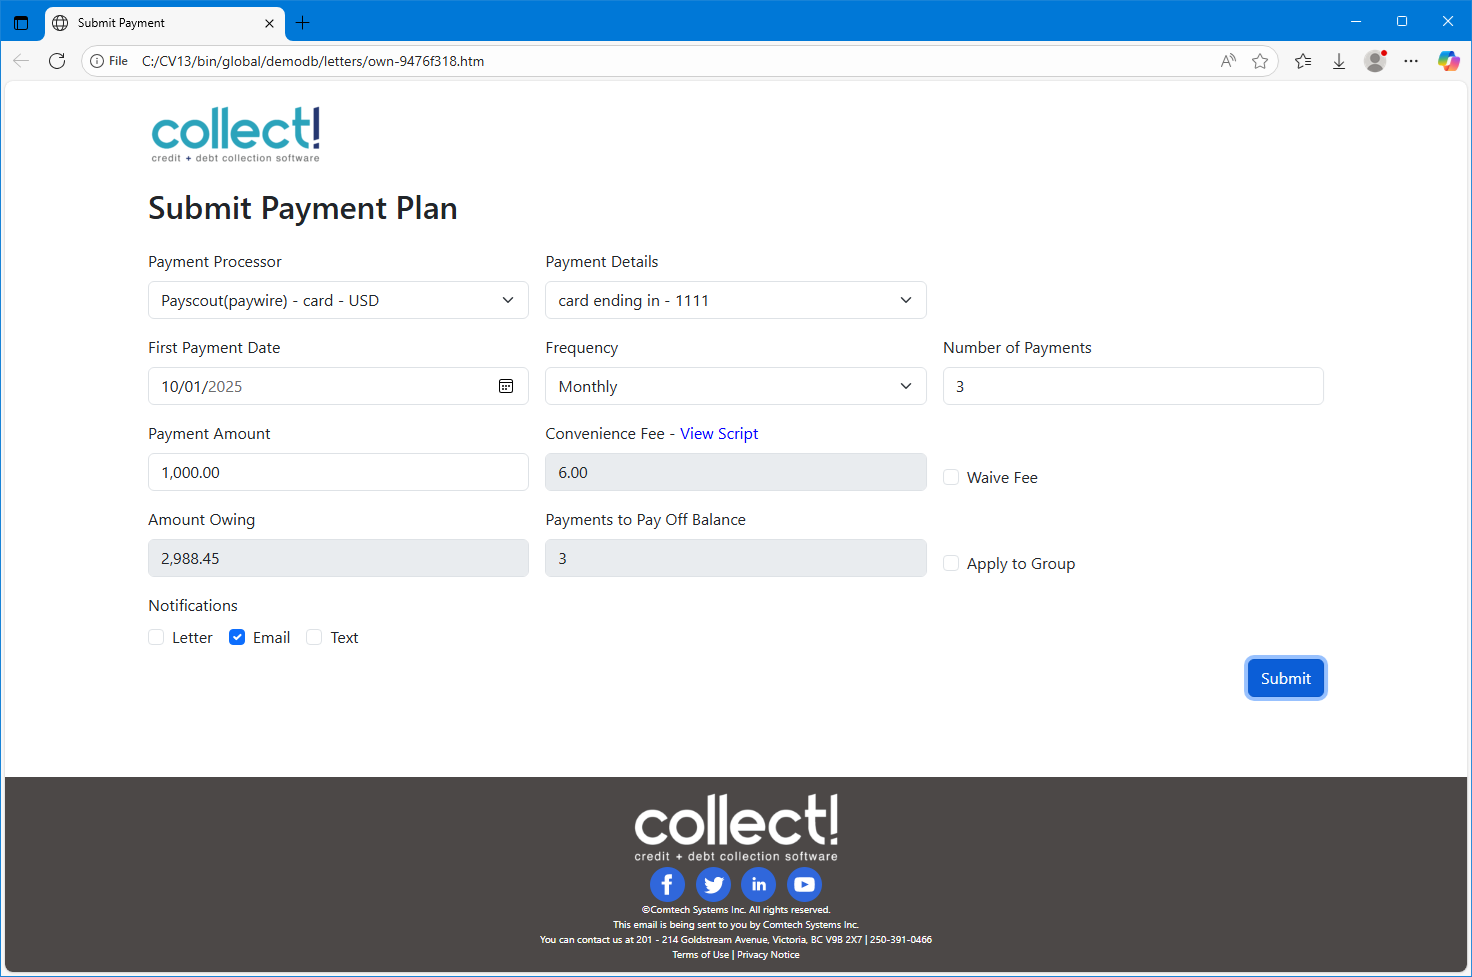
Payment Form - Payment Plan
After the payment plan is setup, you will get the following screen.

Payment Form - After a Plan is Created
In Collect, you will see the post-date Transactions.
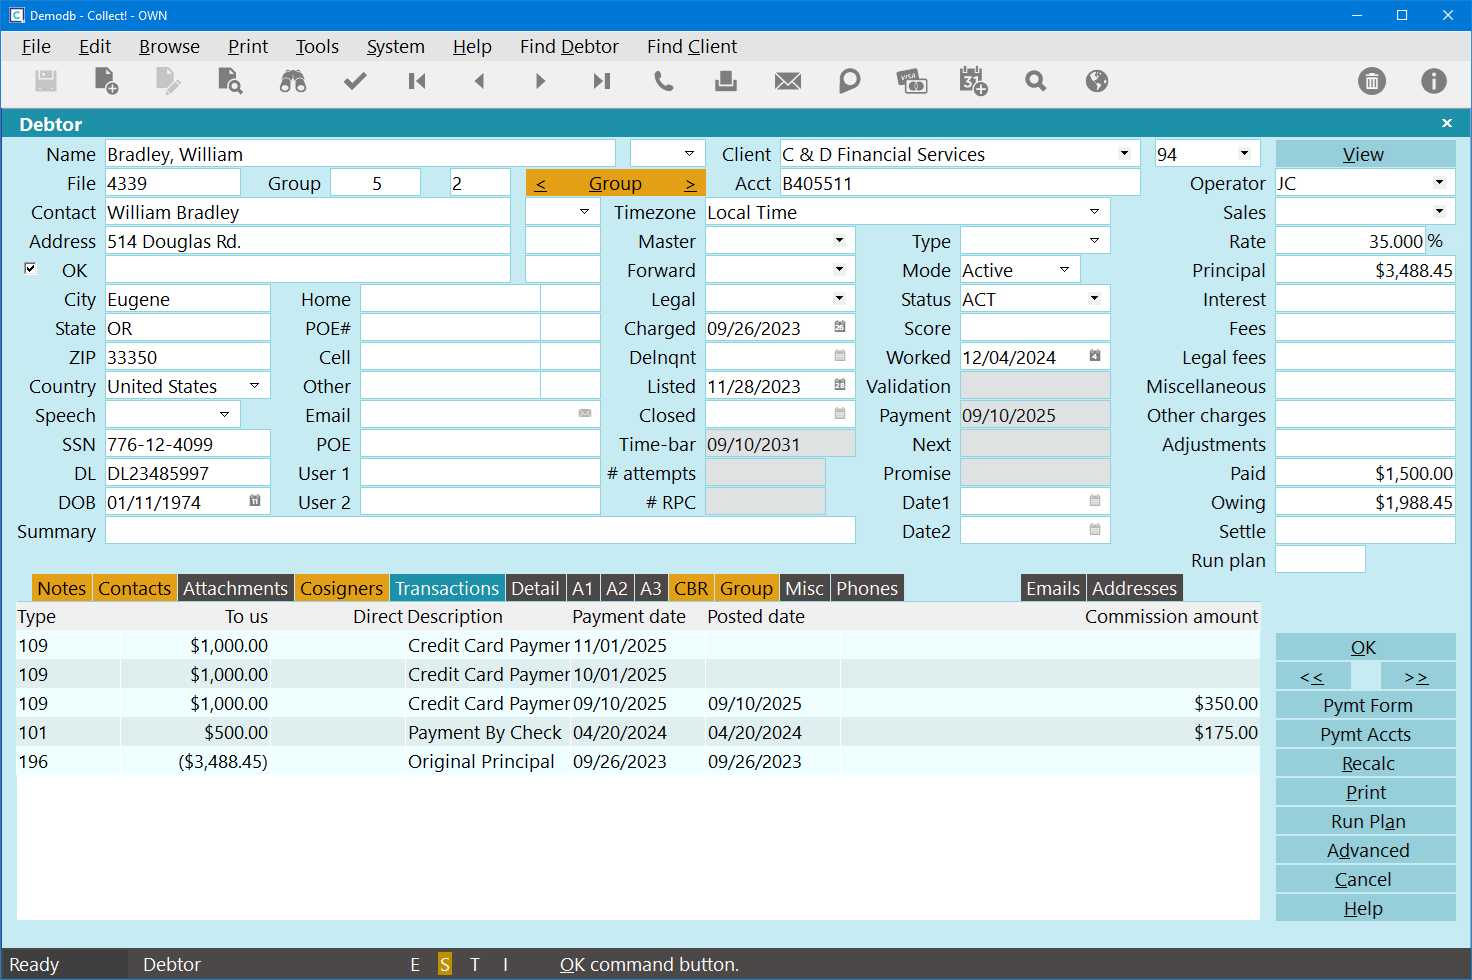
Post-Dated Transactions
In Collect, you will see the Contacts for the payment plan.
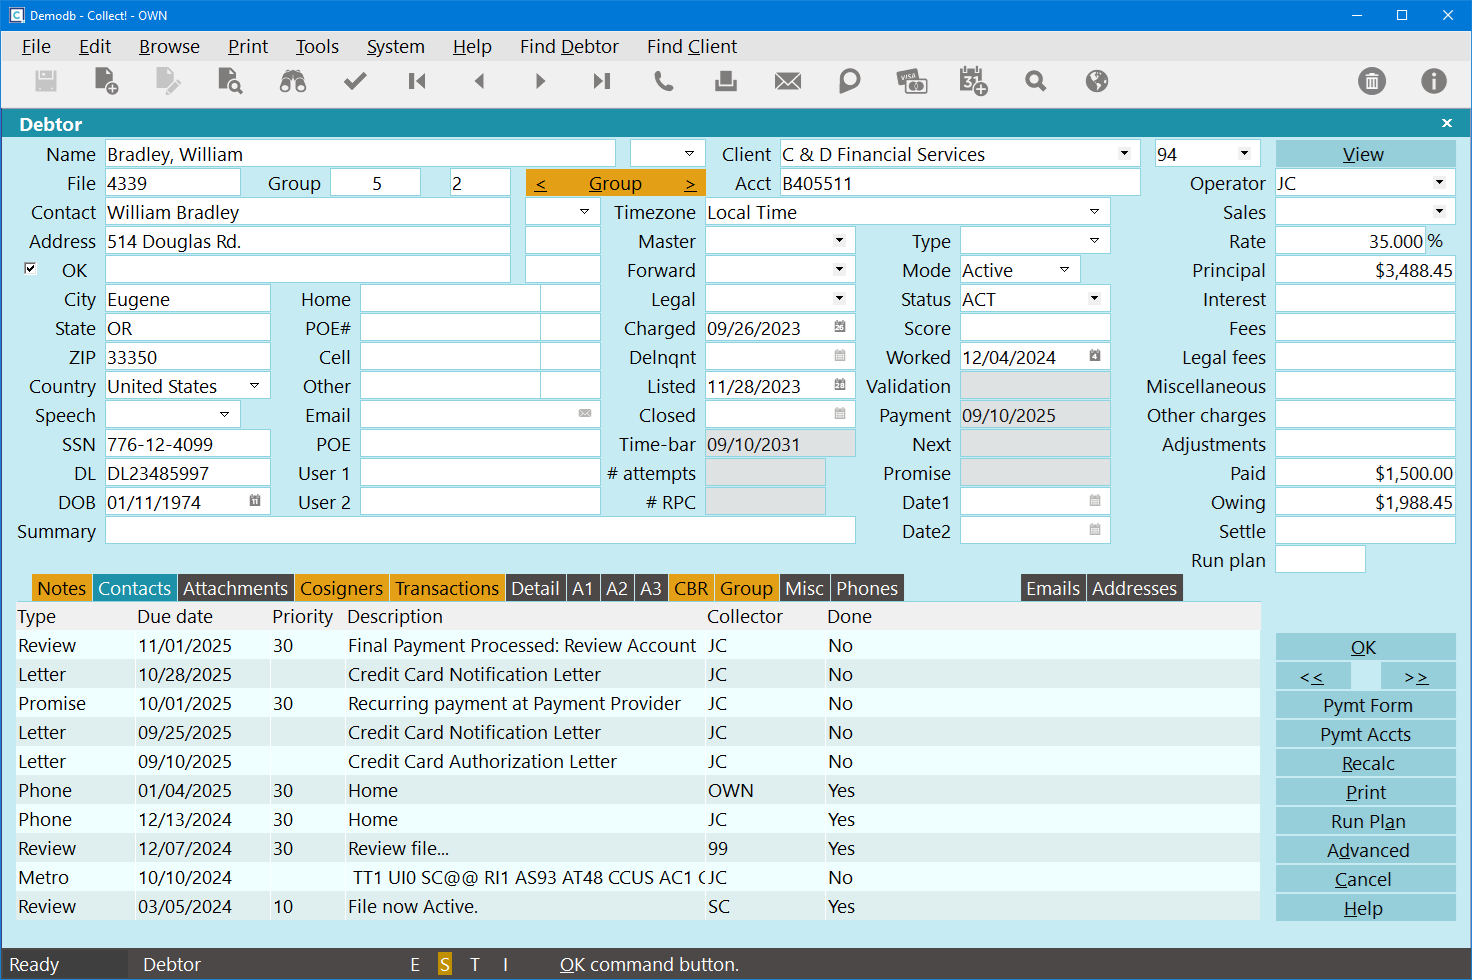
Payment Plan Contacts

Payments To Groups
 This feature is not currently available for Client Groups/Hierarchies.
When checking the Apply to Group box on the payment form, the system will apply the payment (plan)
to the group, where the mode is not closed. It will base the owing on the Active Owing field on
the Group tab.
 If you have suspended accounts that you would like to exclude from group payments, then
check the "Exclude from Group Totals" box on the Group Member Setup form.
Payments to groups are currently paid by Listed Date, from oldest to newest, EXCEPT for the account
that has the payment plan. To avoid the EFT Letters and Promise contacts from being deleted or marked
done early due to a Paid in Full Contact Plan, the account with the payment plan is paid LAST. This
is done rather than moving the EFT Notices to another group member because other group members may
not have the correct or current Address, Email, or Texting number.
- Open the Payment Form.
- Fill in the details.
- Check the Apply to Group box.
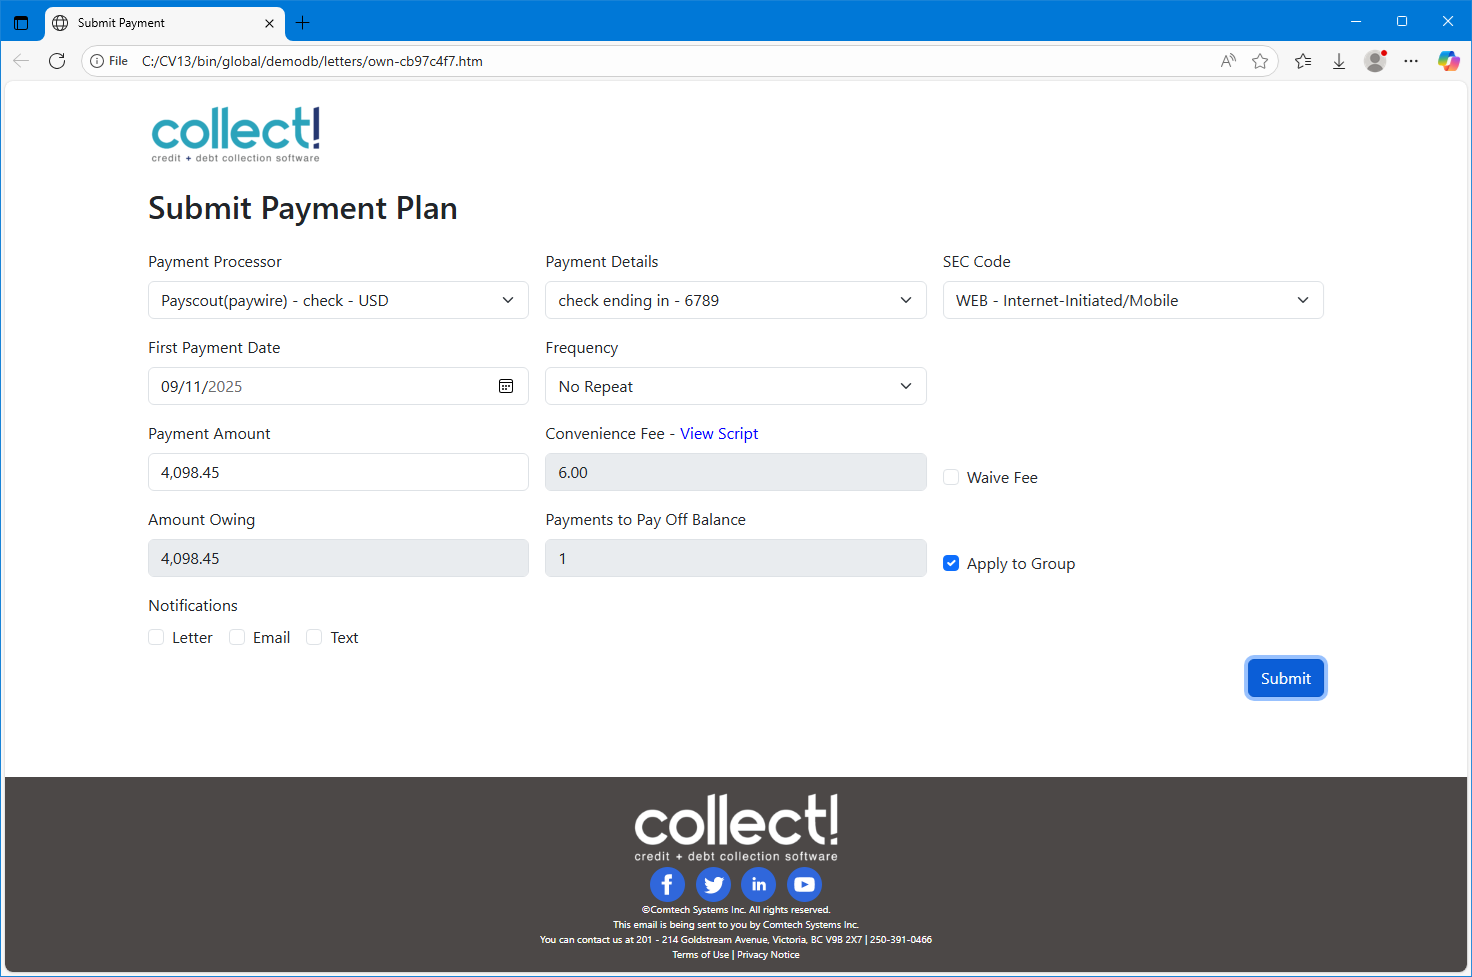
Payment Plan Form - Group Payment
- Click OK to submit.
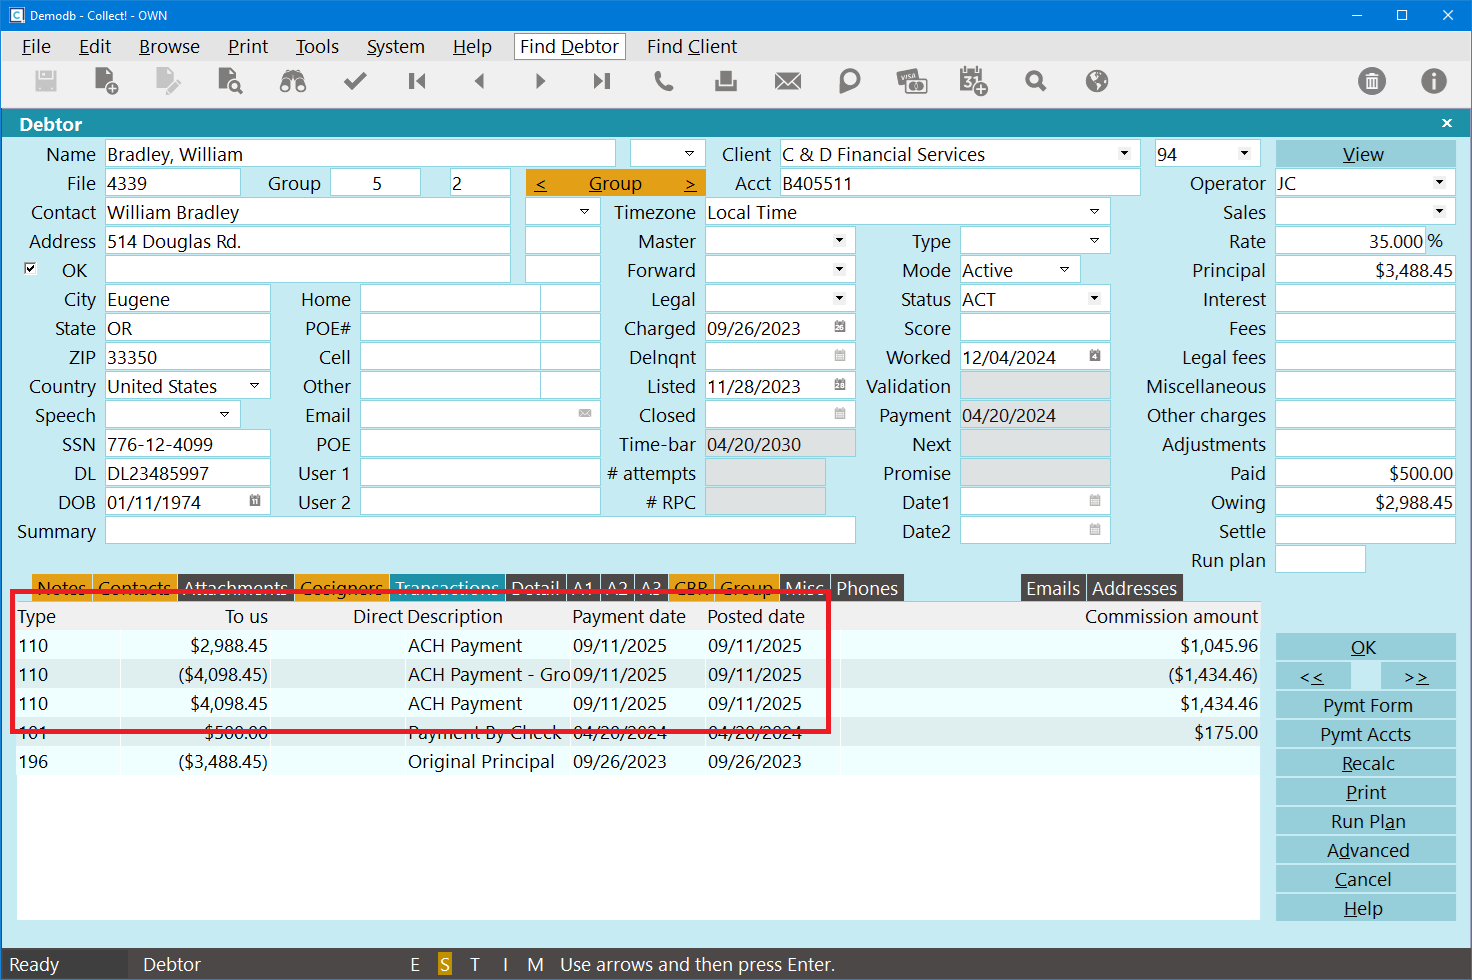
Group Payment Transaction List
When a payment is posted to a group, the system will post the full payment amount to the debtor,
then it will post a reversal. The original transaction will have the Omit from Client Statement box
checked, but not the Omit from Daily Cash Report. The reversal will have both boxes checked, and will
append "- Group Reversal" to the Description field.
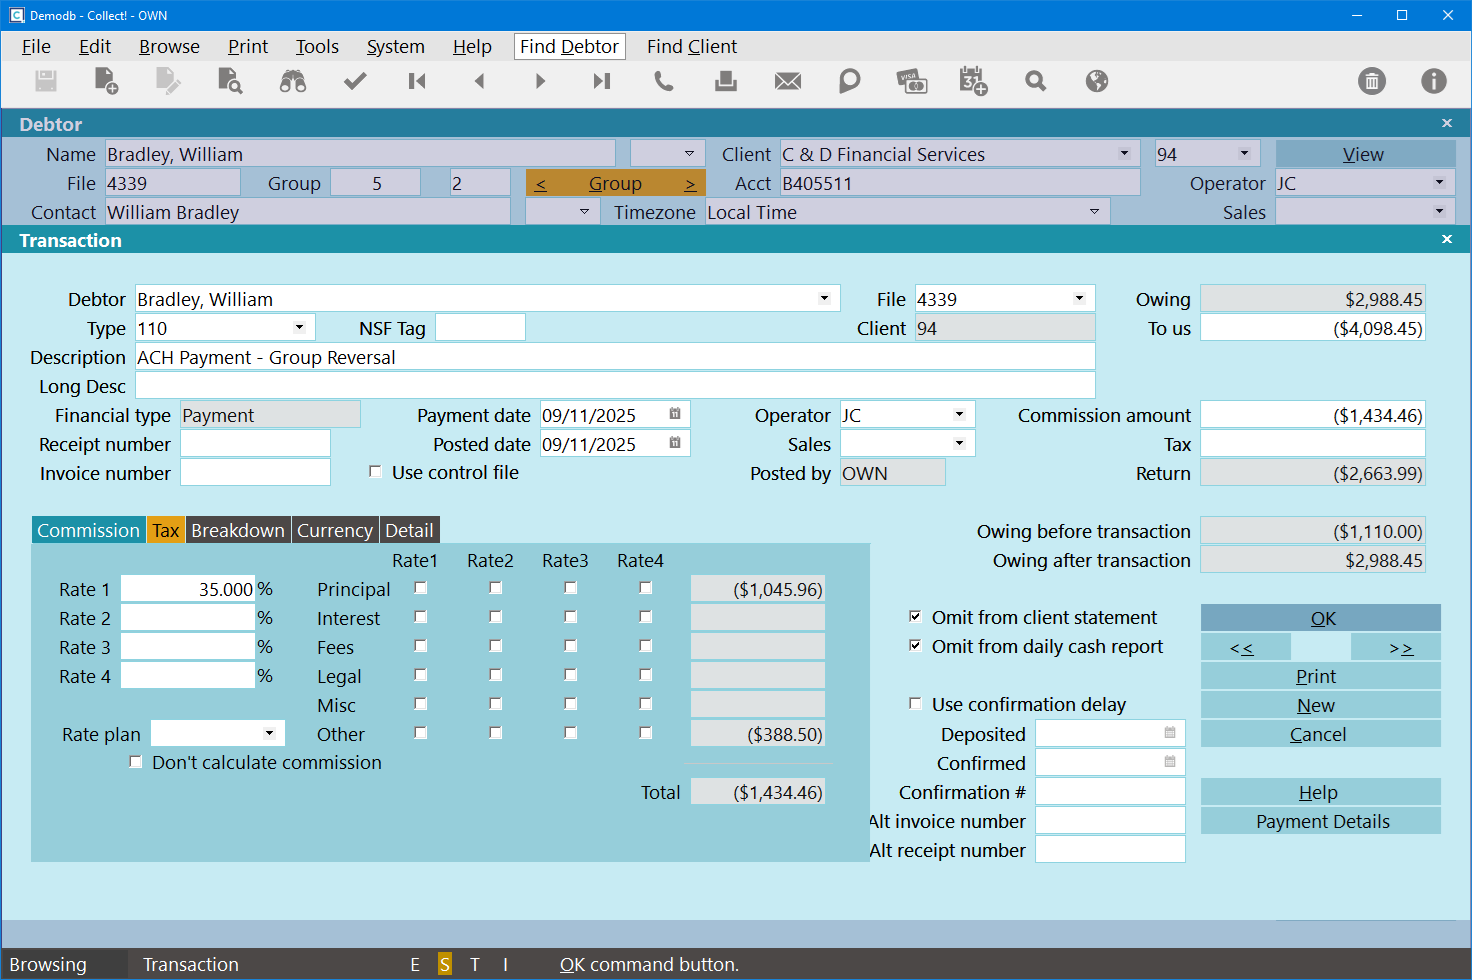
Group Payment Reversal
The system will then post the payments to the applicable group members. These payments will have
the Omit from Daily Cash Report box check, but not the Omit from Client Statement box.

Deleting A Payment Plan Or Post-Dated Payment

Payment Form - Review Payment Plan
- Open the Payment Form.
- Click the Delete button next to the plan that you want to delete.
- On the Delete Payment Plan box, click Delete to confirm.

Viewing Stored Payment Information
- To view the stored payment information, click on the "Pymt Accts" button (Payment Accounts
on the Client form).
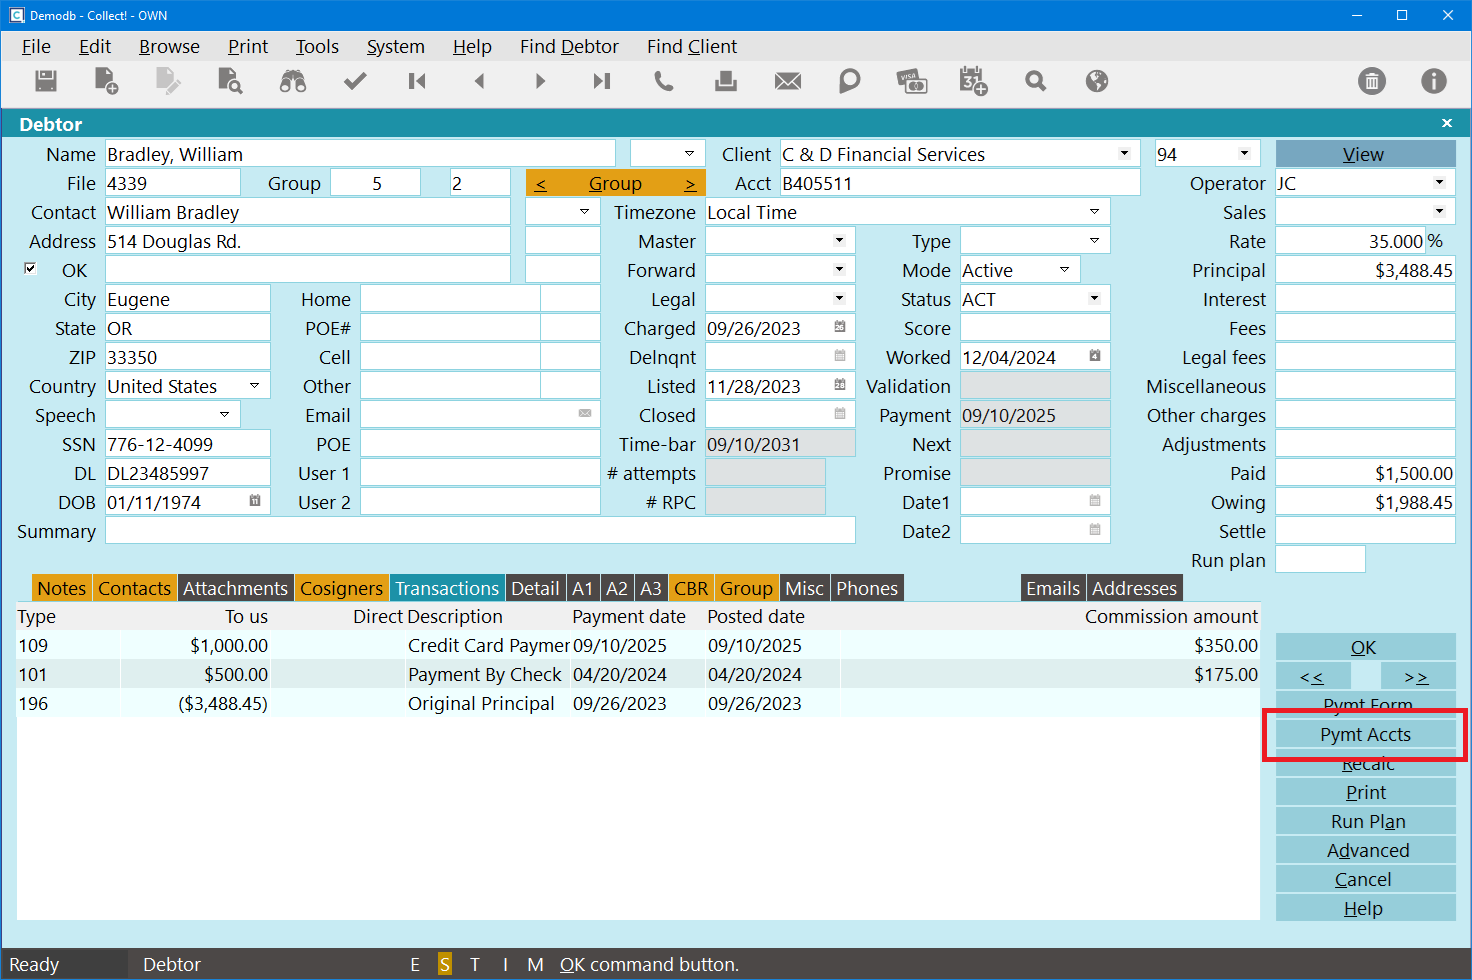
Debtor Form - Payment Accounts Button
- Select one from the list to view the Payment Account Information form.
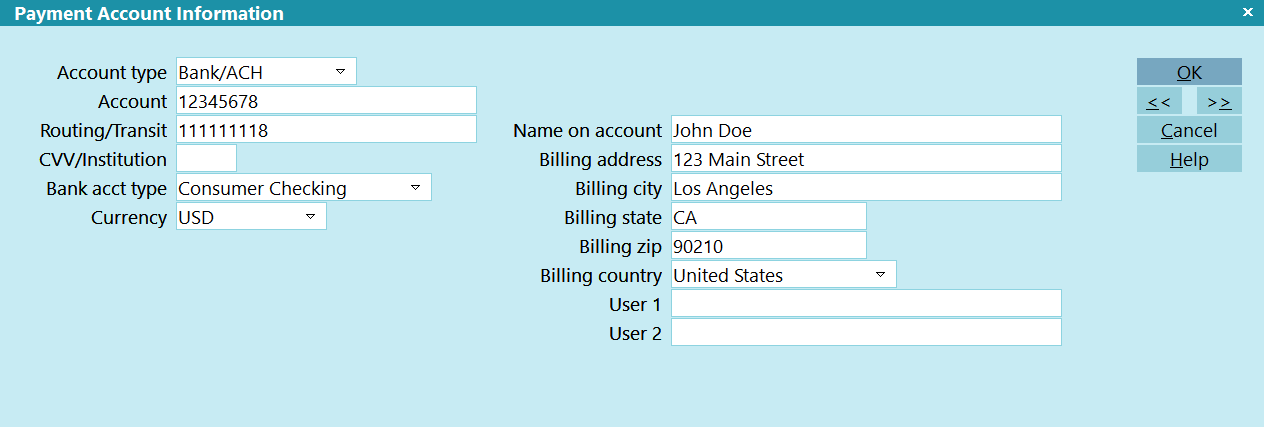
Payment Account Information: Check/Bank/ACH
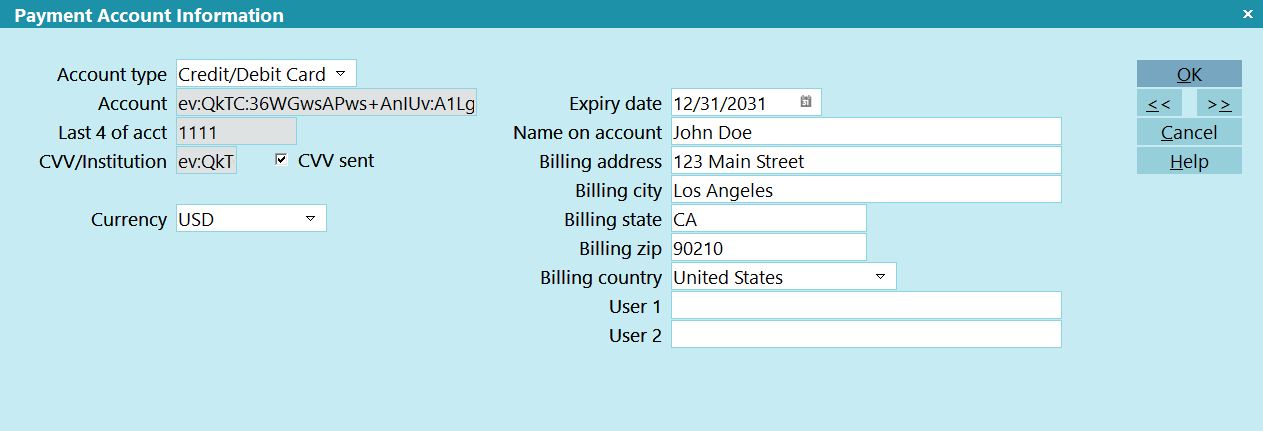
Payment Account Information: Credit/Debit Card

Editing Stored Payment Information
As card data is encrypted, you cannot edit it within the Collect! application. ACH/check data
can be edited in the Collect! application using the forms above, and so can card expiry dates, but
full card editing should be done via the below instructions. Billing name and address can also be
updated within the Collect! application.
- Click the Payment Form button on the Debtor.
- Select either a card or check Payment Processor.
- Select the Payment Account that you want to edit.
- Click the Edit Account link above the Payment Account field.
- Update the applicable fields.
- Click Edit Account to save.

Transaction Details
When post-dated payments are created for payment plans, minimal information is stored on the
Transaction. After the payment is processed, the transaction is processed, including any
Contact Plans and recalculations, then the remaining details from the gateway are populated
in the Debtor Payment Details form.
Unposted Payment
- To access the payment details, open a Debtor Transaction or Client payment.
- Click the Payment Details button.

Transaction - Payment Details Button
Explanation of Fields
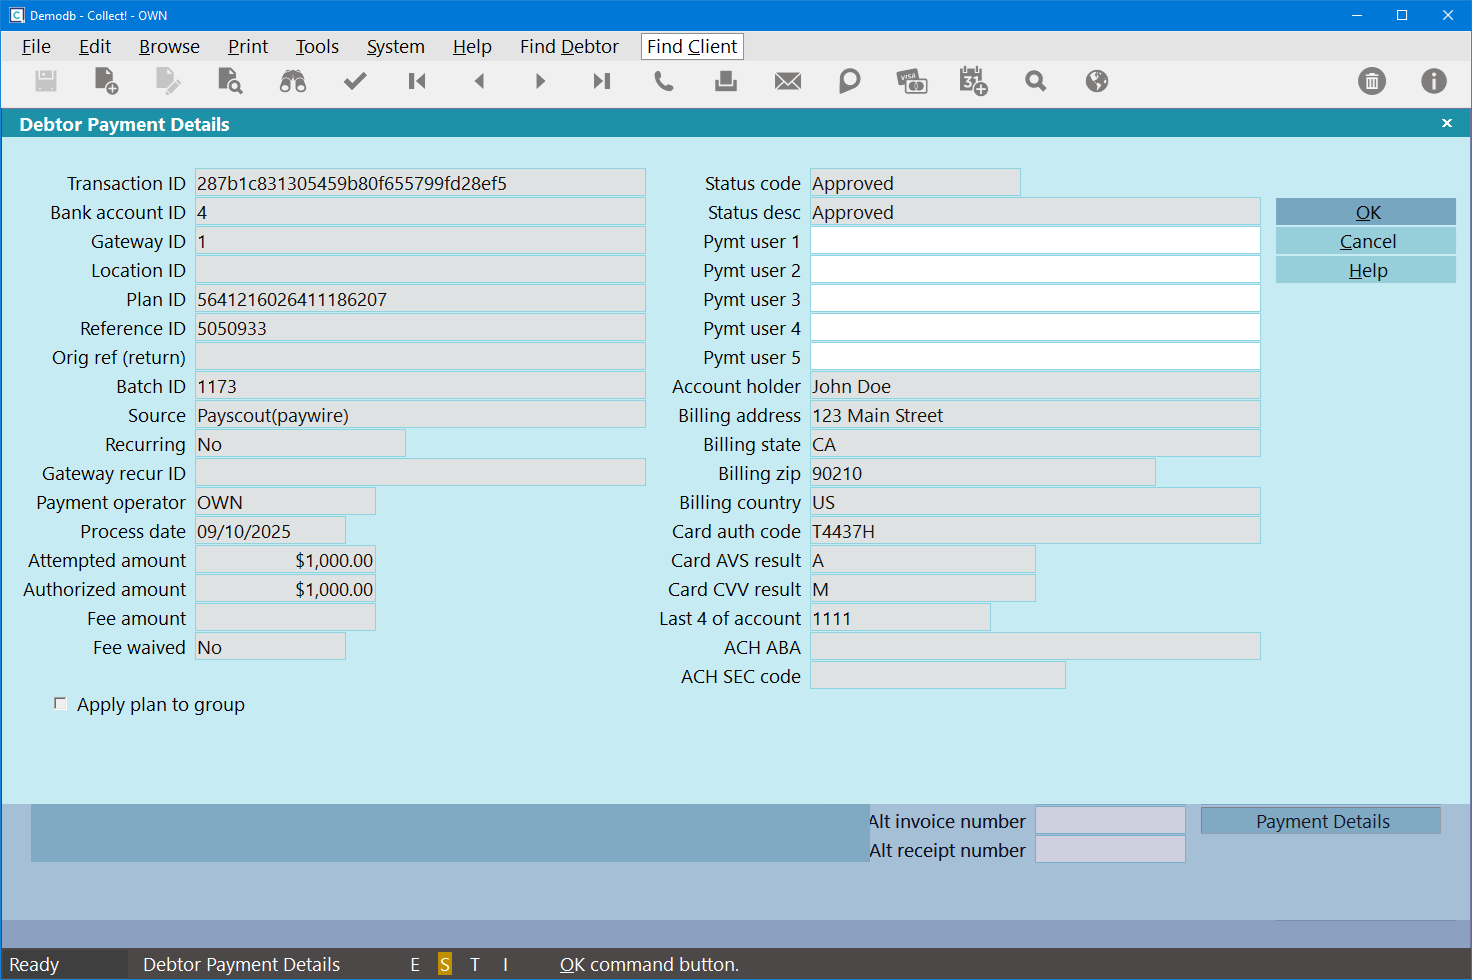
Payment Details

Changing Payment Information
Banking information can be updated via the Collect! user interface.
Card Information
- Click on the Payment Form button in the bottom right of the Debtor form.
- Select the Card gateway from the gateway list.
- Open the applicable card record.
- Enter the new information.
- Click EDIT ACCOUNT to save.
ACH/Check/Bank Information
- Click on the Payment Accounts button in the bottom right of the Debtor form.
- Open the applicable ACH/Check record.
- Update the applicable information.
- Click OK to save.

Reconciliation
There are 3 ways to reconcile payments
- One gateway at a time, manually.
- All gateways in your system, manually.
- All gateways in your system, automatically via the Task Scheduler.
Individual Gateways
- Navigate to System\Preferences\Payment Processing Setup.
- Select a Gateway.
- Click the Reconcile button.
All Gateways
- On the Main Menu, click the Daily Administration button.
- Click the Payments and Charges button.
- Click Reconcile Payments.
 Please refer to the Help document How to Configure Scheduler Tasks for information
on automating the reconciliation.

Troubleshooting
After you click the Payment Form, the form has a 15 minute time limit before you have to close and reopen.
If you get errors, the post-dated Transaction should be created and retried during reconciliation.
Errors during reconciliation may occur if you having internet connectivity issues, or if one of the
upstream service providers is unavailable.


Making Changes To Your Settings Later
Collect! is flexible. You can modify settings at a later date as situations change or your preferences
need to be modified.

Cutting Over To Collect! From Another Software
No two systems are the same. Many aspects need to be implemented. By spending time at the beginning,
understanding what is needed and preparing for it, you can avoid frustration and minimize any down time.
Please refer to the Help topic How To Have A Successful Data Conversion for more information.

Summary
Collect! is a very sophisticated software product which can perform a variety of complex tasks for
you automatically. This requires a solid understanding of how the software works. Please take the
time to understand the basics of Collect!. You will find endless surprises at the work Collect! can
do for you, if it is properly set up right from the start. As you learn more about Collect!, given
your good understanding, you can easily make additional modifications as needed.

| 


 Transaction types can control processing of revenue from commissions and fees. They determine
how information appears on your client statements.
 WARNING: This area can be very complex. It is advised not to delve into this area unless you are
COMPLETELY familiar with Collect! and its forms. Instead, try altering the user level on
an operator's form. It may be possible for you to
Was this page helpful? Do you have any comments on this document? Can we make it better? If so how may we improve this page.
Please click this link to send us your comments: helpinfo@collect.org