Setup Checklist
Setting up your Collect! software is the most important aspect of
preparing to use Collect!. It is very important that you understand the basics
so that the transition from using your existing system to using Collect! is
easy and efficient.
These setup tips are guaranteed to save you from needless frustration.
Please take the time to print this page. You will want to review the
sections you need in your day to day operations.
Introduction
By default, Collect! is set to run an average Collection Agency. Your way
of conducting business may be different. Perhaps you plan to use Collect!
to track your delinquent Accounts Receivable, in a Credit Union, for
Contact Management, or a variety of other businesses. Collect! is readily
modified to suit your needs. The average Collect! user utilizes only a
portion of Collect!'s power.
Most system users have collection strategies which work for them.
Collect! is extremely flexible and can be modified to use your
strategies. You don't have to change the way you do business;
instead Collect! will change to suit your needs.
This checklist shows how you can control Collect! for your own use.
It is divided into sections representing the main operations you
perform.
- Contact Management
- Financial Management
- Multi User Networking
- Optional Add-On Modules

Contact Management
Contact Management tasks include all the day to day operations
you perform to work your accounts. Work queues, letter printing,
entering new accounts, and batch processing are examples.
To use these functions efficiently in Collect!, set up the following
areas right from the start.

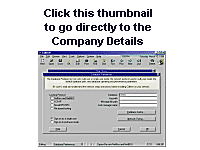
Company Details
Enter information about your company in the Company Details
form. When you enter your company information, please be aware
that, by default, this information is printed on a variety of reports
and letters. You may change the information as needed.
Access your Company Information by selecting System from
the top menu bar. Then select Company Details from the list
of choices that is displayed. Alternatively, through the Main Menu,
select System Administration, Setup and Configuration.

Client Setup
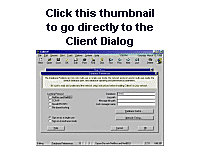
Clients are entered into Collect! before debtors. Once the client
information and the appropriate settings are in place, it is easy
to enter the new debtors through the Client dialog. Entering
information in this order minimizes data entry, because each
time you create a new debtor through the Client dialog, basic
information is automatically placed in the appropriate fields.
It is very important that you understand the client setup to
facilitate any special requirements each client may have for debtor
records and reports.

Debtor Setup
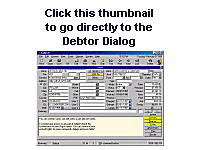
The Debtor form is used to store all account information.
All account related information is stored in areas accessible
from the Debtor screen.
Entering new debtors and setting them up requires a good
understanding of each information field in the Debtor form.
This is particularly important when planning your letters
and reports because the bulk of reported information is pulled
directly from this form.

Debtor Status Codes
What are Status Codes? Is the debtor bankrupt (BNK), have they
skipped (SKP), or are they active (ACT)?
Use a basic three character code to tell you the current state of
each account. It is important to put some thought into this aspect
so that you can define status codes which have meaning for
you. With status codes, you can select clearly defined groups of
debtors and perform specific actions on their accounts. This information
may be accessed to produce debtor information reports based on
assigned status.

Reports And Letters
You may build your own reports and letters or modify the existing
reports in the system. This template driven system can print virtually
any information you see in the program.
Create reports and letters to suit your business needs. Edit the
existing Reports and Letters by selecting Print from the top
menu bar. Then select Customize Printing, Edit Report Templates
and select the report you wish to modify.

Contact Plans
The Contact Plan is Collect!'s expression for "collection strategy."
A contact plan is a series of events which may take place
immediately or at predetermined times in the future, and are to be
processed by designated operators. Contact plans eliminate a
great deal of manual work and optimize your time.You can set
up automatic and semi-automatic sequences for processing debtors,
printing letters, posting transactions, closing accounts and more.
Edit the contact plans already in Collect! or create new plans.
Before you use complex scenarios, you need a good understanding
of what a Contact Event is. So we recommend that you work the
debtors in a fairly manual way until you can define the actual flow for
your contact plan to take upon activation. If you seem to be repeating
steps to an account, automate the sequence by creating a contact plan.

Financial Management
Financial Management includes all tasks pertaining to accounting.
Taking payments, posting fees, printing statements, writing checks
and printing financial reports are examples. There are many
features in Collect! that make handling finances efficient and
professional.
Set up the basic areas right from the start so that all the
necessary information is at your fingertips. Many financial settings
will be in place after you set up your Company Details, Clients
and Debtors, and your Reports and Letters.

Transaction Types
Transaction Types are used to organize account reporting information.
They control what displays on your client statements and are the very
heart of the financial aspect of Collect!. Preparing your transaction types
is one of the most important aspects of setting up Collect!. Spend
some time thinking about the actual transaction types you need and
how each one must perform. You may add, change and delete transaction
types to suit your own business needs.
There are many flags associated with the Transaction Type form. They
control who sees the transactions, that is any fees, principal, interest
or other types of transactions which must be recorded, reported and
fully accounted for.
*** Special note *** Transaction types can control processing
of revenue from commissions and fees. They determine how information
appears on your client statements.

Multi User Networking
Collect! seamlessly integrates many users into the system at all
levels of operation. Predefined levels allow you to set functions
each operator may perform. Screens and menus may be edited
to display pertinent labels in one or several languages. Set up
the necessary areas right from the start so that your workers
can use the system the way you want.

Operator Setup
Each operator accessing Collect! needs their own ID and User
Password. This allows you, the administrator, to control work
queues for each user and to determine which aspects of Collect!
each user has the right to edit or delete. It also defines their
ability to access certain parts of the system.
Each operator will have a unique ID and password with their
special access rights and their name, title and phone number.
This information can be printed on letters. Special User IDs may
be set for clients with limited access rights. All operators may be
defined as to their position in the company, i.e. collector,
administrator, and so on. They may sign in as a collector with no
need to see the administrative aspects, or they may be involved
in administrative tasks necessitating far more freedom.

User Level And Access Rights
This option lists all Forms, Fields and Menus in the system,
and shows which user groups are allowed to access them. The
fields, forms and tasks your operators may view or perform are
controlled by the settings within these forms.
 You must sign out of Collect! completely, returning
to the Desktop, whenever you change to a different User Level,
or some of the rights from the previous level that you were
signed in as may still be in effect.
*** WARNING *** This area can be very complex. It is advised not
to delve into this area unless you are COMPLETELY familiar with
Collect! and its forms. Instead, try altering the user level on an
operator's form. It may be possible for you to find a combination
of activities which is the closest to your requirements, rather than
making changes to access rights.

Pick Lists
Most fields in Collect! can display a list of items to choose from
to speed data entry. You can assign a Pick List to just about any
field on any form. This is a convenient way of letting your
operators select from lists of items with the click of a button. This
aspect speeds up data entry and reduces typographical errors
when entering repetitive information. This enforces data entry
integrity as well. If you want the State of Idaho to be displayed or
printed consistently as ID rather than IO or any other variation,
create a pick list which contains the abbreviations you
wish to use. Pick lists are attached to a field or form using the
Access Rights form.

Screen Labels
You can show, change, or hide the Field Labels/Names in all the forms
in the program. If you want to use a field to show date of insurance
label as (DOI), rather than a birth date (DOB) you can change the way
the screen looks so that it actually reads DOI. This feature can be
very powerful. You can set up Collect! to display for different operators,
dialogs that have been modified for a specific purpose. For example,
if one of your operators works only on Medical Accounts, when this
operator signs into Collect!, they can see the field label PATIENT while
another operator in the same database may see the field label DEBTOR.


Startup Automation
Collect! offers a number of options when starting up the program.
For example, you may always want to sign on with a specific user ID
from a particular workstation, or you might want to stop the user from
exiting Collect!. There are quite a number of functions you can perform,
including running a macro on startup, automating routine maintenance,
changing the logo on the splash screen, inhibiting display of the
Welcome To Collect! screen and more.
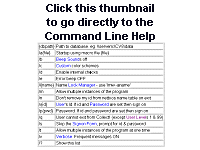
 Right click your Collect! desktop icon, choose Properties,
Shortcut tab. Add the extension /? to the executable's path to display
a complete list of command line startup options. You'll have to
remove the extension to sign into Collect!.

Entering License
When you purchase the software system, or when you add options and
operators to your system, you will need to enter one of our fabulous 41
character license codes. This license has control over how long you will
be able to access your database, which options you may use, and the
number of operators who may sign into your system. Any time that you
purchase an additional user or add a module to Collect!, you will receive
a new license code. Enter the code and you have access to whatever new
aspects you have requested. Entering the code is easy. However, your
typing must be 100% accurate and you must have the correct date, or
the system will not cooperate. License codes are date sensitive, and
therefore must be entered on the designated date.

Network Setup
Before you use Collect! on your network, you must ensure that the
required steps are taken to set up your network properly. Incorrect
network setup can cause unreliable operation.
Check the Help topic "Network Setup" for detailed instructions on
networking Collect!. A great deal of time and effort has been spent
developing network instructions. We find that qualified technicians have
all their "techie" questions answered when they read and follow these
instructions. If your technician has ideas for better settings which
enhance the overall system, please let us know, then we can update
all our clients about this benefit. The exchange of such information is
crucial to all of us.
Remember, if your network is set up correctly, you may save a great
deal of time and energy. Please take the necessary time to assure
your network setup is optimized and stable.

Extension Modules
Several additional components are available to use with Collect!.
These features provide powerful enhancements to the system's
functionality. Proper setup is very important to use the special
and particular features correctly and get the full benefits from
them. You only need to consider these topics if you are interested
in using these functions.

Credit Bureau Reporting
Collect! generates credit bureau reports in a Metro 2 (426 character)
format which is accepted by all the major credit bureaus. You can report
to one or multiple credit bureaus at one time.
There are several areas in Collect! where setup information MUST
be entered prior to reporting to the credit bureaus through Collect!.
Setup your company ID, client classification and enter debtor credit
reporting details as required.
This module requires a license.

Letter Service Outsourcing
You may want to use an external company to print your bulk letters
for you. These large houses can print, fold, stuff and stamp your
correspondence generally at a lower cost than that of the stamp
itself. This is worth investigating if you are mailing large volumes
of letters.
We can supply you with contact names of Letter Service Companies
which currently serve the needs of Collect! users.
This module requires a license.

Auto Dialer Setup
Easily dial phone numbers using Collect!'s Auto Dial feature.
When you are on an account and double-click into any
phone number field, the Auto Dialer module will begin
dialing the debtor's number. Use the normal dialing time to
review the Notes on the account.
 When working accounts through your WIP List,
selecting a Phone type contact will display the Auto Dialer if
you have "Automatically display dialer" switched on in the
WIP Options.
This module requires a license.

Predictive Dialer
You can use a predictive dialer with Collect! to enhance collector
productivity. After this is set up, the operator that is assigned a
Predictive Dialer Operator status can sign into Collect! using their usual
password and ID and sit and wait for the phones to start ringing. When
a connection to a debtor has been established, the related debtor
information will appear on the operator's Collect! screen.
 The equipment needed to complete the predictive dialer
sequence is not inexpensive. Possibly, this equipment could cost
anywhere from $15,000.00 to $45,000.00 US.
In order to interface properly with Collect!, after you have chosen your
equipment, you must send details of the file format that the equipment
requires. We will inform you of any modifications necessary to the
Collect! system to accommodate the equipment.
We strongly recommend that you send us pertinent information
before investing in predictive dialer hardware.
This module requires a license.

Ebureau Module
Collect!'s eBureau Module enables you to work your accounts
more efficiently and profitably by providing you with a wealth
of information for any accounts you submit to eBureau
through Collect!.
Information is returned for the current location of your debtors,
their latest scores and other information, such as bankruptcy
details and deceased status. eBureau uses various pieces of
data to identify consumers, such as, a consumerís name,
address, social security number, date-of-birth and telephone
number. Data from literally billions of records across numerous
databases is examined to find information related to the data
submitted by Collect! for each account. eBureau utilizes a robust
multi-index, parallel searching process to ensure that all the
relevant records are gathered for evaluation.
This module is included in every Collect! Version 11.3.1 and
later licensed in North America. International clients may
also benefit from this service if they call clients in
North America.
 The eBureau Module is an add-on extension
module enabled in CV11.3.1 and newer. If you have upgraded
from an earlier version, you may need to request a new license
from Comtech Systems to enable the feature. You also need to
register an account with eBureau.

TCN Module
Collect! and TCN work together to enable you to deliver
messages to any phone, any time. You complete your
setup with TCN, select the accounts for your campaign
and let TCN and Collect! take care of the rest. The TCN Module
saves valuable time, increases productivity and maximizes
your returns.
Collect!'s Batch Processing feature enables you to schedule
TCN call campaigns and to process returns. Campaign
scheduling and reporting are easily accomplished without
leaving the Collect! interface. Behind the scenes, Collect! logs
into the TCN web site for you, uploading data, retrieving results
and updating your database records.
This module is included in every Collect! Version 11.3 system,
starting with CV11.3 Build 2.1.
 TCN supports international dialing.
Please get in touch with Client Services at TCN for international
pricing and information.
TCN Contact Information
 The TCN Module is an add-on extension module available
for sites operating Collect! CV11.3.2 and newer. Call Administration
for pricing and licensing at 250-391-0466 option 3.

Billing Tree Module
The Billing Tree Module enables you to process credit card and
ACH payments electronically through Collect!'s Billing Tree
connection. This is a full-featured solution for managing single
and recurring payments made by credit card or by bank draft.
External payments posted at the Billing Tree web site are also
reconciled and posted within Collect!. Recurring scheduled
payments are fully managed within Collect!'s promised payment
system.
 The Billing Tree interface is an optional module available in
Collect! Version 11.3.4.1 and newer licensed in the United States.
If you would like more information about licensing this module,
please contact Administration at 250-931-0466 option 3.


Summary
Collect! is a very sophisticated software product which can
perform a variety of complex tasks for you automatically. This
requires a solid understanding of how the software works.
Please take the time to understand the basics of Collect!.
You will find endless surprises at the work Collect! can do
for you, if it is properly set up right from the start. As you learn
more about Collect!, given your good understanding, you can
easily make additional modifications as needed.

| 
Was this page helpful? Do you have any comments on this document? Can we make it better? If so how may we improve this page.
Please click this link to send us your comments: helpinfo@collect.org